Adjust Your Rheem, Bradford White, or A.O. Smith Electric Water Heater Temperature Safely
Is your shower water scalding or your energy bill too high? Setting the right temperature fixes both problems fast.
We will cover finding the thermostat on your specific model, choosing a safe and efficient temperature setting, and making the adjustment without risk of electric shock.
I’ve turned wrenches on these units for twenty years. The one takeaway? Kill the power at the breaker first, every single time.
Why Tweaking Your Water Heater Temperature Matters
You adjust your home’s thermostat for comfort and to control your energy bill. Think of your water heater’s temperature setting the same way. It’s a basic control for safety and your wallet.
The first and most critical reason is safety. Water that’s too hot can cause serious burns in seconds. A child or elderly person is especially vulnerable. Setting your water heater to a safe temperature is one of the simplest and most effective safety upgrades you can make in your home.
The second reason is efficiency and cost. Your water heater is one of the biggest energy users in your house. For every 10 degrees Fahrenheit you lower the temperature, you can save between 3% to 5% on your water heating costs. That adds up fast.
The recommended safe and efficient temperature is 120 degrees Fahrenheit. At this setting, it’s hot enough for most household tasks, including dishwashing, and it significantly slows mineral buildup inside the tank. Many heaters come from the factory set much higher, often at 140°F. That extra 20 degrees is a burn risk and purely wastes energy, forcing the unit to work harder to maintain a heat level you don’t need. Choosing 120°F also aligns with best water heater temp safety savings, a key consideration for energy-conscious homes. By making this simple adjustment, you reduce burn risk while lowering operating costs over time.
The DIY Difficulty Rating: Should You Do This Yourself?
Adjusting the thermostat itself is incredibly simple. On a pure task difficulty scale, it’s a 3 out of 10. You are often just turning a dial or a flathead screw.
The real challenge, which can bump the difficulty to a 7, is safely accessing the thermostat on some electric models. Gas units usually have an exterior dial. Many electric Rheem, A.O. Smith, and Bradford White heaters have thermostats behind screwed-on metal access panels. Some panels also have a foil-faced insulation blanket behind them.
Here is what a confident homeowner can handle:
- Turning an external dial on a gas water heater or an accessible electric model.
- Using a basic screwdriver to remove an access panel.
- Using a non-contact voltage tester to confirm power is OFF before touching anything behind a panel.
- Adjusting a thermostat dial or screw with a flathead screwdriver.
You need to call a licensed plumber or electrician immediately if:
- The access panel is sealed with a warranty sticker or is clearly not meant to be removed by the homeowner.
- You see any damaged, frayed, or burnt wiring when the panel is off.
- The unit fails to heat water after you make an adjustment.
- You are at all uncomfortable confirming the power is completely disconnected.
On my own Bradford White electric heater, the access panels were secured with about eight screws each. After checking for voltage, it was a two-minute job to adjust the thermostats. But I’ve been on service calls where homeowners stripped the screws or panicked when they saw the wiring. Know your limit.
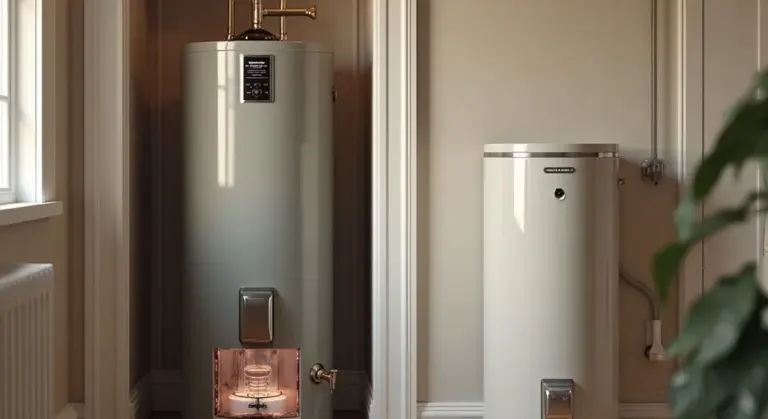
Water Heater Anatomy 101: Finding the Thermostat
You need to get inside. The thermostats on your electric water heater are hidden behind metal or plastic access panels on the side of the tank. Look for one or two rectangular panels screwed into the outer shell; they are usually near the middle and bottom of the unit.
Most standard electric heaters have two separate thermostats controlling two separate heating elements, one in the upper part of the tank and one in the lower. You must adjust both. Setting them to different temperatures makes the elements fight each other, wasting energy and causing inconsistent hot water.
Before you touch anything, gather these tools:
- A flathead screwdriver (to remove the panel and adjust the thermostat dial).
- A good flashlight (it’s always darker behind the heater than you think).
- A non-contact voltage tester (the most important tool for not getting shocked).
First, turn off the power to the water heater at your home’s main circuit breaker panel. Then, use the voltage tester to confirm the wires at the access panel are dead before you unscrew it. I’ve seen too many panels where a homeowner labeled the wrong breaker.
The Science of Heat and Scale
Hot water doesn’t just heat your home; it cooks the minerals in it. The calcium and magnesium in your water, often called hardness, solidify faster as temperature increases.
When your tank is set above 140°F (60°C), it dramatically accelerates the formation of calcium carbonate scale, a rock like substance that coats the heating elements and tank lining. This scale acts like a blanket, forcing the elements to work harder and longer to heat the water. Your energy bills go up, and the tank’s lifespan goes down.
Think of it like a kettle. A clean kettle boils water quickly. A kettle caked with mineral deposits takes forever and wastes gas or electricity. Your water heater is no different. Keeping your temperature at a moderate 120°F (49°C) slows this scaling process, protects your investment, and keeps efficiency high.
How to Adjust Any Standard Electric Water Heater
Let’s get straight to it. The process is nearly identical for Rheem, Bradford White, A.O. Smith, and most other brands. The thermostat is a simple dial behind an access panel. Your main job is to do this safely.
You are working with 240-volt electricity directly next to water, so treating the power disconnect as non-negotiable is your first and most important step.
Step-by-Step Adjustment Guide
Follow these steps in order. Have a non-contact voltage tester and a standard screwdriver ready.
- Turn Off the Power. Go to your home’s main electrical panel (breaker box). Find the breaker labeled for the water heater and flip it firmly to the OFF position. To be doubly safe, tape a note over the breaker so no one accidentally turns it back on.
- Verify the Power is Off. Remove the outer access panel on the water heater (usually held by one screw). Carefully pull back the insulation. You will see one or two thermostats with wires attached. Use your non-contact voltage tester on the wires. If it beeps or lights up, the power is still live. Go back to step one.
- Adjust the Thermostat Dial. Locate the temperature dial. It’s often marked with letters (A, B, C) or numbers. A small flat-head screwdriver fits in the slot. For safety and efficiency, the U.S. Department of Energy recommends 120°F. Many pros set it between 120°F and 130°F. Turn the dial slowly. A small adjustment makes a big difference, so move it just a little at a time.
- Replace the Insulation and Panel. Push the insulation back into place. Secure the metal access panel with its screw. Do not skip this step. The insulation is a critical fire safety barrier.
- Restore Power. Go back to the breaker panel and flip the water heater breaker back to ON.
The Waiting Game and Final Check
Your work isn’t done when the power is back on. The water in the tank is still at the old temperature. It takes time to heat a new, full tank.
You must wait at least 2 to 3 hours before checking the new temperature at a faucet. This gives the heating elements time to do their job.
To check, run the hot water at a faucet farthest from the heater for a full minute. Fill a cup and use a cooking thermometer. Compare the reading to your thermostat setting. Expect it to be within a few degrees. If it’s way off, you may have a faulty thermostat or a failed heating element.
Answering Your Core Question
So, how do you adjust the temperature on your electric water heater? You shut off the power at the breaker, verify it’s dead, turn a dial behind the panel, seal it back up, and wait. That’s the straightforward answer. The nuance is in the safety details and the patience to let the system recalibrate.
On a service call last year, a homeowner complained of lukewarm water. Their thermostat was set correctly, but the lower heating element had burned out. Adjusting the dial did nothing. If your water never gets hot after an adjustment and a long wait, one of your two heating elements has likely failed. That’s a different, but common, repair.
Adjusting a Rheem Electric Water Heater
Most Rheem electric heaters use a straightforward mechanical thermostat. I have one of these in my own basement. The process is simple, but you must respect the electricity and hot water inside. Make sure to understand how electric water heater thermostats work before handling any adjustments.
The Standard Rheem Dial Thermostat
For decades, Rheem has used a reliable dial system. You will find it behind a metal or plastic access panel, usually held on by one or two screws.
Always turn off the power to the water heater at your home’s main circuit breaker before removing any panel.
- Use a screwdriver to remove the panel(s). There is often an upper and a lower panel, each covering a heating element and its thermostat.
- Look for the plastic dial. It will have temperature markings, often from “Low” or “Vacation” up to “Very Hot” (around 150°F).
- Use a flathead screwdriver to turn the dial. For safety and efficiency, aim for 120°F. This reduces scalding risk and saves energy.
- You must adjust both the upper and lower thermostats to the same setting. If you don’t, the heaters will fight each other and run poorly.
- Replace the panels and restore power at the breaker.
Give the tank about an hour to reach the new temperature. Then test the water at a faucet farthest from the heater.
Newer Rheem Units with Digital Controls
Some modern Rheem models have a digital control pad. You won’t find a screwdriver dial behind a panel. The interface is on the front of the unit, often under a small flip-down door.
These work with button presses. You might see an “Up” and “Down” button or a “Mode” button to cycle through settings.
Consult your owner’s manual for the exact button sequence, as it varies by model.
A common method is to press and hold a specific button until the display flashes, then use other buttons to adjust. The display will usually show the temperature numerically, which is more precise.
After adjusting, the unit will often beep or flash to confirm. The system will save the setting automatically.
How Do I Adjust the Temperature on My Rheem Water Heater?
This is the core question. The brand-focused steps depend entirely on which type you have.
For a dial model: Off at breaker, remove panel, adjust both dials to 120°F, reassemble, power on.
For a digital model: Locate the control pad, use the documented button sequence to set to 120°F, wait for confirmation.
If you see water leaking from the temperature and pressure (T&P) relief valve pipe after turning up the heat, the valve may be failing due to the higher pressure. That valve is a critical safety device. Have it inspected.
Setting the temperature correctly is a simple fix. It prevents burns and can lower your electric bill. Just make sure the power is off before you put a screwdriver near anything.
Adjusting a Bradford White Electric Water Heater
Bradford White builds solid heaters. Their thermostat setup is typical for the industry, which makes it pretty simple to work on.
Accessing the Thermostat
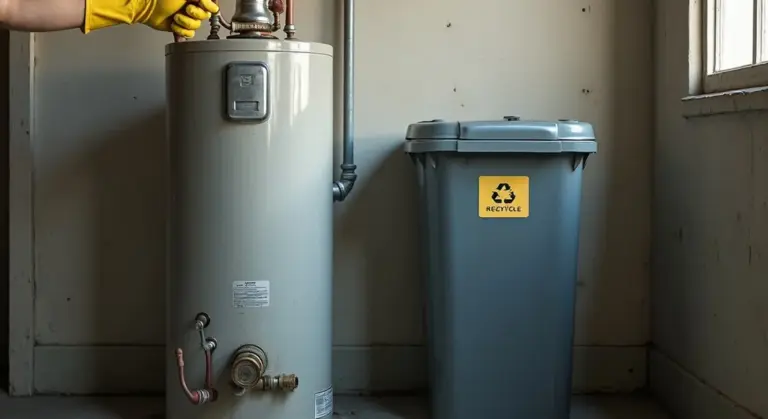
You need to get to the control panel first. On most Bradford White electric models, you’ll find a metal access panel on the side of the tank. This panel is almost always held in place by one or two screws that you’ll need to remove with a screwdriver. Pull the panel off gently. Behind it, you’ll see foam insulation. Carefully peel this insulation back to reveal the thermostat and its dial.
Before you touch anything, turn off the power to the water heater at your home’s main circuit breaker panel. This is non-negotiable. Verify the power is off by testing the wires at the heater with a non-contact voltage tester. To be thorough, check if the water heater is completely de-energized before you proceed with any work. If you’re uncertain, re-test the circuit to confirm safety.
Understanding the Dial
Bradford White thermostats use a straightforward dial. You’ll typically see one of two markings:
- Letters like A (Low, ~120°F), B (Medium, ~130°F), and C (High, ~140°F). Some have a “Very Hot” or “VH” setting beyond that.
- Direct temperature markings in degrees Fahrenheit.
The letter system is easy once you know the code. Setting it to “B” is a good, safe starting point for most homes.
How to Adjust the Temperature
Here is the direct answer to “How do I adjust the temperature on my Bradford White water heater?”
- Locate the Dial: With the power off and the access panel open, find the thermostat dial. There will be one for the upper heating element and one for the lower element. Adjust both to the same setting.
- Make the Adjustment: Use a flat-head screwdriver to turn the dial. If it has letters, align the pointer with your desired setting (e.g., “B”). For temperature dials, point it to your target number.
- Be Aware of the Stop: These dials have a plastic tab that prevents you from turning them to an extremely high temperature. If you feel resistance, do not force it past the stop; that is your maximum safe adjustment.
- Reassemble and Wait: Press the insulation back into place. Secure the metal access panel with its screws. Turn the power back on at the breaker.
- Test the Water: Wait at least 3-4 hours for the tank to fully heat to the new temperature. Then, run hot water at a faucet furthest from the heater for a few minutes and check the temperature with a cooking thermometer.
Aim for 120°F (49°C) for the best balance of safety and efficiency. This temperature reduces scalding risk and mineral buildup. Set it to 140°F (60°C) only if you have a dishwasher without a booster heater or to address specific bacteria concerns, and install mixing valves for safety.
Adjusting an A.O. Smith Electric Water Heater
If you’re asking, “How do I adjust the temperature on my A.O. Smith water heater?” you’ve likely found the control dial. The process is nearly identical across their most common electric models, including the ProMax line. Whether you have a basic 40-gallon unit or a tall 80-gallon model, the a.o. smith water heater temperature control is almost always a simple dial hidden behind an access panel.
Getting to the Temperature Dial
First, shut off the power to the water heater at your home’s main circuit breaker panel. Do not skip this step. You are working with 240-volt electricity.
Locate the two metal access panels on the side of the tank. The temperature control is behind the upper panel. You’ll need a screwdriver to remove it. Some panels are screwed on tight. Others might have a thin sheet of insulation behind them you’ll need to gently pull aside. My own A.O. Smith unit had a very tight panel, so don’t be afraid to use some force with the screwdriver.
Understanding the Settings and Making the Change
Once the panel is off, you’ll see the dial. The standard a o smith electric water heater temperature settings are usually marked from “Low” or “Vacation” up to “Very Hot,” often around 150°F. If you’re leaving on vacation, switch to the “Vacation” setting to lower the temp and cut energy use. This keeps energy costs down while you’re away. Sometimes you’ll see actual numbers. A safe and efficient setting is 120°F. This reduces scalding risk and saves on energy costs.
For a precise a o smith promax water heater temperature adjustment, note that some ProMax dials are labeled differently. They may use letters like “A,” “B,” “C,” and “D.” Here’s what that means:
- “A” is approximately 120°F
- “B” is about 130°F
- “C” is around 140°F
- “D” can be 150°F or higher
Use a flathead screwdriver to turn the dial. Align the pointer or mark with your desired setting. That’s it. Replace the insulation if you moved it, screw the access panel back on tightly, and turn the power back on at the breaker.
Checking Your Work
Wait at least an hour for the tank to heat up. Then, run the hot water at a faucet closest to the heater for a minute. Use a cooking thermometer to check the temperature. If the water isn’t at your target temp, you may need to adjust the dial slightly higher or lower and test again in another hour. It sometimes takes a couple of tries to get it exact.
Red Flags: When Your Temperature Adjustment Fails
Adjusting the thermostat should be a simple turn of a dial. When it’s not, your heater is telling you something is wrong. Ignoring these warnings can lead to bigger repairs or unsafe conditions.
Here is what to look for and what to do next.
1. Water Never Gets Hot or Heats Inconsistently
You turn the dial up, wait an hour, and still get lukewarm water. This is a classic sign of internal failure.
A failed heating element is the most common culprit, especially if only one faucet in your home gets hot water.
Most electric water heaters have two elements. If the upper one fails, you might get a short burst of hot water before it runs cold. If the lower one fails, you’ll run out of hot water very quickly. Electric water heater element guides can help you troubleshoot and decide which part might be faulty.
Another possibility is a stuck or failed thermostat that isn’t sending power to the elements.
- Immediate Action: Turn off the power to the water heater at the circuit breaker. Do not just rely on the switch on the unit.
- Next Step: This requires testing with a multimeter. If you’re not comfortable working with live electrical components, call a licensed technician. They can test both thermostats and heating elements to find the faulty part.
2. Water Gets Dangerously Hot or You Hear Sizzling/Boiling Noises
This is a serious safety issue. If your water is scalding hot straight from the tap, or you hear unusual noises from the tank, the thermostat has likely failed in the “on” position.
The thermostat is not cutting power to the heating elements, so they run continuously. This can overheat the tank, cause excessive pressure, and damage the system.
An overheating water heater is a pressure bomb; you must address it immediately to prevent potential tank failure.
- Immediate Action: Turn off the power at the circuit breaker right away. Do not use the hot water.
- Next Step: Do not attempt to repair this yourself. A failed high-limit safety thermostat or a primary thermostat requires professional diagnosis and replacement. Call a pro.
3. The Heater Cycles On and Off Constantly
You hear the click of the thermostat or the hum of the elements turning on and off every few minutes, even when no hot water is being used. This wastes energy and wears out components.
Often, this is caused by a thermostat that is losing its calibration and is oversensitive to tiny temperature drops. It can also be a sign of a significant sediment buildup in the bottom of the tank.
Sediment acts as an insulator between the water and the lower heating element, causing the thermostat to think the water is cooler than it is.
- Immediate Action: Feel the hot water outlet pipe on top of the heater. If it’s very hot even when the heater shouldn’t be running, sediment is a likely cause.
- Next Step: Try draining a few gallons from the tank to flush out sediment. If the rapid cycling continues, the thermostat likely needs replacement by a technician.
4. Leaking Water or Corrosion Near the Thermostat Access Panel
You see water dripping from the panel covers on the side of the tank or notice rust and corrosion around them. Moisture and electricity are a dangerous mix.
This leak is usually not from the thermostat itself, but from a bad gasket seal behind the access panel or, more seriously, a leaking heating element.
The gasket that seals the element or thermostat to the tank can harden and fail over time. Corrosion here is a clear sign of a long-term, slow leak.
Water inside the electrical compartment will eventually cause a short circuit or damage the controls beyond repair.
- Immediate Action: Turn off the power at the circuit breaker. Do not remove the panel while the power is on.
- Next Step: Once power is confirmed off, you can remove the panel to inspect. If the leak is from a heating element gasket, it can often be replaced. If the tank itself is corroded around the opening, the entire heater may need replacement. If unsure, consult a professional.
Your Water Heater Maintenance Roadmap
Think of your water heater like a car. It needs regular, simple checkups to run safely and last for years. A water heater maintenance schedule keeps those checks on track. It helps upkeep feel manageable. This roadmap covers the three key tasks. Stick to this schedule and you’ll avoid most major problems.
A Simple 3-Point Maintenance Schedule
You don’t need to do everything at once. Space these tasks out and put reminders in your calendar.
- Check the Temperature: Once a Year. This is a two-minute task. Use a thermometer at the faucet to confirm your dial setting is accurate.
- Drain the Tank: Once a Year. Sediment (sand, minerals) settles at the bottom of the tank like silt in a riverbed. Draining it prevents noise, improves efficiency, and extends tank life.
- Inspect the Anode Rod: Every 3 to 5 Years. This rod sacrifices itself to protect your tank from rust. Checking it lets you replace it before it’s gone and your tank starts corroding.
How to Drain Your Tank (The Right Way)
This is the most common maintenance task. Doing it wrong can be messy or cause damage.
- Turn off the power to the electric water heater at the circuit breaker.
- Shut off the cold water supply valve at the top of the heater.
- Attach a standard garden hose to the drain valve at the bottom. Run the other end to a floor drain, bucket, or outside.
- Open a hot water faucet somewhere in the house (like a laundry sink) to let air into the system.
- Open the drain valve slowly. Let the tank empty completely.
Watch the first few gallons; if it’s full of sandy sediment, you’ll know why this job is important. - Close the drain valve, remove the hose, turn the cold water supply back on, and let the tank refill before restoring power.
Inspecting the Sacrificial Anode Rod
This job is less frequent but critical for preventing leaks. You need a 1-1/16″ socket (often called a “water heater socket”) and a long breaker bar or ratchet.
Shut off power and water, and drain a few gallons from the tank to lower the water level below the rod’s location (usually on top of the tank). Unscrew the rod and pull it out.
A good rod will be coated in magnesium or aluminum, with some wear. A bad rod will be severely corroded, with the steel core wire exposed, or it will be almost completely gone. If it’s less than 1/2 inch thick at any point, replace it. This cheap part can add a decade to your tank’s life.
Why Your Temperature Setting is the Most Important Check
Adjusting the thermostat is the easiest maintenance item on the list. It’s also the most important for daily safety and cost.
Set it too low, and you risk growing dangerous bacteria like Legionella in the tank. Set it too high, and you waste energy and create a serious scald risk at your taps. 120°F (49°C) is the recommended sweet spot for most homes, balancing safety and efficiency.
Your Rheem, Bradford White, A.O. Smith, or other electric unit has one or two thermostats behind screw-on panels. Always turn off the power at the breaker before removing these panels. Use a flathead screwdriver to adjust the dial to 120°F. If you have two thermostats (for a two-element heater), set both to exactly the same temperature.
After adjusting, wait a few hours for the tank to heat up. Then check the actual temperature at a faucet closest to the heater. Run only the hot water for a minute and measure with a cooking thermometer. This faucet check confirms your thermostat dial is calibrated correctly; sometimes they are off by 5-10 degrees. If the water is 115°F or 125°F, go back and adjust the dial slightly until you hit 120°F at the tap.
Common Questions
What if my water heater doesn’t have a visible temperature dial?
Some newer models, particularly certain Rheem units, have a digital control pad instead of a screwdriver dial. Look for a small panel or door on the front of the unit. You’ll need to press buttons to adjust the temperature; consult your owner’s manual for the exact sequence, as it varies by model.
What do the “A, B, C” letters on my Bradford White or A.O. Smith thermostat mean?
Those letters are a temperature code. “A” is usually about 120°F, “B” is 130°F, and “C” is 140°F. For safety and efficiency, aim for the “A” or “B” setting. Align the dial’s pointer with your chosen letter using a flathead screwdriver.
How do I know if I have one or two thermostats to adjust?
If your electric heater is standard 40-gallon or larger, it almost certainly has two elements and two thermostats-one behind an upper access panel and one behind a lower panel. You must adjust both to the same temperature to prevent the system from working against itself.
Is it really that dangerous to just flip the switch on the unit instead of the breaker?
Yes. The switch on the unit may only turn off one leg of the 240-volt power, leaving live voltage inside the panel. The only safe method is to turn off the dedicated double-pole breaker at your main panel and then confirm the wires are dead with a non-contact voltage tester.
Why is 120°F the magic number everyone recommends?
120°F is the best balance. It’s hot enough for household tasks and to inhibit bacteria, but it significantly reduces the risk of severe scalds (especially for children) and slows mineral scale buildup in your tank, which protects efficiency and extends the heater’s life.
Final Steps for Safe and Efficient Temperature Control
Set your water heater to 120 degrees Fahrenheit to prevent scalding risks and cut down on energy bills. Check this temperature setting regularly, particularly after maintenance or seasonal changes, to ensure ongoing safety and performance. For more details, see water heater temperature safety settings.
Bob McArthur
Bob is a an HVAC and plumbing industry veteran. He has professionally helped homeowners resolve issues around water softeners, heaters and all things related to water systems and plumbing around their homes. His trusted advice has helped countless of his clients save time, money and effort in home water systems maintenance and he now here to help you and give you first hand actionable advice. In his spare time, Bob also reviews home water systems such as tankless heaters, water softeners etc and helps home owners make the best choice for their dwelling. He lives around the Detroit area and occasionally consults on residential and commercial projects. Feel free to reach out to him via the contact us form.