DIY Well Pump Replacement: Your Step-by-Step Guide for Shallow and Deep Wells
Your well pump died and now you have no water. Let’s get it fixed with your own two hands.
This guide covers critical safety steps, how to pick the right pump, and the complete installation for both shallow and deep well systems.
I’ve installed and repaired these pumps for years on the job and at my own house. One short takeaway: if you mess up the wiring or pipe seals, you’ll be doing this job twice.
First, Diagnose Your Pump Problem
Don’t start pulling pipe yet. A lot of “pump problems” are something else. You need to confirm the pump is the real culprit.
Look for these clear signs of pump failure first. If you have no water at all, that’s a major red flag. Sputtering air at every faucet means the pump is sucking air, often from a cracked pipe or a falling water level. Very low pressure that doesn’t improve usually points to a worn-out pump. Constant cycling, where the pump kicks on and off every minute, can be a bad pressure tank, but it can also mean the pump’s internal check valve has failed.
Before you blame the pump, check the pressure tank’s bladder. This is a common failure that mimics pump issues. Shut off the pump’s power. Drain all the water pressure from the system by opening a faucet. Now, feel the tank’s Schrader valve (it looks like a tire valve). If air hisses out, the bladder is intact. If water comes out, the bladder is ruptured and the tank needs replacement. You cannot replace just the bladder in a standard residential pressure tank.
Here is a simple, safe test. Go to your pressure switch and breaker panel. Listen for a rapid click from the pressure switch. Check that the circuit breaker hasn’t tripped. Use a voltage tester to confirm power is reaching the pressure switch terminals. If the breaker trips or the switch resets erratically, you may be facing a well pump pressure switch breaker trip. In the next steps, we’ll link to a detailed guide on diagnosing that exact condition. You must rule out simple electrical issues before you condemn an expensive pump.
Use this quick-reference list to guide your initial diagnosis.
The Red Flag Troubleshooting Guide
- Sudden, complete loss of water pressure. Think major failure: seized pump, broken pipe, or total electrical fault.
- Pump motor runs but delivers no water. Check for a dry well (lower a weighted string) or a clogged foot valve/screen.
- Pressure switch clicks rapidly on and off (short cycling). This is usually a waterlogged pressure tank, not the pump itself.
- Water sputters with air at every faucet. The pump is drawing air from a leak in the drop pipe or a well water level below the pump intake.
- A noticeable “egg” smell (hydrogen sulfide) that suddenly changes. A new or stronger smell can mean the pump is now drawing from a different, sulfur-rich layer in the well.
What You Need: The Well Pump Toolbox
Gather everything first. A trip to the hardware store with a pump halfway out of the well is a bad day.
For tools, you need two pipe wrenches. One holds the pipe, the other turns the fitting. You also need Teflon tape for threaded joints and proper pipe thread sealant for any plastic-to-metal connections. A non-contact voltage tester is for safety checks. Have wire strippers and connectors for the electrical work. For the pipe itself, use a tubing cutter for clean cuts on PEX or PVC.
Your material list is critical. The new pump must match your well’s depth and home’s demand. You need the correct gauge submersible wire. A torque arrestor stops the pump from twisting in the well. A stainless steel safety rope is a mandatory backup. Use brass fittings, not galvanized. Brass won’t corrode as fast and prevents galvanic reaction between different metals.
Shallow well kits (for depths under 25 feet) are often single, above-ground units. A deep well submersible pump kit includes the pump, wire, rope, and fittings. For a deep well job, a helper is not just nice, they are a critical tool. Pulling several hundred feet of pipe for submersible well pump installation is a two-person job for safety and control.
Safety Is Your First Connection
You cannot cut corners here. A mistake with electricity or pressure can send you to the hospital. Follow these steps in order, every single time.
Step one: TURN OFF THE BREAKER. Tag it. Verify power is off with a voltage tester.
Find the dedicated breaker for your well pump at your main electrical panel and flip it to OFF. This is non-negotiable. Now, put a piece of tape over the breaker and write “WELL PUMP – DO NOT TURN ON” with a marker. This tag stops someone else from accidentally restoring power while you’re working. That’s part of safely shutting down the well pump electrical system to prevent accidental restarts during maintenance. For extra safety, verify the circuit is de-energized before you start work.
Your next move is verification. Go to the pressure switch near your pressure tank. Using a non-contact voltage tester, check the terminals on the switch. The tester should not beep or light up. I keep a Klein Tools tester in my bag for this. If it indicates voltage, go back and find the correct breaker. Never assume the power is off.
Step two: Relieve all water pressure from the system.
Before you disconnect any pipes, you must drain the pressure. The system holds water under high pressure, often 40-60 PSI. If you open a connection, that pressurized water will blast out.
Open the hose bib or drain valve closest to your pressure tank and let the water run until it stops. You will hear the air in the tank hiss out as the water drains. To answer a common question: yes, you can drain the pressure tank’s bladder from inside your house. This hose bib is how you do it. It empties the water from the tank and the main line, taking the pressure down to zero.
After water stops flowing, open a faucet inside the house, like a sink, to confirm there is no more pressure in the lines. Only then is it safe to disconnect plumbing.
Discuss safe lifting techniques for heavy submersible pumps.
A submersible pump is heavier than you think. Once you pull it up, it’s covered in water and can weigh over 50 pounds. Your back is not a replacement for proper equipment.
For a deep well, you must use a proper hoist or a sturdy tripod and winch made for well work. Do not try to pull hundreds of feet of pipe and a pump by hand. For a shallower well, you can pull by hand but you need leverage. I use a length of sturdy, smooth pipe (like a well pipe) threaded through the well cap as a fulcrum. Have a helper feed the pipe and wire as you pull. Once you’re ready to install the wire and the deep-well submersible pump, plan the wiring route and proper pump placement. The next steps cover the installation details.
Lift with your legs, keep the load close to your body, and set it down carefully. Clear a flat space next to the well to coil the pipe and set the pump down without kinking wires.
Warn about well caps and potential gases. Work in a ventilated area.
When you open the well cap, you are opening a direct path to the water table. In some wells, particularly those with sulfur bacteria, dangerous gases like hydrogen sulfide can accumulate. This gas smells like rotten eggs and can cause dizziness or worse in confined spaces.
Always remove the well cap outdoors or in a very well-ventilated area like an open well house. Do not stick your head directly over the open hole and take a deep breath. Let it air out for a minute first. If you smell a strong rotten egg odor, consider wearing a proper respirator. Your safety is more important than rushing the job.
Shallow or Deep? Know Your Well Type
Before you buy a single fitting, you need to know what you’re working with. Getting this wrong means buying the wrong pump.
Simple Definitions
A shallow well uses a jet pump installed inside your house or well house. This pump sits above ground and uses suction to pull water up from the well. In this setup, the jet pump’s suction creates low pressure that pulls water from the well. This is how shallow well jet pumps work.
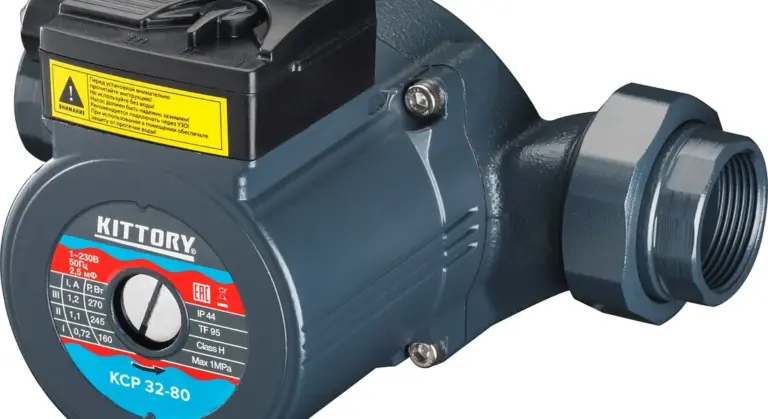
Adeep well uses a submersible pump. This is a long, cylindrical pump that gets lowered directly into the well casing and sits underwater. Depth in the well influences the flow and pressure the pump can deliver. This makes depth, flow, and pressure key considerations when selecting and operating a submersible well pump.
The rule of thumb is this: if your water comes from less than 25 feet down, you likely have a shallow well. If it’s deeper than 25 feet, you need a deep well system.
How to Tell by Looking at Your Equipment
You don’t always know the well depth. Look at your current setup. The equipment tells the story.
- You see one pipe going into the well head. This is a single-drop jet pump for a shallow well. The pump is in the house.
- You see two pipes going into the well head. This is a two-pipe jet pump system. The jet assembly is down the well, but the motor and impeller are still in the house. This is still a shallow well setup, just for slightly deeper pulls.
- You see a pressure tank and a grey control box. This signals a deep well submersible pump. The control box is for the pump’s motor down the hole.
Never assume pipe count equals well depth. Look for the pressure tank and control box combo as the sure sign of a submersible pump.
How to Measure Your Well Depth
If you have no records, find out yourself. You need a long string, a heavy weight (like a large nut), and a tape measure.
- Tie the weight securely to the end of the string.
- Remove the well cap carefully. Watch for spiders or insects.
- Lower the weight down the well casing until you feel it hit water. You’ll feel the tension go slack.
- Mark the string at ground level. Pull it up and measure from the weight to your mark.
This gives you the depth to the water level, not the total well depth, but it’s the number that matters for choosing your pump’s lifting capability. If that measurement is over 25 feet, plan for a deep well submersible pump.
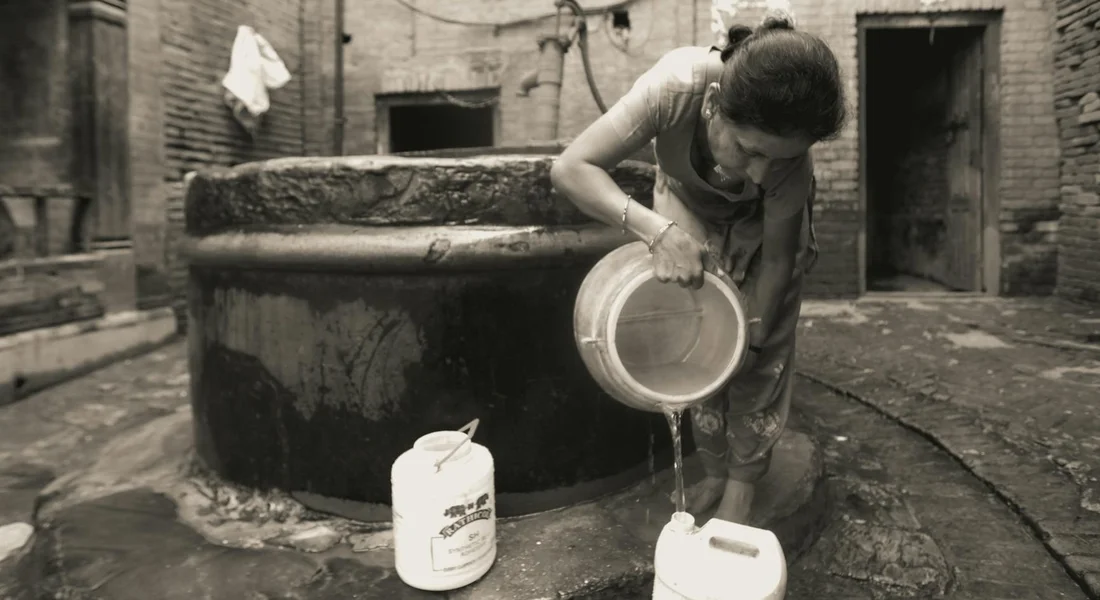
How a Hand Pump Works as a Backup
Think of a hand pump like a giant syringe for your well. It uses a simple piston inside a long cylinder called a drop pipe. You work the handle up and down. On the upstroke, the piston lifts and creates a vacuum. This suction pulls water up from the well into the cylinder. On the downstroke, the piston pushes that water out through a spout. This manual piston action is entirely mechanical, requiring no electricity or complex parts. I have an old pitcher pump on my shallow well at the cabin. It’s the same basic idea and it never fails.
When the power goes out, your electric submersible pump is dead. A hand pump is not. This makes it a reliable emergency backup you can install and forget until you need it. To get one, search for “deep well hand pump” or “shallow well hand pump” online or at a farm supply store. Brands like Bison, Simple Pump, and Lehman’s are common. I keep a Bison pump kit in my garage. After a bad storm took out our grid for two days, it was the first thing I bought.
You cannot just screw a hand pump onto your existing well cap. Installing one usually requires a separate, dedicated well seal or a pitless adapter tee. This gives the hand pump its own sealed entry point into the well casing. If you try to mount both pumps through one standard seal, you will almost certainly cause a leak and lose prime. For my deep well at home, I used a pitless adapter with a tee fitting. It lets the electric pump and hand pump draw water independently without messing with each other.
Here is a simple check before you start. Look at your wellhead. If you see a single pressure switch and one pipe coming out, you have a standard setup. You will need to upgrade the well seal. For a proper installation, follow these steps.
- Shut off power to your electric pump and drain the system.
- Remove the existing well cap or seal.
- Install a new, larger well seal with multiple ports or a pitless adapter tee.
- Assemble the hand pump’s drop pipe and piston, then lower it into the well.
- Secure the hand pump head to the new seal or adapter.
A common pitfall is not getting a tight seal on all new threaded connections. Use a good pipe thread sealant, not just tape. Another mistake is letting the hand pump’s pipe bang against the electric pump’s wiring. Use cable ties to keep everything separated. For maintenance, lubricate the piston seals with food-grade silicone grease once a year. Check for any air leaks around the well seal after heavy use.
Replacing a Shallow Well Jet Pump
Replacing a shallow well jet pump is a very manageable weekend project. The pump sits in your basement or pump house, not down the well. You just need to be methodical. Here is the step by step process I use on every service call to install a shallow well pump.
- Shut everything down. Turn off the electrical power to the pump at the breaker panel. Then, shut off the water supply to the building.
- Drain the pressure. Open a faucet at the lowest point in your home to drain the system and relieve all water pressure. Open the drain valve on the pressure tank to empty it completely.
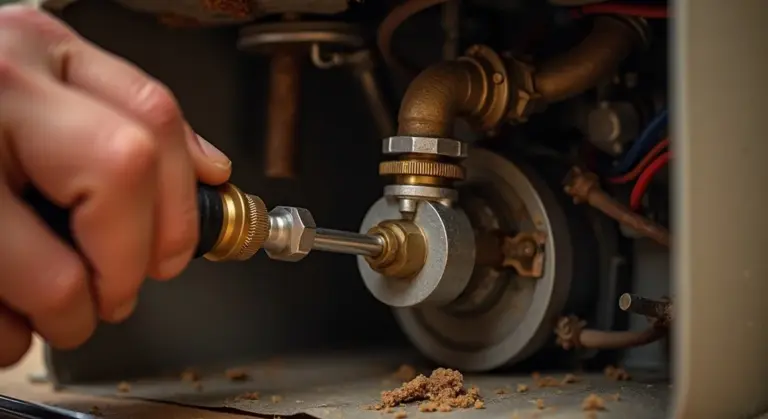
- Disconnect the plumbing. Use two pipe wrenches one to hold the pipe steady and one to turn the fitting. Unscrew the pipe from the pump’s inlet and outlet.
- Disconnect the wiring. Remove the cover from the pump’s pressure switch or connection box. Take a picture of the wire connections with your phone. Then, disconnect the wires.
- Unbolt and remove the old pump. The pump is usually mounted on a base or platform. Unbolt it and lift it out. Have a pan or towels ready for any residual water.
Before you buy the new pump, you must match the inlet and outlet configuration to your old one. Pumps can have ports on the top, side, or front. The sizes must be the same. The photo you took of the plumbing is your best friend here. Take it to the store. Verify the horsepower and voltage match your old pump’s specifications exactly.
Now, guide on reinstalling the new unit.
- Set the new pump in place on its base.
- Use new pipe dope or Teflon tape on all threaded connections. Do not reuse old sealant. Hand tighten the plumbing connections, then give them another quarter turn with a wrench. Do not overtighten.
- Connect the wiring exactly as it was in your photo. Secure the wires under the terminal screws and replace the cover.
- Do not turn the power on yet. The single most crucial final step is priming the pump. A dry pump will destroy itself.
How to Prime a Shallow Well Pump
Priming fills the pump casing with water so it can create suction. Think of it like oil in an engine. Without it, the impeller spins against air, creates no suction, and overheats almost instantly. Follow these clear numbered steps.
- Locate the primer port plug on the pump housing. It’s usually on top.
- Remove the plug. You may need a large screwdriver or a special hex key.
- Using a funnel, slowly pour water into the port until the housing is completely full. Water may trickle back out when it’s full.
- Replace and tighten the primer port plug securely.
You must prime the pump before every single start up. I once fried a brand new pump for a neighbor because we thought there was enough water left in the housing. There wasn’t. It lasted about eight seconds. It’s crucial to start and prime well pumps correctly.
Now you can restore power and turn the pump on. It should start, build pressure, and shut off at its cut out setting (usually 40 or 50 PSI). Listen for smooth operation. Check all new connections for leaks. Keep a bucket of water handy during this first test. If the pump struggles to build pressure or cycles on and off rapidly, it likely lost its prime. Shut it off immediately and repeat the priming steps.
Replacing a Deep Well Submersible Pump

This job is physical. You are pulling 100 to 400 feet of heavy, water-filled pipe straight up out of the ground. I will not sugarcoat it. You need a clear plan, the right tools, and ideally a helper for the pulling and lowering stages. Disorganization here can lead to a dropped pump or a dangerous, tangled mess of pipe and wire in your yard.
Pulling the Old Submersible Pump
Start by making the system completely safe to work on. Turn off the circuit breaker for the well pump. Then, go to the control box (usually on the wall near the pressure tank) and disconnect the power wires. Use a voltage tester to confirm there is no power.
Your next target is the pitless adapter, the fitting that allows the pipe to run horizontally underground to your house. You need to disconnect the plumbing here.
- Find the access port, which is often a buried casing or a well seal.
- Use a pipe wrench to unscrew the drop pipe from the adapter.
- Have a bucket ready, as water will drain from the pipe.
Now the real work begins. Pull the pipe straight up, section by section, and lay it out flat and straight as you go. Do not let it coil or kink. I use two pipe stands to rest the pipe on once a section is clear. A helper can guide the pipe to keep it from swinging and damaging the well casing. As you pull, inspect everything you see. If you haven’t already, make sure to disassemble the pump for maintenance before pulling it out.
Installing and Lowering the New Pump
Once the old pump is out, prepare the new one. Do this work on a clean tarp.
- Thread the new drop pipe (I always use new, schedule 80 PVC or polyethylene) into the pump discharge. Use pipe sealant made for plastic.
- Secure a stainless steel safety rope to the pump’s rope eyelet. This is a backup in case the pipe fails.
- Slide a torque arrestor onto the pipe about 10 feet above the pump. This device centers the pump and prevents it from spinning when it starts.
The electrical connection is the most critical seal on the entire assembly. Use a high quality, submersible pump splice kit. These have a rubber sleeve and stainless steel clamps that create a permanent, waterproof seal. Follow the kit’s instructions exactly. Do not just use wire nuts and electrical tape, they will fail.
Lowering the pump is the reverse of pulling it, but with more care. Feed the pump slowly into the well.
- Never lower the pump by its electrical wire. Lower it only by the pipe.
- Your helper should feed the wire and safety rope alongside the pipe, keeping them from tangling.
You must set the pump at the correct depth, typically 10 to 20 feet above the bottom of the well and below the water level. Refer to your well log for the proper setting. Never let the pump rest on the bottom, as it will suck up sediment.
Wiring It All Back Together
With the pump secured at the pitless adapter, you need to connect it to power. The pump wires will run to a control box or directly to a pressure switch and breaker.
Match the wire colors exactly: black to black, red to red, green or bare to ground. Use wire nuts and wrap them with electrical tape for a secure connection. If your old control box had a wiring diagram on the lid, use it. If not, you can find the diagram for your specific pump model online.
This is where many DIYers hit a wall. The wiring inside the control box can look confusing. If you are unsure about any connection, from the wire nuts at the splice to the terminals in the panel, stop. This is the point to call a licensed electrician. Getting this wrong can ruin your new pump instantly or create a serious fire hazard.
Testing, Troubleshooting, and First Run
You’ve pulled the old pump and wrestled the new one into place. Good work. Now comes the moment of truth. Powering it up for the first time is where you find out if your connections are solid and the pump is happy. Take your time here.
Turn Power On and Monitor Pressure
With all your electrical connections double-checked and secure, go to your breaker panel. Turn the power on for the pump circuit. You should hear the pump start immediately. Your main job now is to watch the pressure gauge on the tank tee like a hawk. The needle should climb steadily from zero toward your pressure switch’s cut-off point, usually 40, 50, or 60 PSI.
If the gauge doesn’t move within 10-15 seconds, turn the power off immediately. You likely have a wiring issue, a stuck check valve, or the pump isn’t primed (for shallow wells). If the needle climbs but stops short of the cut-off pressure and the pump keeps running, your pressure switch may need adjustment or the pump might be struggling with depth or a restriction.
Check for Leaks at All New Connections
While the pump is building pressure, get a flashlight and inspect every single connection you made. This is non-negotiable.
- Check the pitless adapter connection at the well casing.
- Look at every threaded joint on the drop pipe and the pump itself.
- Inspect the connection at the tank tee and the pressure switch.
A small drip might not show up until full pressure is reached. A slow seep often just needs another quarter-turn with a wrench. For tiny leaks you can hear but not see, spray soapy water on the joint; bubbles will form. A major leak will cause the pump to run continuously without building proper pressure, and you must shut it down to fix the fitting.
Listen for Unusual Noises
A new submersible pump should be relatively quiet. You’ll hear a hum from the pressure tank area. A jet pump will be louder. What you’re listening for are warning sounds.
- Grinding or Screeching: Could indicate a failing motor or debris caught in the impeller. Shut down.
- Loud Knocking or “Water Hammer”: Often means there’s air in the system or a missing/ faulty check valve letting water surge back.
- Continuous Rapid Cycling: If the pump turns on and off every few seconds, you have a waterlogged pressure tank or a massive leak.
Let the pump complete at least three full cycles-from when it kicks on at 30 PSI up to 50 PSI and shuts off, then back down again. This settles everything in.
Flush the System to Clear Sediment
A new pump installation stirs up sediment in the well and piping. You must flush this out before using house fixtures. The easiest way is to connect a garden hose to the boiler drain valve on your pressure tank tee. Run the hose outside, away from your foundation.
- Open the drain valve fully.
- Let the water run until it’s completely clear. This could take several minutes.
- Do not let the pressure tank drain completely empty while doing this.
Flushing protects your new pump, your pressure switch from clogging, and keeps sediment out of your water heater and faucet aerators. After flushing, close the valve and let the system repressurize. Now you can cautiously run a bathtub or outside faucet inside to confirm clear, steady water flow throughout the house.
When to Put Down the Wrenches and Call a Pro
Pulling a pump is hard, dirty work. I’ve done dozens. Knowing when you’re in over your head is not a failure, it’s smart planning. Calling a professional can save you thousands in ruined equipment or a dry well. Here’s when to make that call.
You can’t find your well pump or well head.
“I can’t find my well pump” is a common and serious problem. The well head is a sealed cap, usually 4 to 10 inches wide, at the top of the well casing. It can be buried under dirt, hidden in a well pit, or disguised in a garden box. If you cannot locate the well head, you physically cannot service your system and must stop. Do not start digging randomly. Check your property inspection report or the original well log from when the house was built. If you have no records, a local well driller can often find it with a metal detector.
The well is deeper than 200 feet or the pump is extremely heavy.
This is about physics and safety. A deep well submersible pump, its hundreds of feet of pipe, and the wire are immensely heavy. A 300-foot pull is a two-person job with a proper pull tripod or truck-mounted hoist. The weight can snap a pipe, causing the pump to drop back down the well. A dropped pump can destroy the well casing, turning a $2,000 pump replacement into a $10,000 new well drill. Professionals have the rigging and experience to handle this weight safely.
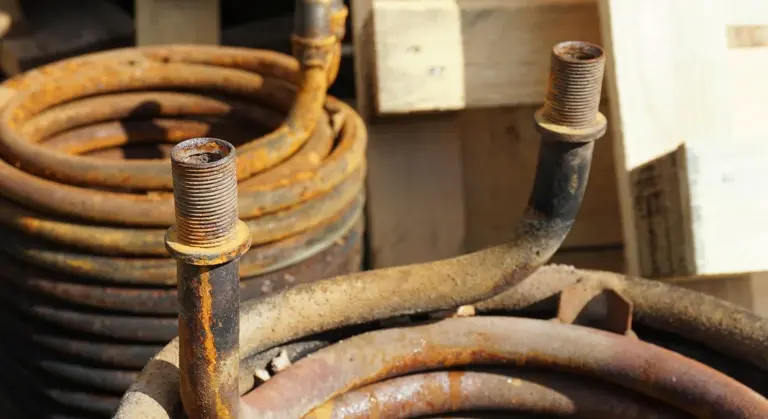
You see extensive corrosion or complicated wiring that intimidates you.
Corrosion fuses metal parts together. I’ve spent hours with penetrating oil and a sledgehammer on a single union that a homeowner would never budge. Worse, corroded electrical connections in the control box or at the well head are a fire and shock hazard. If the wiring looks like a melted bird’s nest or you see green crust on every connection, this job has moved beyond basic DIY. A pro will correctly diagnose if you need a new control box, a splice repair, or a full wiring run from the house.
You’ve followed the steps and the new pump still doesn’t work.
You pulled the old pump, installed the new one, wired it, and dropped it in. You turn on the power and get nothing but a hum or a click. The problem is now a mystery. It could be a faulty pump, a pressure switch issue, a broken wire you didn’t see, or a problem with the well itself. At this point, you need diagnostic equipment like a megohmmeter to test the motor and wiring, which most homeowners don’t own. A technician can usually pinpoint the failure in under an hour, saving you from pulling the pump again on a guess.
You simply don’t have the time, help, or confidence for the pull.
This is the most valid reason of all. A full pump replacement is an all-day project. You need a helper. You need to rent equipment. You will get wet and dirty. If you’re missing any of those pieces, the job will beat you up. There is no shame in hiring out hard labor. I’ve hired electricians for work in my own home because my time was better spent elsewhere. A licensed well contractor will get it done in a few hours and often guarantees the work, giving you peace of mind water will flow when you need it.
Quick Answers
How do I test the new pump after installation?
Turn the power on and immediately watch the pressure gauge. The needle should climb steadily to the system’s cut-off pressure (usually 40-60 PSI). If the gauge doesn’t move within 15 seconds or the pump runs continuously, shut it off and check for wiring errors or a major leak.
Do I need to prime a deep well submersible pump?
No, a submersible pump is designed to be under water and does not require priming. However, a shallow well jet pump must always be primed by filling its housing with water through the primer port before start-up to prevent immediate damage.
What’s the most common mistake after installing a new pump?
Failing to check every new connection for leaks under full pressure. Use a flashlight and inspect all fittings while the pump is running; a small drip often needs just another quarter-turn with a wrench. A major leak will cause the pump to run non-stop.
My new pump works, but the water is sandy or cloudy. What should I do?
This is normal initially. Connect a garden hose to the drain valve on your pressure tank tee and flush the water outside until it runs completely clear. This removes sediment stirred up during installation and protects your pump and appliances.
When is it absolutely time to call a professional?
Call a pro if you can’t locate the well head, if the well is over 200 feet deep, or if you see severely corroded or confusing wiring. Also, if you’ve followed all steps and the new pump still doesn’t work, a technician has the diagnostic tools to find the real issue efficiently. Replacing a well sump pump can be tricky, especially in tight spaces or with old wiring. If you’re having trouble with the replacement, a pro can handle the install and testing safely.
Final Steps and System Check
Your first test cycle is the most important. Before you turn the power back on, double-check every connection for leaks. Once the system is running, listen for unusual noises and verify the pressure switch is cycling correctly.
Bob McArthur
Bob is a an HVAC and plumbing industry veteran. He has professionally helped homeowners resolve issues around water softeners, heaters and all things related to water systems and plumbing around their homes. His trusted advice has helped countless of his clients save time, money and effort in home water systems maintenance and he now here to help you and give you first hand actionable advice. In his spare time, Bob also reviews home water systems such as tankless heaters, water softeners etc and helps home owners make the best choice for their dwelling. He lives around the Detroit area and occasionally consults on residential and commercial projects. Feel free to reach out to him via the contact us form.