How to Connect a Sump Pump Discharge Hose: Fittings, Adapters, and Secure Attachment
A loose or leaking discharge hose connection can turn your sump pump into a flood maker in your basement. Getting this joint right is simple if you know which parts to use and how to lock them down.
We will cover the pros and cons of common hose materials, how to select the right threaded or barbed fittings and adapters, and the secure attachment methods that actually hold under pressure.
I’ve connected more of these hoses than I can count on service calls, and the wrong clamp on a cheap hose is the most common fail point I see. Skip the zip ties and use a proper stainless steel hose clamp every single time.
DIY or Call a Pro? The Sump Pump Hose Connection Verdict
This is a job many homeowners can tackle. I’ve helped neighbors with it more times than I can count. Let’s break down the skill level.
The difficulty sits at about a 4 out of 10 for a basic flexible hose, but a solid 6 out of 10 for a permanent, glued PVC system. The main difference is PVC cement work, which is permanent and mistakes are messy.
What a Homeowner Can Do
You can handle these tasks yourself with basic tools:
- Connecting a flexible hose to the pump’s outlet using hose clamps.
- Basic PVC cutting and solvent welding for an above-ground pipe run.
- Running the discharge hose or pipe away from your foundation, ensuring it slopes downward.
- Securing the line with pipe straps or zip ties.
- Installing a swing check valve to prevent backflow.
If you can change a washing machine hose, you can connect a sump pump hose.
When to Call a Licensed Plumber
Know your limits. Call a professional for these situations:
- Hardwiring the pump’s electrical. If your pump isn’t a simple plug-in type and needs a direct connection, this is licensed electrician or plumber territory (“can you hardwire a sump pump”). Water and electricity are a dangerous mix.
- Complex below-slab drainage. If you need to tie the discharge into an underground drain tile or municipal system.
- If your local building code requires a permanent, buried discharge pipe. Many codes do, and they may specify depth and termination points.
A buried discharge line often requires a permit and an inspection, so pulling that permit is a key sign you might want a pro on the job. I ran into this with a buried line for my own backyard drain project, and getting it inspected saved headaches later.
What You Need: Your Fittings and Tools Checklist
Don’t make three trips to the hardware store like I used to. Get this stuff first.
Tools
- Adjustable wrench: For tightening threaded fittings onto the pump discharge.
- Screwdriver: For tightening hose clamps, typically a flat-head or Phillips.
- Utility knife: To cut flexible hose cleanly or score PVC pipe.
- PVC primer & cement (if using PVC): These chemicals permanently fuse PVC pipe and fittings together.
- Tape measure: For measuring hose/pipe length and ensuring proper slope away from the house.
- Hose clamps: Stainless steel clamps are best to secure a flexible hose onto fittings.
Materials
- Discharge hose (type/size): Flexible ribbed hose (1.5″ or 1.25″ is common) is easy; rigid PVC pipe is more permanent.
- Correct adapters (“sump pump hose fitting adapter”): This adapts the pump’s threaded outlet to your hose or PVC size. It’s often a male or female threaded adapter.
- Teflon tape (“do you need to tape pvc adapter sump pump”): Yes, you do. Teflon tape seals threaded plastic fittings to prevent leaks at the pump outlet.
- Check valve (if needed): Prevents water in the discharge line from flowing back into the sump pit after the pump shuts off.
- Pipe straps or heavy-duty zip ties: These secure the hose or pipe to a wall or joist to prevent movement and sagging.
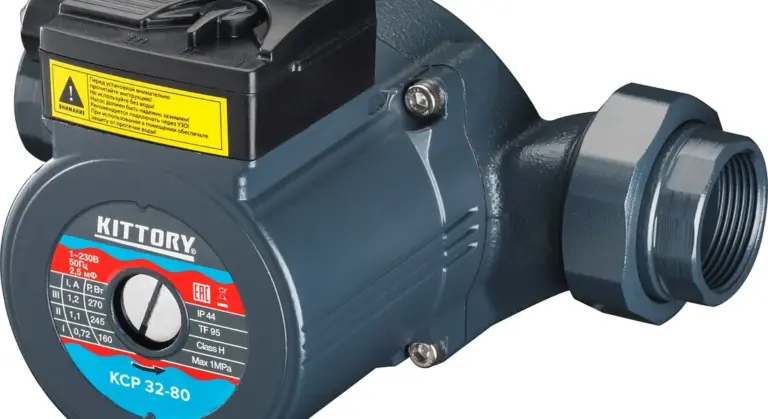
First Step: Identify Your Pump’s Discharge Outlet
Think of your sump pump’s discharge outlet like the spigot on your garden hose. It’s the point where all that pumped water has to exit. On almost every residential pump, this is a threaded pipe nipple built right into the pump’s volute-that’s the rounded chamber that directs the water flow. Different sump pump work types move water in slightly different ways, depending on whether the unit is submersible or pedestal. Knowing these work types helps you choose the right pump for your setup.
This outlet will have either male threads (threads on the outside of the pipe) or female threads (threads on the inside). Most standard pumps use a male-threaded outlet.
You must know your thread size and type before you buy a single fitting. Getting this wrong means leaks, frustration, and a return trip to the store.
How to Measure the Thread Size
The two most common sizes are 1 1/2 inch and 1 1/4 inch NPT (National Pipe Taper). Don’t guess. Here’s how to be sure:
- For a male threaded outlet: Use a tape measure or caliper to measure the outer diameter (OD) of the threaded pipe. A 1 1/2″ NPT male thread will measure about 1.9 inches OD. A 1 1/4″ NPT will measure about 1.65 inches OD.
- For a female threaded outlet: Measure the inner diameter (ID) of the opening. A 1 1/2″ NPT female opening is about 1.85 inches ID. A 1 1/4″ NPT is about 1.6 inches ID.
If you don’t have calipers, take your pump model number to the hardware store or match it visually to adapters in the plumbing aisle. The size is often stamped on the pump volute near the outlet.
This Measurement Is Your Shopping Key
Knowing your exact thread size is the golden ticket. Walk into any home center with this number, ask for a “sump pump hose fitting adapter” in that size, and you’ll get the right part. These adapters are the bridge between your pump’s specific threads and a standard garden hose or rigid discharge pipe.
With the correct adapter, connecting your hose becomes a simple, leak-free job. Without it, you’re trying to force the wrong parts together.
Submersible vs. Pedestal Pump Outlets
The outlet design is functionally the same for both pump types. The difference is location. On a submersible pump, the discharge outlet is part of the pump body at the bottom of the pit. On a pedestal pump, the outlet is on the pump volute at the top of the long pedestal shaft. Just remember to clear any debris away from the outlet before you start connecting anything.
Once you’ve got your thread size noted, you’re ready to choose and attach the right adapter. That’s the foundation of a secure connection.
Choosing Your Adapter: The Link Between Pump and Hose
Your pump outlet and your hose won’t magically fit together. You need the right adapter, which is just a connector. The best type depends on your hose and how permanent you want the setup. Use this simple comparison to decide.
| Adapter Type | Best For | Key Point |
| Threaded | Most common setups, switching between hose types | Screws onto the pump. Needs sealant. |
| Barbed Hose | Flexible discharge hose (corrugated or vinyl) | Pushes into hose. Requires two clamps. |
| PVC | Permanent, rigid pipe systems | Glued or threaded for a fixed installation. |
Threaded Adapters: The Versatile Connector
This is the most common starting point. The discharge port on your sump pump has male pipe threads. A threaded adapter screws right onto it. For a seamless, step-by-step sump pump installation, the next steps will walk you through securing the discharge line. This keeps your setup ready for the rest of the installation.
Always wrap the pump’s threads with Teflon tape or pipe dope before screwing the adapter on to create a watertight seal. Go clockwise, and hand-tighten firmly, then give it another quarter-turn with a wrench. Do not overtighten, you can crack the pump’s discharge port.
These adapters often have a different connection on the other end. One end is threaded for the pump, the other might be a barb for a hose or a PVC slip fitting for solid pipe. This lets you adapt the pump to almost any system.
Barbed Hose Adapters: For Flexible Hose
If you’re using a standard, flexible corrugated discharge hose, you likely need a barbed adapter. It has ridges (barbs) that grip the inside of the hose.
You simply push the barbed end into the hose. The critical step comes next: clamping.
You must use two stainless steel hose clamps on every barbed connection, spaced about a half-inch apart. This is non-negotiable. The pressure from the pump can blow a weakly clamped hose right off. Two clamps provide a fail-safe. If one loosens over time, the second holds the line. Tighten the clamps until the hose material just begins to bulge slightly around the barbs.
PVC Adapters: Building a Permanent System
Many homeowners ask, “how do I attach PVC pipe to my sump pump?” when they want to run a solid pipe out of the basement. You have two main choices for selecting the right PVC pipe size for your sump pump and attaching it properly.
The first is a threaded PVC adapter. It’s a PVC fitting with female threads on one end. You screw this directly onto the taped threads of your pump. The other end is a PVC socket, which you then glue your solid PVC pipe into using PVC cement. This creates a very strong, permanent seal.
For serviceability, install a union. A union is a special fitting that allows you to unscrew and remove the entire pipe system without cutting it. Install the union a foot or two above the pump. If you ever need to remove the pump, you simply unscrew the union instead of wrestling with glued pipe.
What is a Sump Pump Hose Fitting?
This is the simple answer to a common search. A sump pump hose fitting is not one universal thing; it’s the specific adapter or connector that links your specific pump’s outlet to your specific hose or pipe. It’s the missing puzzle piece you identify by looking at the pump’s thread size and your hose’s inner diameter. Knowing the three types above lets you find the right one. Different brands and models can use different ports and fittings. Checking the pump’s parts list helps ensure a perfect match.
Step-by-Step: Making the Actual Connection
This is where we get our hands dirty and make it watertight. Follow these steps in order.
Step 1: Seal the Threads with Teflon Tape
Find the male threads on your pump’s discharge outlet or on your adapter. Grab a roll of high-density “pipe thread” or “plumber’s” Teflon tape. Start wrapping from the end of the threads, moving toward the pump body. Wrap the tape clockwise, which is the same direction you’ll screw the fitting on, so it doesn’t bunch up. Do three to four full wraps. Press it down firmly as you go. This tape fills the gaps between threads to prevent leaks.
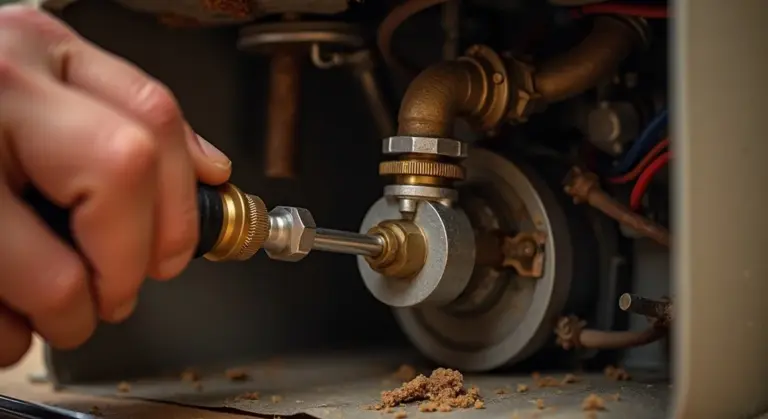
Step 2: Attach the Adapter to the Pump Outlet
Screw your threaded adapter (like a PVC male adapter or a hose barb) onto the taped pump outlet. Do this by hand first until it’s snug. Then, use an adjustable wrench to give it one final quarter-turn. Do not crank it down with all your might, as you can crack the pump’s plastic housing. Just a firm quarter-turn past hand-tight is perfect. You should feel solid resistance.
Step 3: Connect the Hose or Pipe
Your method here depends on whether you’re using a flexible hose or rigid PVC pipe.
For a Flexible Discharge Hose:
- If the adapter has a barbed end, apply a small amount of liquid soap or silicone lubricant to the barbs. This helps the hose slide on.
- Push the hose onto the barb all the way until it hits the collar. You want it seated completely.
- Place two stainless steel hose clamps over the hose, positioned over the barb’s ridges. Tighten them securely with a screwdriver. Using two clamps prevents the hose from blowing off under pressure.
For Rigid PVC Pipe:
- Dry-fit all your PVC pieces (adapters, elbows, pipe) together first to confirm the fit and layout. Mark the alignment with a pencil.
- Disassemble. Apply purple PVC primer to the end of the pipe and the inside of the fitting socket, then apply clear PVC cement over both primed areas.
- Quickly push and twist the pipe into the fitting, holding it for 15 seconds. Align your marks. The cement sets fast.
Step 4: Install a Check Valve (If Needed)
A check valve is a one-way gate for water. It lets water pump out but stops it from flowing back into the pit. Install the check valve close to the pump outlet, following the directional arrow on its side pointing away from the pump. This prevents the “water hammer” thump and stops the pump from having to re-lift the same column of water every cycle, which extends its life. If your discharge line has a vertical section, this valve is non-optional.
A Crucial Clarification: Discharge vs. Supply
Let’s be clear. You do not connect a sump pump *to* your home’s water supply. That’s for your pressure tank. A sump pump has one job: to collect water from the sump pit and discharge it away from your foundation. The “connection” we’re making is for this exit path only. Never tie a sump pump discharge line into a sewer line or your home’s drinking water plumbing.
Where Does the Water Go? Discharge Point Rules
You must send the water far from your house. The goal is simple: move water away so it doesn’t seep right back into your basement. Local plumbing codes make this a rule, not a suggestion.
Local Code Basics
Your city or county has specific rules. You can usually find them online or by calling your building department. A common requirement is discharging water at least 6 to 10 feet away from your home’s foundation. This distance gives the water a chance to soak into the ground safely away from your basement walls. Always check your local code first, as fines for incorrect discharge are common.
Can a Sump Pump Discharge on Lawns?
Yes, you can discharge onto a lawn, but with critical limits. The water must not create a nuisance or hazard. You are responsible for ensuring the discharged water does not flood your neighbor’s yard or property. You also cannot let it run across a sidewalk or driveway where it could create ice in winter. On your own lawn, aim for a well-draining area and consider using a splash block to prevent erosion.
Comparing Your Discharge Options
You have two main paths: the simple above-ground route or a more permanent buried system.
Flexible Hose to a Splash Block
- This is the easiest, most common DIY method.
- You connect a reinforced vinyl hose to the pump’s discharge outlet and run it to a concrete or plastic splash block placed 6-10 feet away.
- The splash block helps disperse the water and prevents it from digging a trench in your lawn.
- It’s cheap and easy to inspect, but the hose can be tripped over, kinked, or damaged by the sun over time. I use this method for a secondary pump in my own basement because it’s easy to pull out and check each spring.
Rigid PVC Pipe to a Pop-Up Emitter
- This is a cleaner, more permanent, and safer installation.
- You glue Schedule 40 PVC pipe from the pump to a buried pop-up emitter in your yard.
- The pop-up lid stays flush with the ground when not in use and opens only when the pump runs, spraying water away from the house.
- It’s out of sight, won’t trip anyone, and protects the pipe from freezing and UV damage. It requires more work to dig a trench and glue pipe, but it’s the professional standard for a reason.
DWV PVC vs. Schedule 40 for the Outlet
Homeowners often have spare Drain-Waste-Vent (DWV) pipe from other projects. DWV pipe is not pressure rated. A sump pump creates pressure when it runs. For a short, above-ground run, DWV pipe can work in a pinch, but it’s more prone to cracking under pressure and is not meant for burial. If you’re burying a sump drainage line to divert water away from the foundation, use pipe rated for burial and proper slope. This helps keep the area dry and reduces the risk of leaks. Schedule 40 PVC is designed for pressure. It’s thicker, stronger, and the only right choice if you are burying the line. Spend the few extra dollars on Schedule 40. It’s not worth a burst pipe flooding your crawl space.
Securing the Hose and Final Testing
Your connections are tight, but the job isn’t done. A loose hose is a flood waiting to happen. Securing it is non-negotiable.
How to Secure the Discharge Hose
Vibration from the pump and water pressure can shake fittings loose over time. Your goal is to support the hose’s weight and limit movement.
Forgetting to secure the hose is the top reason for a wet basement after what seemed like a perfect installation.
You have a few good options:
- Pipe Straps with Screws: These are the best choice for a permanent, rigid installation against a joist or wall. Use a strap every 4 to 6 feet.
- Heavy-Duty UV-Resistant Zip Ties: Perfect for attaching the hose to a fixed pipe, a conduit, or through eye-hooks you’ve screwed into wood.
- Landscape Staples (for buried hose): If your hose runs across the lawn before discharging, use large plastic or metal staples every few feet to pin it down and prevent tripping.
Avoid sharp bends. A gentle curve is better than a 90-degree kink. The hose should have a consistent downward slope away from the foundation.
The Final Test Procedure
Now, prove your work. This test mimics real operation and catches problems before the next storm.
- Ensure the pump is plugged into a dedicated GFCI outlet.
- Slowly pour about 5 gallons of water into the sump pit. Use a bucket. Watch the water level.
- The pump should activate automatically once the water reaches the float switch. Let it run its full cycle until the pit is nearly empty.
While the pump runs, get on your hands and knees and check every single connection and joint you made for drips or spraying water.
Trace the entire discharge path, from the pump outlet to the final point outside. Tighten any leaking fittings immediately. A small drip under test pressure will become a gusher under full pump load.
Listen for Proper Operation
Your ears are great diagnostic tools. A correctly working system has a specific sound profile.
- You should hear a distinct, solid “thump” when the pump shuts off. This is the check valve closing to prevent water from flowing back into the pit. No thump means the check valve is stuck open, faulty, or missing.
- The discharge flow should sound steady. You should not hear a gargling or sucking sound. This usually means there’s an air leak on the inlet side of the pump or the hose isn’t fully primed with water, which reduces efficiency.
- The pump motor should hum steadily, not strain or sound labored. A grinding noise means trouble.
If the test passes, you’re set. This simple ten-minute check saves you from a major disaster later.
Fixing Common Problems: Leaks and Freezes
Troubleshoot a Leaking Fitting
A leak at a connection is the most common problem. It means water is escaping the system before it gets outside. Start simple and work toward more involved fixes.
First, tighten the hose clamps with a screwdriver, but don’t strip the screw or crush the fitting.
If the leak slows but doesn’t stop, add a second hose clamp right next to the first one. This often seals small gaps in the hose wall. For threaded adapters (like a PVC male adapter screwed into the pump), the issue is usually the threads. You need to remove the adapter, clean off all the old Teflon tape, and re-wrap the threads. Wrap the tape clockwise, three to four layers thick.
Sometimes the plastic adapter itself is cracked. This happens from overtightening or freezing. If you see a hairline crack, you must replace it. They cost a few dollars at any hardware store.
Address a Constantly Running Pump
If your pump runs non stop after a storm, you have a different issue. Unplug the pump before you do anything.
A constantly running pump usually means water is flowing back into the pit as fast as the pump is removing it.
First, check the discharge point outside. Is water pouring out of the hose, or is it just trickling? If it’s a strong flow, go back inside and listen. Do you hear water flowing back down the pipe after the pump shuts off? That points to a missing or failed check valve. The check valve’s job is to stop that backflow. If it’s broken, the pit refills immediately and the pump kicks on again in a vicious cycle.
If there’s no backflow sound, the problem could be a stuck float switch. Gently nudge the float up and down by hand to see if it moves freely. A stuck switch will keep the pump activated even when the water level is low.
Discuss Winterizing
This step is non negotiable in cold climates. A frozen discharge line will destroy your pump.
When water in the hose freezes, it expands and blocks the pipe completely. The next time the pump tries to start, it has to work against a solid ice plug. This can burn out the pump motor in seconds, leading to a very expensive repair.
To winterize, disconnect the discharge hose from the pump outlet after the last storm of fall. Let all the water drain out. I simply coil my hose and hang it in the garage. Some people use a “freeze guard” fitting at the wall exit, but disconnecting is the surest method. If you need the pump operational in winter, the only safe option is to bury the discharge pipe below the frost line or run it to an indoor drain.
The Fitting on My Hose is Leaking. What Do I Do?
Follow this sequence. First, tighten the hose clamps on both sides of the leak. No good? Install a second clamp right next to the first one.
If it’s a threaded connection that’s leaking, you must take it apart. Unscrew the fitting, clean off every bit of old, shredded Teflon tape from the threads, and wrap new tape around them three times. Screw it back together and tighten.
Look the plastic adapter over carefully. If you see any crack, even a small one, it’s garbage. Go buy a new PVC adapter and hose barb, wrap the threads with tape, and connect it.
Common Questions
Where exactly do I find the right fittings and adapters at a hardware store?
Head to the plumbing aisle. Look for the section with PVC pipes and fittings; adapters are usually in bins labeled “pipe adapters” or “male/female adapters.” If you’re unsure, bring your pump’s model number or the measured thread size, and an associate can point you to the correct “sump pump hose fitting adapter” at Home Depot, Lowe’s, or any hardware store. After picking up the fittings, refer to a sump pump install, test, and troubleshoot guide for the rest of the steps. This guide helps ensure everything seals and runs correctly.
Do I really need Teflon tape on the threads, and how do I apply it correctly?
Yes, it’s essential for sealing plastic threads. Wrap high-density Teflon tape clockwise around the male threads 3-4 times, pulling it tight as you go. This prevents leaks at the pump outlet, which is the most critical connection point.
What’s the difference between a cheap vinyl hose and a more expensive reinforced one?
A cheap hose kinks easily and can collapse under pump pressure, leading to failure. A reinforced hose with a polyester cord or wire helix maintains its shape and handles pressure surges. For a reliable system, the extra cost for a reinforced hose is a wise investment.
Can I use just one hose clamp on a barbed adapter?
Never. Always use two stainless steel clamps, spaced about half an inch apart. Pump pressure is significant and can blow a single-clamped hose right off the barb. Two clamps are your fail-safe against a basement flood caused by a failed sump pump.
What should I do with my discharge hose before winter?
Disconnect and drain it to prevent freezing. A frozen hose blocks discharge and can burn out your pump motor in seconds. For a permanent buried line, ensure it is installed below your local frost line to operate year-round safely.
Secure Your Sump Pump Connection for Peace of Mind
Always match your hose size to the pump outlet and clamp it down tight with a stainless steel hose clamp. Give the hose a firm tug after installation and run the pump to check for leaks before you walk away.
Relevant Resources for Further Exploration
- Everbilt 1-1/4 in. x 24 ft. Sump Pump Discharge Hose Kit EBHK24 – The Home Depot
- Superior Pump 24 ft. Poly Universal Discharge Sump Pump Hose Kit 99624 – The Home Depot
- Little Giant SPDK Sump Pump Discharge Hose Kit, 1-1/4-inch Hose – 1-1/2 Inch and 1-1/4 Inch Adaptors, 24-Feet – Amazon.com
- 1-1/4 in. x 24 ft. Sump Pump Discharge Hose Kit
- Red Lion RL-SPDK Sump Pump Discharge Hose Kit, Fits 1-1/4″ and 1-1/2″ FNPT Discharge, 24-Feet Long, Black, 599304 – Amazon.com
Bob McArthur
Bob is a an HVAC and plumbing industry veteran. He has professionally helped homeowners resolve issues around water softeners, heaters and all things related to water systems and plumbing around their homes. His trusted advice has helped countless of his clients save time, money and effort in home water systems maintenance and he now here to help you and give you first hand actionable advice. In his spare time, Bob also reviews home water systems such as tankless heaters, water softeners etc and helps home owners make the best choice for their dwelling. He lives around the Detroit area and occasionally consults on residential and commercial projects. Feel free to reach out to him via the contact us form.