Large Water Tank Prices and Sizes: The Homeowner’s Cheat Sheet
You need a big water tank, but the prices and sizes are all over the place. Let’s get straight to the point.
This guide gives you the facts. We will cover price ranges by material, the full cost with installation, and standard dimensions for your property.
I’ve sold and installed these tanks for a decade. Pick the wrong one, and you’re throwing cash and space down the drain.
The Real-World Price Tag: What You’ll Pay for the Tank Itself
Forget the vague numbers. Here’s what you’ll actually pay for a new tank, based on recent service calls and my own projects.
Price Breakdown by Capacity
Prices are for the empty tank only. They swing based on material, brand, and where you buy it.
- 250 to 500 Gallons: $300 to $800. This is your common aboveground plastic cistern for rainwater collection.
- 1000 to 1500 Gallons: $800 to $2,500. The most popular range for whole-house backup or large-scale irrigation.
- 2500 to 5000 Gallons: $2,000 to $6,000. You’re now in serious storage territory, often requiring a pro for placement.
- 10000 Gallons and Up: $5,000 to $15,000+. These are commercial-grade or whole-farm systems. Delivery and placement become a major part of the cost.
Aboveground vs. Underground Tank Prices
An aboveground tank is just the tank. An underground tank is a tank plus a burial system.
Underground tanks cost more upfront because they’re built stronger to handle soil pressure. The real price jump comes from the “bench.” That’s industry slang for the concrete pad or compacted gravel base the tank sits on in the hole. Excavating the hole, building a proper bench, and backfilling correctly can double the total installed cost compared to an aboveground setup.
Plastic (Polyethylene) vs. Steel Tanks
This is the big choice for most homeowners.
- Plastic Tanks: These are rotationally molded, like a giant, single-piece plastic drum. They’re corrosion-proof, lighter, and cheaper. A 1500-gallon poly tank often costs $1,200 to $1,800.
- Steel Tanks: These are welded from coated steel plates. They’re for high pressure or permanent, heavy-duty installs. Steel costs 50% to 100% more than a plastic tank of the same size because of the material and skilled labor to build it. You pay for extreme durability and often a longer warranty.
Brand Name vs. Generic Tanks
A brand name like Norwesco or Snyder adds 10-20% to the price. You’re paying for consistent molding quality, standardized fittings, and reliable customer support.
A generic tank from a farm supply store is fine for a simple, non-critical aboveground rain barrel project. For a tank that your home’s water supply depends on, the warranty and technical support of a known brand are worth the extra cost, especially considering potential material and safety concerns. I learned this after a no-name tank at a neighbor’s developed a weird seam bulge. No one would answer the phone for a warranty claim.
How Big Is My Tank? Making Sense of Dimensions and Space
You need to visualize this. A 1000-gallon tank sounds abstract until you see the space it eats up.
Common Tank Sizes and Footprints
| Capacity | Approximate Dimensions (Diameter x Height) | Real-World Comparison |
|---|---|---|
| 100 Gallons | 3 ft x 2.5 ft | A large trash can. |
| 250 Gallons | 4 ft x 3.5 ft | A mid-sized refrigerator. |
| 1000 Gallons | 6 ft x 6 ft | The footprint of a small car. |
| 2000 Litres (~530 Gal) | 1.8m x 1.8m | Similar to a 1000-lb pallet of goods. |
| 10000 Litres (~2640 Gal) | 3m x 2m | About the size of a large delivery truck’s cargo box. |
Tank Shape Matters
A 1000-gallon tank can be tall and slim (5ft wide x 8ft tall) or short and wide (8ft wide x 3ft tall). The short/wide “pancake” style is common for attic or crawlspace installs where height is limited. The tall/slim style saves floor space.
Leave Room for Service
Do not jam the tank against a wall. You need at least 18 to 24 inches of clear space all around the tank. This lets you inspect for leaks, connect hoses, and service valves and pumps. For my 2500-gallon tank, I left a full 3-foot aisle on the pump side.
Beyond the Sticker: The Full System Cost of Installation
The tank price is just the start. These hidden costs sink budgets fast.
- Site Prep: A level gravel pad (6 inches deep, compacted) or a concrete slab. Gravel costs $50-$150. A concrete pad can run $500-$2000.
- Plumbing & Electrical: PVC pipe, fittings, primer/cement, valves, and a check valve. If you need a pump, factor in electrical conduit, wiring, and a dedicated circuit.
- Permits: Many counties require a permit for a permanent water storage structure, especially if it ties into your home’s plumbing. Budget $50-$200.
- Delivery & Placement: A 1500-gallon tank weighs hundreds of pounds empty. Delivery might be free, but placement with a truck-mounted crane or forklift can cost $200-$600.
An aboveground setup might cost $1,500 for the tank and another $1,000 for prep and plumbing. Burying that same tank can easily push the total to $5,000 or more with excavation, the bench, and specialized backfill.
DIY Prep Checklist
If you’re handling site prep, you’ll need:
- A 4-foot level and a tamper for the gravel base.
- Crushed gravel (3/4-inch minus is ideal).
- PVC pipe cutter, primer, and cement.
- Two large pipe wrenches (12-inch minimum).
- Teflon tape and pipe sealant for all threaded connections.
The DIY vs. Pro Verdict for Large Tank Installation
Difficulty Rating
- Simple Aboveground Placement: 6/10. Heavy lifting and precise plumbing are required.
- Complex Aboveground (with pump house tie-in): 8/10. Adds electrical and critical pressure system work.
- Underground Burial: 9.5/10. Excavation safety, precise benching, and backfilling are pro-only tasks.
What a Confident DIYer Can Handle
You can do the site prep. You can assemble the gravel pad to perfection. You can position a smaller (under 1000-gallon) tank with a few strong friends and a rented equipment trailer. You can run the basic PVC from the tank to a nearby connection point if you’re skilled with solvent welding.
What Absolutely Requires a Pro
Hire a professional for these three things:
- Crane or Heavy Equipment Operation: Lifting a full-sized tank onto a roof or pad.
- Underground Burial: From digging the hole to the final backfill. One mistake collapses the tank.
- Complex Plumbing Tie-Ins: Connecting the tank as a pressurized backup to your main house supply. This involves code-required backflow prevention devices and pressure tanks.
Code Compliance is Not Optional
Your local plumbing code (IPC or UPC) governs this. It’s not just bureaucracy. Codes dictate how the tank must be supported, vented to prevent vacuum lock, and have an overflow pipe directed away from your foundation and other critical backflow preventer requirements. A pro installer knows these rules. If you DIY, you are responsible for pulling permits and passing inspection. Failing an inspection because your overflow drains into your neighbor’s yard is an expensive headache.
Your Tank’s Health: A Simple Maintenance Schedule
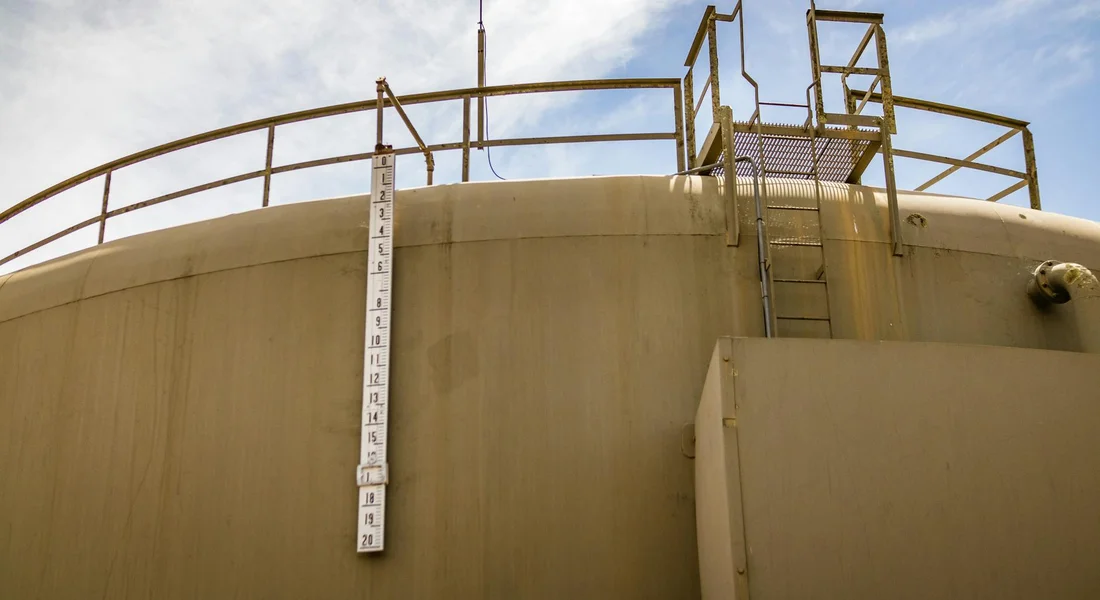
A water tank is not a set-it-and-forget-it item. Regular checks keep it working and your water safe. Here is a straightforward schedule to follow, no matter what type of water tank you have.
Yearly Maintenance Checklist
- Inspect for sun damage. For plastic tanks, look for fading, brittleness, or chalky white powder on the surface. This is UV degradation. Consider a tank cover.
- Check for rust. On steel tanks, examine seams, bolts, and the base for any bubbling paint or orange-brown corrosion. Touch up with a suitable rust-inhibiting paint.
- Look for sediment. Drain a few gallons from the tank’s bottom drain valve into a clear bucket. If you see sand, silt, or debris, it is time to clean.
- Sanitize the interior. For potable water tanks, add the correct amount of unscented household bleach (sodium hypochlorite) per gallon of tank capacity. Fill the tank, let it sit for 12 hours, then drain completely and refill.
Every 5 Years (or Sooner if Needed)
- Perform a complete drain and interior inspection if possible. Look for biofilm (slimy coating), heavy sediment buildup, or any signs of wear on the tank floor.
- Check and tighten all fittings, inlet/outlet connections, and access hatches.
- For steel tanks, consider a professional inspection for internal corrosion if used for critical applications.
Water Science Snippet: Stagnation
Stored water wants to grow things. Without movement, oxygen levels drop and bacteria can thrive, leading to foul tastes and odors. Testing your stored water annually for total coliform bacteria and pH gives you a clear picture of its safety and condition. To verify with lab-grade precision, you can submit a sample to a certified home water quality testing lab and review their detailed results. These lab results can help you make informed treatment decisions. Simple test kits are available online or through your local health department.
What Helped Me: The Sump Pump Trick
Draining a big tank with just the little drain valve can take forever. My method is to use a small, submersible utility pump. Drop it into the tank through the access hatch, hose it out to my driveway, and I can empty 1,000 gallons in under an hour. It makes the cleaning and sanitizing process much faster.
Red Flag Troubleshooting: Signs Your Tank is Failing
Do not ignore these signs. Catching a problem early saves money and prevents a mess.
- Visible cracks or bulges: Even a small hairline crack can become a major leak. A bulging sidewall means structural stress. These are critical.
- Persistent leaks at seams or welds: A drip that returns after tightening fittings indicates a material failure.
- A rotten egg smell from the water: This often points to sulfate-reducing bacteria growing in sediment or on the tank walls. The tank needs a thorough shock chlorination and cleaning.
- Cloudy or discolored water output: This signals heavy sediment disruption or internal corrosion. Check your filters first, then inspect the tank.
- A tilting or sinking tank base: This is a major structural emergency. The pad has failed and the full tank is at risk of catastrophic rupture.
Call a professional immediately for any visible crack, bulge, or foundation shift. Issues like sulfur smells or minor sediment are usually fixable with cleaning and sanitizing, but persistent problems mean the tank itself may be compromised. Regular maintenance includes cleaning and sanitizing the RV fresh water tank to prevent odors and sediment buildup. The next steps include a quick guide on how to clean and sanitize your RV fresh water tank.
Choosing the Right Tank: A Guide for Your Home’s Needs
Picking a tank is about matching the material and size to your job. Get this wrong, and you will have problems down the line, especially when it comes to materials for tanks used in water heaters.
Matching Tank Type to Application
- Rainwater Collection: Use large, opaque polyethylene tanks. They are light, durable, and block sunlight to prevent algae growth. Dark green or black is best.
- Potable Drinking Water Storage: You must use an NSF/ANSI 61 certified tank. These are made from materials approved for contact with drinking water. Do not use a standard “food grade” tank if it lacks this certification for potable use.
- Fire Suppression Reserve: Galvanized or coated steel tanks are often specified for their strength and reliability in emergency systems.
- General Irrigation or Non-Potable Backup: A standard polyethylene or corrugated steel tank will work well and is cost-effective.
Recommended Products by Category
These are common, reliable types you will encounter.
- Food-Grade Polyethylene Tanks: Rotomolded, seamless construction. Great for most home uses. Come in vertical (saves space) and horizontal (lower profile) models.
- Corrugated Steel Tanks: Bolted panels with a liner. Excellent for very large capacities (5,000+ gallons) often used in homesteading or agriculture.
- Vertical vs. Horizontal: Vertical tanks have a smaller footprint. Horizontal tanks are more stable when full and easier to place on a restrained pad if you have height restrictions.
What Size Water Tank For…?
This is the most common question. Think in gallons per day of use.
- Garden Irrigation: Calculate your garden’s weekly water need, then size for at least a 1-2 week supply. A 500-1,500 gallon tank is typical.
- Whole-House Backup (basic use): Plan for 50-100 gallons per person, per day. For a family of four to survive a 3-5 day outage, a 1,000-2,000 gallon tank is a practical minimum.
- Homestead or Off-Grid Supply: This depends on wells, rainfall, and livestock. Start by tracking your total daily water consumption for a month, then size your storage to cover 7-14 dry days. Tanks of 2,500 gallons and up are common here.
Quick Answers
1. Are there financing options for a large tank system?
Yes, many dealers offer installment plans, and some states have rebate programs for rainwater harvesting or fire suppression tanks. Check with your supplier first, then look into local water conservation incentives. A good installer can often point you to the best financial options.
2. Can I reduce the delivery and placement cost?
Absolutely. The biggest saving is ensuring a clear, level path for the delivery truck and equipment. Move fences or gates if needed. Having your base pad completely ready before the truck arrives prevents costly rescheduling or extra labor fees.
3. How much extra space do I really need around the tank?
You need a minimum of 2 feet of clear access on all sides, especially where the plumbing connections are. This isn’t just for installation-it’s a critical safety margin for future inspections, leak detection, and emergency repairs. Don’t let landscaping or structures box it in. Also follow the backflow preventer installation location orientation guidelines to ensure correct placement. These guidelines help maintain accessibility and proper flow direction during maintenance.
4. Is a more expensive tank always a better long-term value?
For a permanent, critical system, usually yes. You’re paying for thicker material, better UV inhibitors, and a stronger warranty. A cheaper tank might save you hundreds now but cost thousands in premature replacement or water damage later. Invest in quality for primary water storage, especially when considering tank capacity and volume.
5. What’s the most common “hidden cost” homeowners forget?
It’s the plumbing and electrical run from the tank to the house. Every extra foot of trenching, pipe, wire, and conduit adds up. Measure this distance accurately during planning and budget for it separately-it’s often where DIY estimates fall short.
Final Considerations for Your Tank Project
Before you buy anything, measure your available space twice and check local codes. Your total project cost will always be higher than the tank’s price tag, so budget for delivery, a proper base, and all the necessary plumbing. When you’re ready to buy a hot water tank, compare models by size and energy efficiency. Plan for professional installation to ensure safe, reliable operation.
Bob McArthur
Bob is a an HVAC and plumbing industry veteran. He has professionally helped homeowners resolve issues around water softeners, heaters and all things related to water systems and plumbing around their homes. His trusted advice has helped countless of his clients save time, money and effort in home water systems maintenance and he now here to help you and give you first hand actionable advice. In his spare time, Bob also reviews home water systems such as tankless heaters, water softeners etc and helps home owners make the best choice for their dwelling. He lives around the Detroit area and occasionally consults on residential and commercial projects. Feel free to reach out to him via the contact us form.