Sump Pump Costs and Sizing: What Homeowners Need to Know
Basement flooding can wreck your stuff and your wallet. Get the right sump pump, and you stop the problem before it starts.
This guide will cover average pump prices, how to calculate the correct size, and the smartest way to buy one.
I’ve swapped out more pumps than I can count, in my basement and yours. Skip the guesswork: the correct size is cheaper than a flooded floor.
The Real-World Cost of a Sump Pump: Unit Price and Installation
Expect to pay between $600 and $1,200 for a professional to install a standard sump pump. This total splits into two parts. The pump unit itself typically costs $100 to $400. Professional labor adds another $500 to $800 to your bill.
Different pump types come with different price tags. Your choice directly impacts your upfront cost.
- Pedestal Pumps: These are the most budget-friendly, ranging from $50 to $150 for the unit. The motor sits above the pit, making it louder and easier to service.
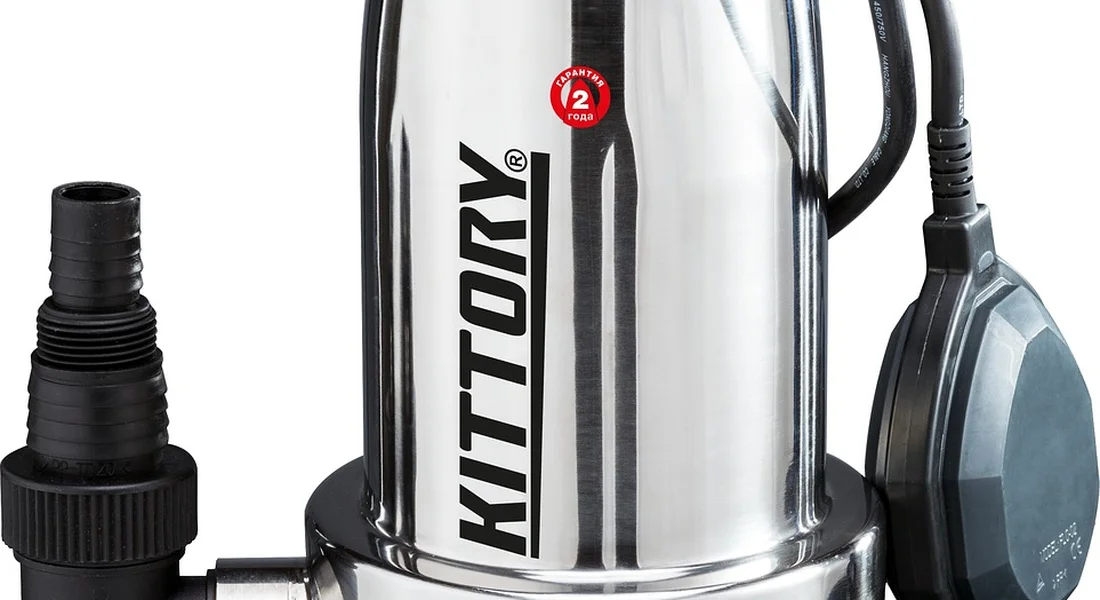
- Submersible Pumps: This is the common choice for basements. Units cost $100 to $400. They operate quietly inside the pit but can be harder to access for maintenance.
- Battery Backup Systems: These are add-ons or complete units for power outages. Plan on $200 to $600 or more just for the backup pump and battery.
Features on the pump unit will change the price. A basic 1/3 horsepower model is the standard and most affordable. Jumping to a 1/2 or 3/4 HP motor for a wetter area adds $50 to $100. Pumps with smart controls that send alerts to your phone can add $100 to $200. Construction matters too. A cast iron pump casing costs more than plastic but resists corrosion better.
The final bill depends heavily on what the plumber finds when they arrive. A simple replacement, where they swap an old pump in an existing pit, is the cheapest job. Labor might be $300 to $600. Installing a brand new system with a dug pit, liner, and discharge piping is a major project. That labor can push the total cost to $1,000 or even $2,500.
Sump Pump Sizing 101: Why ‘Bigger’ Isn’t Always ‘Better’
When you ask how big of a sump pump you need, you are talking about its pumping capacity. This has nothing to do with its physical dimensions. A pump that is too small will lose the fight against incoming water. A pump that is too large can short cycle, turning on and off too quickly, which wears it out fast.
You need to understand three key terms to pick the right capacity.
- GPH (Gallons Per Hour): This is the pump’s flow rate. It tells you how many gallons of water the pump can move in one hour under ideal conditions.
- Head Height: This is the total vertical distance the pump must push water, from the bottom of the pit up to where the discharge pipe ends outside. Every foot of height reduces the pump’s effective GPH.
- Horsepower (HP): This measures the motor’s power. A more powerful motor (like 1/2 HP vs. 1/3 HP) can generally pump water higher or faster, but the GPH at your specific head height is the number that really counts.
Think of it like bailing out a leaking boat. If you have a small, slow leak, a coffee can might keep up. If water is pouring in, you need a big bucket. But a bucket so huge it’s awkward to lift and empty wastes your energy. You need the right tool for the specific leak.
Sizing your sump pump boils down to two main factors. First, estimate the volume of water that flows into your pit during the worst storm you expect. Second, measure the head height from your pump to the discharge point. The pump you choose must have a GPH rating that meets or exceeds your water volume at that specific head height.
The DIY Sizing Formula: How to Calculate Your GPH Need

Forget complex math. Sizing a sump pump comes down to two things: how much water can come in and how hard the pump must work to push it out. You can get a solid baseline number in three steps. That foundation naturally leads toward the basics, functions, and classifications of sump pumps. In the next steps, those topics will be subtly linked for further reading.
Step 1: Find Your Collection Area in Square Feet
This is the footprint of the space you are protecting. For a full basement, go downstairs and measure the length and width. Multiply them. If you have a crawl space, measure its length and width from the access point.
No tape measure? Your property survey or closing documents list your home’s footprint. Use that number. It’s better to overestimate. Protecting 1,000 square feet is a common starting point for an average basement.
Step 2: Measure Your Critical “Head Height”
Head height is the total vertical distance the pump must push water. It is not just basement depth. Here is how to measure it correctly.
- Find the spot in your sump pit where the pump discharge port will be.
- Run your tape measure vertically from that point up to where the discharge pipe exits your home’s exterior wall.
- Now, add the vertical distance from that exit point down to the ground where the water spills out.
This total vertical feet is your head height, and it is the single biggest factor in choosing pump power. Add 2-3 extra feet to account for friction loss in the pipes and fittings. A head height of 10-15 feet is very common.
Step 3: Calculate Your Baseline Gallons Per Hour (GPH)
Now, combine area and rainfall. A good rule is that your system should handle 1 inch of rainfall per hour over your collection area.
Here is the simple formula: Square Feet x 0.62 = Gallons Per Hour (GPH) needed. The 0.62 multiplier converts 1 inch of water over one square foot into gallons.
For a 1,000 sq ft basement, you need a pump that can move at least 620 GPH at your measured head height. Use this quick reference table for common sizes.
| Basement Area | Baseline GPH @ 1″ Rain/HR |
| 500 sq ft | ~310 GPH |
| 750 sq ft | ~465 GPH |
| 1,000 sq ft | ~620 GPH |
| 1,500 sq ft | ~930 GPH |
Answering Your Specific Questions
“How big a sump pump for 35 feet?” A 35-foot head is high, typical of deep basements or long runs to a uphill discharge. You need a powerful ½ HP or even ¾ HP submersible pump. Check the pump’s performance chart. At 35 feet, a good ½ HP pump will move between 2,000 and 3,000 GPH. That is enough for most homes if the other factors are normal.
“How big a sump pump tanks?” This refers to the pit or basin. The standard plastic sump liner is 18 inches in diameter (about 20 gallons). A larger pit, like 24 inches in diameter, holds more water. This lets the pump run less often, which extends its life. Your pump must be sized to move water faster than it fills the pit. A small pit with a slow pump will overflow. This is especially important when you drain condensate to a sump pump pit, as it adds to the water volume.
Critical Factors That Change Your Pump Size Choice
That baseline GPH is just the start. Real world conditions mean you often need to buy more pump.
Local Water Table
If you live in a low lying area near a lake or river, your ground is always wet. A high water table means water is constantly seeping into your pit, even without rain. In this case, your pump runs frequently, and you need a unit with a higher GPH rating and a durable switch. Consider a cast iron pump and always have a tested battery backup.
Regional Rainfall Intensity
Do you get gentle showers or torrential downpours? The 1 inch per hour rule may not be enough in monsoon or hurricane prone regions. Check historical data for your area. If 2 or 3 inch per hour storms are possible, double your baseline GPH. A faster pump can keep up during the peak of the storm, which is when you need it most.
The Impact of Basin (Pit) Size
Think of the pit as a bucket filling with a hose. A small bucket (pit) fills fast. To keep it from overflowing, you need to empty it very quickly. That demands a high GPH pump. A larger pit fills slower, giving the pump more time to do its job. A small basin forces the pump to cycle on and off rapidly, which is the main cause of motor burnout. If you cannot install a bigger pit, you absolutely must install a bigger, faster pump.
Sizing for a Large Tank or Cistern
“How big a sump pump for 180 gallon tank?” This usually means you are emptying a large collection tank or cistern, not a standard sump pit. The concern here is cycling. You need to match the pump’s flow rate to the inflow rate. If water flows into the 180 gallon tank at 20 gallons per minute (1,200 GPH), your pump must be able to pump at least that fast. Otherwise, the tank will never empty. Choose a pump whose GPH rating at your head height exceeds the tank’s maximum inflow rate. For large volumes, a ½ HP or ¾ HP utility pump is often the right tool.
Tools & Materials Checklist for Installation or Replacement
Gather everything before you start. This saves you a mid-project run to the hardware store. I keep a dedicated tote for sump pump jobs in my own basement. Here is your list.
You need these tools to cut, connect, and secure the plumbing.
- Hacksaw: For cutting PVC pipe cleanly.
- PVC Primer & Cement: This is the glue. Do not skip the primer; it cleans and softens the pipe for a permanent bond.
- Two Pipe Wrenches: One to hold the fitting, one to turn the pipe. They prevent damage.
- Check Valve: This one-way valve stops water from flowing back into the pit after the pump shuts off.
- Discharge Hose: A flexible hose for the final run outside. Get one rated for burial if it will go underground.
The right materials ensure your system lasts and works correctly.
- PVC Pipe: Use Schedule 40. The standard diameter is 1.5 inches. Buy a 10-foot section so you have extra.
- Clean Gravel: About a 50-pound bag. This goes in the bottom of the pit to keep the pump intake clear of silt.
- Sump Liner: A plastic basin. You only need this if you are creating a new pit or the old one is cracked.
Helpful extras make the job better. A small torque wrench ensures you do not over-tighten the check valve connections. Always consider a backup power solution, like a battery backup pump or a generator hookup, to protect your basement during a storm-induced power outage.
Code & Compliance Check: What Your Town or Inspector Wants
Your local building code is the final word. Ignoring it can lead to fines or a failed home inspection.
The electrical connection must be a dedicated GFCI outlet within reach of the pump’s power cord. This type of outlet prevents electrocution if the pump or wiring gets wet. Do not use an extension cord.
Where the water discharges matters. You cannot dump it onto your neighbor’s property. Most codes require the outlet to be at least 10 feet away from your home’s foundation. This stops the water from seeping right back in.
Call your local building department. Many towns require a permit for a new sump pump installation, especially if you are tying it into the home’s perimeter drainage system. The permit fee is cheaper than redoing the work. Know the sump pump permit legal requirements for your city. Following the official permit process helps ensure compliance.
The DIY vs. Pro Verdict: A Realistic Difficulty Rating
I rate a full new sump pump installation, from pit to discharge, a 6 out of 10 on the DIY difficulty scale. It involves concrete work, precise plumbing, and electrical safety. Replacing a well sump pump specifically can add challenges, such as accessing a buried pit and coordinating well piping. That nuance matters when planning any upgrade or retrofit.
A confident DIYer with experience using PVC and basic hand tools can successfully replace an old pump in an existing pit. This is a straight swap: disconnect the old pump, attach the new one to the existing discharge pipe, and plug it in. Test it by pouring water into the pit.
You need to call a licensed plumber or contractor in three situations. First, if you must core a new discharge hole through your concrete foundation wall. That requires a special drill and skill. Second, for any complex plumbing rerouting. Third, for any new electrical circuit work from your main panel. Messing with your home’s foundation or electrical system without proper training is a clear safety and legal risk.
System Maintenance Roadmap: Keep Your Pump Ready for the Storm
A sump pump is a mechanical device. It needs basic care and understanding of how it works and the types available. Ignoring it until water is pouring in is a recipe for a flooded basement and an expensive emergency service call.
Follow this simple schedule. It takes minutes and saves thousands.
- Test Monthly: Pour a 5-gallon bucket of water into the pit. Watch the pump turn on, lift the float, and pump the water out. If it doesn’t, you found the problem on a sunny day.
- Clean the Intake Screen Quarterly: Unplug the pump. For a submersible, pull it up (it’s heavy). Clear the small screen at the pump base of silt, gravel, and debris. A clogged screen makes the pump work harder and fail faster.
- Inspect the Check Valve Annually: Listen for a loud “thump” when the pump shuts off. That’s the check valve closing, stopping water from flowing back into the pit. No thump or a constant trickle sound means the valve is faulty and needs replacing.
- For Battery Backups: Test the alarm button every 6 months. Replace the sealed lead-acid battery every 2 to 3 years, no exceptions. A dead backup pump is just a heavy paperweight.
Plan for a full system inspection every 5 to 7 years by a pro, which is the right time to consider a preemptive replacement before the old unit quits. The pump in my own basement gets this treatment every spring. It’s cheap insurance.
The Red Flag Troubleshooting Guide
Your pump will tell you when it’s sick. You just need to listen and look. Here are the common failure signs you can diagnose yourself.
- Pump runs constantly, water level doesn’t drop: This is usually a clogged intake screen or discharge pipe. For older pumps, the impeller (the spinning fan that moves water) can be worn down to a nub and needs replacement.
- Pump cycles on and off rapidly (short cycling): The float switch is likely stuck on the pit wall or the pump is too powerful for a small basin. The pump kicks on, empties the tiny pit instantly, shuts off, and refills in seconds. It burns out the motor.
- Unusual noise (grinding, screeching): This is a death rattle. The motor bearings are shot. The pump could fail at any moment. Plan for immediate replacement.
- Visible rust on a submersible pump housing: The seal has failed. Water is inside the motor compartment. It’s only a matter of time before it shorts out.
Old age is the biggest red flag; budget for a new pump at the 7-10 year mark even if the old one seems fine, because failure during a storm is guaranteed.
Water Science Snippet: Understanding Your Home’s Hydrology
Knowing a little about your ground water explains why sizing and maintenance matter so much.
Static water table versus perched water table: The static water table is the permanent, underground level of water in your area. A perched water table is a temporary, localized pool that sits on top of a layer of clay or rock. Your sump pump often deals with perched water after heavy rain.
Hydraulic head pressure is the force that pushes water through the soil toward your foundation. Think of it like the weight of all the water in the saturated ground around your house. More water equals higher pressure.
This pressure is why proper drainage grading away from your home and a correctly sized pump are non-negotiable; you’re fighting against a physical force, not just a puddle.
When to Seek Professional Help: No Shame in Calling a Plumber
Installing a sump pump is a solid DIY project. I’ve done it in my own basement. But some situations are a hard stop. Knowing when to call a pro protects your home and saves you money on much bigger repairs down the line.
If you see significant foundation cracks where water is entering.
A hairline crack is one thing. A crack you can fit a coin into, especially if water is actively seeping or pouring through, is a major red flag. Your sump pump is a symptom fixer, not a foundation repair tool. A plumber or foundation specialist can assess whether this needs hydraulic cement, epoxy injection, or exterior waterproofing. Trying to just pump away water coming through a big crack is like bailing out a boat without plugging the hole.
If you have recurrent flooding despite a working pump.
This tells you the problem is bigger than the pump. Your pump might be running fine, but it’s overwhelmed. The issue is usually outside your home. Recurrent flooding often points to failed perimeter drainage, like clogged or crushed drain tile, or severe negative grading around your foundation. A professional can perform a camera inspection of your drain lines and evaluate your yard’s slope. They fix the source, so your pump only handles what it’s supposed to.
If you are not comfortable working with PVC plumbing or electrical connections.
This is the biggest safety gate. Sump pumps use 120-volt power, often with a dedicated GFCI outlet. If your wiring isn’t right, you risk shock or fire. On the plumbing side, a bad PVC glue joint can leak under pressure and flood the area you’re trying to protect. If splicing wires or solvent-welding pipe isn’t in your skill set, hire it out. I’ve been on service calls to fix DIY plumbing fails that caused more water damage than a storm ever did.
If your diagnostic steps point to a major system redesign, not just a pump swap.
Sometimes the fix isn’t a new pump. It’s a new system. Signs you need a pro redesign include:
- Your pit is too small or shallow for a proper pump.
- You need to add a battery backup or water-powered backup system.
- Your discharge line needs to be rerouted outside due to freezing or code issues.
- You’re considering adding a second pump for a high-water table.
A plumber can ensure the entire system-pit, pump, pipe, and power-is sized and installed correctly for your specific home. That’s a job worth paying for.
Common Questions
Is a battery backup really necessary, or is it an upsell?
Think of it as flood insurance for your pump. If the power goes out during a storm-when you need the pump most-a basement flood is almost guaranteed. For essential protection, a quality battery backup system is non-negotiable, not an upsell.
What’s the real difference between pedestal and submersible pumps?
Pedestal pumps are cheaper and easier to service, but they’re louder. Submersible pumps are quieter and handle solids better, making them the preferred choice for finished living areas. Your choice balances budget, noise tolerance, and your basement’s use.
I’m replacing an old pump. Can I just buy the same horsepower?
Not necessarily. Horsepower is just one factor. Always match the new pump’s Gallons Per Hour (GPH) rating at your specific head height to your old pump’s performance or your current needs. An incorrect match can lead to short-cycling or inadequate water removal.
What’s the one installation mistake you see most often?
A missing or failed check valve. This one-way valve stops pumped water from flowing back into the pit, which makes the pump work constantly. Always install a quality check valve and listen for a firm “thud” when the pump shuts off-it’s the sound of it working.
When sizing a pump, what’s more important: my basement size or how wet my yard gets?
Your yard’s conditions are critical. The basement square footage gives you a baseline, but a high water table or intense local rainfall means you must significantly increase the pump’s capacity. Always size for the worst-case scenario your property actually experiences.
Getting Your Sump Pump Right
First, figure out how quickly water enters your sump pit to buy a pump with enough power. In particular, when you choose sump pump horsepower for your basement, you’ll want to balance power with efficiency. Matching the pump size to your actual needs, even if it costs a little more, keeps your basement dry and prevents repair bills.
Bob McArthur
Bob is a an HVAC and plumbing industry veteran. He has professionally helped homeowners resolve issues around water softeners, heaters and all things related to water systems and plumbing around their homes. His trusted advice has helped countless of his clients save time, money and effort in home water systems maintenance and he now here to help you and give you first hand actionable advice. In his spare time, Bob also reviews home water systems such as tankless heaters, water softeners etc and helps home owners make the best choice for their dwelling. He lives around the Detroit area and occasionally consults on residential and commercial projects. Feel free to reach out to him via the contact us form.