A.O. Smith Water Heater Guide: Troubleshoot, Find Parts, Check Warranty, and Determine Age
Your A.O. Smith water heater is making noise or not heating right? You need answers fast, and I have them.
We will cover how to troubleshoot common issues, find genuine replacement parts, check your warranty coverage, and decode the serial number to determine the unit’s age.
I have fixed these in homes and on service calls for over a decade. Your first move is always to cut power and water at the source before touching anything.
First, Is It Safe? What to Check Before You Touch Anything
Stop. Before you poke, prod, or take anything apart, you need to make the unit safe to work on. This isn’t just advice; it’s the rule.
- Shut off the gas. Find the red handle on the gas line going into the heater. Turn it so it’s perpendicular to the pipe. If you smell gas at any point, leave the area and call your utility company immediately.
- Shut off the water. Find the cold water shut-off valve on the pipe leading into the heater. Turn it clockwise until it stops.
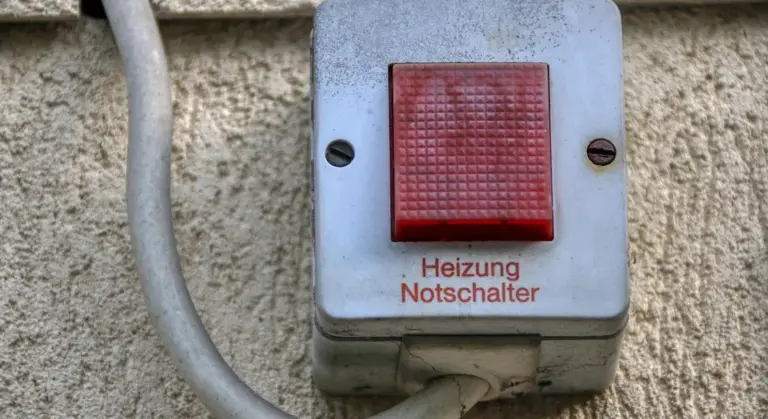
- Shut off the electricity (for electric models). Go to your home’s main circuit breaker panel and turn off the breaker dedicated to the water heater. Do not rely on a nearby switch. Verify the power is off by testing at the heater’s junction box with a non-contact voltage tester.
For gas heaters, a key safety part is the thermocouple. It’s a thin copper rod that sits in the pilot flame. Its job is simple: it generates a tiny bit of electricity (like a watch battery) when heated to prove the pilot is lit. This tiny current tells the gas valve it’s safe to stay open. If the thermocouple fails, the gas valve shuts off completely, killing your hot water.
This part wears out over time and is the most common reason a pilot light won’t stay lit, leading directly to an a o smith hot water heater thermocouple replacement.
For Gas Heaters: The Pilot Light is Your First Clue
If you have no hot water, look at the bottom of your heater. There’s a small window. Do you see a steady blue flame? If not, you need to relight it.
Here’s the safe way to relight a standing pilot on an A.O. Smith:
- Turn the gas control knob from “ON” to “PILOT.”
- Press and hold the knob down. This starts the gas flow to the pilot.
- While holding the knob, use a long lighter to ignite the pilot at the end of the tube you see through the window.
- Keep holding the knob down for 60 seconds after the pilot lights. This heats the thermocouple enough to generate its safety signal.
- Slowly release the knob. The pilot should stay lit. If it goes out, the thermocouple is likely bad.
- Turn the knob to “ON.” You should hear the main burner ignite.
A failed thermocouple often looks crusty or sooty at the tip. It may also be bent away from the pilot flame. If the pilot lights but immediately goes out when you release the knob, the thermocouple has failed and needs replacement.
For Electric Heaters: It’s Usually a Heating Element or Thermostat
Electric water heaters have two heating elements, one upper and one lower. They work on a rotation: the top one heats first, then the bottom one kicks in to finish the job. If one fails, you’ll often still get some hot water, but the tank won’t recover fully. It’s important to understand how electric water heater elements function to troubleshoot issues effectively.
Your first tool for a o smith electric water heater troubleshooting is a multimeter. You’ll use it to test for continuity (a complete electrical path) through the elements and thermostats. One common check is the water heater element continuity test to confirm the heating elements are functioning. If the test shows no continuity, the element may need replacement.
Always shut off power at the breaker and verify it’s dead before removing any access panels. Behind the panels, you’ll see two thermostats and two elements. A common failure is a burned-out element, which you can identify by a visible blister or hole, or by testing for continuity with your meter. A faulty thermostat won’t send power to the element at all.
How to Diagnose Common A.O. Smith Water Heater Problems
Think of this as a roadmap. Start with your symptom and follow the path to the likely cause.
No Hot Water? Start Here.
First, figure out what “no hot water” means. Is it completely cold at all faucets? Or do you get hot water that runs out in 5 minutes?
- Completely cold (Gas Model): Check the pilot light. If it’s out, follow the relight steps. If it won’t stay lit, replace the thermocouple. If the pilot is on but the main burner won’t ignite, you may have a faulty gas control valve.
- Completely cold (Electric Model): Check the breaker first. If it’s tripped, reset it. If it trips again, you have an electrical short, likely in a failed heating element. Use a multimeter to test the elements and thermostats.
- Runs out very fast: This points to a failed lower heating element on an electric model. The top element heats a small amount of water, which you use quickly. On any model, it could also mean the tank is so full of sediment there’s little room for water.
Water Not Hot Enough or Temperature Fluctuates
You’re getting warm water, not hot. First, check the thermostat setting. Access the dial behind the panel (electric) or on the gas valve. It’s often set to 120°F. Do not crank it above 125°F to compensate, as this creates a scalding risk. If the setting is correct, the thermostat might be miscalibrated and reading the temperature wrong.
Another classic cause is a broken dip tube. This is the plastic tube that sends incoming cold water to the bottom of the tank. If it cracks, cold water mixes with the hot water at the top, sending lukewarm water to your faucets. You’ll need to drain the tank and replace the dip tube at the cold water inlet.
Strange Noises: Rumbling, Popping, or Hammering
A noisy water heater is almost always talking about sediment. It’s telling you to flush it.
The Science of Sediment: It’s Like a Coffee Pot Scale
When you heat water, minerals like calcium and magnesium (what makes water “hard”) fall out of solution. Think of the limescale in your coffee pot or kettle. In a water heater, this mineral sediment falls to the bottom of the tank. Over time, it forms a thick layer.
When the burner or element heats this wet sediment layer, the water trapped underneath turns to steam. That steam bubble forces its way up through the sediment, creating a rumbling or popping sound. Water with high TDS (Total Dissolved Solids), which is a measure of all minerals and salts in the water, will create sediment much faster. Flushing the tank annually helps prevent this.
Leaks: Finding the Source is Key
Water on the floor? Don’t panic. Find where it’s coming from.
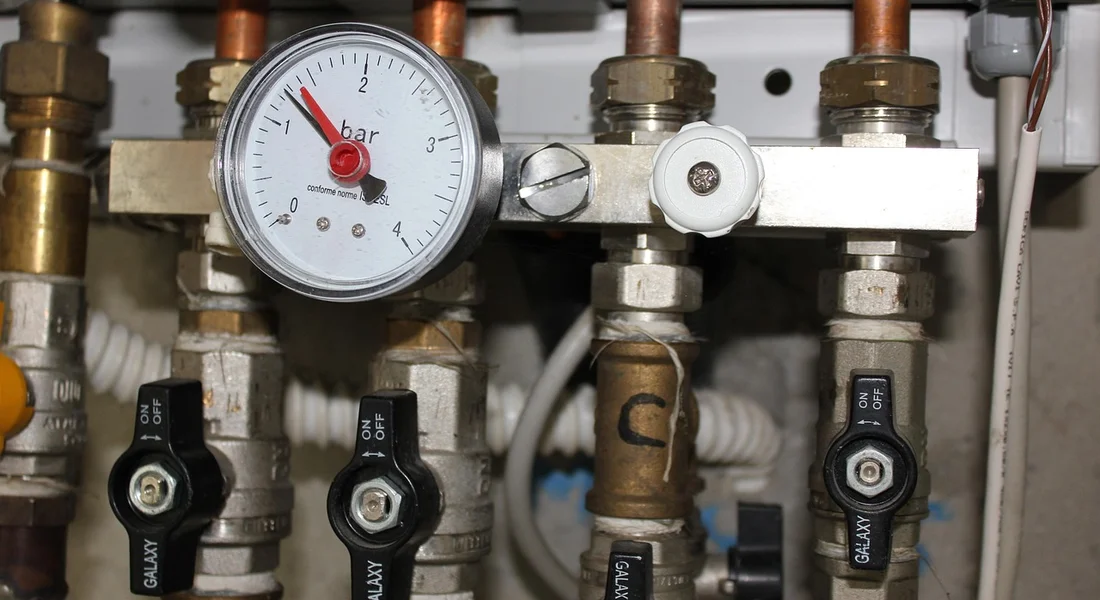
- Leaks from the top: Check the pipe connections at the cold water inlet and hot water outlet. Tighten them slightly. Check the Temperature and Pressure (T&P) Relief Valve and its discharge pipe. A slow drip from the valve can mean excessive pressure in your home’s plumbing.
- Leaks from the bottom: If water is coming from the very bottom of the tank itself, especially around the seam or from the drain valve, the steel tank has likely corroded through. A leak from the tank itself is not repairable; the entire heater must be replaced.
Special Case: Power Vent Heater Issues
These high-efficiency units use a blower fan to push exhaust gases outside. They have their own common problems.
If the unit won’t fire, listen for the fan. Do you hear it start? If not, check for power and a tripped disconnect switch. These heaters have a pressure switch that checks if the fan is running before allowing gas to flow. A failed switch or a blocked vent pipe can cause a shutdown.
Many models have a diagnostic light that flashes a code. Refer to the label on your heater or the manual to decode the flashes. Common a o smith power vent water heater troubleshooting involves checking for blocked air intake or exhaust vents, a failed pressure switch, or a faulty blower assembly.
How to Find the Right Parts for Your Specific Model
Before you buy a single screw, you need two numbers. Your water heater’s model and serial number are the only reliable way to find the correct parts for your exact unit. Guessing based on tank size or a picture almost always leads to wasted time and money. Every repair or maintenance job starts right here.
When you search for a o smith hot water heater parts, you will be swamped with options. These numbers filter out the noise and get you what you actually need. To keep things simple, consult a water heater parts guide identifying components. It helps you map each part to its name and function.
Where to Locate Your Model & Serial Number
Shut off the power to the heater at your home’s breaker panel before you start poking around. Safety first, always.
Look for a large product rating plate or sticker on the side of the tank. It is almost always near the top, above the gas valve or electrical junction box. On my own unit, it’s right on the front, just below the cold water inlet. The sticker lists the model number, serial number, gallon capacity, and other specs.
If the sticker is faded or peeling, try shining a flashlight at an angle. Sometimes you can catch the embossed numbers. Write both numbers down clearly. A common mistake is confusing a ‘0’ for an ‘O’ or a ‘1’ for an ‘I’. Double check your work.
Using the Serial Number to Find Parts Online
With your model and serial number in hand, go directly to the A.O. Smith parts finder page. Enter your information. The site will show you a detailed breakdown of your heater with a numbered parts list.
Here is a simple process:
- Find the part number for the component you need (like a thermostat or heating element) from the official diagram.
- Copy that exact part number.
- Search for that part number on reputable third party supplier sites or at your local plumbing supply house.
For critical, hard to fit components like the dip tube or gas control valve, I strongly recommend buying the OEM (Original Equipment Manufacturer) part from A.O. Smith. The fit and performance are guaranteed.
For common wear items like standard screw in heating elements or anode rods, a high quality generic brand from a known supplier is often a perfectly fine and more affordable choice. Just match the wattage, voltage, and thread size exactly. I have used generics in my own heaters for years without issue.
Cracking the Code: How Old is Your A.O. Smith Water Heater?
You find the a o smith hot water heater age by looking at the serial number on the manufacturer’s sticker. That sticker is usually on the side of the tank. The serial number contains a code that tells you the exact month and year it was built. Forget installation dates or vague guesses from the previous owner. The serial number is the only reliable record.
Deciphering the Serial Number Like a Pro
A.O. Smith uses a straightforward letter and number system. Look for a serial number that starts with two letters, like “AB” or “CJ”. The first letter is the month code. The number immediately following those two letters is the year code. For example, a serial number starting with “A23” was made in January (A) of 2023 (23).
Here is the simple key to crack the code.
- A = January
- B = February
- C = March
- D = April
- E = May
- F = June
- G = July
- H = August
- J = September
- K = October
- L = November
- M = December
Find the letter, then look at the next one or two digits for the year. “M19” is December 2019. “C4” is March 2004, 1994, or 1984. You need to use context for the decade, like knowing when your house was built or when the unit was installed. Most heaters from the 80s are long gone. If your serial number is longer and doesn’t seem to fit this pattern, you might have an older model that uses a different, less common dating system. In that case, a call to A.O. Smith with the full model and serial number is your best move.
Checking Your Warranty Status and What It Covers
When your water heater acts up, your first question should be about your a o smith hot water heater warranty. This coverage is your best defense against a big repair bill. Your warranty isn’t a generic promise. It’s a specific contract tied directly to your unit’s serial number. The length of coverage varies by model, often 6, 9, or 12 years.
Most residential tank warranties are prorated, meaning their value decreases over time. A full replacement might be covered for the first few years, but after that, you may only get a credit towards a new unit based on its age. I once helped a neighbor who was shocked to find his 10-year-old heater’s warranty only offered a $150 credit. Knowing this upfront prevents frustration.
The Step-by-Step Warranty Check Process
Checking your warranty is straightforward if you have the right information. You will need three key pieces of data, all found on the heater’s rating plate.
- The model number
- The serial number
- The date of installation (if known)
Grab a flashlight and look on the side of the tank. The rating plate is a metal sticker. Write these numbers down. If you don’t know the install date, the serial number often contains a date code that A.O. Smith can decipher.
With your model and serial number in hand, go directly to the official A.O. Smith warranty validation page on their website. You will enter your information into their system. It will tell you the exact warranty period remaining and what components are covered. Do not guess or rely on paperwork from the previous homeowner. Always check with the manufacturer.
Understanding Labor vs. Parts Coverage
This is where homeowners get a reality check. You must read the fine print of your warranty terms.
Standard warranties almost always cover only the replacement part (like the tank or a heating element), not the labor cost to install it. If your 8-year-old tank is leaking under warranty, the company might send you a new tank. You will still pay a plumber several hundred dollars to install it. Budget for this.
There’s another critical rule. To keep your warranty valid, many manufacturers require proof of professional installation by a licensed technician. If you installed the heater yourself and can’t provide a permit or invoice for installation, they may deny the claim. I’ve seen this happen. Always keep your purchase receipt and installation certificate in a safe place with your water heater manual.
Your A.O. Smith Water Heater Maintenance Roadmap
A water heater is an appliance you can easily forget about until it fails. Do not do that. A simple, time-based maintenance schedule is your best defense against cold showers and expensive repairs. Stick to this roadmap.
Every 6 Months: The Two-Minute Check
Set a calendar reminder for this. It takes less time than brewing your morning coffee. You are doing two things: testing the safety valve and looking for leaks.
First, find the Temperature and Pressure (T&P) relief valve. It’s a brass valve on the side or top of the tank with a small lever. Place a bucket under the discharge pipe connected to it. Lift the lever straight up until you feel it click, hold it for a second, then let it snap back down. You should hear a gush of water into the bucket. If water continues to drip from the valve after you release it, the valve is worn out and needs replacing. This quick test confirms your most critical safety device is working and prevents a dangerous pressure buildup.
Next, do a visual scan. Look at the base of the heater, the pipe connections, and the area around the valves. You are searching for any beads of moisture, white corrosion deposits, or small puddles. A tiny leak today is a flood next month.
Every Year: The Crucial Flush
This is the most important task for the long term health of your heater. Think of sediment buildup like the mineral scale in a coffee maker. Left inside, it reduces efficiency, causes strange rumbling noises, and can eventually burn out the heating element.
Here is how you flush it. Always turn off the power to an electric heater at the breaker box. For gas, turn the thermostat knob to “Pilot.”
- Connect a standard garden hose to the drain valve at the bottom of the tank. Run the other end to a floor drain, a bucket, or outside.
- Open a hot water faucet somewhere in the house (like a bathroom sink). This breaks the vacuum so the tank can drain.
- Slowly open the tank’s drain valve. Let about three to five gallons of water drain out. Watch the water. It will likely be cloudy or have sandy particles at first.
- Close the drain valve, remove the hose, turn the power or gas back on, and let the tank refill and reheat.
If you were hearing banging or rumbling, this annual flush is often the simple cure, as it clears out the sediment that causes those noises. A word of caution: the water will be extremely hot. Wear gloves and be careful.
Considering an 80-Gallon or Larger Unit?
Big families or homes with multiple bathrooms often need the capacity of a larger unit, like an a o smith promax 80 gallon electric water he. The maintenance logic does not change, it just gets more important.
A larger tank holds more water, which means it can accumulate more sediment over time. That annual flush is non-negotiable. The T&P valve test is the same critical safety step. The principles of finding parts, checking the warranty, and determining age are identical whether you have a 40-gallon or an 80-gallon model; you just need more space and a bigger bucket for maintenance.
When to Call a Professional Plumber
Knowing when to tackle a job yourself and when to step back is the mark of a smart homeowner. Some water heater issues are simple fixes. Others are red flags you must not ignore.
Put down your tools and call for help immediately if you encounter any of these situations.
The Smell of Gas
If you have a gas water heater and smell rotten eggs or sulfur, act fast. This smell is added to natural gas so you can detect it. A gas leak is a serious fire and explosion hazard.
- Do not light any matches or create any sparks.
- Do not flip light switches on or off.
- Leave the house immediately.
- Call your gas company or 911 from a safe distance outside.
This is never a DIY moment. A pro needs to find the leak’s source, which could be at the gas control valve, the thermocouple, or a supply line fitting.
A Major Leak from the Tank Itself
Water on the floor from a loose drain valve or inlet connection is one thing. A steady stream or pool coming directly from the tank’s body is another.
A leak from the steel tank means the internal glass lining has failed and the tank is corroding through; it cannot be repaired, only replaced. I’ve seen homeowners try to patch these with epoxy or weld them. It never holds for long and you’ll just have a bigger flood later. Shut off the water and power (or gas) to the unit and call a plumber to quote a replacement.
Complex Electrical Work
Modern water heaters have complex control boards, sensors, and safety cut-offs. If you’ve checked the simple stuff like the high-temperature reset button and the circuit breaker and the unit still won’t power on, the issue is deeper. Common water heater reset-trip causes include overheating, faulty thermostats, and mineral sediment buildup. We’ll outline practical solutions for these issues in the next steps.
Diagnosing and replacing a bad control module or upper thermostat requires a multimeter and specific knowledge. Getting it wrong can be a shock risk or can fry an expensive part. If you’re not confident tracing 240-volt circuits, call a technician.
You’re Simply Unsure
This is the most important red flag. If you’ve read the manual, watched a video, and still feel hesitant, stop. A little doubt means you might miss a crucial safety step or make a misdiagnosis that costs more later.
Calling a pro is not a failure. It’s the smart move. A good plumber can often diagnose the issue in minutes based on years of seeing the same problems. They get the right part the first time and their work often comes with a service warranty. Paying for an hour of a professional’s time is frequently cheaper than buying three wrong parts yourself and still needing them to fix it.
I keep a local plumber’s number on my fridge, right next to my own tool cabinet. There’s no shame in using it. It protects your home, your wallet, and your family’s hot water.
Common Questions
1. What’s the one thing I should check first if my heater stops working?
Check your home’s power source. For electric, ensure the breaker hasn’t tripped. For gas, verify the pilot light is lit. Always shut off power and water to the unit before any hands-on inspection for your safety.
2. Is it okay to use generic replacement parts, or should I buy OEM?
For critical safety and fit components like gas valves or thermostats, I strongly recommend OEM parts. For common wear items like standard heating elements, a high-quality generic that matches the exact specifications (wattage, voltage, size) is often a reliable and cost-effective choice.
3. My warranty says a part is covered, but I still got a bill. Why?
Most warranties cover the replacement part only, not the labor cost to install it. You are responsible for the service call and installation charges. Always read the warranty terms so you aren’t surprised by this common scenario.
4. Why is knowing my water heater’s age so important?
The age tells you if a repair is worth the investment. If your heater is near the end of its typical lifespan (10-12 years) and needs a major part, replacing the entire unit is often more cost-effective than repairing an old tank that may soon fail elsewhere.
5. I’ve fixed the immediate problem. How do I know if my heater is truly safe to use now?
After any repair, especially for gas units, you must check for leaks. For gas, use a soapy water solution on connections to look for bubbles. For all types, restore power and water, then monitor for proper operation and any new leaks or unusual sounds for the next 24 hours.
Final Tips for A.O. Smith Water Heater Owners
Always find your water heater’s serial number first to learn its age and warranty status. This tells you if a repair is worthwhile or if you should plan for a replacement.
Bob McArthur
Bob is a an HVAC and plumbing industry veteran. He has professionally helped homeowners resolve issues around water softeners, heaters and all things related to water systems and plumbing around their homes. His trusted advice has helped countless of his clients save time, money and effort in home water systems maintenance and he now here to help you and give you first hand actionable advice. In his spare time, Bob also reviews home water systems such as tankless heaters, water softeners etc and helps home owners make the best choice for their dwelling. He lives around the Detroit area and occasionally consults on residential and commercial projects. Feel free to reach out to him via the contact us form.