The Homeowner’s Guide to Picking and Installing a Sump Pump for Ponds and Drains
Water in your pond is rising fast or a drain keeps backing up. You need a reliable pump, and you need to put it in right.
This article gives you the straight talk. We will cover which pump types work best, how to install one yourself, and the simple maintenance that prevents failure.
I’ve serviced pumps in everything from koi ponds to basement French drains. Here’s the takeaway: a cheap pump costs you more when it quits during a storm.
First Things First: Is This Even the Right Tool?
A sump pump moves water. That’s its entire job. It sits in a low spot, like a pit, and when water rises to a certain level, it kicks on and pumps that water up and out to a discharge point away from your home. There are different sump pump work types, including submersible and pedestal models, along with backup options. Knowing the type helps you choose the right setup for your space.
Yes, you can use a sump pump for a pond, but only for one task: moving large volumes of water in or out. Think of it as a bulk water hauler. You’d use it to drain a pond for cleaning or to fill it from a well. It will not aerate the water or circulate it for a healthy ecosystem. It is not a substitute for a filter pump or a fountain pump.
Using the wrong pump is a common mistake. Here’s the breakdown:
- Sump Pump: Made for dirty water and high-volume removal. It’s the brute.
- Waterfall or Pond Pump: Made for clean water and constant, gentle circulation. It’s the marathon runner.
- Fountain Pump: A small, low-power pump for decorative features. It is not a light-duty sump pump and will fail quickly if used for drainage.
You’ll know you need a sump pump for a few classic homeowner jobs. I’ve been on service calls for all of these:
- Emptying a flooded basement or crawl space after a heavy rain.
- Draining a backyard pond or a water feature liner so you can repair it.
- Acting as the discharge pump for a French drain system that empties into a low pit.
Picking Your Workhorse: What to Look For
You have two main choices, and the right one depends on where it’s living.
Submersible vs. Pedestal: The Soldier and the Periscope
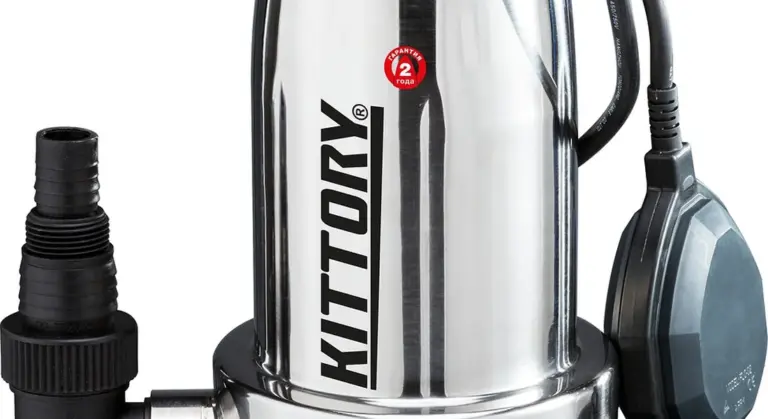
Think of a submersible pump like a soldier who operates completely underwater. The entire unit sits in the water, which cools the motor and makes it very quiet. This is what you want for a basement sump pit or for dropping directly into a pond.
A pedestal pump is like a periscope. Only the intake pipe goes in the water. The motor sits high and dry on a long column above the pit. It’s louder, but the motor is easier to service. Use this if your pit is very narrow or shallow.
Understanding the Specs: HP, GPH, and Head Height
Don’t let the numbers scare you. They just tell you how much work the pump can do.
- Horsepower (HP): The engine size. More HP typically means it can move water faster and push it higher. For most home ponds and drains, 1/3 HP to 1/2 HP is plenty.
- Gallons Per Hour (GPH): How much water it can move under ideal conditions. A 3000 GPH pump can empty a 1500-gallon pond in about 30 minutes, not counting slow-downs from lift or hose friction.
- Head Height: This is the maximum vertical lift from the pump to the discharge point. This is the most critical spec. A pump’s GPH rating drops sharply as the head height increases. If the box says 3000 GPH at 0 feet, it might only move 1000 GPH at a 15-foot lift. Always check the pump’s performance chart.
Construction: Plastic for Ponds, Iron for Basements
The material tells you where the pump belongs.
- Thermoplastic (Plastic): Lightweight and highly resistant to corrosion from pond water, fertilizers, or mild acids. This is your go-to for outdoor, agricultural, or pond use. The one in my own garden shed for drain duty is thermoplastic.
- Cast Iron or Stainless Steel: Much heavier and more durable. Built to handle the abrasive grit and constant use of a basement sump pit. They last longer in tough conditions but can corrode in certain chemical environments.
Float Switches: The On/Off Trigger
This is what tells the pump to start and stop. The right type prevents short-cycling or burnout.
- Tethered Float: A floating ball on a cord. It needs wide, open space to swing up and down freely. Good for large pits or ponds.
- Vertical Float: A float that moves straight up and down a rod. It needs much less horizontal space. This is what’s in most modern basement sump pits.
- Electronic Sensor: No moving parts. It uses probes to sense the water level. Excellent for small pits where a float might get stuck. More expensive but very reliable.
Hooking Up a Hose: The Right Way
Yes, you can and will attach a hose to a sump pump. No, you should not use a standard garden hose for your sump pump discharge. The pressure will cause it to swell, kink, and burst.
The pump outlet has a threaded discharge, usually 1 1/4″ or 1 1/2″. You need a reinforced, flexible discharge hose or a rigid PVC pipe. Screw the hose onto the pump’s discharge port and always use a hose clamp. For my outdoor pump, I keep a 25-foot section of reinforced hose and two clamps on a hook right next to it.
The Water Science Snippet: What’s In Your Water?

You think you’re just moving water. You aren’t. The stuff in your pond or basement isn’t pure H2O. It’s a soup of particles that will make or break your pump. Pick the wrong pump and you’re buying another one in a year.
Pond Water: More Than Just Water
Pond water is alive. Fish waste, decaying plants, and algae constantly dissolve into the water. This creates Total Dissolved Solids, or TDS. Think of TDS like making tea. The leaves (fish waste) steep in the water, changing its makeup. High TDS makes water more conductive, which can accelerate corrosion on a pump’s electrical components if it isn’t built for it. The bigger issue is debris. Leaves, twigs, and silt can clog an impeller in seconds. A pump rated only for “clean water” will choke on this.
Basement and Drain Water: Grit and Chemistry
Water from a French drain or basement sump pit is loaded with fine sediment and sand. This grit acts like sandpaper on a pump’s mechanical seals and bearings. The real silent killer is pH. Groundwater is often slightly acidic. I’ve pulled pumps out of pits where the stainless steel shaft looks fine, but the cast iron casing has rusted paper-thin from the inside out. Acidic water eats cheaper, thinner metals from the inside, leading to a sudden and catastrophic failure when you need the pump most. Regular maintenance, including the judicious use of sump pump maintenance chemicals, can help stabilize pH and protect metal parts between service intervals. Use these products exactly as directed to avoid harming seals or voiding warranties.
Choosing the Right Pump for the Job
This science dictates your tool. For a muddy pond or a gritty drain, you need a pump with a “solids-handling” rating. This is listed on the box, like “Handles solids up to 1/2 inch.” That means the impeller is designed to pass small solids without jamming. For acidic environments, look for pumps with cast-iron or stainless-steel housings, not thin thermoplastic. Spending more upfront for a pump built for your specific water chemistry is always cheaper than replacing a cheap pump every other season.
How to Install a Sump Pump for a Pond or Drain: A Real-World Guide
Installing a pump is straightforward if you respect the water and the electricity. I’ve set up dozens for clients and a few for my own backyard projects. Here’s how to do it right, especially when it comes to a solar well pump.
DIY Difficulty Ratings
- Temporary Pond Pump (Draining/Filling): Difficulty 3/10. This is a “drop and plug” operation, but you still need to manage the hose and power safely.
- Permanent Drain or Dry Well System: Difficulty 6/10. This involves digging, securing pipe, and ensuring a reliable, long-term setup. It’s more labor than skill.
Installation 1: Temporary Pond Drain or Fill Setup
Use this to lower water levels for cleaning or to refill from a well. My go-to is a submersible utility pump with a hose adapter.
- Safety First: Plug the pump into a GFCI outlet. This is non-negotiable. If you don’t have one, use a GFCI extension cord. It will trip if water contacts electricity, preventing a shock.
- Prep the Pump: Slide a hose clamp over your discharge hose, then push the hose onto the pump’s discharge port. Tighten the clamp with a screwdriver. A loose hose will blow off under pressure.
- Place the Pump: Set the pump on a solid, level spot in the pond. If the bottom is muck, put it on a brick or paver to keep the intake screen off the bottom and reduce debris.
- Route the Hose: Run the discharge hose to where you want the water to go, ensuring no kinks that can block flow and overwork the pump.
- Power Up: Plug it in. The pump will start immediately. To stop, unplug it.
Installation 2: Permanent Drain or Dry Well System
This is for managing water from a basement drain tile or a low spot in your yard. It’s a semi-permanent fixture.
- Pick the Pit: Dig a sump pit in the lowest collection point. The pit should be wider than your basin to allow for gravel backfill.
- Set the Basin: Place a rigid sump basin in the hole. Surround it with 3/4-inch drain gravel for stability and drainage.
- Install the Pump: Place the submersible sump pump inside the basin. It should sit flat on the bottom.
- Plumb the Discharge: Connect rigid PVC pipe to the pump’s threaded discharge. Use a union fitting for easy future removal. Install a check valve in the vertical discharge pipe just above the pump to prevent water from flowing back into the basin after it shuts off. This stops short-cycling.
- Route the Pipe: Run the PVC pipe to your discharge point. Maintain a slight upward slope away from the pump so water drains out and doesn’t freeze in the pipe.
- Wire It Safely: Run the pump’s power cord up and out of the basin. Plug it into a dedicated GFCI outlet. The pump motor itself is grounded through the plug. Do not cut the cord.
Can You Drain a Sump Pump to Your Yard?
Often, yes, but you can’t just create a mud pit next to your house. You must discharge water far enough away so it doesn’t simply seep back into your foundation, defeating the whole purpose. I run mine about 15 feet into a dry creek bed. Check your local codes. Most require discharge at least 10 feet from your foundation and not onto a neighbor’s property. Never tie it directly into a sanitary sewer; that’s usually illegal.
Critical Tips for Reliability
- Secure Hose Connections: Always use stainless steel hose clamps, not the plastic junk that comes in the box.
- Prevent Backflow: A check valve is mandatory for any permanent basement sump pump system.
- Protect from Debris: For ponds, use a pump with a large intake screen or place it in a perforated bucket. For drains, ensure the sump basin has a solid lid to keep out dirt.
Keeping It Running: Simple Maintenance That Prevents Disasters

A good pump fails when you need it most. That’s the rule. The goal is to prove it wrong with basic care.
My own basement backup pump gets a look three times a year. You should do the same.
Your Seasonal Action Plan
- Before Spring Rains: This is your most important check. Ensure the pump is clear and the discharge path is unobstructed after winter.
- After Fall Leaf Drop: Clear all debris from outdoor discharge points, grate covers, and the pump pit itself.
- Before Winter Storage: For pumps used in ponds or outdoor drainage projects, this is when you winterize. For basement sumps, just verify operation before freezing weather sets in.
Hands-On Cleaning & Inspection
Unplug the pump first. Always. For submersible models, lift it out of the pit or pond.
Cleaning the intake and impeller is your best defense against clogging and burnout. Locate the bottom intake screen or grate. Use a soft brush and water to remove silt, sand, and debris. For the impeller (the spinning fan inside), you may need to remove a cover plate. Shine a light in and check for winding debris; a bent paperclip can often fish it out.
Check the float switch by moving it through its full range of motion. It should swing freely without catching on the pit wall or the pump cord. A stuck float means a pump that never starts, or one that never stops.
The Manual Test and Backup Advice
Pour a five-gallon bucket of water into the sump pit. The float should rise, trigger the pump, and the pump should move the water out. If it doesn’t, you’ve found a problem on a sunny day. You may need to adjust sump pump float levels to ensure it triggers at the proper water height. Keeping an eye on the float height helps prevent unwanted pump cycling during storms.
A battery backup for a basement sump is not an accessory; it’s part of the system. When the power goes out during a storm, that’s when your primary pump fails. A good backup gives you 6-12 hours of peace of mind. Proper installation ensures it works when you need it most.
Winterizing an Outdoor or Pond Pump
Water left inside will freeze, expand, and crack the pump housing. It’s a guaranteed kill.
- Unplug and remove the pump from the water.
- Let it drain completely, then run it for a few seconds in the air to clear the impeller chamber.
- Store it indoors in a bucket or container. Do not leave it sitting on a concrete garage floor, as condensation can cause corrosion.
Signs of Failure and the Repair Choice
Listen and watch. A grinding noise often means a worn bearing or debris in the impeller. Humming but not pumping usually points to a jammed impeller. Constant on-and-off cycling can be a faulty switch or a pump that’s too powerful for your pit.
Rebuild the pump only if it’s a quality brand and the housing/motor are intact. Kits with new seals and impellers are available for many major brands. If it’s a generic big-box pump over five years old making noise, replacement is almost always cheaper and smarter than repair. For a submersible well pump, a careful repair or rebuild can restore performance without the cost of replacing the unit. If the brand is reputable and the housing and motor are sound, this route is worth considering before a full replacement.
The DIY vs. Pro Verdict: Where to Draw the Line
Installing a basic pump in an existing pit is a straightforward DIY project for a handy person. Tying new drainage into your home’s foundation or public sewer is not. For best results, follow best practices for sump pump pit installation to ensure safety and reliability.
What a Handy Homeowner Can Do
This is the green light zone. You can handle:
- Placing a pump in a pre-dug pit or pond.
- Connecting a standard garden hose or rigid PVC discharge pipe.
- Plugging it into a dedicated, GFCI-protected outlet.
- All routine cleaning, testing, and maintenance described above.
The difficulty is low, but the payoff in preventing water damage is enormous.
When to Call a Licensed Professional
Know your limits. Call a pro for:
- Installing a new dedicated electrical circuit from your panel. This is electrician territory.
- Cutting into or repairing your home’s perimeter drain tile system to install a new sump pit.
- Creating a permanent drain line that connects to a municipal storm sewer or sanitary line. This involves proper backflow prevention and often a permit.
Messing with foundation drains or city connections can lead to massive leaks or legal fines if done wrong.
Understanding Permit Requirements
Any permanent alteration to your home’s drainage that connects to a public system almost always requires a permit. The city needs to ensure you’re not overloading their sewers or creating a contamination risk. A licensed plumber will know the local codes and handle this. For a simple hose that drains into your yard, no permit is needed.
Rough Cost Comparison: DIY vs. Pro
| Scope | DIY Cost (Parts Only) | Professional Installed Cost |
| Basic Sump Pump in Existing Pit | $150 – $400 (pump, hose, check valve) | $800 – $1,500+ |
| New Pit & Pump Installation | Not Recommended | $2,500 – $5,000 (includes concrete work, digging, plumbing) |
| Battery Backup System Add-on | $200 – $600 (kit) | $900 – $1,800 (installed) |
The professional cost includes labor, expertise, warranty on workmanship, and the peace of mind that it’s done to code. You’re paying to make the problem someone else’s responsibility.
Common Questions
How long should a good sump pump last?
A quality pump in a residential setting should last 7-10 years. Its lifespan depends entirely on how often it runs and the grit or chemicals in your water. Regular seasonal cleaning is the single biggest factor in hitting that decade mark, especially for submersible well pumps.
My pump runs constantly during a storm. Is that okay?
It’s designed for that, but watch for signs of fatigue. If it runs non-stop for over 24 hours, give it a break by unplugging it for 15 minutes if water levels allow. Constant cycling for weeks often means an undersized pump or a water source issue that needs addressing.
What’s the most common installation mistake you see?
Using a garden hose on the discharge. It will kink and burst under pressure, flooding the area you’re trying to protect. Always use a reinforced, flexible discharge hose or rigid PVC pipe, secured with a stainless-steel hose clamp.
Can I use my basement sump pump to drain my yard after heavy rain?
Technically yes, but I don’t recommend it. Basement pumps are built for different water chemistry and debris. For consistent yard drainage, invest in a dedicated, submersible utility pump made for outdoor, silt-laden water to avoid damaging your primary basement defender.
When should I repair my pump, and when should I just replace it?
Repair only if it’s a major brand and the housing/motor are sound-think simple switch or impeller replacement. If it’s a generic pump over five years old making strange noises, replacement is almost always more cost-effective and reliable than repair.
Keeping Your Sump Pump Ready for Action
Always pick a pump rated for your exact water volume and lift height to prevent burnout. Set a quarterly reminder to test the float switch and clear the intake screen, just like I do at my home before storm season.
Bob McArthur
Bob is a an HVAC and plumbing industry veteran. He has professionally helped homeowners resolve issues around water softeners, heaters and all things related to water systems and plumbing around their homes. His trusted advice has helped countless of his clients save time, money and effort in home water systems maintenance and he now here to help you and give you first hand actionable advice. In his spare time, Bob also reviews home water systems such as tankless heaters, water softeners etc and helps home owners make the best choice for their dwelling. He lives around the Detroit area and occasionally consults on residential and commercial projects. Feel free to reach out to him via the contact us form.