How to Flush, Drain, and Clean Sediment from Your Water Heater
Is your water heater making rumbling noises or not heating as well as it used to? That’s sediment buildup, and you need to clear it out.
We will cover the tools you need, critical safety steps, the full draining and flushing process, and the key differences for tankless units.
I’ve serviced hundreds of these. From my own Rheem to on-demand systems, the method is straightforward. This is a routine job, not an emergency.
What Is That Gunk? Understanding Sediment, Lime, and Calcium
Think of the stuff in your water heater like dirt and cement. They are different problems that need different solutions.
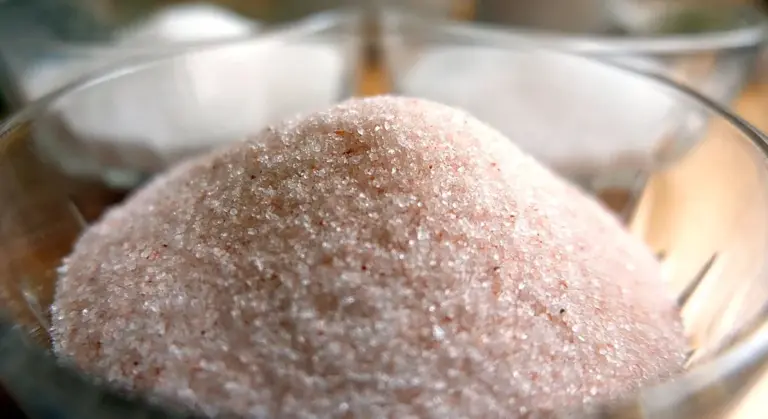
Loose sediment is sand, silt, and rust particles. They settle at the bottom of a tank like sand in a bucket. Hard scale is lime and calcium carbonate. It forms a rock-like coating on heating elements and pipes, just like the chalky ring inside a neglected tea kettle.
A Quick Water Science Lesson
Hardness is measured in grains per gallon (gpg). One “grain” is a tiny unit of weight. If your water tests at 10 gpg, that’s like having 10 grains of hardness minerals in every gallon of water. Total Dissolved Solids (TDS) measures all minerals dissolved in your water. High TDS and a high pH (alkaline water) are a perfect recipe for scale to form and stick to hot surfaces.
This gunk is not just a nuisance; it actively destroys your water heater’s efficiency and lifespan. Hard water buildup drives this loss of efficiency by depositing minerals that insulate hot water. Over time, the unit must work harder and longer, spiking energy use. Sediment insulates the water from the burner or element, making it work harder and longer to heat up. Scale on tankless heat exchangers acts like a jacket, trapping heat and causing the unit to overheat and shut down. Both create rumbling and popping noises as water bubbles under the mineral layer. This extra strain leads to higher bills and early failure.

Is It Time? The Red Flag Signs Your Water Heater Needs a Flush
Your water heater will tell you when it’s suffering. You just need to know what to listen and look for.
For traditional tank-style heaters (gas or electric Rheem models, for example), the signs are often physical:
- Popping or Rumbling Sounds: This is the classic symptom. It’s the sound of water boiling and steaming underneath a layer of sediment at the bottom of the tank.
- Longer wait times for hot water at your faucet.
- You run out of hot water much faster than you used to.
- Cloudy hot water or a metallic taste coming from the hot side only.
Tankless units (like Navien or Rinnai) fail differently. They have sensors and computers that detect problems caused by scale:
- Error codes flashing for “overheating,” “low flow,” or “combustion failure.”
- Inconsistent water temperature during use (sudden cold bursts).
- Reduced flow rate from the hot water taps because scale has narrowed the internal passages.
How do you know you need to clean sediment from your water heater? If you hear noises, get less hot water, or see error codes, it’s past time for maintenance. For tanks, an annual flush is cheap insurance. For tankless in hard water areas, yearly descaling with vinegar or a dedicated cleaner is non-negotiable to prevent expensive damage.
Getting Ready: The Non-Negotiable Safety and Prep Steps
Yes, you can absolutely flush your own water heater if you follow these steps. I do mine every year. It’s a straightforward job that saves you a service call and extends your heater’s life. Let’s get you set up right.
Difficulty Rating: What to Expect
Draining a standard tank heater is simple. I rate it a 4 out of 10. The challenge is patience, not skill. Chemically cleaning a tank or flushing a tankless unit is harder, about a 6 out of 10. It involves pumps, hoses, and specific chemicals. Draining the heater regularly benefits efficiency by removing sediment buildup. This simple step can help lower energy use and extend the unit’s life.
The Absolute First Steps: Shut It Down & Cool It Off
Do not skip or rush this. Your safety depends on it.
- Turn Off the Power Source.
- For a gas heater: Find the gas valve on the supply line. Turn the knob to the “OFF” or “PILOT” position.
- For an electric heater: Go to your home’s main electrical panel. Flip the dedicated circuit breaker for the water heater to the OFF position. Do not rely on a nearby switch.
- Shut Off the Cold Water Inlet.
- Find the cold water valve on the pipe leading into the top of the tank. Turn the handle clockwise until it stops. On my Rheem, it’s a standard ball valve.
- Let the Unit Cool Completely.
- This is not optional. A 50-gallon tank holds scalding hot water under pressure. You must wait at least 12 hours, preferably overnight. Working on a hot unit is dangerous and can damage the tank’s internal lining.
Essential Safety Gear and Draining
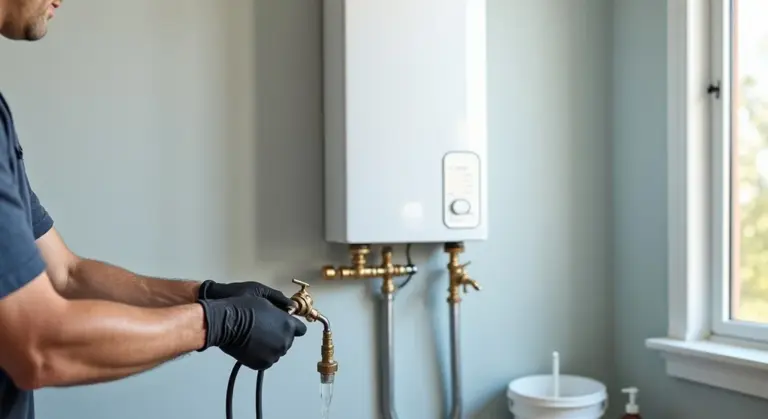
Once the unit is cold, gather your gear. You need heavy-duty work gloves and safety glasses. Sediment water is dirty, and connections can spray unexpectedly.
Connect a standard garden hose to the drain valve at the bottom of the tank. Run the other end of the hose to a safe drainage point, like a floor drain, a sump pit, or directly outside onto a driveway or gravel area. Do not drain sediment-laden, possibly acidic water near plants, gardens, or your home’s foundation. The first gallon will be the dirtiest.
The Toolbox: Your Drain and Flush Kit Checklist
Gather your tools first. Walking back and forth from the basement to the garage wastes time. You will need a few specific items for a basic tank flush and a couple of extras for a tankless descale.
The Core Gear for Any Heater
For draining a standard gas or Rheem tank heater, you can get by with a simple setup.
- A standard garden hose: Make sure it’s long enough to reach from your heater’s drain valve to a floor drain, a sump pit, or outside.
- Channel-lock pliers or a screwdriver: You will need these to open the drain valve, which is often a square-shaped plastic or brass nipple.
- A bucket (5-gallon is ideal): Use this to catch the initial surge of water when you open the drain. Sediment can clog the hose at the start.
- Work gloves and safety glasses: The water will be hot and the sediment is dirty. Protect your hands and eyes.
Test your drain valve for a few seconds before attaching the hose; a valve that hasn’t been used in years can snap off or fail to close completely.
The Special Additions for Tankless Units
Flushing a tankless water heater is different. You are circulating a cleaning solution through its internal heat exchanger, not just letting gravity do the work.
- A submersible utility pump (1/10 or 1/6 HP): This is the heart of the operation. You’ll place it in a bucket of cleaning solution to pump the liquid through the unit.
- Two short washing machine hoses (or the hoses from a kit): These connect your pump to the isolation valves on the water heater.
- White vinegar or a manufacturer-approved descaler: For light scale, plain white vinegar works. For heavy lime, use a dedicated descaler like CLR or a brand like Nor-Cal.
Code & Compliance Check
This part is simple but non-negotiable for safety and preventing damage.
Your drain hose must be rated for hot water. A cheap, thin vinyl hose can melt and burst when draining a 120+ degree water heater, causing a flood and potential burns. Look for a reinforced rubber or hot water rated hose.
The discharge point matters. The drain valve on your heater and where you send the water must meet basic International Plumbing Code (IPC) standards. This means draining to an approved location like a floor drain, laundry sink, or outside away from the foundation. Do not drain hundreds of gallons of hot, sediment-filled water onto your lawn or driveway; it can kill grass, erode soil, or create an icy hazard.
Pre-Made Kit vs. Making Your Own
You can buy a pre-assembled tankless water heater flushing kit for about $50 to $100. It includes a pump, hoses, and sometimes a bucket.
These kits are convenient. Everything fits together. For a homeowner who plans to flush their unit once a year, a kit is a sensible, one-time purchase that eliminates guesswork.
Making your own kit is cheaper. You likely already have a bucket and hoses. A basic utility pump costs $30-$50. If you have other uses for the pump (draining a flooded basement, cleaning a pond), putting together your own kit makes more sense. My own setup is a pump I’ve owned for years, two old washing machine hoses, and a 5-gallon bucket from a hardware store. If you’re focusing on ponds, the best pond sump pumps can simplify install and maintenance.
The Big Flush: How to Drain and Clean a Standard Gas Tank Water Heater
Let’s get right to it. The process has two levels: a simple sediment flush you should do yearly, and a deeper clean for stubborn lime or calcium if you have hard water.
The Basic Sediment Flush: A Step-by-Step Guide
This is routine maintenance. It removes the sandy grit that settles at the bottom of your tank, which robs efficiency and causes rumbling noises. Plan for about an hour.
- Turn off the power. For a gas heater, switch the gas control valve to “Pilot.” Do not just turn the thermostat down.
- Turn off the cold water supply. Find the cold water inlet valve on top of the heater and turn it clockwise to shut it off.
- Connect a standard garden hose to the tank’s drain valve. Run the other end to a floor drain, utility sink, or outside. A standard washer hose bib drain valve is prone to clogging; if yours is plastic, consider upgrading to a full-port brass ball valve after this flush.
- Open a hot water faucet in your house. This is the critical step for “How do you drain a gas water heater?” It breaks the vacuum inside the tank so water can flow out. Open the faucet on a tub or sink upstairs if you can.
- Open the pressure relief valve on the side of the heater for a second to help start the flow. Be careful, it may release hot water and steam.
- Open the drain valve. Use a flathead screwdriver or a dedicated valve key. Water will start flowing out the hose. Let it drain completely.
- Briefly turn the cold water supply back on. Let a gallon or two rush into the tank to stir up more sediment, then shut it off and let it drain again. Repeat until the water runs clear from the hose.
- Close the drain valve, close the hot water faucet you opened, and turn the cold water supply fully back on. Let the tank fill completely. You’ll hear the sound of running water stop and the pressure relief valve may drip briefly, signaling it’s full.
- Turn the gas control valve back to “On.” Relight the pilot if necessary following the unit’s instructions. You’re done.
The Aggressive Lime and Calcium Clean
If your hot water volume has dropped or you see white, chalky deposits, you need to dissolve the scale. We use white vinegar. It’s mild, safe for the tank, and effective.
Start by completing the basic flush steps 1 through 6 above to empty the tank. Once it’s empty, proceed.
- Locate the anode rod port. It’s the large hex-head plug on the very top of the tank, usually near the cold water inlet.
- Use a 1-1/16″ socket and a long breaker bar or ratchet to unscrew it. This can be very tight. Apply steady pressure.
- Using a funnel, pour 2-3 gallons of plain white vinegar directly into the tank through this opening.
- Do not reinstall the anode rod yet. Simply thread the plug back in a few turns to seal the opening. Turn the cold water supply on just enough to completely fill the tank with the vinegar inside. Then shut the supply off again.
- Let the vinegar sit in the tank for at least 6 hours, or overnight for heavy scale.
- After soaking, drain the entire tank again using the hose and drain valve. You’ll likely see chunks of white scale come out.
- Perform a final quick flush with fresh cold water to rinse out any remaining vinegar.
- Reinstall your anode rod (or a new one if the old is heavily corroded). Tighten it securely.
- Close the drain valve, turn the cold water supply on, let the tank fill, and restore power to the gas valve.
Pro Tip: When the Drain Valve Fights Back
If the drain valve is clogged and won’t flow, or if it leaks around the stem when open, don’t force it. The plastic or cheap brass valves often fail. Your best move is to replace it with a high-quality, full-port brass ball valve. You must drain the tank completely first (if you can). Then, using two wrenches-one to hold the tank nipple-unscrew the old valve and thread on the new one with pipe tape or sealant. If it’s leaking from the tank threads and you can’t empty it, you’ll need to call a pro. Trying to fix it under pressure will flood your basement.
Rheem-Specific Steps: Flushing and Cleaning Your Rheem Gas Heater
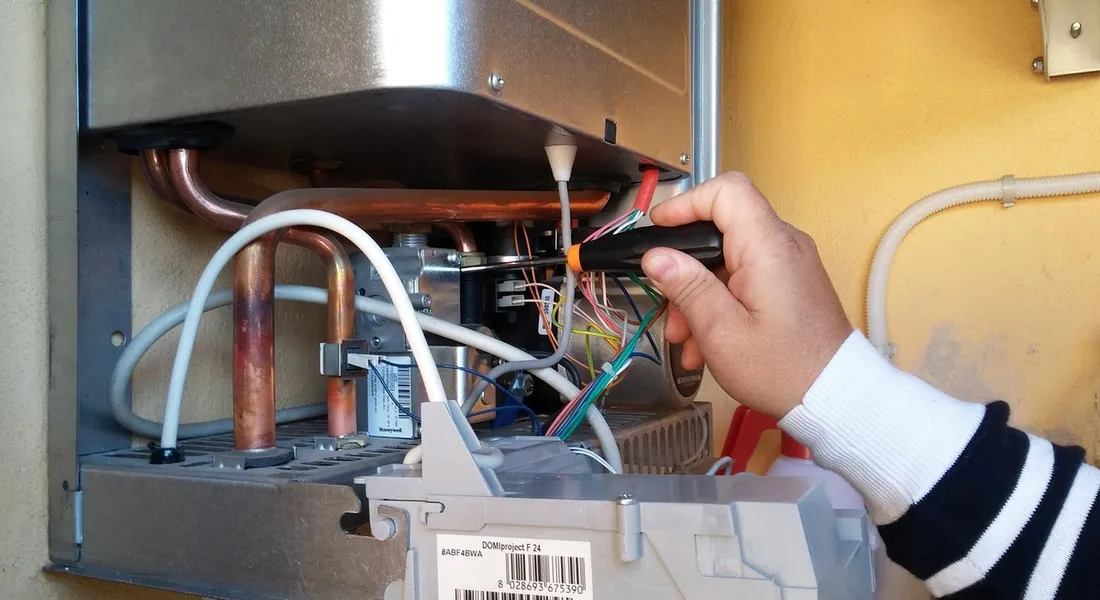
The basic process of draining and flushing is the same for most tank heaters. You turn off the gas and water, connect a hose, open a valve, and let it drain. But the devil is in the details, and Rheem models have a couple of specific quirks you need to know. If you’re working with an electric Rheem unit, you’ll want to cut power at the breaker before you begin. We’ll cover how to safely drain an electric Rheem water heater tank and address its unique quirks.
First, locate your components. The drain valve is almost always near the bottom on the side. The temperature and pressure relief valve will be on the side or top. The anode rod? On Rheem gas models, it’s almost always under a hexagonal plastic cap on the very top of the tank. You’ll need a 1-1/16 inch socket to remove it.
How to Clean Lime from a Rheem Gas Water Heater
Cleaning lime and calcium scale isn’t about scrubbing the inside of the tank. You flush that debris out. The real target for mineral cleaning is the sacrificial anode rod. To effectively clean lime from a Rheem water heater, you need to remove and soak the anode rod in a descaling solution. Here’s how:
- Shut off the gas and the cold water supply to the heater.
- Drain about 5-10 gallons of water from the tank to lower the water level below the top of the tank.
- Using your 1-1/16 inch socket and a long breaker bar, unscrew the anode rod from its top-mounted housing. Be ready for resistance.
- Inspect the rod. If it’s less than 1/2 inch thick or heavily corroded, just replace it. If it’s still robust but coated in white mineral scale, clean it.
- Submerge the rod in a bucket of white vinegar or a dedicated lime remover. Let it soak for several hours or overnight.
- Scrub the rod with a wire brush to remove the softened scale, rinse it, and reinstall it with pipe sealant tape on the threads.
This process removes the mineral layer that insulates the rod, allowing it to work properly again and protect your tank from corrosion.
A Warning About Rheem’s Plastic Drain Valve
Many Rheem models come from the factory with a plastic drain valve, often a blue or white lever. These plastic valves are notorious for breaking if forced or if a heavy garden hose is left hanging from them. I treat them with kid gloves.
When you open it to drain, turn the lever slowly. When you close it, snug it up gently-do not crank it hard. To take pressure off the valve, I always loop the drain hose over something so its weight isn’t pulling down on the plastic spigot. If the valve ever starts to leak or you plan to do frequent flushes, replace it with a full-port brass ball valve. It’s a permanent fix I did on my own unit.
The Stuck Anode Rod Service Call
Here’s a story from the field I see all the time. A homeowner tries to check their anode rod. They get the socket on it, push on the breaker bar, and nothing happens. They’re afraid to snap the tank’s internal threads, so they call me.
The rod has fused to the tank’s fitting with years of heat and corrosion. The fix is to apply heat directly to the tank’s boss where the rod screws in, using a propane torch, to break the corrosion bond before applying leverage. It’s a tricky maneuver that risks damaging the tank if done wrong. If you face this, know that applying penetrating oil from the inside after draining might help, but heat is often the only real solution. If you’re not comfortable with that, calling a pro for this single task is a smart move to save the entire heater.
Flushing a Tankless Water Heater: The Closed-Loop System Method
Forget everything you know about draining a tank-style heater. A tankless unit has no reservoir to empty. You need a pump to drain the RV and tankless water heaters.
You cannot just pour cleaner in and hope it works. You must actively circulate a cleaning solution through the small, intricate heat exchanger to dissolve mineral deposits. This requires a closed-loop system you create with a submersible pump and hoses.
Step-by-Step: Creating Your Cleaning Loop
Gather your tools: a 1/6 HP or similar submersible utility pump, two standard garden hoses, hose clamps, a 5-gallon bucket, and your chosen cleaning solution. Turn off the electrical power and the gas supply valve to the heater at the unit.
- Locate the heater’s service valves. These are the two small, usually plastic, valves with caps on the cold water inlet and hot water outlet pipes.
- Close both the main cold water isolation valve and the main hot water valve feeding the heater. This isolates the unit from your home’s plumbing.
- Attach one garden hose to the cold water inlet service port. Run the other end of this hose to your submersible pump, placed inside the empty 5-gallon bucket. Secure connections with hose clamps.
- Attach the second garden hose to the hot water outlet service port. Place the other end of this hose so it empties back into the same 5-gallon bucket.
- Open both the hot and cold water service valves on the heater by turning their caps. Do not open the main house valves.
You have now created a closed loop: bucket -> pump -> cold inlet -> through heat exchanger -> hot outlet -> back to bucket. The pump will push the cleaner through the system continuously.
Choosing Your Cleaning Solution
The right cleaner depends on your water hardness and how long it’s been since the last flush.
For regular maintenance (once a year) or areas with moderately hard water, plain white distilled vinegar works. It’s a mild acid that handles light scale safely.
For severe lime and calcium buildup, or if you’ve never flushed the unit, use a dedicated, manufacturer-approved liquid descaler. These are formulated to be more effective on heavy deposits without damaging the exchanger.
Never use harsh, hardware store muriatic acid meant for concrete; it will destroy the internal components of your water heater.
How Do You Clean Calcium from a Tankless Water Heater?
Cleaning calcium is a chemical process, not a mechanical one. You dissolve it.
Pour your chosen cleaning solution (4-5 gallons for a full bucket) into the bucket with the pump. Turn the pump on and let it circulate for the time specified on the descaler bottle, or for at least 45 minutes to an hour for vinegar.
You will often see sediment and discoloration in the bucket as the scale dissolves. After circulation, turn the pump off. Drain the spent solution from the bucket and the hoses.
The final, critical step is a thorough fresh water rinse to purge all acid from the system. Disconnect the hose from the hot water outlet and place it in a drain. Fill the bucket with fresh water. With the cold inlet hose still connected to the pump, turn the pump on and flush clean water through the heater and out the hot water hose for at least 5-10 minutes.
Close the service valves, disconnect all hoses, reopen the main water isolation valves, and restore power and gas. Run hot water at a faucet inside to remove air from the home water lines.
Keeping It Clean: Your Water Heater Maintenance Roadmap
Think of flushing your water heater like changing the oil in your car. Skip it, and things get gunky, loud, and expensive. This roadmap tells you when to do it and what to do next.
Provide a simple schedule
Start with the calendar. For tank-type heaters (gas or electric), flush it once a year, no excuses. I mark my home calendar for the weekend after Thanksgiving every year. It’s easy to remember. Tie this into your water heater maintenance schedule to avoid missing it. A simple schedule helps you stay on track. Tankless heaters are different. They don’t hold water, but minerals can still bake onto the heat exchanger. Flush a tankless unit like a Rheem every 1 to 2 years, depending entirely on your water’s hardness. If you have a softener, lean toward every two years. If you have hard water, make it an annual task.
System Maintenance Roadmap
The schedule above is the baseline. Your actual water hardness fine-tunes it. Hardness is measured in grains per gallon (gpg).
- 0-3 gpg (Soft): You can likely stretch maintenance intervals.
- 3-7 gpg (Moderate): Stick firmly to the annual or biennial schedule.
- 7+ gpg (Hard): Consider flushing tank-type heaters every 6-8 months if you notice symptoms.
If you’re constantly battling sediment, the problem starts before the heater. Installing a simple spin-down or cartridge-style pre-filter on your main water line is the permanent fix for constant sediment. It catches sand and grit before they ever settle in your tank. I put one in my own basement after the third service call for a clogged anode rod. It’s a $50 part that saves hundreds. To identify and remove water heater sediment, start with a quick tank flush to reveal any buildup. Regular flushing helps keep sediment from returning and protects your heater’s efficiency.
Give the final DIY vs. Pro Verdict
Here’s the simple breakdown. The basic annual drain and flush of a tank-type heater is a very DIY-friendly job. You need a garden hose, a flathead screwdriver, and about an hour. If your heater is making loud rumbling or popping noises, that’s a sign of major scale build-up. Descaling a tankless unit with a pump and vinegar is also DIY, but it’s more involved. My rule is this: if you’re handy and can follow a video guide, you can do it. Call a professional plumber if you see any of these:
- You open the drain valve and only a trickle comes out (major clog).
- The tank is making loud banging noises (heavy scale).
- You smell gas (for gas heaters, turn off the gas and call a pro immediately).
- You’re simply not comfortable working with plumbing connections.
Offer one final reassurance
Don’t overcomplicate this. Setting a yearly reminder to flush your water heater is the single most effective maintenance task you can perform to guarantee a long lifespan and efficient operation. It prevents sediment from insulating the bottom of the tank (which makes it work harder) and stops scale from destroying heating elements and heat exchangers. This one habit can easily add 5+ years of service to your unit.
Common Questions
Is my flush successful if the water runs clear?
A clear drain stream means you’ve removed loose sediment. For a tank heater, that’s a great annual maintenance result. However, clear water does not mean you’ve dissolved hard lime or calcium scale coating the tank walls or elements. If performance issues like rumbling or low hot water volume persist after a flush, you likely need the vinegar soak or anode rod check described in the guide.
What do I do if the drain valve is completely clogged?
Stop. Do not force it open, as the valve can snap off. For a tank heater, you have two practical choices: carefully try to gently poke the opening with a stiff wire (like a straightened coat hanger) with the valve barely open, or call a professional to replace the valve. A clogged valve is a sign of severe neglect and often requires an upgrade to a full-port brass ball valve.
How often should I really be doing this?
Mark your calendar. For a standard tank heater, flush it once every 12 months without fail. For a tankless unit in a home with hard water, a chemical descale is mandatory every year. To tailor these intervals to your setup, the tankless water heater flush frequency guide explains how water hardness and mineral content influence the recommended schedule. If you have a water softener, you can extend the tankless interval to every 18-24 months, but never skip it entirely.
When is it time to call a professional instead of DIY?
Call a pro if you smell gas, if a valve is leaking from the tank threads and you can’t empty it, or if you’re simply uncomfortable with the steps. For tankless units, if you see persistent error codes even after a proper descale, the issue may be with a sensor or combustion component that requires a technician’s diagnostic tools.
Do I need to turn off the gas to flush my tankless heater?
Yes, always. The process for “How do you flush a tankless water heater” requires you to turn off the unit’s electrical power and the gas supply valve at the heater before beginning. You are isolating and circulating fluid through the heat exchanger, and the unit must be completely inactive and cool for safety and to prevent damage.
Keep Your Hot Water Flowing Smoothly
Schedule a full flush of your water heater every year to stop sediment from settling and reducing efficiency. Catching this early prevents loud noises, poor heating, and expensive damage to the tank or heat exchanger.
Bob McArthur
Bob is a an HVAC and plumbing industry veteran. He has professionally helped homeowners resolve issues around water softeners, heaters and all things related to water systems and plumbing around their homes. His trusted advice has helped countless of his clients save time, money and effort in home water systems maintenance and he now here to help you and give you first hand actionable advice. In his spare time, Bob also reviews home water systems such as tankless heaters, water softeners etc and helps home owners make the best choice for their dwelling. He lives around the Detroit area and occasionally consults on residential and commercial projects. Feel free to reach out to him via the contact us form.