Hooking Up Your Water Heater: A Straight Talk Guide to PEX, SharkBite, Gas, and Heating Lines
Wiring a new water heater into your house seems like a big job. Do it right the first time and save yourself a flood or a gas leak.
I’ll show you how to handle each connection safely. We will cover working with PEX pipe, using SharkBite push-to-connect fittings, making safe gas line connections, and tying into a home heating system.
I’ve done this on hundreds of service calls. The main takeaway: test for leaks on every single connection before you fire it up.
What You Need Before You Start: The Toolbox Check
Do not make a hardware store run halfway through the job. Get everything on the bench before you touch a pipe.
Tool Kit by Connection Type
- For PEX: A PEX cutter (the ratcheting kind is best) and the correct crimp or cinch tool for your PEX type. They are not universal.
- For Any Threaded Pipe: Two pipe wrenches. One holds the fitting, the other turns the pipe. A 14-inch and an 18-inch are a good pair.
- For Gas Lines: Dedicated gas line wrenches (often yellow). Using your regular pipe wrenches on gas can contaminate the threads with old pipe dope.
- For Cutting Copper: A sharp tubing cutter. A hacksaw makes a mess of the pipe end that no fitting will seal properly on.
- For Everything Else: Adjustable wrench, channel locks, screwdrivers (flathead and Phillips), and a tape measure.
Buy quality tools once; my 30-year-old Ridgid pipe wrench has outlasted three water heaters and still doesn’t slip.
Material Checklist
- PEX Pipe: Know if you have PEX-A (expandable) or PEX-B (standard crimp). They need different fittings and tools.
- Fittings: Brass fittings for the heater connections. Plastic is fine for long runs but use brass at the unit. Get the right size (usually 3/4″).
- SharkBite Options: SharkBite ball valve stops for easy future service and a couple of straight couplings for repairs. Remember, they are for permanent installations inside walls, not temporary fixes.
- Gas Connection: A new, approved flexible corrugated stainless steel gas connector (CSST) of the correct length. Do not reuse the old one.
- Sealants: Pipe thread sealant (pipe dope) rated for gas AND water, or gas-rated yellow PTFE tape. Do not use standard white tape on gas lines.
- Safety Gear: Heavy gloves, safety glasses, and a commercial gas leak detection solution (soapy water works in a pinch).
Getting Ready: Safety First and System Shutdown
This is the most critical phase. Rushing here causes floods and gas leaks.
Step by Step Shutdown Order
- Turn off the water heater’s gas control valve (set it to “PILOT”).
- Turn off the gas supply at the manual shut-off valve on the gas line feeding the heater.
- Switch off the electrical power to the water heater at the circuit breaker. For a 240v unit, turn off the double-pole breaker.
- Turn off the cold water supply valve feeding the heater. If there isn’t one, you’ll need to shut off the main house water.
- Open a hot water faucet somewhere in the house (like a sink) to relieve pressure in the lines.
Draining and Disconnecting the Old Unit
Connect a standard garden hose to the drain valve at the bottom of the tank. Run the other end to a floor drain or outside. Open the drain valve and open the pressure relief valve on the side of the tank to let air in. Let it drain completely; sediment will clog the valve if you rush it.
Once empty, use your two pipe wrenches to disconnect the water lines. The union nuts on old galvanized or copper can be fused. Soak them in penetrating oil for 15 minutes first. If they won’t budge, you may need to cut the pipe back a few inches with your tubing cutter.
Disconnect the gas line at the flexible connector. Cap the open gas line immediately with a proper pipe cap.
Codes and Permits Are Not Optional
Most municipalities require a permit for water heater replacement, especially for gas work. The inspection is for your safety. Your homeowner’s insurance may not cover a failure from unpermitted work. Check your local code for requirements like earthquake strapping, expansion tanks, and drip legs on the gas line.
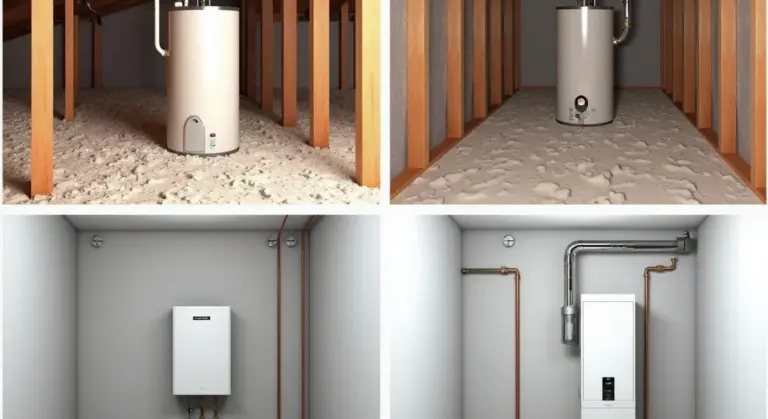
Are the Furnace and Water Heater Connected?
Usually, no. Your furnace heats air, your water heater heats water. They are separate systems. You might have a combined “boiler” system that does both, heating water for radiators and your taps. You can tell by looking: a standard water heater is a tall tank with water and gas lines. A boiler is a larger, squarer unit with many small pipes (for heating zones) and a circulator pump. If you have a boiler, connecting a new water heater is a different, more complex project.
Making Water Connections: PEX Pipe and SharkBite Fittings

The Core Methods: Crimp vs. Cinch
You have two main ways to connect PEX to your water heater. Both use the heater’s threaded brass nipples as a starting point. The first method uses copper crimp rings. You slide the ring onto the PEX, push the pipe onto a barbed brass fitting (like a 3/4″ male adapter), and squeeze the ring with a crimping tool. The second method uses stainless steel cinch rings and a special cinching tool. I find cinch rings a bit more forgiving if your alignment isn’t perfect, but both create a permanent, solid seal when done right. For a complete walkthrough of pex water line installation, see the pex water line installation guide. It covers sizing, tools, and safety practices.
Your choice often comes down to which tool you own or can rent, as both methods are code-approved and reliable for the long haul.
How Do You Connect a Water Heater to PEX Pipe?
Here’s the step-by-step I use in my own basement and on service calls. You’ll need a brass fitting, PEX pipe, support brackets, and your chosen ring and tool.
- Turn off the water supply and drain the heater. This is non-negotiable.
- Install a dielectric union or dielectric nipple on the heater’s hot and cold ports. This brass-and-plastic fitting stops corrosion where copper meets steel.
- Thread a 3/4″ brass male adapter into the dielectric fitting. Apply pipe sealant or Teflon tape to the male threads, not the female threads.
- Cut your PEX pipe square using a proper PEX cutter. A clean cut is everything.
- Slide your crimp or cinch ring onto the pipe.
- Push the PEX firmly onto the barbed end of the male adapter until it bottoms out. You should feel it seat.
- Position the ring 1/8″ to 1/4″ from the end of the pipe and crimp or cinch it.
- Support the pipe within 18 inches of the connection with a bracket. Forgetting pipe support is the most common DIY mistake I see, and it puts stress on the heater’s valve.
Are SharkBites OK for Water Heater?
This is a hot topic. A SharkBite push-to-connect fitting is okay for a water heater connection, but with big caveats. Compare it to a traditional threaded joint: threaded is a permanent mechanical connection. A SharkBite uses a rubber O-ring and a stainless steel grab ring.
I use SharkBites for temporary fixes or in totally accessible spots, like an open basement ceiling, but I never bury them inside a wall or ceiling cavity. They are brilliant for a quick repair when you need water back on fast. For the permanent connection right at the heater, I always prefer the reliability of a crimped or cinched PEX connection or threaded copper. The heat cycling at the heater can be tough on O-rings over a decade or more.
Pro-Tip: The Depth Gauge and My Truck Stock
If you do use a SharkBite, use the depth gauge. It’s the little plastic clip that comes with the fitting. Mark your pipe with it to ensure you’re inserting the pipe the full, required depth. An incomplete insertion is the main cause of a SharkBite failure. This is why I keep a few 3/4″ SharkBite couplings and caps in my service truck. They’re for emergencies only, like capping a line at 8 PM on a Sunday to stop a leak until I can make the proper repair the next day. They are a tool, not a first-choice solution.
Connecting the Gas Line: A Job for Caution
You asked, “How do you connect a water heater to gas lines?” The answer starts with safety and your local building code. Gas work is not like plumbing water. A mistake here is dangerous. Your first step is always to check with your local building department. Many areas legally require this work to be permitted and inspected by a licensed professional. Ignoring this can void your home insurance and put your family at risk.
The Steps for a Safe Gas Connection
If you have confirmed you can proceed legally, here is the safe process. You must have the gas supply to the house shut off completely before starting.
- Applying pipe dope correctly: Use a pipe thread sealant labeled for gas, not standard Teflon tape. Apply it only to the male threads, starting from the second thread back. Getting compound on the first thread can cause it to get into the gas line and foul the appliance valve.
- Using a flexible approved connector: A corrugated stainless steel connector (often called an “appliance connector”) is the standard. Ensure it is the correct length and has a listed rating for gas. It must not be kinked or stretched.
- Checking for leaks with soapy water: This is non-negotiable. Mix dish soap with water. With the gas on, liberally brush the solution over every connection, including the valve at the heater. Any bubbles forming indicate a leak. Turn the gas off immediately and fix the connection.
The DIY vs. Pro Verdict
Difficulty Rating: 8/10. A skilled DIYer can handle PEX and water lines. Gas is a different world. The tools and knowledge are more specialized. In most municipalities, gas line work legally requires a licensed plumber or gas fitter to both perform the work and sign off on the permit. I’ve had my own gas work inspected, and the peace of mind is worth the cost. The pro ensures proper venting, gas pressure, and code compliance you might not consider, especially compared to DIY water line installations.
The Major Red Flag: The “Rotten Egg” Smell
Utility companies add a chemical called mercaptan to natural gas and propane. It smells like sulfur or rotten eggs. If you ever smell this near your water heater or in your basement, act fast.
Do not turn on or off any lights or electrical switches. Do not use your phone in the area. Get everyone out of the house immediately. Call your gas company or 911 from a safe distance outside. That smell is the only warning you get before a potential explosion.
Integrating with Home Heating: The Combo System
You asked how to connect a water heater to a home heating system. That question means you’re likely dealing with a boiler, not a furnace. This setup uses your boiler’s heat to warm your water, either in a combi unit or a separate indirect tank. It’s important to understand the differences in HVAC and water heater systems connection.
Are Hot Water and Heating Systems Separate?
They can be, but they often work together. Most homes have one of two setups.
- Standalone Water Heater: This is the most common. A tank (gas or electric) or a tankless unit heats water only for your sinks and showers. It has nothing to do with your home’s heating. Your furnace or heat pump handles the air.
- Boiler-Connected System: A boiler heats water that circulates through radiators or radiant floor tubing to warm your home. That same boiler can also heat your domestic water.
The boiler does two jobs: it keeps your house warm and provides hot water for your taps.
How a Boiler Heats Your Water: Key Parts
Connecting a water heater to a boiler involves specific components that control the heat transfer. It’s not just a simple pipe connection.
The Heat Exchanger
This is the core of the system. Think of it as a coil or a wall inside the water heater tank. Boiler water flows through one side, and your home’s cold drinking water flows on the other. Heat transfers through the metal, warming your domestic water without the two waters ever mixing.
The Circulator Pump
This pump is the heart of the loop. When your tank needs heat, the pump turns on. It pushes the hot boiler water from the boiler, through the heat exchanger in the tank, and back to the boiler to be reheated. I have a small, quiet circulator on my own indirect tank that kicks on for about ten minutes every hour or two.
The Zone Valve or Controller
This is the brain. It tells the system when to run. A thermostat on the water tank signals that water temperature is dropping. The controller then opens a motorized zone valve (or starts the circulator pump on a dedicated loop) to begin the heating cycle. It shuts everything off once the tank is hot.
This is Specialized Work: Call a Pro
Connecting a new water heater to an existing boiler system is not a standard DIY project. It requires integrating with high-temperature, high-pressure boiler piping and complex controls.
A mistake here can lead to scalding water, pressure relief valve failures, or damage to your expensive boiler. This section is the main reason to seek professional help. You need a technician who understands both potable water plumbing and hydronic (boiler) heating systems. They will ensure the expansion tank is sized correctly, the circulator is properly wired, and the system is balanced so it doesn’t steal heat from your radiators on a cold day.
The Water Science Snippet: Why Temperature and Pressure Matter
Think about cooking rice. The dry grains take up little space in the pot. Add water and heat, and those grains swell up. If you put a tight lid on, pressure builds until it blows. Water in your pipes acts the same way when heated.
This is thermal expansion. As your water heater warms water from, say, 50°F to 120°F, the water molecules get excited and move apart. This increases its volume. In a confined space like your plumbing pipes, that increased volume has nowhere to go, so the pressure spikes. Thermal expansion is not a maybe, it is a guaranteed physical reaction every time your heater cycles on.
The Fix: The Expansion Tank on the Cold Line
Your home’s plumbing is either “open” or “closed.” An open system has a path for expanded water to push back into the public main, like an old-fashioned system without a backflow preventer. Almost all modern homes are “closed” systems. A pressure-reducing valve or a backflow preventer acts like a one-way door, blocking that escape route.
In a closed system, the extra pressure from heating water has only two choices: stress your pipes, fittings, and the water heater itself, or find a dedicated cushion. That cushion is an expansion tank, installed on the cold water inlet line to the heater.
Inside the tank, a rubber diaphragm separates air from water. When heated water expands, it compresses the air pocket instead of spiking pressure in your pipes. Installing an expansion tank on the cold water line is a mandatory, non-negotiable step for a safe and code-compliant water heater installation in any closed system. Without it, you will hear water hammer, see your pressure relief valve drip constantly, and drastically shorten the life of your appliances.
The Heater’s Core Job Creates This Pressure
This isn’t a side effect of a faulty heater. It’s a direct result of its primary function. A water heater’s job is to raise water temperature. By definition, that process creates thermal expansion and the accompanying pressure increase. Managing water heater pressure isn’t optional add-on work, it’s integral to the installation. Every connection you make-to PEX, to SharkBite fittings, to a circulation line-must account for this constant cycle of heating and expansion. Understanding what drives that pressure points to the fixes that keep your system safe. These fixes include installation of expansion tanks, ensuring a properly functioning pressure relief valve, and correct piping layouts.
Keeping It Running: Your Maintenance Roadmap
Setting up your water heater correctly is only half the job. The other half is keeping it running well for years. Neglect it, and you’ll pay for it in repairs or an early replacement. Think of it like changing the oil in your car. A regular water heater maintenance schedule can help you catch issues early and extend the unit’s life.
Follow this simple annual schedule to protect your investment and ensure a steady supply of hot water.
Your Annual Water Heater Checkup
Pick a date you’ll remember, like the start of spring or your birthday. Do these three things every year.
- Test the Temperature and Pressure (T&P) Relief Valve: This is the most important safety device on your tank. If pressure gets too high, this valve opens to prevent an explosion. To test it, place a bucket under the discharge pipe, lift the valve’s lever for a few seconds until hot water flows out, then release. It should snap shut and stop. If it continues to drip or doesn’t open, replace the valve immediately.
- Flush Sediment from the Tank: Minerals in your water settle at the bottom of the tank. This sediment insulates the water from the heat source, making your heater work harder. To flush it, connect a garden hose to the drain valve at the tank’s base, run it to a floor drain or outside, turn off the cold water supply, open the drain valve, and let it run until the water looks clear. Do this for at least a few minutes.
- Check the Anode Rod Every 3-5 Years: This “sacrificial” rod attracts corrosive elements to protect your tank’s steel lining. Once it’s mostly corroded, your tank starts to rust. After 3-5 years, use a 1-1/16″ socket and a long breaker bar to unscrew it from the top of the tank. If it’s less than 1/2 inch thick or the steel core wire is visible, replace it. If you have a powered anode, just check its status light per the manufacturer’s instructions.
Special Care for Combo Systems (Indirect Water Heaters)
If your water heater gets its heat from your home’s boiler, you have two systems to watch.
A combo system adds efficiency but requires you to maintain the boiler side as well. The health of your hot water depends on the health of your boiler.
- Maintain Boiler Pressure: Your boiler has a pressure gauge, usually on the front. When the system is cold, the pressure should typically be between 12 and 15 psi. If it’s too low, you may need to add water via the boiler fill valve to bring it back up. If pressure is consistently too high, you may have a failing expansion tank or another issue.
- Bleed Radiators or Baseboards: Air trapped in the hydronic (hot water) heating loops reduces efficiency. Once a year, when the heating system is running, use a radiator key to open the bleed valve on each radiator until a steady stream of water comes out. This ensures maximum heat transfer to the water heater’s internal coil.
Spot the Red Flags Early
Your water heater will often tell you when something is wrong. Don’t ignore these signs.
- Rust-Colored Water from Hot Taps: This usually means your tank is corroding from the inside. The anode rod is likely gone, and the tank itself is rusting. You have limited time before it starts leaking.
- Rumbling or Popping Sounds: This is the sound of steam bubbles forming under a layer of hard sediment at the bottom of the tank. It means your flush is long overdue, and the excessive heat on the sediment layer is stressing the tank.
- Water Leaking from the T&P Valve or its Discharge Pipe: A small drip after testing is normal. Continuous leaking means the valve is faulty or, more critically, your system pressure or temperature is too high. Check your thermostat settings and expansion tank immediately.
- No Hot Water or Not Enough Hot Water: For gas heaters, this could be a failed thermocouple or gas valve. For electric, it’s often a failed heating element. For combo systems, check that the boiler is running and the zone valve or circulator for the water heater is operating.
- A Small Puddle of Water Under the Tank: Find the source. If it’s from a pipe connection, you can tighten it. If it’s seeping from the tank itself, especially from the welded seams, the tank is failing. Start shopping for a replacement.
What Helped Me and Final Reality Checks
The One Tool That Caught My Big Mistake
I was hooking up a new gas water heater in my own house years ago, feeling pretty good about it. I used new yellow Teflon tape on all the threaded gas fittings. Turned the gas on, heard no hissing, and figured I was golden. A week later, I walked by the utility closet and caught the faintest whiff of mercaptan-that rotten egg smell they add to gas. My heart sank.
I had forgotten the pipe dope. Teflon tape alone on gas fittings is a gamble; it can leave microscopic channels for gas to escape. I shut the gas off at the main valve immediately. I didn’t have a fancy gas sniffer, so I mixed a squirt of dish soap with water in a spray bottle and doused every single fitting. When I slowly turned the gas back on, a tiny bubble formed on one nipple, growing like a slow-motion zit.
That bottle of soapy water is the cheapest, most reliable safety tool you can own for any gas work.
I drained the lines, took the fitting apart, applied a proper gas-rated thread sealant (the dope), and reassembled it. The second soap test showed nothing. That lesson, learned in my own basement, is why I insist on it for every project.
When You Should Stop and Call a Pro
Knowing when a job is over your head is more important than knowing how to start it. Here’s my short list of red flags.
- Gas work makes your palms sweat. If you’re nervous threading a pipe or connecting the flex line to the valve, that’s your gut telling you to stop. A small mistake here isn’t a water leak; it’s a potential disaster.
- Your existing piping looks like a museum exhibit. If you have old threaded galvanized pipe, odd-sized copper, or a mess of unknown valves, the job complexity just tripled. Modern fittings might not adapt easily.
- Your local code requires a permit and inspection. This is non-negotiable. Many areas mandate permits for water heater replacement, especially for gas. The inspector ensures it’s safe for you and your neighbors. Doing it without a permit can void your homeowner’s insurance and cause huge problems if you sell.
- Integrating with a complex home heating system. Linking a water heater to a boiler for indirect heat involves circulator pumps, zone valves, and low-voltage wiring. This is HVAC territory.
There is zero shame in calling a licensed plumber for gas or system integration. It’s a smart liability shield.
The DIY Line in the Sand
Let’s be perfectly clear. Connecting PEX water lines with SharkBite fittings is a very achievable DIY task if you follow the instructions. Swapping a water heater with existing, standard plumbing connections is a big, but manageable, weekend project. Beyond that, you can apply the same approach to installing water lines, a water heater, a softener, or a filtration system. The next steps will include practical guides for each topic.
Working with natural gas or propane crosses a line. Tying into a hydronic heating system crosses another. For these, the pros have the tools, the licenses, and the experience to guarantee a safe, code-compliant install. Your job is to know the difference.
Gear I Trust and Use Myself
If you’re moving forward with the water side of things, using quality parts prevents callbacks. Here’s what I keep on my truck and what’s in my own house.
- Brass Fittings & Valves: Always use brass for the final connections to the water heater’s nipples. It handles heat better than plastic. I use full-port ball valves, not gate valves, for reliable shut-offs.
- Expansion Tank: If your system is closed, you need one. I install name-brand tanks like Amtrol or Watts. Don’t cheap out here.
- Pipe Sealant: For any threaded pipe (not PEX), I use a reliable paste like RectorSeal No. 5. For gas, I use a sealant rated specifically for fuel gas.
- PEX Tubing: I stick with major brands like Uponor (for their expansion system) or SharkBite’s EvoPEX. Their color-coding (red for hot, blue for cold) is foolproof.
- Support Straps: Use proper copper or plastic PEX hangers every 32 inches. Don’t let tubing sag.
Common Questions
Is it safe to use SharkBite fittings right at the water heater?
For a permanent, out-of-sight connection, I strongly prefer a crimped PEX or threaded fitting. While SharkBites are certified for the job, the heat cycling can stress the O-ring over many years. I reserve them for accessible, temporary repairs where I can easily inspect them.
What’s the one safety check I must do after connecting the gas line?
You must test every single gas connection for leaks with a commercial leak detection solution or soapy water. Turn the gas on, apply the solution, and look for bubbles. If you see any, turn the gas off immediately and fix the connection before using the heater.
How can I tell if my water heater is also tied to my home’s heating system?
Look at the unit. A standalone water heater is a tall tank with just cold in/hot out and a gas or electric connection. If you see a boiler (a squarer unit with a circulator pump and many small pipes) connected to your hot water tank, you have a combo system for heat and hot water.
Why do I keep hearing that I need an expansion tank?
Modern plumbing is a “closed” system. When water heats up, it expands and pressure needs a place to go. An expansion tank on the cold water line absorbs this pressure, protecting your pipes, fittings, and the water heater itself from stress. It’s often required by code.
Can I reconnect the old flexible gas line to my new water heater?
No. Never reuse an old gas connector. The corrugated stainless steel tubing (CSST) can fatigue and the seals degrade. Always install a new, approved connector of the correct length, and ensure it has no kinks or sharp bends.
Final Checks for Your Water Heater Hookup
Always test gas connections with soapy water for bubbles before you light the heater. Make sure every PEX and SharkBite fitting clicks fully into place and shows no moisture.
Bob McArthur
Bob is a an HVAC and plumbing industry veteran. He has professionally helped homeowners resolve issues around water softeners, heaters and all things related to water systems and plumbing around their homes. His trusted advice has helped countless of his clients save time, money and effort in home water systems maintenance and he now here to help you and give you first hand actionable advice. In his spare time, Bob also reviews home water systems such as tankless heaters, water softeners etc and helps home owners make the best choice for their dwelling. He lives around the Detroit area and occasionally consults on residential and commercial projects. Feel free to reach out to him via the contact us form.