Water Heater Element Dead? Test It, Diagnose It, Replace It.
No hot water from your electric or RV heater? The heating element is likely fried. We’ll get you back in hot water fast.
This guide walks you through the whole process. We will cover safety steps, how to test the element with a multimeter, ruling out other issues, and swapping in a new one.
I’ve pulled and tested more elements than I can count. One takeaway: always verify it’s the element before you buy a new one.
First, Spot the Signs of a Faulty Heating Element
Your water heater will tell you when an element is failing. You just need to listen to what it’s saying. The most common complaints are no hot water at all or water that only gets lukewarm. A repeatedly tripping circuit breaker is a major red flag that points directly to a shorted heating element.
Sometimes, the clue is in the water itself. If you see brown or rusty colored water coming from your hot water taps, it often means a heating element has corroded through. The rust from the element is mixing with your water. That’s a cue to check hot water heater rust signs. Recognizing these rust signs early can help you address the issue before it worsens. In an RV with a combo electric and LP gas water heater, you might find the gas side works fine but the electric side does nothing. That narrows the problem down.
Remember, these symptoms are your starting point. They tell you it’s time to investigate, not that you should immediately buy a new element.
Gather Your Tools and Replacement Parts
Do not start this job without the right gear. Trying to make do will waste your time and can damage the heater. Here is your checklist.
- Digital Multimeter: This is your diagnostic brain. You will use it to check for power and test the element.
- Element Socket Wrench: A standard deep-well socket, usually 1-1/2 inches. The one in my toolbox is beat up from a dozen jobs, but it never fails.
- Screwdrivers: To remove the access panels and thermostat covers.
- Non-Contact Voltage Tester: A safety must. Double-check that the power is truly off.
- Bucket and Garden Hose: For draining the tank. A short hose that connects to the drain valve makes this much cleaner.
- Wire Disconnect Tool or Small Flathead Screwdriver: For safely releasing the spade connectors from the element terminals.
- Teflon Tape or Pipe Sealant: Use tape or a non-hardening sealant labeled for potable water on the new element’s threads.
Buying the correct replacement element is the most critical step in this entire process. The new one must match the old one exactly in wattage (like 4500W), voltage (120V for some RVs, 240V for most homes), length, and thread type (usually NPT). Write these numbers down from the old element’s side or look up your water heater’s manual. Always look for a UL-listed part for safety.
The process for an RV water heater is the same, but access is usually tighter. You might need a smaller ratchet or a universal joint to get your socket onto the element.
The Golden Rule: Making the Water Heater Safe to Work On

Do not touch a single wire or bolt before you do this. This rule is the same for the big electric heater in your basement and the compact one in your RV. Getting lazy here can hurt you or flood your home.
Step 1: Kill the Power. Then Prove It’s Dead.
First, go to your home’s main electrical panel. Find the breaker labeled for the water heater and flip it to the OFF position. In an RV, you’ll turn off the corresponding 120V breaker.
Now, here is where most mistakes happen. You must verify the power is truly off. A breaker can be mislabeled or fail. Use a non-contact voltage tester on the wires at the water heater’s access panel to confirm there is no live current. To stay thorough, you may also want to test voltage at the water heater’s components. This sets up the next steps, where we’ll explore how to test voltage across the heater’s internal terminals. This tool is cheap and non-negotiable. I keep one in my tool bag and another in my kitchen drawer. It beeps or lights up when it detects voltage. No signal means you’re safe to proceed.
Step 2: Shut Off the Cold Water Supply
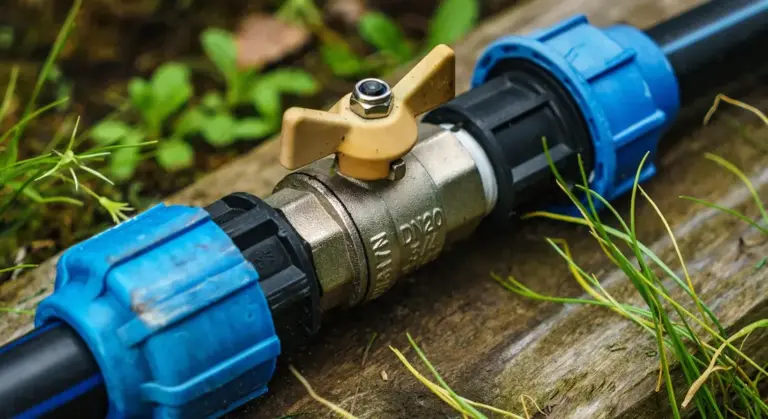
Locate the pipe feeding cold water into the heater. There will be a valve on it, usually a ball valve (a lever) or a gate valve (a round handle). Turn it to the closed position. For a ball valve, the handle should be perpendicular to the pipe.
Why do this? When you remove the old heating element, you’re opening a hole directly into the water tank. If the water supply is still on and under pressure, it will immediately start pouring out. This step stops the refill cycle and prevents a huge mess.
Step 3: Relieve the System Pressure
The tank is still full of water and under pressure. You need to release that pressure before opening it up. Go to any sink in your house or RV and turn a hot water faucet on. Let it run for a second and then turn it off. This simple act opens the system to atmospheric pressure.
You can also attach a hose to the drain valve at the bottom of the tank and open it slightly. This begins the draining process, which you’ll need to do anyway to replace the element. Just opening a hot faucet upstairs is the minimum safety step to prevent a burst of hot water when you break the element’s seal.
How to Test a Water Heater Element with a Multimeter
You can test the electrical function of a water heater element without draining the tank. You cannot physically inspect or replace it without draining first. This test tells you if the element has an internal break or a dangerous short to ground. It’s a great first step before you commit to a full drain-down.
Always shut off the power first. For a home electric water heater, flip the correct double-pole breaker at your main panel. For an RV, disconnect from shore power and switch off the unit’s internal breaker. Confirm the power is off with a non-contact voltage tester at the element’s wiring. Let the water cool before starting.
Step-by-Step Testing Guide
Get a digital multimeter. You don’t need a fancy one. Follow these steps carefully.
- Set your multimeter to measure resistance (Ohms, Ω).
- Locate the element. You’ll see two electrical terminals (screws) on it.
- Carefully disconnect the two wires from the terminals. Note or take a picture of which wire went where.
- Touch one multimeter probe to each of the element’s terminals. A healthy element will show a specific resistance, not zero and not infinite.
For a standard 240-volt, 4500-watt home water heater element, expect a reading between 10 and 16 ohms. A 120-volt, 1500-watt RV element will read higher, usually around 10-12 ohms. A reading of “OL” (over limit) or “1” means the element is broken inside and must be replaced. A reading of zero ohms also indicates a failure.
The Critical Second Test: Checking for a Ground Fault
This test is non-negotiable. A ground fault means electricity is leaking from the element into the water and tank, which is a major shock hazard.
- Leave one multimeter probe on one of the element’s terminals.
- Touch the other probe directly to the metal base of the water heater element (the threaded part screwed into the tank) or to any bare, unpainted metal on the tank itself.
Your meter must read “OL” (infinite resistance) for this test. Any other reading, especially a low one, means the element is shorted to ground and is dangerously faulty. Replace it immediately.
Can a Water Heater Element Test Good But Be Bad?
Yes, absolutely. I see this all the time. An element can pass both electrical tests but still fail to heat your water. The culprit is almost always scale.
Hard water minerals like calcium and lime build up a thick, rocky coating on the heating rod. This coating acts like an insulator. The element gets blazing hot inside, but that heat can’t transfer through the scale to warm the water. It’s like trying to boil a pot of water with a blowtorch aimed at a brick sitting in the pot.
If your element tests fine electrically but you have no hot water, you likely need to drain the tank, remove the element, and check for scale. A heavily scaled element must be replaced. Cleaning it is rarely effective and can damage it.
The Step-by-Step Process to Replace the Element
Draining Down the Tank
Turn off the power to the water heater at the breaker panel. Confirm it is off with a non-contact voltage tester. Shut off the cold water supply valve feeding the heater, especially when leaving for an extended period.
Attach a standard garden hose to the tank’s drain valve and run the other end to a floor drain, utility sink, or safely outside. Now, go upstairs and open the hot water side of any faucet. This breaks the vacuum in the pipes so the tank can drain completely.
Open the drain valve on the heater. Expect a burst of rusty water and sediment. This is normal. Let it flow until the water runs clear or the tank is empty.
If nothing comes out, the drain valve is clogged with sediment. Close the valve. You can try using a wet/dry shop vac on the hose to suck the clog out. For a stubborn clog, an advanced trick is to disconnect the cold water line and carefully introduce low-pressure air to push the sediment out through the drain. Do this with caution.
Removing the Old, Stubborn Element
Find the element’s access panel. Remove the insulation to expose the element and its wiring. Take a picture of the wiring connections first. Disconnect the wires.
The number one problem is a seized element. You need the correct deep socket, usually 1-1/2 inches. A standard wrench won’t work. Use a long breaker bar or a pipe over your ratchet handle for leverage.
Apply steady, firm pressure in a counter-clockwise direction. Do not jerk the tool. If it won’t budge, you can apply heat to the tank’s threaded flange (the part the element screws into) with a propane torch. Heat the metal, not the element itself. The expansion can break the mineral bond.
Using a torch introduces risk of fire or damaging seals, so this is only for experienced DIYers. Once the element is out, immediately clean the threaded opening in the tank with a dry rag to remove any old sealant or debris.
Installing and Sealing the New Element
Take your new element. Wrap the male threads with 3 to 4 layers of high-quality Teflon tape. Always wrap in a clockwise direction when looking at the threads. This prevents the tape from bunching when you screw the element in.
Hand-tighten the new element into the tank. Then, use your socket and wrench to give it one final, firm turn. You are aiming for snug, not Hercules-tight. Overtightening can strip the threads in the soft steel tank, which is a catastrophic repair.
Reconnect the wiring exactly as it was. If you have a dual-element system, the upper and lower elements are not interchangeable. Double-check the wire placement against your photo. Ensure all connections are tight.
Replace the insulation and access panel. Close the drain valve and the upstairs hot water faucet. Turn the cold water supply back on and let the tank fill completely. Check for leaks at the new element. Once water flows steadily from a hot water faucet, you can restore power at the breaker.
Refilling, Purging Air, and Restoring Power
Now comes the most critical part. Getting this wrong will burn up your new element faster than you can say “cold shower.” The goal is simple: a completely water-filled tank before any electricity touches the element.
Close the Drain Valve and Restore Water Supply
First, close the drain valve you opened earlier. Turn it until it’s snug. Don’t over-tighten it, especially if it’s plastic. You just need it to seal.
Next, turn the cold water supply valve on the heater all the way back on. You’ll hear water rushing into the tank.
Purging Air from the System
You must open the hottest faucet in your house, usually an upstairs bathroom, and let it run. Start with the hot side only. At first, you’ll hear sputtering and hissing. That’s the air being forced out of the tank and through your pipes.
Let it run. Wait until the water flows from that faucet in a steady, solid stream with no spitting or coughing. This is your visual confirmation that the tank is full and the air is gone. On my own 50-gallon heater, this takes about three to four minutes.
Why is this so vital? An electric heating element is designed to be submerged. If even a small part of it is exposed to an air pocket while powered on, that section overheats instantly. It’s like a toaster coil with no bread. The metal fails, and you’re back to square one with a dead element.
Restoring Power Safely
Only after you see that steady stream of water from the hot faucet should you even think about the breaker panel.
Go to your electrical panel and flip the breaker for the water heater back to the “ON” position. You should hear a faint hum or buzz from the heater shortly after. That’s the sound of the element heating. If you have a non-contact voltage tester, you can confirm power is at the unit to make sure your water heater is on.
Your job is done. The heater will need time to bring the full tank up to temperature. Expect to wait about an hour before you have full hot water again.
Special Cases: RV and Dual-Element Heaters
The process for a standard home tank is your foundation. Now let’s apply it to two common variations.
Testing and Replacing an RV Water Heater Element
RV systems are compact and designed for 120-volt power. You’ll find the heater element behind an exterior access panel on the side of your camper or trailer. It’s usually a square or rectangular metal cover held on by a few screws.
Before you open that panel, turn off the 120V power supply at the RV’s main panel and shut off the water pump and city water connection. The electrical test with your multimeter is exactly the same as for a home unit-you’re checking for continuity and a lack of a short to ground.
The key difference is the element’s wattage. Where a home heater uses a 4500W or 5500W element, an RV element is typically 1200W or 1440W. You must replace it with the same wattage and voltage. Installing a higher-wattage element will overload the RV’s electrical circuit.
Understanding Standard Dual-Element Home Heaters
Most home electric water heaters have two elements: one near the top of the tank and one near the bottom. They work on a simple rotation controlled by the thermostats. Only one element heats at a time.
The upper element heats first to create a quick reserve of hot water in the top of the tank. Once that zone is satisfied, the upper thermostat turns off the top element and switches power to the lower element to heat the rest of the tank.
You test and replace each element using the same drain, disconnect, and test procedure you’d use for a single-element tank. The upper element is accessed under its own cover panel above the thermostat. The lower element has its own cover panel lower down on the tank. Always shut off power at the breaker before removing either cover.
The Domino Effect: One Bad Element Stresses the Other
If your water heater stops making enough hot water, test both elements. A quick water heater element continuity test can help confirm which element is faulty. Don’t just test the one you suspect. When one element burns out, the other is forced to do all the heating work. This constant overwork causes it to fail much sooner.
I learned this on a service call. The homeowner had replaced the lower element themselves six months prior. When the heater failed again, only the upper element was bad. The previous failure of the lower element had sent the upper one into early retirement. Replacing both elements at the same time is the most reliable long-term fix, even if only one tests bad now. It saves you from draining the tank again in a few months.
Keeping Your System Healthy and Knowing Your Limits
Water Science & Maintenance Roadmap
Think of your water heater element like the coil in an electric kettle. Hard water, which is water with a high mineral content measured in grains per gallon (GPG), is the enemy. Those dissolved minerals, mostly calcium and magnesium, solidify and stick to the hot metal of the element. Over time, this buildup acts as an insulating layer, forcing the heater to work harder and reducing heater efficiency.
This rock-like scale acts like a winter coat on the heating rod. The element has to work harder and get much hotter to push heat through that insulation just to warm the water. This extra stress cooks the element from the inside out, leading to a dead short or an open circuit. It’s the most common reason for failure.
You can fight this with simple, yearly maintenance. Every twelve months, attach a garden hose to the tank’s drain valve and flush several gallons out into a bucket or floor drain until the water runs clear. This removes the sediment layer of minerals and grit at the bottom of the tank that contributes to the problem.
If your water heater has an access panel that lets you see the element mounting flange, give it a look. Heavy, chalky, white corrosion around the edges is a sign of active scale issues. In my own basement, I put a reminder in my phone every fall to drain my heater. It takes fifteen minutes and it’s saved me from at least two early element failures.
The DIY vs. Pro Call
Replacing a water heater element is a job with a clear path. I rate this a 6 out of 10 on the DIY difficulty scale. The process itself is straightforward: drain, disconnect, unscrew, replace, reseal, and reconnect.
The challenge isn’t the steps, it’s the execution under strict safety rules and with potential for stubborn, corroded parts. You need confidence with wrenches and a multimeter, and you must respect the electrical and plumbing systems completely.
Call a licensed professional immediately if you see any of these red flags:
- The steel tank itself is leaking from a seam or rust spot. This means the whole tank is failing.
- The idea of testing 240-volt terminals with a multimeter makes you nervous. There’s no shame in this.
- The element flange is so corroded it’s crumbling, or the element is hopelessly stuck in the tank.
- You finish the replacement, but the new element or gasket has a persistent drip you can’t stop.
Trust your gut during this job. If something doesn’t look right or your confidence wavers, put the tools down. The cost of a professional service call is always less than the cost of repairing water damage from a failed installation or treating an electrical injury. A good pro will get it done right and safe.
Quick Answers
How do I *really* make sure the power is off before I start?
Simply flipping the breaker isn’t enough. You must use a non-contact voltage tester on the wires at the heater’s access panel. No beeps or lights confirm it’s safe. This is the one step you never, ever skip.
What happens if I install a replacement element with the wrong wattage?
You’ll create a new problem. A higher-wattage element will overload and trip your circuit breaker, while a lower-wattage one can’t heat enough water. Always match the voltage and wattage printed on your old element exactly.
Do I need to replace both elements in a dual-element heater if only one is bad?
It’s the smart play. When one element fails, the other works overtime and often fails soon after. Replacing both at the same time saves you from a second drain-and-replace job in a few months.
What’s the single most important step after installing the new element?
Purging all the air. Before restoring power, you must open a hot faucet and let water run until it’s a solid, steady stream. Any air pocket left in the tank will cause the new element to burn out instantly.
My element tests fine with a multimeter, but I have no hot water. Why?
Scale is the likely culprit. A thick layer of hard water minerals can insulate the element, preventing heat transfer to the water. The element heats itself into failure. You’ll need to drain the tank and inspect the element physically.
Keeping Your Water Heater Running Smoothly
Always verify a heating element is truly faulty with a multimeter before you replace anything. Getting the wiring connections tight and correct is the most critical step for a safe, lasting repair.
Bob McArthur
Bob is a an HVAC and plumbing industry veteran. He has professionally helped homeowners resolve issues around water softeners, heaters and all things related to water systems and plumbing around their homes. His trusted advice has helped countless of his clients save time, money and effort in home water systems maintenance and he now here to help you and give you first hand actionable advice. In his spare time, Bob also reviews home water systems such as tankless heaters, water softeners etc and helps home owners make the best choice for their dwelling. He lives around the Detroit area and occasionally consults on residential and commercial projects. Feel free to reach out to him via the contact us form.