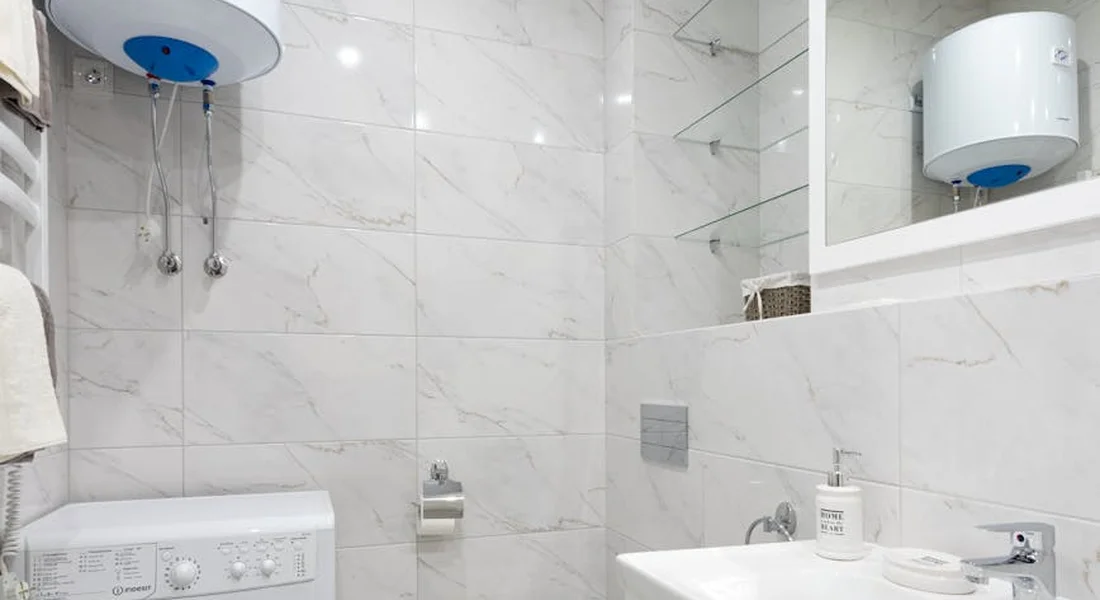
Stop the Racket: Fixing Popping, Banging, and Other Water Heater Noises
Your water heater is making strange sounds and it’s got you worried. Those pops, bangs, and hisses are common, and I’ll show you what to do about them.
This guide breaks down each noise and its fix. We will cover sediment buildup for pops and bangs, thermal expansion for knocks, faulty pressure relief valves for whistles and hisses, and trapped air for gurgles.
I’ve torn apart and repaired more heaters than I can count. Here’s the truth: ignoring these sounds costs you money in the long run.
Why a Quiet Water Heater Suddenly Starts Talking
When your water heater makes noise, you are hearing a symptom. The noise itself is not the problem. You are hearing the result of a physical condition inside the tank or its components. Fix the condition, and you silence the symptom.
Think of your water heater tank like a giant, slow boiling kettle. At the bottom, a burner or heating element heats the water. Minerals in the water, like calcium and lime, settle to the bottom as sediment. Over years, this sediment layer builds up. Now, when the heat comes on, it has to work through that insulating layer of gunk to heat the water. This causes localized superheating, steam bubbles, and uneven expansion. That’s the source of most rumbles and pops.
The type of noise can also hint at whether you have a gas or electric unit. Loud rumbling and banging is classic for gas heaters with sediment. Electric heaters can make similar sounds, but you might also hear a steady hiss or sizzle if an element is coated in scale and overheating. Whistling or high pitched noises often point to pressure and flow issues at valves, which is common to both types.
The “What’s That Sound?” Diagnostic Guide
First, isolate the sound. Put your ear near the tank. Then, listen to the pipes connected to it and the pressure relief valve. Is the noise coming from the tank itself or is it traveling through the pipes? Hearing water rush through baseboard heating when the thermostat kicks on is normal. Tank noises are different. They happen during heating cycles or when water is not being used.
Use this guide to match the sound you hear with the likely cause and your next step.
| Noise You Hear | Most Likely Culprit | What to Check or Do |
|---|---|---|
| Popping, Rumbling, Banging | Sediment buildup at the bottom of the tank. | Drain and flush the tank. If it’s been years, the sediment may be hardened. A second flush after a few months may be needed. |
| Knocking or Hammering | Water hammer in pipes or thermal expansion. | Listen if it happens when a faucet shuts off fast (water hammer). If it happens during heating, it’s likely thermal expansion. Check if you have an expansion tank, and if it’s waterlogged. |
| Hissing or Sizzling | 1) A leak dripping onto the hot burner. 2) An overworked, scaled electric heating element. |
For Gas: Inspect for water leaks at the tank bottom or relief valve pipe. For Electric: This often means the lower element is failing and needs replacement. |
| Whistling or Screeching | High water velocity or a faulty valve. | Often from the temperature and pressure (T&P) relief valve or a partially closed inlet valve. Check if the T&P valve discharge pipe is hot, which indicates it’s leaking. |
| Gurgling or Bubbling | Sediment trap creating steam pockets, or air in the lines. | If it’s constant during a heating cycle, it’s sediment. If it happens after main work or well pump activity, it’s likely trapped air that will clear. |
Start with the simple fix: drain a few gallons from the tank’s spigot into a bucket. If the water is brown or full of grit, you have confirmed sediment is your core issue. If the noise continues after a full flush, the problem may be more advanced, like a failing heating element or a tank that is severely corroded underneath the sediment.
Popping or Rumbling: The Sediment Trap
That popcorn-like popping or low rumbling sound is almost always caused by a layer of sediment at the bottom of your tank. It’s the most common noise complaint I hear.
Here’s how it happens. Your water contains dissolved minerals, mainly calcium and lime (hardness). When water is heated, these minerals become less soluble. They fall out of the water and settle to the tank floor. Over months or years, this forms a sludgy, sandy, or even rock-like layer.
The popping sound comes from steam bubbles. Water at the very bottom of the tank, trapped under this sediment blanket, can get superheated past 212°F because it can’t circulate properly. That trapped water instantly flashes into steam. The steam bubble forces its way up through the sediment, creating that distinctive pop or rumble when it bursts. If you hear this sound, your water heater is literally cooking its own mineral buildup.
The fix is simple: you need to drain the tank and flush out that sediment.
Water Science Snippet: This sediment is directly related to your water’s TDS, or Total Dissolved Solids. Think of TDS as a score for all the stuff dissolved in your water-minerals, salts, even some metals. Hard water (high in calcium and magnesium) has a high TDS. The higher the TDS, the faster minerals will drop out during heating and form sediment. A water softener removes the hardness minerals (calcium and magnesium), dramatically lowering this particular cause of high TDS and protecting your heater from hard water build-up.
How to Flush Your Tank: A Safe DIY Method
You can do this. It’s messy but straightforward. Here’s the safe way I do it at my house and on service calls.
Tools You’ll Need:
- A standard garden hose (long enough to reach a drain or outside)
- A flathead screwdriver or a hose bib/drain valve key
- Channel lock pliers or an adjustable wrench
- A large bucket (just in case)
- Turn Off the Power or Gas. For an electric heater, flip the breaker at your main panel. For gas, turn the thermostat knob to “Pilot” or “Off.” Do not skip this step. Heating an empty tank will destroy the elements or burner.
- Shut Off the Cold Water Inlet. Find the cold water valve on top of the heater and turn it clockwise to close it.
- Wait for the Water to Cool. This is critical for safety. Wait at least 5-6 hours, or ideally overnight, for the water to cool to avoid serious burns. If you must proceed, be extremely cautious.
- Connect Your Hose. Attach one end to the drain valve at the base of the tank. Run the other end to a floor drain, sump pump, or outside. If draining outside, ensure the hot water won’t damage plants or landscaping.
- Open a Hot Water Faucet. Go to a sink or tub and open the hot water side. This breaks the vacuum and lets the tank drain smoothly.
- Open the Drain Valve. Use your screwdriver or pliers to slowly open the tank’s drain valve (it’s usually plastic, turn it counterclockwise). Let the water flow. If nothing comes out, the valve is likely clogged with sediment. Gently poke the end of the hose wire into the valve opening to clear it.
- The Flush. Let the tank drain completely. Then, for the key cleaning step, briefly turn the cold water supply back on. Let a few gallons blast into the tank and stir up the sediment, then drain it out. Repeat this flush cycle.
- Finish Up. Once the water running out of the hose is completely clear, close the drain valve tightly. Turn the cold water supply back on fully and let the tank refill. Keep that hot water faucet you opened earlier running until a steady stream with no sputtering comes out-this purges air from the lines. Finally, restore power or relight the gas pilot per your unit’s instructions.
What Helped Me: Patience is key. The first gallon will be disgustingly muddy. Don’t stop when it’s just light brown. I flush until the water runs absolutely clear for a full minute, even if it means running 20 or 30 gallons through it. That ensures you got the vast majority of the loose sediment out. Doing this simple flush once a year can prevent the noise and extend your heater’s life.
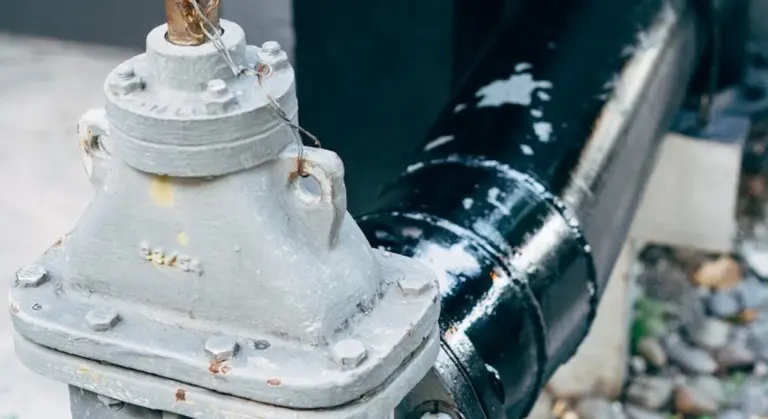
Loud Banging or Hammering: It’s in the Pipes
That single, loud bang or rapid knocking is almost always water hammer. Think of your water like a train speeding through a pipe. When a valve at your washing machine or toilet shuts instantly, it’s like slamming that train into a wall. The water has nowhere to go, so it smashes back into itself, creating a shockwave that shakes your pipes.
Yes, your hot water heater can be the source of water hammer, often when its inlet valve shuts quickly during a demand cycle. You might hear the bang right at the tank. But the hammer can travel, making it seem like the noise is coming from a wall or appliance far away.
Other common culprits are loose pipes and high pressure. If the pipe straps in your walls are loose, the shockwave makes the pipe jump and bang against the wood framing. Also, if your home’s water pressure is too high (above 80 PSI), the force of the stopping water is much greater, making hammer more likely and more severe.
Securing Pipes and Taming Pressure
Start with the easiest fix and work your way up. Listen closely to pinpoint where the banging is loudest. If it’s in a specific wall, that’s a good clue.
First, secure any accessible pipes. In your basement or crawlspace, check the pipe straps (the metal brackets holding pipes to joists). If they’re loose, tighten them. If they’re missing, add one. A secured pipe can’t jump and bang. This is a simple, often effective first step.
If the noise persists, install a water hammer arrestor. These are small, sealed tubes that install near the problem valve (like on your washing machine shut-offs) and act like a shock absorber. They give the water shockwave a small pocket of air to compress, stopping the bang. For a whole-house issue, a larger arrestor can be installed on your main line.
If you still have hammer, your home’s water pressure is likely too high. You need a pressure gauge. Screw it onto an outdoor hose bib or your water heater’s drain valve. Turn on the water and read the pressure. If it’s consistently above 80 PSI, you need to adjust your Pressure Reducing Valve (PRV), usually located where the main water line enters your home.
Tools & Material Checklist:
- Pipe strap and screws
- Hammer or drill
- Water hammer arrestor (appliance or whole-house)
- Teflon tape
- Water pressure gauge
DIY vs. Pro Verdict:
Securing loose pipes is a 3/10 on the difficulty scale. Anyone with a drill and a ladder can handle it.
Adjusting a PRV or installing a whole-house arrestor is a 7/10. It involves working on the main water supply line. If you’re not comfortable shutting off your main water and making pressure adjustments, call a pro. Getting the pressure setting wrong can cause problems throughout your house.
Knocking, Whistling, or Hissing: Valve and Tube Troubles
If your water heater sounds like a rattling toolbox or a boiling kettle, you are likely dealing with valve or internal tube problems. These noises happen when water flow gets disrupted by a faulty part. We will look at three specific sounds next.
Knocking from the T&P Valve
A sharp, repetitive knocking or a rapid chattering noise often comes from the temperature and pressure (T&P) relief valve. This valve is your heater’s emergency brake. The knocking means it is partially open or the internal spring is worn out.
You can test it. Locate the valve, usually on the top or side of the tank with a small metal lever. Place a bucket under the discharge pipe. Carefully lift the test lever about halfway for one second and let it snap back. You should hear a gush of water into the bucket, then it should stop completely when you release it. If water continues to drip or trickle out after the test, the valve has failed to reseat.
A T&P valve that does not fully close after testing is defective and must be replaced immediately. This is not a part you can clean or repair. You must buy a new valve with the exact same temperature and pressure rating stamped on its body (common ratings are 150 PSI and 210°F). Installing the wrong valve is a safety hazard and likely violates your local plumbing code. To resolve this, you may need to replace or adjust the water heater relief valve. The next steps will guide you through replacing or adjusting a water heater relief valve with the correct rating.
Whistling Through the Dip Tube
A high-pitched, teakettle-like whistle is a classic sign of dip tube failure. The dip tube is a plastic pipe attached to your cold water inlet. Its job is to send incoming cold water straight to the bottom of the tank so it can be heated properly.
Over many years, the plastic can crack or chemically disintegrate. When this happens, the cold water jets out of the broken tube sideways inside the tank, creating a whistling sound. You might also notice sandy plastic particles clogging your faucet aerators and a sudden shortage of hot water.
The only fix is to replace the damaged dip tube. This requires shutting off the water and power to the heater, draining the tank partway, and unscrewing the cold water inlet nipple. You pull out the old tube pieces and insert a new one. It is a straightforward repair but can be messy. If your dip tube has completely turned to mush, you will need to flush the tank thoroughly to remove all the plastic debris.
Hissing: Leaks and Steamy Problems
A constant hissing sound means water or steam is escaping under pressure. Your first move is to play detective and find the source.
Start by visually and physically checking all pipe connections on top of the heater. Feel for moisture. Next, trace the copper or PVC discharge pipe from the T&P valve. Is it dripping or hissing at the end? Finally, check the tank body itself, especially around the weld seams, for any signs of weeping water.
A hiss you cannot locate from a connection is more serious. It could mean water is leaking from the tank internally and flashing into steam, or that the tank is overheating and building dangerous pressure. If you feel hot water or steam coming from the T&P valve discharge pipe, turn off the power and water supply to the heater immediately and call a licensed technician. This indicates a critical failure of the thermostat or pressure control system.
Gurgling and Bubbling: Trapped Air or a Failing Rod
That gurgle or bubbling sound from your water heater isn’t normal. It tells you something is happening inside the tank that shouldn’t be. The fix depends entirely on which of two common problems you have.
What Causes Gurgling Noises and How Do You Fix It?
Gurgling happens when gas gets trapped in the water. You need to figure out if it’s just harmless air or a sign of serious corrosion.
The two culprits are air bubbles stuck in the system or hydrogen gas from a destroyed anode rod.
Cause 1: Air Bubbles in the Tank
This is the easy one. It almost always happens right after someone has worked on the plumbing.
- You or a plumber recently replaced a water heater, hose, or valve.
- The main water supply was shut off and turned back on.
- You drained and refilled the tank for maintenance.
When the system refills, air gets trapped at the top of the tank and in the pipes. As hot water rises, it pushes past these pockets, creating a gurgling or sputtering sound at your faucets.
Fixing Trapped Air: Bleed the System
This is a simple, five-minute fix. You just need to let the air out.
- Start with the highest faucet in your house, like an upstairs bathroom sink.
- Turn the hot water tap on all the way.
- Let it run for a full two to three minutes. You’ll hear sputtering and spurting as the air clears.
- Repeat this process at a few other hot water taps around the house.
The gurgling in the heater itself should stop once the air is purged from your pipes.
Cause 2: A Corroded Anode Rod Making Hydrogen Gas
This is the problem you don’t want to ignore. Every water heater has a metal rod called an anode rod that sacrifices itself to protect the tank from rust. When this rod is completely used up, the tank starts to corrode.
A severely corroded anode rod can cause a chemical reaction that produces hydrogen gas. Tiny bubbles of this gas form at the bottom of the tank. As they rise and collect, they create a constant gurgling or bubbling sound.
If the gurgling is paired with a rotten egg smell from your hot water, your anode rod has failed and is producing hydrogen sulfide gas.
The “Rotten Egg” Smell Test
This is your clear warning sign. Run the hot water at a faucet and smell it.
- No smell? The gurgling is likely just air.
- Rotten egg smell? The anode rod is gone. The tank is actively corroding, and the clock is ticking on its lifespan.
Fixing a Failed Anode Rod: Inspection and Replacement
You must check the rod. For this, shut off the power to an electric heater or the gas supply to a gas heater. Also, shut off the cold water inlet and relieve the pressure.
- Locate the anode rod. It’s screwed into the top of the tank, usually under a large, hexagonal plastic plug.
- Use a 1 1/16-inch deep socket and a long breaker bar or impact wrench to loosen it. They are installed very tightly.
- Pull the rod out and inspect it. A healthy rod will have a thick core of steel wire covered in magnesium or aluminum. A failed rod will be almost completely eaten away, sometimes down to a thin wire.
If it’s more than 50% gone, replace it. Matching the rod type (magnesium or aluminum) and length is key. While the rod is out, this is also the best time to flush sediment from the bottom of your tank.
Replacing a spent rod can add years to your heater’s life. Ignoring it guarantees you’ll be shopping for a new one much sooner. Also, check the water heater’s anode rod and replace it when it’s worn. This simple anode-rod replacement can extend tank life and prevent costly leaks.
Your Water Heater Maintenance Roadmap
Think of maintenance like an oil change for your car. Skip it, and you will hear expensive noises. A simple routine stops most bangs and gurgles before they start.
Follow this schedule. It takes a few hours a year and saves you from major repairs.
System Maintenance Roadmap
Stick to these four tasks. They target the root causes of nearly all water heater noises: sediment, corrosion, and valve failure.
Annual Tank Flush
Do this every 12 months. Sediment (sand, minerals, scale) settles at the bottom of the tank. It traps water under the heating element or burner. That trapped water boils and explodes into steam, causing loud popping or knocking sounds.
Flushing removes this sediment layer, stopping the popping and banging for good.
- Turn off the power (circuit breaker) or gas (control knob to “pilot”).
- Connect a standard garden hose to the drain valve at the tank’s base. Run the other end to a floor drain, sump pit, or outside.
- Open a hot water faucet in your house, like a nearby sink. This breaks vacuum lock.
- Open the tank’s drain valve. Let the water flow until it runs completely clear. This can take 5-10 minutes.
- Close the drain valve, remove the hose, and ensure the hot water faucet is closed.
- Turn the power or gas back on.
3 to 5 Year Anode Rod Check
The anode rod is a sacrificial metal rod that attracts corrosive elements in your water. It corrodes instead of your steel tank. When it’s fully eaten away, corrosion attacks the tank itself, which can create leaks, rust flakes, and gurgling sounds from internal damage. Understanding the purpose of the water heater anode rod can help you know when to inspect or replace it. This simple knowledge can help extend your tank’s life.
Inspecting and replacing the anode rod is the single best thing you can do to extend your tank’s life and prevent corrosion related noises.
Use a 1-1/16″ socket and a long breaker bar. Shut off the water and power first. Unscrew the rod from the top of the tank. If it’s less than 1/2″ thick or coated in calcium, replace it. I check mine every 4 years. In my last house with aggressive water, I replaced it every 3.
Bi-Annual Temperature & Pressure (T&P) Relief Valve Test
This valve is a critical safety device. It opens if temperature or pressure gets dangerously high, which can cause hissing or whistling. A stuck valve can also cause gurgling as pressure tries to escape.
Testing it twice a year ensures it will work in an emergency and confirms it’s not the source of a constant hiss.
- Place a bucket under the valve’s discharge pipe (usually on the tank’s side or top).
- Lift the valve’s test lever straight up for a few seconds. You should hear a rush of hot water and air into the bucket.
- Release the lever. It should snap closed and the flow should stop completely. If water continues to drip or drain, the valve is faulty and must be replaced immediately.
Monthly Visual Leak Check
This is a 60-second walk-by. Look at the base of the tank, the connections, and the pressure relief valve pipe. A small leak can drip onto the burner assembly (causing sizzling) or create vapor sounds as water hits hot surfaces.
Catching a minor leak early prevents a cascade of problems, including strange new noises and water damage.
Make it part of another routine, like when you change your air filter. Look for rust streaks, mineral deposits, or pooled water. If you see moisture, tighten the fitting. If it continues, you have a failing part that needs repair.
When to Stop DIY and Call a Professional Plumber
Knowing your limits saves money and prevents disasters. Some water heater problems are straightforward, but others demand a pro’s touch for your safety, especially when it comes to preventing risks and explosions.
When NOT to Try This
Hands off the tools if you encounter any of these. The risk is not worth it.
- Gas valve work. Adjusting or replacing a gas control valve is a job for a licensed technician. A mistake here can lead to a gas leak or carbon monoxide poisoning, and I’ve had to fix several botched DIY jobs that started with a simple “adjustment.”
- Major tank leaks. If water is actively streaming from the tank body itself, the steel tank is likely corroded through. This is not a repairable issue. The entire unit needs replacement.
- No hot water. When you have zero hot water, the cause could be a failed thermocouple, gas valve, or heating element. Diagnosing which one requires specific testing and know-how. It’s often faster and safer to call a pro.
- Any electrical work if you are not qualified. Working on the electrical connections of an electric water heater involves high voltage. One wrong connection can cause a short circuit, fire, or severe shock. Always hire a licensed electrician.
Professional Help Needed
For these specific issues, picking up the phone is the smartest first step.
- T&P valve replacement if you’re uncomfortable. The temperature and pressure relief valve is a critical safety device. If it’s leaking or faulty, it must be replaced correctly. If you aren’t confident in draining the tank and threading in a new valve exactly to code, call a plumber. A failed T&P valve can lead to a dangerous pressure explosion.
- Internal tank issues. A deep rumbling or roaring noise from an electric heater often means severe scale buildup on the elements or a failing element itself. Fixing this requires draining the tank and removing the elements, which can snap off if corroded. I keep a spare element wrench in my truck for these service calls because it’s a common point of failure.
- Any gas line concerns. This includes smelling gas, suspecting a leak at the connection, or needing to run a new gas line for a heater replacement. Gas line work always requires a professional with the proper tools and certifications.
Immediate Red Flags: Stop and Call
If you see or hear any of these, shut things down and get help.
Water leaking from the tank body means the internal liner has failed; the heater must be replaced. Hissing accompanied by steam or vapor indicates overheating or a massive pressure problem. Turn off the power or gas supply to the heater right away. The smell of natural gas or propane is the biggest red flag. Evacuate the area, avoid using any light switches or appliances, and call your gas company or an emergency plumber from outside your home.
Gathering Your Gear: Tools and Parts for Common Fixes
Do not try to fix your water heater with whatever is in the junk drawer. Having the right tools and parts on hand before you start is the difference between a quick win and a long, messy weekend. This list covers what you need for the fixes we discussed, including how to identify the components you’ll be working on.
Recommended Products
Buy quality parts. A cheap part that fails in a year is no bargain. These are the specific items I keep in my own service truck and basement.
Standard Anode Rods: Get a magnesium rod for most standard tanks. For smelly water (sulfur smell), you need an aluminum-zinc alloy rod. Make sure you get the right length and thread type (usually 3/4″ NPT) for your heater. I use a standard 44-inch magnesium rod in my own unit. For sulfur odor removal, the right anode is part of a broader approach that includes tank maintenance and flushing.
Brass Garden Hose Adapters: This little fitting is a lifesaver. It screws onto your heater’s drain valve so you can connect a standard garden hose. Get one that’s all brass, not plastic. The plastic ones crack under heat and pressure.
3/4″ Water Hammer Arrestors: For knocking pipes, install these on your washing machine’s hot and cold supply lines. They are simple, sealed units. You cannot repair them, you just replace them when they fail. The 3/4″ hose thread size is standard.
T&P Valve Replacement Kits: Do not just buy the valve. Get the full kit that includes the discharge tube and any required fittings. The valve must have the same pressure and temperature rating as your old one (commonly 150 PSI and 210°F). Make sure to test and troubleshoot your T&P valve before replacement.
Tools & Material Checklist (Comprehensive)
Run through this list before you shut off the water or power. There is nothing worse than being halfway into a job and realizing you are missing a critical tool.
- Garden Hose: A standard hose for draining the tank. Make sure it’s long enough to reach from your heater to a floor drain or outside.
- Bucket & Drain Pan: Use a large, flat pan under your work area to catch inevitable spills and drips. A 5-gallon bucket is also useful for catching water from lines you disconnect.
- Socket Wrench Set (1/2″ drive): You need this for the anode rod. The plug is almost always a 1-1/16″ hex head. A deep well socket and a long breaker bar are non-negotiable for breaking it loose.
- Pipe Wrench: A 14-inch or 18-inch wrench is perfect for holding pipes and fittings. Use two wrenches-one to hold the pipe, one to turn the fitting-to avoid twisting and damaging your plumbing.
- Teflon Tape: Use the pink or yellow tape rated for water and gas. Wrap male threads 3-4 times clockwise. Do not use the cheap white tape on water heater connections.
- Multimeter (for electric heaters): A basic digital multimeter is required to safely check for power and test heating elements. Always verify the power is OFF at the breaker and then again at the heater terminals with your meter before touching any wires.
- Voltage Tester (Non-Contact): This is your first line of safety. Use it to double-check wires are dead even after you flip the breaker.
- Work Gloves & Safety Glasses: The water can be scalding hot, and debris will fall. Protect your hands and eyes.
Common Questions
My water heater never used to pop. Why did it start, and how urgent is the fix?
Popping starts when enough sediment (mineral scale) builds up at the tank’s bottom to trap and superheat water. It’s a sign your heater is working harder than it should. Schedule a tank flush soon; delaying it wastes energy and stresses the tank, shortening its life.
Is a loud banging noise from my heater an emergency?
Usually not, but it needs attention. A single loud bang when a faucet shuts is likely water hammer in your pipes, which can damage fixtures. If the bang comes from the tank itself during heating, check for a waterlogged thermal expansion tank, which is a pressure control issue.
Should I be worried about a whistling sound?
Yes, investigate promptly. Whistling often comes from the Temperature & Pressure (T&P) relief valve or a restricted water inlet. First, feel the valve’s discharge pipe; if it’s hot, the valve may be leaking and needs replacement, as it’s a critical safety device.
My hot water smells like rotten eggs and gurgles. What’s happening?
This combination is a classic sign your anode rod has failed. The rod’s corrosion produces hydrogen sulfide gas (the smell) that bubbles up (the gurgle). Replace the anode rod immediately to slow tank corrosion; this is a key maintenance task you likely have missed.
I hear a constant hiss. What’s my first safety step?
Your first step is to locate the source. Check all fittings and the T&P valve pipe for leaks. If you find steam or a continuous hot water drip from the T&P pipe, turn off the heater’s power and water supply immediately and call a professional, as this indicates a dangerous over-pressure or overheating condition.
Putting It All Together
Chasing a single noise often misses the bigger picture, as your water heater’s sounds are symptoms of its overall health. Start any diagnosis by verifying your home’s water pressure and the heater’s temperature setting, as these two factors are the root cause of most common issues.
Bob McArthur
Bob is a an HVAC and plumbing industry veteran. He has professionally helped homeowners resolve issues around water softeners, heaters and all things related to water systems and plumbing around their homes. His trusted advice has helped countless of his clients save time, money and effort in home water systems maintenance and he now here to help you and give you first hand actionable advice. In his spare time, Bob also reviews home water systems such as tankless heaters, water softeners etc and helps home owners make the best choice for their dwelling. He lives around the Detroit area and occasionally consults on residential and commercial projects. Feel free to reach out to him via the contact us form.