How to Fill a Water Softener: Salt or Potassium Chloride
You’re staring at that half-empty brine tank, bag in hand, worried you’ll mess up your whole system. Let’s get it right.
We will cover why this matters, picking the right salt or potassium chloride, the step-by-step fill process, and how to avoid common mistakes.
I’ve serviced hundreds of these units. Skip the guesswork and you’ll never have a mushy salt bridge or a failed regeneration.
What Should You Put in Your Brine Tank? Salt vs. Potassium Chloride
Your brine tank needs a refill. Do you grab the classic bag of salt or the pricier potassium chloride? Both are regenerants. They recharge the resin beads in your mineral tank that grab hard water minerals like calcium and magnesium.
Sodium chloride, common salt, swaps sodium ions for the hard minerals. Potassium chloride works the same way but swaps in potassium. The hard minerals get flushed to the drain. Your resin is fresh and ready to soften again.
Salt vs. Potassium Chloride: The Direct Comparison
You need to pick one. Here is how they stack up.
| Factor | Sodium Chloride (Salt) | Potassium Chloride |
| Cost | Lower cost. The standard choice. | Can cost 3 to 4 times more per bag. |
| Effectiveness | Very effective. The industry standard. | Slightly less efficient. You may need to use more to get the same softening power. |
| Environmental Impact | Adds sodium to wastewater. | Considered more septic-safe and adds potassium, a plant nutrient, to wastewater. |
| Best For | Nearly everyone. It is reliable and affordable. | Households on strict sodium-restricted diets, or those with specific environmental concerns. |
That last point is key. If someone in your home is on a doctor-ordered, low-sodium diet, discuss using potassium chloride with their physician. The amount of sodium added to water by a softener using salt is small, but for some, every bit counts.
Switching to potassium chloride is not just a simple bag swap. You must adjust your softener’s control head settings. Because it is less efficient, you typically need to program the unit to use more of it per regeneration. Check your manual for the “salt type” or “regenerant” setting.
Water Softener Salt vs. Potassium Chloride: Which One is Better?
Better for what? For saving money and getting proven results, salt is better. For a strict medical need to avoid sodium, potassium chloride is better. There is no universal winner. It depends on your home’s priorities. I use standard salt in my house on Well Road. It works, and it keeps my budget in check.
The Right Stuff: Understanding Water Softener Salt Types
You have chosen salt. Now you face a wall of bags: pellets, crystals, blocks. What is the difference? It comes down to shape, purity, and how much mess they leave in your brine tank. Next, we’ll compare salt pellets versus crystals—their dissolution speed and purity. That quick difference will guide your next choice and prepare you for the details ahead.
Pellet, Block, or Crystal?
Here is the breakdown of the common forms.
- Pellets or Tablets: These are small, uniform cylinders. They are the go-to for most modern softeners. They dissolve evenly and leave minimal insoluble residue, called “mush.”
- Crystals: These look like coarse, irregular rock salt. They are often cheaper but can contain more impurities. These impurities turn into a muddy sludge at the bottom of your brine tank.
- Blocks: Large bricks of salt. They dissolve very slowly. I rarely recommend them for residential use. They can create a concentrated brine that is too strong for some systems and lead to bridging.
The simple rule is to use pellets for almost any unit made in the last 20 years. They are clean and reliable. Crystals might save you a few dollars upfront, but you will pay for it later when you have to scoop sludge out of the tank.
Why Purity Matters: Evaporated, Solar, and Rock Salt
This is about how the salt was made, and it directly impacts tank cleanliness.
- Evaporated Salt (Highest Purity): Made by boiling brine. It is 99.5% pure or higher. It is the cleanest option, leaving almost no residue. Look for bags labeled “99.8% pure” or “evaporated.” This is what I buy.
- Solar Salt (Medium Purity): Made by evaporating seawater in large ponds. It is about 99.5% pure. It is a good, common choice that works well for many homes.
- Rock Salt (Lowest Purity): Mined from the earth. It can be only 95% pure or less. The other 5% is insoluble dirt and minerals that sink to the bottom of your tank as a hard cake. Avoid it if you can.
Using high-purity evaporated salt pellets means less maintenance for you. You might only need to clean the brine tank once every few years instead of every year. That is a trade-off worth the slightly higher price per bag.
Gathering Your Gear: What You Need Before You Start

Don’t make a simple job a messy one. A few basic items, most of which you already own, make this task clean and quick.
Essential Tools for a Clean Job
This isn’t a major plumbing repair. You just need items to see, scoop, pour, and keep your hands clean.
- Flashlight: Your brine tank is a dark hole. Shine a light in to check the water level and see any salt bridge or sludge buildup at the bottom.
- Gloves: Wear a pair of durable work gloves. Salt is abrasive and can dry out your skin quickly.
- Something to Remove Sludge: If you find a thick, muddy layer of sediment (salt mushing), you need to remove it. A small plastic cup or a wet/dry shop vac works perfectly. I keep an old plastic yogurt container in my utility room just for this.
- Large Funnel: This is your best friend for avoiding salt spills all over your floor and the softener. A big automotive funnel is ideal.
Getting these four items together before you open the salt lid saves you time and prevents a frustrating cleanup.
Sourcing Your Salt or Potassium Chloride
You can’t refill it without the softener salt. The good news is it’s sold almost everywhere.
For standard sodium chloride pellets, check home improvement stores like Lowe’s or The Home Depot. Warehouse clubs like Costco often have the best price per bag if you have space to store them. A typical 40-pound bag of salt at Costco might cost between $6 and $9. If you need it delivered, Amazon and other online retailers sell it, but you’ll pay more for shipping. A quick search for “water softener salt nearby” will show your local options.
Remember, potassium chloride is a common alternative for those on sodium-restricted diets. It works the same way but is more expensive. Buy the type specified for water softeners. If you’re weighing options, compare potassium salt vs sodium chloride softener salt to see which fits your needs. That quick check can help you decide which is right for your system.
Stick with clean, high-purity pellets or cubes to minimize the sludge problem you’re trying to avoid.
Check Your Manual for Capacity and Settings
Before you buy or pour a single bag, know how much your system holds. Overfilling is wasteful and can cause issues.
Your softener’s user manual has the exact brine tank capacity and may have specific salt recommendations. If you don’t have the paper copy, the model number is almost always on a label on the control valve. Search for “[Brand] [Model Number] manual PDF” online. You’ll find it.
This quick check tells you two things: how many bags to buy and how high to fill the tank. It also confirms your system’s settings, ensuring it’s regenerating on the correct schedule for your salt usage.
Taking two minutes to find this information prevents guesswork and keeps your softener running at its best.
Your Step-by-Step Guide to Adding Salt or Potassium Chloride
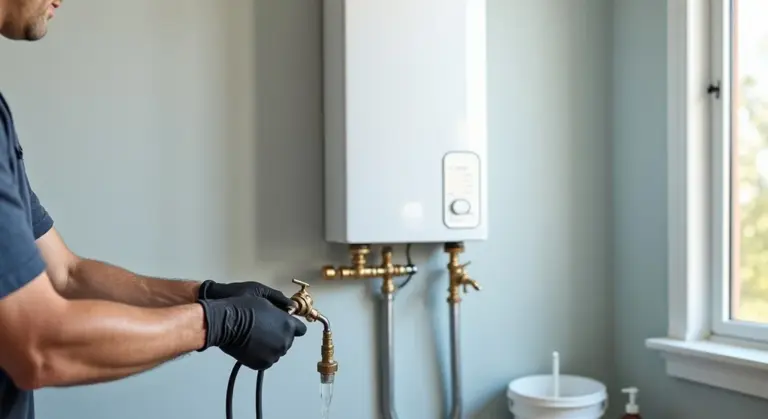
Step 1: Check the Level and Inspect the Tank
Knowing how do i add salt to my water softener starts with looking before you pour. First, turn off the power to the unit to be safe. Open the lid on the brine tank (the shorter, wider tank next to the mineral tank). Look inside. A good level is when the salt or potassium is about one-third to one-half full. You should see clean, dry crystals or pellets. If you see mostly water with a few lonely pieces at the bottom, you waited too long. Now, the critical part. Do not just dump new salt on top. Shine a flashlight in and poke around with a clean stick. You are checking for two common problems: a salt bridge or a layer of mushy sludge at the bottom.
Step 2: Break a Bridge or Clean Out Mush If You Find It
If your poking hits a hard, hollow shelf of salt above water, you have a bridge. This stops fresh brine from forming. Grab a broom handle and firmly break through that shelf. You will hear it crack and see the salt fall into the water below. If you find a thick, wet, muddy layer of undissolved salt (called mushing or sludge), you must remove it. A small shop vacuum (wet/dry vac) is the best tool for this. Suck out all the wet mush and any dirty water. This is not a suggestion. Adding salt on top of mush is a waste of money and will cause your softener to fail. This cleanup is core maintenance, not just a refill step. For best results, keep the salt at the optimal level specified for your water softener. Regularly check and maintain these salt settings to prevent future issues.
Step 3: Pour in the New Salt or Potassium Chloride
With a clean, clear tank, you can now add your softener material. Always check your manual, but most units use either sodium chloride pellets or potassium chloride. Use the high-purity kind meant for water softeners to reduce mush. Now, how do you put salt in without making a mess? Pour slowly. Keep the pellets from spilling into the small brine well (the tube or cylinder in the center of the tank). If your unit loads from the side or is in a tight closet, a large funnel is your best friend. Fill the tank only until it is about half to two-thirds full. Never fill it to the very top. Overfilling can cause bridging and makes a mess for next time. That is the simple answer to how do i put salt in my water softener properly. Keeping a steady salt level helps maintain water softener efficiency. Regular topping up and avoiding bridging keeps the system running at peak performance.
Step 4: Secure the Lid and Run a Manual Regeneration
Brush any stray pellets off the rim. Put the lid back on and make sure it snaps or seals tight. A loose lid lets in moisture, which causes bridging, and pests, which you do not want. Finally, turn the power back on. Your softener will eventually run its next automatic cycle, but I always recommend a manual regeneration after refilling. This forces the system to immediately draw brine from the new salt, dissolving it and verifying everything works. On most controls, you press and hold the “Regen” button for 3-5 seconds until it beeps. The unit will go through its cycles (about 60-90 minutes). Do not use any household water during this time. When it finishes, you have a full, clean brine tank and a confirmed working system.
Setting It and Forgetting It? How Much Salt to Use and When
You can’t just dump salt in and walk away. The control head needs to know how much to use for each regeneration cycle. Think of it like setting a medication dose. Too low, and it’s ineffective. Too high, and you’re wasting salt and money.
The salt dosage setting tells the softener how many pounds of salt to dissolve to make the brine that cleans the resin beads. This number is directly tied to your water’s hardness. A higher hardness number needs a higher salt setting to clean the resin thoroughly. There are many hard water myths about softeners and scale. In the next steps, we’ll be debunking hard water myths and explaining how salt dosing affects scale and resin cleaning.
The Simple Guideline: Hard Water Demands More
Here’s the rule I use on every service call. More hard water equals a higher dosage setting, which in turn leads to more frequent salt refills. It’s a direct relationship.
If your water test shows 20 grains per gallon (gpg), you’ll need a much higher salt dose per regeneration than if you have 5 gpg. Your unit will also run regeneration cycles more often to keep up, burning through that salt faster.
Getting the dosage wrong is the main reason people see hard water symptoms return or complain about sky-high salt bills.
How Often Will You Be Filling the Brine Tank?
For a typical family of four with average water use and moderately hard water (around 10-12 gpg), plan on checking and likely adding salt every 4 to 6 weeks.
My own home sits at 18 gpg. With two people, I’m topping off a 40-pound bag about every five weeks. A bigger family or harder water will pull that down to a monthly schedule. The only way to know for sure is to check the tank every month until you see your personal pattern.
Never let the salt level drop below one-quarter full. Running on empty lets the brine tank fill with water, which can cause bridging and leave you with hard water.
FAQ: Finding Your Water Softener Salt Dosage Setting
Most people search for a universal chart. It doesn’t exist because every softener model and resin tank size is different. But the principle is always the same. You use your water hardness number and your softener’s capacity to find the setting.
Your owner’s manual has the specific chart for your model. If you lost it, search online for “[Your Softener Brand and Model] salt setting chart.” You should also know the capacity of your water softener to accurately adjust the salt settings.
| Your Water Hardness (in grains per gallon) | Typical Dosage Setting Guidance | Expected Refill Frequency* |
|---|---|---|
| 0-10 gpg (Slightly Hard) | Lower Setting (e.g., 4-6 lbs) | Every 6-8 weeks |
| 11-20 gpg (Hard to Very Hard) | Medium to High Setting (e.g., 8-12 lbs) | Every 4-6 weeks |
| 20+ gpg (Extremely Hard) | Highest Recommended Setting | Monthly or more |
*For a family of four. Your frequency depends entirely on your water use and system efficiency.
Start with the manual’s recommendation for your hardness. If you still get hard water, the dosage may be too low. If you’re refilling salt constantly with no performance gain, it might be set too high.
Red Flag Alert: 5 Signs Your Salt Refill Went Wrong
Filling the brine tank is simple, but problems can start fast. These are the signs your softener is crying for help. Ignoring them wastes salt and leaves you with hard water.
Hard Water is Back Immediately After Refill
You just added salt, but your shower feels slimy and your glasses are spotted. This is a classic failure. The softener isn’t pulling brine to regenerate.
The usual suspects are a salt bridge or salt mushing. A bridge is a hard crust of salt that forms an empty cavity above the water. The system can’t reach it. Mushing is a layer of dissolved salt crystals at the bottom that turns into a thick sludge, blocking the brine draw.
Break up a suspected bridge by gently pushing a broom handle down the side of the tank until you feel it give way. For mush, you will need to remove all salt and sludge. Use a wet-dry vacuum to clean the brine tank thoroughly before adding fresh salt.
Strange Noises From the Brine Tank
A healthy brine tank is mostly silent. New, alarming sounds mean trouble.
- A loud humming or buzzing: Often a brine pump running dry because it can’t pull water through a blockage.
- Loud gurgling or sucking air: This can indicate a clogged venturi or injector in the control valve.
- Rattling or grinding: A foreign object or a large chunk of salt may be interfering with the float or grid assembly.
If you hear a pump straining or loud gurgles, check for a salt bridge or mush first, as that’s the most common cause. If the noise continues after clearing the salt, the issue is likely inside the control valve and will require more involved cleaning or part replacement.
Water in the Salt Tank is Extremely High or Low
Water level matters. After the brine draw cycle, you should typically see just a few inches of water at the bottom of the salt tank.
- Water Level is Too High: This often points to a dirty or faulty brine valve, a clogged drain line, or a control valve stuck in refill mode. The tank is overfilling.
- Water Level is Too Low or Dry: This usually means the control valve isn’t adding water to make brine. A clogged injector, a malfunctioning timer, or a stuck float can be the cause.
On my own unit, a chronically high water level was a grimy brine valve. A simple disassembly and cleaning fixed it in ten minutes.
Salt Level Isn’t Going Down Between Regenerations
Look at your salt level a week after a refill. It should be noticeably lower. If it’s not, the system isn’t using salt to make brine.
This is another strong indicator of a salt bridge or mush creating a barrier. The other possibility is a programming error. Verify your softener is set to regenerate based on actual water usage, not just on a timer set for too few days. A unit set for a 14-day regeneration in a house of four will barely use any salt.
Visible Rust or a Water Softener Salt Container Leak
Check the base and seams of your brine tank, especially if it’s older plastic or fiberglass.
Surface rust on a steel tank is a warning. It weakens the structure. A leak means water and salty brine are seeping out, which can damage flooring and subfloor. For a plastic tank, look for cracks or hairline splits at the seams or base.
A small leak or significant rust means the brine tank needs to be replaced soon. You can patch a tiny plastic crack with a waterproof epoxy as a very temporary fix, but plan for a new tank. For a steel tank, once rust starts, the integrity is compromised.
Fixing Common Brine Tank Headaches: Bridges, Mush, and Sludge
Your brine tank isn’t just a bucket for salt. It’s where the regeneration magic happens. When it gets dirty or clogged, your whole softener stops working right. Let’s fix the three most common problems.
How to Break a Salt Bridge and Prevent It
A salt bridge is a hard, hollow shell that forms over the water in your tank. The top looks full of salt, but underneath is just empty space. No salt touches the water, so your softener can’t make brine and won’t regenerate. This common issue can be addressed with a salt bridge water softener fix. A quick, careful reset can restore brine production and the regeneration cycle.
You’ll know you have one if you tap the side of the tank with a rubber mallet and hear a hollow sound, or if your salt level never seems to go down.
To break a bridge, you need to physically break it. Don’t just poke it. Here’s how:
- Unplug your water softener.
- Take a long, sturdy tool like a broom handle or a piece of PVC pipe.
- Push down firmly around the edges of the tank to crack the bridge.
- Work your way toward the center until the entire shell collapses and the salt falls into the water.
Prevention is straightforward. Use high-purity salt pellets, not rock salt. The higher the purity (look for 99.5% or better), the fewer insoluble impurities that can cement together. Also, control humidity around the tank with a dehumidifier or better basement ventilation, as moisture is the main cause of clumping. In my own setup, I switched to high-purity pellets and ran a small dehumidifier nearby. I haven’t touched a broom handle in two years.
How to Clean Out Salt Mush and Brine Tank Sludge
Mush is the wet, cement-like gunk at the very bottom of your brine tank. Sludge is the thick layer of dirt and impurities that settles underneath it. This sludge can get sucked into the brine line and clog the injector, causing a regeneration failure.
This sludge is the answer to “does water softener salt go bad.” The salt itself doesn’t expire, but its impurities and moisture cause it to dissolve unevenly and create this nasty residue.
A full tank clean-out is the only real fix for mush and sludge. Plan for about an hour of messy work. Here are the steps:
- Unplug the softener and bypass the water. This is your first safety step.
- Remove all loose, dry salt from the top of the tank. A plastic cup or small shovel works.
- Scoop out as much of the wet salt mush as you can. It’s heavy.
- Use a wet/dry shop vacuum to suck out the remaining sludge and any standing water.
- Rinse the tank interior with a hose or several gallons of clean water. Vacuum the dirty water out.
- Let the tank air dry completely. Wipe it down with an old towel to speed this up.
- Once dry, plug the softener back in, take it off bypass, and refill it with fresh, high-purity salt.
Do this cleaning once a year to prevent major clogs. If you see a lot of sludge, your salt quality is poor.
Dealing with Rust, Dirt, and Other Tank Contaminants
Rust in your brine tank usually comes from two places: rust particles embedded in low-quality salt, or the steel brine tank itself starting to corrode from the inside. You might also see dirt or sand, which are common impurities in cheaper salt products.
These contaminants are problematic because they travel. They get pulled into the brine line and can scratch seals, clog small screens, and jam valves.
For a rusty or dirty tank, start with the full clean-out process described above. Be thorough with the vacuuming and rinsing. After cleaning, inspect the tank’s interior walls. If you see widespread rust spotting or pitting, the metal is actively degrading.
For minor surface rust, a thorough cleaning might be enough. For a tank with serious corrosion, you have two choices. You can install a plastic brine tank liner, which is a drop-in plastic bag that protects the salt from the rusty walls. Or, you can replace the entire brine tank. Liners are a good short-term fix, but a new polypropylene tank is a permanent solution. I’ve installed liners for customers as a stopgap, but in my home, I replaced a rusty steel tank with a plastic one. It was worth the peace of mind.
The Homeowner’s Water Softener Maintenance Roadmap
Your softener works hard, so a little regular care keeps it running smoothly for years. Think of this as a quick check-up schedule. Stick to it, and you’ll avoid most common problems.
| Frequency | Task |
| Weekly | Check salt/potassium chloride level. |
| Monthly | Inspect for salt bridges or mush during refill. |
| Every 6 Months | Deep clean the brine tank. |
| Annually | Sanitize resin tank & check brine line filter. |
Weekly: Check Salt Level
Make this a habit, like taking out the trash. Just lift the lid on the brine tank (the tall tank with salt) and look inside. You want the salt or potassium chloride to always be at least half full, ideally about two-thirds.
Running the softener completely out of salt is one of the fastest ways to cause a problem, which answers the common question, “does running out of salt damage a water softener.” When the salt is gone, the system cannot regenerate. Your resin beads become saturated with hardness minerals and can’t grab any more, letting hard water flow straight into your pipes and appliances.
I keep a bag of salt right next to my unit as a visual reminder. When I open the lid and see that bag, I know it’s time to check.
Monthly: Inspect for Bridges or Mush During Refill
When you add salt, don’t just dump it in and walk away. Take 30 seconds to poke around. Use a broom handle or a piece of PVC pipe.
A salt bridge is a hard crust that forms a false floor above the water, preventing salt from dissolving. If you tap the side of the tank and it sounds hollow a few inches down, you have a bridge. Break it up carefully.
Salt mush is a sludgy layer of undissolved salt at the bottom of the water. It can clog the brine well and stop the regeneration cycle. If you find mush, you’ll need to clean it out, which leads us to the six-month task.
Every 6 Months: Deep Clean the Brine Tank
This takes 20 minutes and prevents mush and sludge buildup. Here’s how I do it in my basement.
- Unplug the softener or turn it to bypass mode.
- Use a wet/dry shop vac to remove all remaining salt and water.
- Mix a gallon of warm water with a little dish soap. Scrub the inside of the empty tank with a long-handled brush.
- Rinse thoroughly with clean water and vacuum out all the rinse water.
- Let the tank air dry completely, then refill with fresh salt.
Never use chemical drain cleaners or bleach for this routine cleanout, as residues can damage the system. This is just a physical cleaning.
Annually: Sanitize the Resin Tank and Check the Brine Line Filter
Once a year, I give the whole system a refresh. This kills any bacteria in the resin bed and ensures the brine draw is working perfectly.
To sanitize, you’ll need about a cup of standard household bleach. Follow your softener manual’s steps for adding bleach to the brine tank and initiating a manual regeneration cycle. This flushes the sanitizing solution through the resin tank.
Always bypass your softener and run outside faucets until the bleach smell is gone before letting water go to household taps. This is a critical safety step.
Finally, locate the brine line where it connects to the control valve. Many units have a small screen filter here. Unscrew the fitting, pull out the filter, and rinse it under tap water. A clogged filter will slow or stop brine from being pulled into the resin tank.
Smart Salt Storage and Other Pro Tips
Getting the salt in the tank is one thing. Storing the rest of it properly ensures your next refill is just as easy and prevents a frustrating mess.
How to Store Leftover Salt or Potassium Chloride
An open bag is an invitation for moisture. Once you open a bag, you need a good storage plan.
- Keep it Dry: Store bags in the driest place you have. A basement corner away from the laundry sink or a garage shelf works. Humidity turns salt into a solid brick.
- Get it Off the Floor: Never store bags directly on a concrete floor. Concrete sweats, pulling moisture right into the salt. Place them on a wooden pallet or even a couple of 2x4s.
- Seal it Tight: If you only used part of a bag, fold the top over several times and clamp it shut with strong clips. For the best protection, pour the remaining salt into a heavy-duty plastic storage bin with a tight-sealing lid.
I keep my partial bags in a large food-safe bucket with a gamma seal lid in my garage; it’s completely airtight and keeps everything dry and pourable.
Answering Common Storage Questions
Homeowners always have the same two questions about the bags sitting in their storage area.
Does water softener salt expire?
Technically, no. Salt and potassium chloride do not go bad. But they do absorb moisture from the air over time, which causes clumping. A bag left open in a damp space can become one unusable, rock-hard chunk. If it’s clumped, you can break it up, but it’s a sign your storage spot is too humid.
Are the empty bags recyclable?
Most water softener salt bags are made from plastic film, similar to grocery bags. Do not put them in your curbside recycling bin. You need to check with your local municipality. Many grocery stores or recycling centers have bins for plastic film and grocery bags. If the bag is dirty or wet, it typically cannot be recycled.
Buying in Bulk the Smart Way
Buying a pallet from a club store saves money. It also creates a storage problem if you just stack the bags in your garage.
The pro move is to use a dedicated storage container inside your home. Pour the salt from the bulk bags into a large, sealed garbage can or storage tote with a lid. This does two things: it creates a moisture-proof barrier, and it makes refilling your softener much cleaner and faster. You’re just scooping from a bin instead of wrestling with a 40-pound bag.
Transferring bulk salt into a sealed container is the single best way to prevent waste from clumping and to simplify your refill day.
Don’t Trust Your Memory: Set a Reminder
The easiest way to run out of salt is to forget to check the tank. Make it automatic.
Check your brine tank the same day each month. When you refill it, immediately mark the next check date on your kitchen calendar or set a monthly reminder on your phone. Your softener’s performance depends on a consistent salt supply. Letting it run empty lets hard water back into your pipes and can cause the resin bed to foul.
What to Buy: A No-Nonsense Guide to Recommended Products
Forget fancy marketing. The right product prevents clogs, mess, and softener damage. Your tank’s design and your choice of sodium or potassium dictate what you need.
For Top-Loading Tanks: Evaporated Pellets
Your standard brine tank with a big opening on top needs evaporated salt pellets. They look like small, white, uniformly round balls. This shape and high purity (99% or higher) is key.
High-purity evaporated pellets dissolve completely, leaving almost no messy sediment or “mush” at the bottom of your tank. This sludge can clog the brine well or the injector, leading to a softener that stops regenerating. I use these in my own home unit. Avoid rock salt or solar crystals for these tanks; they contain too much insoluble dirt and gypsum.
For Side-Loading or Cabinet-Style Units: Small Pellets or Fine Crystals
These sleek, modern units have a small hatch or drawer. Standard pellets can literally get stuck in the chute. You need a product engineered for the space.
Look for bags labeled “fine mesh,” “cabinet style,” or “high efficiency.” The pellets or crystals will be noticeably smaller. Using the wrong salt here is a direct path to a jammed loading system and a service call. The smaller size ensures smooth flow into the compact brine tank without “bridging” or clogging in the entry.
For Potassium Chloride Users: High-Purity Softening Pellets
If you’re on a low-sodium diet, you’re using potassium chloride. Not all potassium is the same. You must buy pellets specifically labeled for water softening use.
Potassium chloride softening pellets are refined to minimize the insoluble minerals that can rapidly foul your resin bed. Using a generic, lower-grade potassium chloride can leave a rusty-looking residue and reduce your softener’s capacity much faster than sodium salts. It costs more, but it protects your larger investment.
For Cleaning: Resin Tank Cleaner
Salt doesn’t clean the softener itself. Iron, manganese, and organic gunk build up on the resin beads over years. You need a dedicated resin cleaner.
This is a liquid acid-based solution. You add it directly to your brine tank before a regeneration cycle. Using a resin cleaner once a year breaks down iron and biofilm that salt alone cannot remove, restoring your softener’s performance. It’s the simplest preventative maintenance you can do. Pour it in, run a manual regeneration, and you’re done.
Common Questions
Where’s the best place to buy water softener salt?
For price and convenience, check home improvement stores like Lowe’s or warehouse clubs like Costco. You can order online from Amazon, but shipping heavy bags adds cost. My advice: buy high-purity evaporated pellets locally to avoid a mess in your tank.
Is the water softener salt price at Costco worth it?
Typically, yes. Costco and similar clubs offer the best price per 40-pound bag, often between $6-$9. The value is in buying in bulk, but only if you have a dry, proper storage spot off the concrete floor to prevent clumping.
What should I do if I find a water softener salt container leak?
Act immediately. For a plastic tank, empty it, dry it, and inspect for cracks-a waterproof epoxy can be a temporary patch. For a rusty steel tank, the integrity is compromised; plan to replace the tank soon to prevent floor damage.
I found a water softener salt dosage setting chart online. Can I trust it?
Be cautious. Generic charts often give bad advice. Your unit’s exact setting depends on its model, tank size, and your water’s tested hardness. The only chart you should trust is the one in your unit’s owner’s manual.
How should I store my leftover water softener salt bags?
Keep them sealed and dry. Fold the bag tightly and clip it shut, then store it on a wooden pallet or shelf-never directly on a concrete floor. For best results, transfer salt to a sealed plastic bin to lock out moisture completely.
Keeping Your Softener Running Smoothly
Make a habit of checking your brine tank salt level at least once a month. Keeping it adequately filled is the simplest way to ensure your softener works and your home gets truly soft water.
Further Reading & Sources
- Water Softener Salt vs. Potassium Chloride
- Amazon.com: Diamond Crystal Water Softener Bag 40 Lb. : Tools & Home Improvement
- Morton Salt 40 lbs. Water Softener Salt Pellets Morton Potassium Chloride 1498 – The Home Depot
- Morton® Potassium Chloride – Morton Salt
Bob McArthur
Bob is a an HVAC and plumbing industry veteran. He has professionally helped homeowners resolve issues around water softeners, heaters and all things related to water systems and plumbing around their homes. His trusted advice has helped countless of his clients save time, money and effort in home water systems maintenance and he now here to help you and give you first hand actionable advice. In his spare time, Bob also reviews home water systems such as tankless heaters, water softeners etc and helps home owners make the best choice for their dwelling. He lives around the Detroit area and occasionally consults on residential and commercial projects. Feel free to reach out to him via the contact us form.