Well Pump Cycling: Normal Frequency vs. Problem Signs
Your well pump cycling non stop is a warning you can’t ignore. We’ll cut through the noise and tell you exactly what’s normal and what’s broken.
This article covers normal cycle frequency, standard run time, red flags for failure, and immediate troubleshooting steps.
I’ve fixed more pumps than I can count. Here’s the takeaway: if your pump kicks on more than once a minute with no water running, you have a leak or a bad pressure tank.
Understanding Normal Well Pump Cycles and Run Times
A pump cycle is one complete on and off sequence. The pump turns on when pressure drops, fills the pressure tank, and shuts off. It’s the basic heartbeat of your water system.
For most homes, a healthy pump will cycle 1 to 3 times per hour when no water is being used, with each run lasting 30 seconds to 2 minutes. This steady rhythm means your system is working efficiently without strain.
Think of your well system like a heart. A steady, strong beat at rest is normal. A heart that flutters constantly or pounds for too long is a sign of trouble. Your pump is the same.
What’s “normal” depends on your pressure tank’s size and your home’s water use. A larger tank holds more water, so the pump cycles less. Here’s a quick reference for a quiet hour with no water use:
- 20-gallon tank: 2-4 cycles per hour.
- 40-gallon tank: 1-3 cycles per hour.
- 80-gallon tank: May only cycle once an hour or less.
How Many Times Per Hour is Healthy?
Use the numbers above as your baseline. If someone takes a shower, the pump will run for that entire duration. Once water use stops, the cycling should return to that infrequent resting rate.
If your pump is kicking on more than 10 to 15 times in an hour with no taps open, you have a serious problem called short cycling. This rapid on-off action will burn out the pump motor very quickly. It’s the most urgent warning sign your system can give you.
How Long Should Each Pump Run Last?
Run time is tied to your pump’s flow rate (measured in gallons per minute, or GPM) and your tank’s “drawdown.” Drawdown is the amount of usable water in the tank between the pump’s cut-on and cut-off pressures.
A standard 1/2 HP pump delivering 8-10 GPM into a typical 40-gallon tank should refill it in about 30 to 90 seconds. A run time under 30 seconds is often too short and points to a tank problem, while a run time consistently over 2-3 minutes for normal tank refill is too long and suggests a water supply issue.
Too short means the tank isn’t storing enough water. Too long means the pump is struggling to get water, possibly from a weak well or a clog.
What Decides How Often Your Pump Turns On and Off?
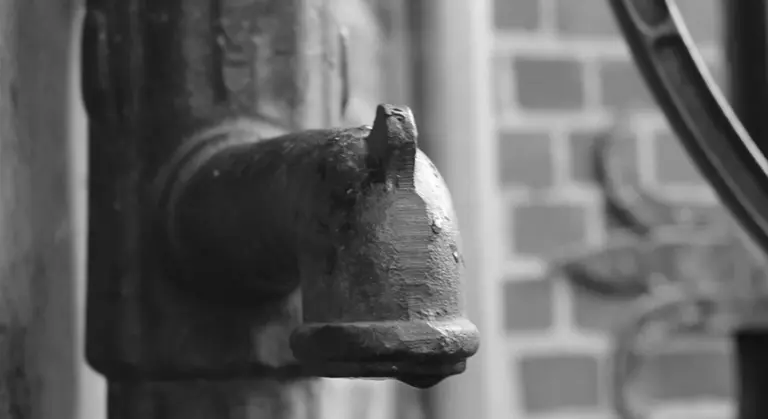
Four main components control the pump’s rhythm: the pressure tank, the pressure switch, the check valve, and the well itself.
The pressure tank is the star player. It has an air-filled bladder. When working right, this bladder squeezes the water out, allowing the pump to rest. If the bladder ruptures or the tank loses its air charge (this is called being “waterlogged”), water fills the entire tank. A waterlogged tank has almost no drawdown, so the pump kicks on for just a second every time you use a teaspoon of water, causing rapid, damaging short cycling. You can check this by tapping the top and bottom of the tank. It should sound hollow at the top and solid at the bottom.
The pressure switch is the brain. It tells the pump when to start and stop based on pressure (usually 40/60 psi). A faulty switch can cause irregular cycling.
The check valve is a one-way gate in the drop pipe. It stops water from flowing back into the well. If it fails, water drains back, pressure drops, and the pump cycles on to repressurize the empty line.
Finally, your well yield matters. If the well recovers water slowly, the pump may run for several minutes to fill the tank, then shut off. If you’re using water during this, the pump might run continuously until you stop. This is a supply issue, not necessarily a pump issue.
Your whole house water use sets the pace. A water softener during its regeneration cycle or a large irrigation zone will make the pump run longer to meet that demand. That’s normal. The problems start when the cycling is wrong at rest.
The Red Flag Troubleshooting Guide: Signs You Can’t Ignore

Normal cycling is a gentle hum in the background. Problematic cycling is your pump screaming for help. Here are five signs that mean you need to stop and investigate.
Rapid, Clicking Sounds from the Pressure Switch (Short Cycling)
This is the classic “click-click-click” you hear every few seconds. It means your pump is starting and stopping far too quickly. This is called short cycling, and it destroys pumps. The most common cause is a waterlogged or failed pressure tank. The tank’s air charge is gone, so the pump kicks on at 40 PSI, hits 60 PSI almost instantly, shuts off, and then the pressure drops right back down.
Your first check should always be the pressure tank’s air charge with a simple tire gauge. Turn off the pump, drain all water from the tank, and check the air pressure. It must be 2 PSI below the pump’s cut-in pressure. If it’s at zero, you’ve found the problem. If the tank feels completely solid or water sprays from the air valve, the bladder is ruptured and the whole tank needs replacement.
Pump Running for Several Minutes Non-Stop to Fill a Sink
If running a little water makes your pump grind away for two, three, or five minutes straight, your well is not keeping up. This is often a sign of a dropping water table or a pump that’s failing and losing its prime. The pump is struggling to draw water from a greater depth or through a clog, resulting in no water flow despite the noise.
Listen closely. A healthy pump under load has a steady hum. If you hear grinding, screeching, or it sounds labored, the pump itself is likely failing. A pump that runs continuously for more than two minutes for a small demand is working too hard and will overheat. Check for recent drought conditions. If the weather’s been normal, the issue is likely with the well yield or the pump.
Flickering Lights When the Pump Kicks On
Your lights dimming or flickering when the pump starts is a major electrical red flag. A well pump draws a large inrush of current when it starts. If your home’s wiring or the pump’s dedicated circuit can’t handle it, you see voltage drop as flickering lights.
This indicates a potentially dangerous situation like a loose connection, undersized wiring, or a failing pump motor drawing excessive amperage. Loose connections heat up and can cause fires. Do not ignore electrical flickering; it requires a qualified electrician or well technician to diagnose the circuit and pump motor. This isn’t a DIY fix.
Air Sputtering from Faucets or Cloudy Water
Air in your lines means your pump is sucking air. This happens when the water level in the well drops below the pump’s intake, often called a “low yield” or “dry well” scenario. The pump pulls a mix of water and air, which shows up as sputtering faucets or cloudy, aerated water that clears after a few seconds.
You might also notice more frequent cycling as the pressure tank fills with both air and water. Continuing to run the pump while it draws air will quickly burn out the motor due to lack of cooling. You need to stop using water immediately to let the well recover and call a professional. They can measure the well’s recovery rate and determine if the pump needs to be lowered or if the well itself has a problem. Addressing a well pump short cycling fix is often part of returning the system to stable operation. A professional can guide adjustments to the tank, switch, or pump to prevent future short cycles.
Dramatic Change in Cycling Behavior Overnight
Your system had a steady rhythm for years, but this morning it’s completely different. That’s a huge clue. Mechanical failures don’t usually happen gradually. A sudden onset of rapid short-cycling points to a sudden loss of air charge in the tank (a bladder rupture). A sudden shift to long run times could mean a pipe burst overnight, creating a massive hidden leak the pump is trying to satisfy.
Go to your pressure gauge. Watch it while the pump runs. Does it spike erratically? Does it struggle to climb? A sudden, unexplained change in performance is your system’s way of telling you a component has categorically failed. Compare it to your car’s alternator dying-the change is immediate and obvious. This is when you start checking for leaks at the wellhead and listening for the sound of running water when no fixtures are on.
How to Diagnose a Short-Cycling Well Pump
When your pump is kicking on and off too much, it’s screaming for help. A fast diagnosis saves the pump and your wallet. Here is the safe order of operations I use on service calls and at my own house.
Step 1: Listen and Count Cycles for 15 Minutes
Do nothing but listen first. Go to a faucet. Turn it on full, then shut it off completely. Now, just stand there near your pressure tank for 15 minutes. Do not use any water. Your job is to count how many times the pump starts.
If the pump starts more than twice in that quiet 15 minutes, you have a textbook short-cycle problem. This test rules out normal water use as the cause. At my place, a short-cycle sounds like a rapid *click-hum-click* every few minutes, which is a sure sign of trouble in the tank or switch.
Step 2: Check the Pressure Tank’s Air Charge
A waterlogged tank is the number one cause of short-cycling. The air cushion inside gets waterlogged and can’t do its job. You need a standard tire pressure gauge.
- Shut off power to the well pump at the breaker box. This is non-negotiable for safety.
- Drain all water pressure from the system by opening a hose bib or faucet downstairs.
- Find the air valve (Schrader valve) on the pressure tank. It looks like a tire valve.
- Press your tire gauge onto it and get a reading.
The air pressure must be 2 psi below the pump’s cut-in pressure. If your pressure switch is set to 40/60 psi (cut-in/cut-out), the tank’s air charge should be 38 psi. If you get a reading of 0 psi or water sprays out, the bladder is ruptured and the tank is dead. A reading far below 38 psi means it’s waterlogged and needs recharging. Check the bladder in your pressure tank regularly to ensure it’s in good condition.
Step 3: Inspect the Pressure Switch
The pressure switch is the brain telling the pump when to start and stop. Shut the power off first. Locate the small box with electrical wires and a water pipe connected to it. You have two checks here. Sometimes you may need to manually operate the well pump pressure switch to verify its function. If that’s necessary, proceed with caution and ensure safety protocols are followed.
First, look at the settings. There are two nuts on big springs. The larger nut controls the cut-in and cut-out range (like 40/60). The smaller nut adjusts the differential (the gap between on and off, usually 20 psi). If someone has messed with these nuts, the settings could be too tight, like 50/55 psi, forcing the pump to cycle constantly.
Second, find the small pipe nipple that connects the switch to the water line. Unscrew it. Debris like sand and scale loves to plug this tiny port, tricking the switch. Blow it clear and reconnect it. This fix alone has saved me a hundred service calls.
Step 4: Look for Leaks Between the Pump and Tank
Even a tiny leak downstream of the pump but before the pressure tank will cause short-cycling. The pump repressurizes the line, but water is always sneaking out through the leak, so pressure drops fast.
Listen carefully for a hissing sound in the piping. Check all joints, the pressure switch connection, and the tank tee. A trick I use is to drape a single square of dry toilet paper over suspect joints; a small leak will make it dampen and wiggle. Don’t forget to check the pressure relief valve on your water heater, as a faulty one can drain back to the well system and cause cycling.
When to Call a Pro Versus DIY
You can safely do Steps 1, 2, and 4. Recharging a bladder tank is a common DIY task. Cleaning the pressure switch port is also fine if you’re confident with power off.
Call a pro if Step 2 shows a ruptured bladder (you need a new tank), or if adjusting the pressure switch in Step 3 doesn’t resolve it. A $150 service call to replace a $30 switch is a bargain compared to a $1,200 pump replacement from letting it short-cycle to death. Electrical work on the switch itself is best left to technicians. Tell them exactly what you’ve tested; it gets you to the fix faster and keeps the bill lower.
How to Diagnose a Well Pump That Runs Too Long

A pump that runs and runs is trying to tell you something. It’s working too hard, and that leads to burnout and a big repair bill. Let’s find out why.
Step 1: Test the Pump’s Actual Output
First, you need to see what the pump is actually delivering. Is it weak, or is it fighting a losing battle?
Go to the faucet closest to your pressure tank. This is usually a basement sink or an outside hose bib. You will perform a simple bucket test to measure the pump’s gallon-per-minute output.
- Get a 5-gallon bucket and a stopwatch (your phone works).
- Make sure no other water is running in the house. Turn off ice makers, humidifiers, and irrigation.
- Open the cold faucet all the way.
- Start the stopwatch the moment the pump kicks on.
- Time how long it takes to fill the 5-gallon bucket. Stop the watch when the bucket is full.
Now, do the math: 5 gallons divided by the number of minutes it took. If your 5-gallon pump took 2 minutes to fill a 5-gallon bucket, it’s producing 2.5 gallons per minute (GPM). A modern ½ HP submersible should typically deliver 8-12 GPM. If your number is very low, the pump is worn out or there’s a blockage.
Step 2: Inspect the Check Valve
A faulty check valve is a classic culprit for long run times. Its job is to hold water in the pipes and pressure tank so the pump doesn’t have to start from zero. When it fails, water drains back into the well.
Listen closely. After the pump shuts off, go to the wellhead. If you hear a constant hissing or water rushing sound for more than a minute, you likely have a leaking or stuck check valve. The sound is water flowing backwards.
Another test: Shut off power to the pump. Open a faucet and let the pressure drop to zero. Close the faucet. Wait an hour. Turn the pump power back on. If it takes an unusually long time to build pressure and shut off, water drained back and the check valve is suspect. Replacing a submersible pump check valve requires pulling the pump, which is a job for a pro.
Step 3: Audit Your Household Water Demand
Sometimes the problem isn’t the pump, it’s the request. Your system might be fine for a family of three but can’t keep up with new demands.
Ask yourself:
- Did you recently install a large irrigation system for a new garden?
- Are there more people living in the home (adult children moving back, new roommates)?
- Did you add a water-loving appliance, like a large whirlpool tub or a pressure washer you use frequently?
A simple demand change can push a properly sized system into constant “catch-up” mode. Try running your new sprinkler zone by itself and time the pump cycle. If it runs non-stop, your well yield or pump size may not support the new demand.
Step 4: Evaluate the Well Yield Itself
This is the most fundamental issue: a slow-recovering well. Think of your well as a glass of water with a tiny, slow straw refilling it. Your pump is a big straw trying to empty it. Sometimes the pump itself gets stuck making the problem worse.
The well’s “recovery rate” is how fast groundwater refills the well casing after you pump it out. If the pump pulls water out faster than the well can recover, the water level drops until the pump is just sucking air. It will run continuously until you stop using water and let the well recover.
Diagnosing this requires a well professional with specific tools. They can perform a “drawdown test” to measure the recovery rate in gallons per hour. If your well only recovers 100 gallons per hour (1.6 GPM) and your pump is a 10 GPM pump, you’ll run out of water in 10 minutes of continuous use. The fix isn’t on the pump side, it’s on the well side.
When the Fix is a Booster Pump (The Expensive Solution)
If your well yield is simply low but consistent, one technical solution is a booster pump and a large storage tank. The idea is to let a small pump slowly fill a 500 or 1000-gallon tank over many hours. Then, a second booster pump draws from that tank to provide strong pressure to the house.
This is a major plumbing project often costing several thousand dollars for equipment and installation. Compare that to the cost of replacing a $25 check valve or adjusting your irrigation schedule. Always rule out the simple, cheap maintenance issues on the delivery side before investing in complex fixes for the supply side. Most long-run-time problems are in the plumbing, not the well.
How to Fix Common Cycling Problems and Get Back to Normal
You need a systematic approach. Start with the simple, cheap fixes before you assume the worst. Here are the solutions, ranked from easiest to most involved.
Fixing a Waterlogged Pressure Tank
This is the most common fix. The air bladder inside the tank loses air over time. Water fills the tank, leaving no cushion of air. The pump turns on for just a second every time you open a faucet.
To fix it, shut off the pump’s power, drain all the water from the tank, and use a tire gauge and air compressor to recharge the bladder to 2 psi below the pump’s cut-in pressure. For a typical 40/60 switch, that’s 38 psi.
- Turn off the circuit breaker for the well pump.
- Open a hose bib or faucet downstream from the tank to relieve water pressure.
- Find the air valve on the tank (it looks like a tire valve). Check the pressure with a tire gauge.
- If there’s no pressure reading or it’s very low, use an air compressor to add air until you hit the correct psi (e.g., 38 psi).
- Close the faucet, restore power, and let the system repressurize. Listen for longer pump runs.
Adjusting the Pressure Switch
If the tank air charge is good, the switch might be set wrong. The pressure switch tells the pump when to start (cut-in) and stop (cut-out). A range that’s too narrow causes rapid cycling.
You’ll see two nuts on the switch’s spring assembly. The larger nut adjusts both cut-in and cut-out together. The smaller nut adjusts only the cut-out pressure, widening or narrowing the range.
Turn the larger nut clockwise to raise both pressure settings, or turn the smaller nut clockwise to increase only the shut-off pressure and create a wider, healthier run cycle. Make small, quarter-turn adjustments and let the pump cycle to test.
Replacing a Failed Check Valve or Pressure Switch
Parts wear out. A stuck or leaking check valve lets water drain back into the well. The pressure drops, and the pump kicks on even when no one used water. You might hear a knocking sound when the pump shuts off.
A failed pressure switch gets stuck “on” or “off” or won’t make proper contact. If adjusting it does nothing, or the contacts look burnt, it’s done.
Replacing a pressure switch is a common DIY job under $50; shut off the power, disconnect the wires, and swap the unit. A check valve replacement is harder, as it’s usually installed in the drop pipe in the well. That often requires a pro.
Addressing a Leak in the Drop Pipe or Well Itself
This is a serious, and expensive, problem. If you’ve checked everything else and the pump still cycles when all water is off, you have a leak. It could be a cracked pipe, a faulty fitting, or a failing well seal.
Listen at the wellhead for the sound of running water. Check your water meter (if you have one) with all water off. If the dial moves, you have a leak.
A leak in the well or drop pipe is not a DIY fix for most homeowners; you need a well professional with a pump hoist to pull the pipe and inspect it.
Cost to Fix: DIY Parts vs. Pro Installation
Let’s talk money so you know what you’re getting into. The cost to fix cycling swings wildly based on the cause.
- Recharging a tank: $0 (if you have a compressor) to $150 for a service call.
- New pressure switch: $20-$40 for the part.
- New check valve: $30-$80 for the part, plus several hundred for labor if it’s in the well.
- Fixing a well leak or replacing a pump: $1,000 – $3,000+.
Just like you’d research how expensive a sump pump is before buying one, a new well pump and professional installation is a major investment, often costing over $2,000. When you compare DIY vs pro pump install costs, the numbers can influence your decision. The DIY fixes are cheap. The moment the problem is in the well itself, your wallet is in for a ride.
When a New Pressure Tank is the Answer
Sometimes, recharging the air does not work. The rubber bladder inside the tank can rupture. When that happens, water and air mix. The tank becomes “waterlogged” permanently and cannot hold a proper air charge.
You know the bladder is ruptured if the tank feels completely full of water when you drain it, or if you get water spraying out of the air valve when you try to check the pressure. Understanding how the water tank psi and bladder air pressure interact can help explain these symptoms. A properly charged bladder maintains steady pressure, while deviations in air pressure often signal a fault. Another simple test is the “tap test.” Tap the top and bottom of the empty tank with a wrench. A hollow “ring” means air is present. A dull “thud” means it’s full of water.
Sizing a replacement is straightforward. Match the gallon capacity of your old tank. A common size for a 3-4 bedroom home is an 86-gallon tank (which holds about 23 gallons of water). If you’re upgrading or your needs changed, a simple rule is 10 gallons of tank capacity for every bathroom in the house. When in doubt, go bigger. A larger tank means fewer pump cycles and longer pump life.
Your Well Pump Maintenance Schedule and Cost-Saving Tips
A good pump maintenance schedule is simple. It stops small issues from becoming big bills. Think of it like changing the oil in your truck. A little regular attention keeps everything running longer.
This roadmap is based on what I do in my own house and what I recommend to customers.
Every Month: The Listening Check
Just listen. When a faucet turns on, your pump should start smoothly. It should run for a minute or two to refill the pressure tank, then shut off cleanly. That’s a normal cycle.
You are listening for short cycling, which is the pump kicking on and off every few seconds.
That sound means trouble. It often points to a waterlogged pressure tank or a failing pressure switch. Catching it early saves the pump motor from burning out.
Every 6 Months: The Pressure Tank Air Charge Check
The bladder inside your pressure tank is what does the work. If it loses its air charge, the pump has to turn on for every glass of water you draw. That destroys the pump fast.
Here is how to check it:
- Turn off the pump’s power at the breaker.
- Open a faucet to drain all water pressure from the pipes and tank.
- Find the air valve on the pressure tank (it looks like a tire valve).
- Use a standard tire pressure gauge to check the air pressure.
The air pressure must be 2 PSI below your pump’s cut-on pressure. For a common 40/60 pressure switch (cuts on at 40 PSI, off at 60 PSI), your tank’s air charge should be 38 PSI. If it’s low, use a bike pump or air compressor to add air. Do this with the water pressure fully drained.
Every Year: Pressure and Switch Inspection
Once a year, get a little more hands on. You will need a pressure gauge that screws onto a hose bib or washing machine valve.
- Test System Pressure: Attach the gauge to an outdoor faucet. Turn the faucet on. Watch where the gauge reads when the pump kicks on (cut-on) and when it kicks off (cut-off). It should match your pressure switch setting (like 40/60). If it doesn’t, the switch may need adjusting or replacing.
- Inspect the Pressure Switch: Turn the power off. Remove the plastic cover from the pressure switch. Look at the electrical contact points inside. If they are blackened or pitted, they are causing resistance and can lead to rapid cycling. A pro should clean or replace the switch.
Every 3-5 Years: Professional System Inspection
Some things you just can’t check from the basement. A well technician can pull the pump for inspection, check the well’s water level, and test for changes in water quality. This inspection can warn you of a dropping water table or a pump nearing the end of its life, letting you budget for a replacement instead of facing an emergency.
This maintenance costs money, but it is a planned expense. Compare it to the cost of a new submersible pump installed, which can easily be over $1,500. A $200 inspection every few years is cheap insurance.
Planning for the Inevitable: Pump Lifespan and Backup Power
Even with perfect care, pumps wear out. A quality submersible pump typically lasts 8 to 15 years. The exact lifespan depends on water quality, sand content, and how many cycles it runs. This is why monitoring cycle frequency is so critical.
When the power goes out, your well pump stops. That means no water for drinking, toilets, or your boiler. For a home on a well, a backup plan is not a luxury.
A dedicated battery backup system for your well pump is the most reliable solution. These systems use deep-cycle batteries and an inverter to power the pump for hours or even days, depending on how much you use it. A typical setup might give you 8-12 hours of normal household use.
Some homeowners use a water-powered backup pump, similar to how a water-powered backup sump pump works. It uses municipal water pressure to create suction and draw water from your well if the power is out. It can run indefinitely as long as you have city water pressure, but it wastes a large amount of city water to produce a smaller amount of well water.
Think about these costs upfront, like you would a sump pump price or a whole house water filtration system cost. A battery backup might cost $1,500 to $3,000 installed. Replacing a flood-damaged basement or going a week without water during an outage often costs much more. Regular maintenance and smart backups protect your larger investment, your home.
Quick Answers
Why should I care how often my pump cycles?
Frequent cycling is the #1 cause of premature pump failure. Each start-up creates a surge of electrical and mechanical stress. Protecting your pump’s cycle count is the most effective way to avoid a very expensive replacement bill.
Is it okay if the pump runs while I’m using water?
Absolutely. The pump is supposed to run continuously to meet active demand, like during a shower. The key metric is its resting rhythm; listen for how often it cycles *after* all water use has stopped completely.
What does a “normal” pump cycle sound like?
A healthy cycle is a steady hum for 30 seconds to 2 minutes, followed by a distinct “click” off and a period of quiet. You’re listening for a consistent, infrequent rhythm-not rapid clicking (short cycling) or a constant, labored grind (long running).
My pump seems fine, but my lights dim when it starts. Is that a problem?
Yes, treat this as a serious safety warning. Significant light flickering or dimming indicates a voltage drop, often from a loose electrical connection or failing pump motor. This can be a fire hazard; have an electrician or well technician inspect it immediately.
The pump suddenly started cycling all night. Could it be a leak?
A sudden, major change in cycling with no water use is a classic sign of a significant leak or a catastrophic failure like a ruptured pressure tank bladder. Check for running toilets and listen for hissing pipes. If you find nothing obvious, call a pro-your pump is actively destroying itself.
Smart Monitoring for a Healthy Well Pump
Pay attention to how often your pump cycles and how long it runs to spot trouble early. If you notice rapid, short cycles or unusually long runs, immediately check for running toilets or a waterlogged pressure tank.
Bob McArthur
Bob is a an HVAC and plumbing industry veteran. He has professionally helped homeowners resolve issues around water softeners, heaters and all things related to water systems and plumbing around their homes. His trusted advice has helped countless of his clients save time, money and effort in home water systems maintenance and he now here to help you and give you first hand actionable advice. In his spare time, Bob also reviews home water systems such as tankless heaters, water softeners etc and helps home owners make the best choice for their dwelling. He lives around the Detroit area and occasionally consults on residential and commercial projects. Feel free to reach out to him via the contact us form.