Connect PVC and Copper Water Lines Right: A No-Nonsense DIY Guide
Mixing PVC and copper pipes in your home water system? Get it wrong, and you’ll have leaks. Do it right, and it’s a solid, lasting fix.
This guide gives you the straight talk. We will cover the tools you need, how to join the pipes correctly, testing for leaks, and avoiding common mistakes.
I’ve been a water systems technician for over a decade and fixed this exact issue in my own basement. The short takeaway: always use a proper dielectric fitting to stop corrosion cold.
The Big Picture: What You’re Getting Into
Connecting and running water lines is a serious project. It’s also completely doable if you’re methodical, patient, and respect the rules. When you reach the stage of disconnecting water supply lines from fixtures, shut off the main supply and have towels ready to absorb any drips. In the next steps, we’ll guide you through the disconnection process and preparing for reattachment or replacement.
The goal is not just to get water from point A to point B. Your goal is to create a safe, leak-free system that will last for decades and passes inspection if required.
Your first and biggest decision is choosing between PVC and copper, and you might even use both in the same project. You often see PVC used for the main cold supply line from the street to the house, and copper for all the hot and cold lines running inside your walls.
Here’s my take on the difficulty. For a homeowner with some DIY skill, I rate this a 6 out of 10. The concepts are simple, but the execution demands precision. One bad solder joint or glued fitting can cause thousands in water damage. If you’re running lines inside finished walls or aren’t confident with a torch, hire a pro. For a straight run in a basement or crawlspace, a prepared DIYer can succeed.
PVC or Copper? Your Material Decision Guide
This isn’t just about price. It’s about matching the material to the job for your home’s entire lifetime.
| Factor | PVC (CPVC for hot) | Copper |
|---|---|---|
| Cost (Material) | Low | High |
| Skill Required | Low (Cut & Glue) | Moderate to High (Sweat Soldering) |
| Durability | Good, but brittle in cold, degrades in sun | Excellent, withstands heat and physical abuse |
| Best For | Main supply, drain lines, cold water indoors (if code allows) | Hot water lines, all indoor supply lines, tight spaces in walls |
Water Science Snippet: Why Material Matters
Pipes are more than hollow tubes. PVC is inert and resistant to scale, making it great for mineral-heavy water. Copper has natural antibacterial properties. More importantly, pipe size and smoothness affect water pressure. Undersized pipes or too many sharp turns will kill your shower pressure. Think of it like drinking a thick milkshake through a skinny, twisted straw.
People often ask, “Are copper water lines safe?” Absolutely. For decades, copper has been the standard for safe, clean drinking water. Concerns about lead in solder were resolved decades ago with lead-free laws. Modern solder and fittings are completely safe. For added peace of mind, a quick lead water test helps validate safety for your family, and you can pair the results with filtration options designed for home use.
Another common question: “Can you use Type M copper for water lines?” Yes, but know its place. Type M has a thinner wall, so it’s cheaper and fine for most residential hot and cold water inside your home. I use Type L for anything underground or in high-pressure commercial settings. Type K is even thicker, mostly for underground service lines.
Code compliance is not a suggestion. The International Plumbing Code (IPC) and Uniform Plumbing Code (UPC) dictate what’s allowed. Generally, PVC (specifically CPVC) is approved for both hot and cold indoor potable water. However, many local municipalities ban plastic for indoor water lines. You must check with your local building department. Copper is universally accepted for indoor hot and cold lines. For outdoor, buried lines, both specific types of PVC and copper (Type K or L) are approved. PEX piping is also a common option for outdoor runs. It must be UV-rated and protected from sunlight and damage when exposed.
The Simple World of PVC
PVC shines for straightforward, cost-effective runs. It’s my go-to for the main cold water line from the meter to the house, for drain-waste-vent (DWV) systems, and for outdoor irrigation manifolds—especially in standard installations where pipe selection and installation practices are crucial.
Its limitations are critical to remember: standard PVC cannot handle hot water, and sunlight degrades it rapidly. In home water systems, this matters for choosing the right piping for cold and hot lines. PVC is typically used for cold-water runs, while CPVC is designed for hot-water lines. For hot water, you must use CPVC, which is a different material with different glue. For any outdoor use, it must be painted or wrapped to block UV rays.
When you buy, look for two things on the pipe: “NSF-pw” (meaning it’s certified for potable water) and “Schedule 40” for pressure applications. Schedule 40 is the standard wall thickness for home water supply.
The Classic Choice: Copper
Copper is the king of reliability inside your home. It handles heat perfectly, it’s rigid for clean runs through studs, and a properly soldered joint is as strong as the pipe itself. I replumbed my entire 1970s house with copper and sleep soundly because of it.
You need to know the types. For home water lines, you’ll only see L and M. Type M (red stamp) is thinner and cheaper. Type L (blue stamp) is thicker and stronger. I use Type L as my default for the extra margin of safety, especially on hot water lines. Type K (green stamp) is for burial.
Can you bend copper water lines? You can, with a tool called a tube bender. It creates smooth, kink-free curves that reduce friction and the need for elbow fittings. It’s a skill worth learning for long, clean runs.
For joining, soldering (“sweating”) is the standard method for homeowners and pros alike. Brazing uses a higher-temperature torch and a different filler metal, creating an even stronger joint. It’s typically required for medical gas lines or high-pressure steam, but it’s overkill for home water lines. Stick with lead-free solder and a good map gas torch.
Your Complete Plumbing Tool Kit
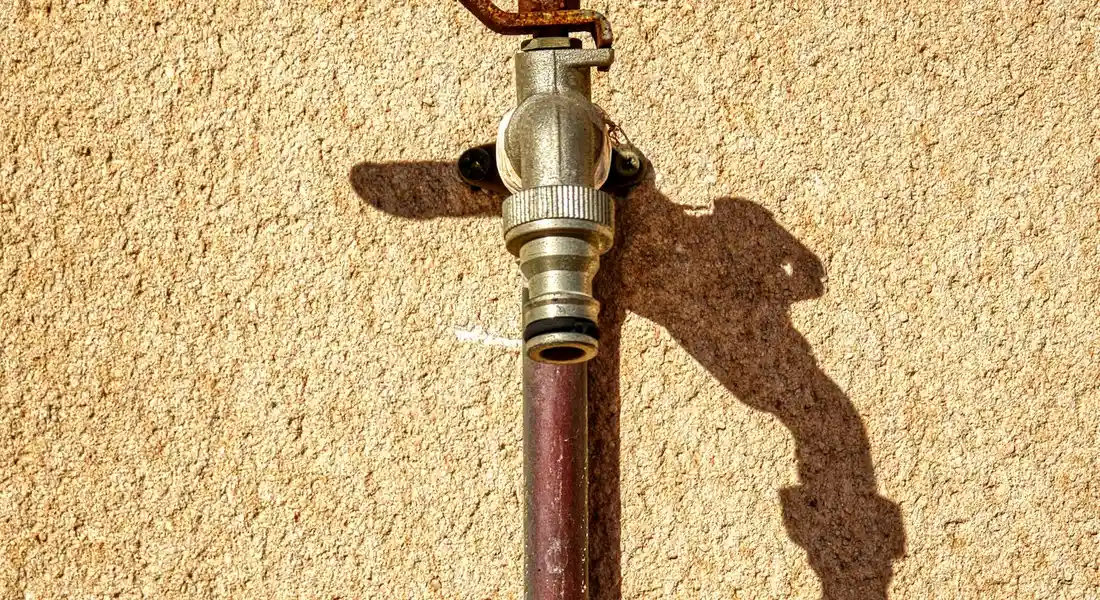
You need the right tools on the bench before you make the first cut. Running pipes for your softener, heater, or filtration system is straightforward with proper preparation. This checklist covers everything for both PVC and copper work.
Tools for Dominating PVC
PVC is forgiving, but doing it right means clean cuts and solid solvent welds. Here is your essential kit.
- PVC Cutter (Ratchet Style): Makes straight, burr-free cuts fast. A hacksaw works but is slower and less precise.
- Deburring Tool or Sandpaper: Cleans the inside and outside of the cut pipe. A rough edge can cause turbulence and weaken the joint.
- PVC Primer & Cement: You must use both. Primer prepares the surface, cement creates the permanent weld. Get the correct type for your pipe schedule.
- Tape Measure & Marker: For accurate measurements. A sharpie works best.
- Level: Ensures your pipe runs and supports are straight, which is critical for proper drainage and appearance.
Always wear chemical-resistant gloves and safety goggles when using primer and cement, and work in a well-ventilated area like an open garage. The fumes are intense. I keep a small fan pointed out the door when I’m gluing pipes in my basement.
Tools for Mastering Copper
Soldering copper (“sweating”) is a skill, but the right tools make it achievable. This answers the common question, “What tools do I need for copper?”
- Tubing Cutter with a Sharp Wheel: A clean, square cut is non-negotiable. A dull wheel will deform the pipe.
- Tube Reamer or File: Removes the internal burr left by the cutter. This burr restricts flow and causes noisy water.
- Propane Torch (or MAP Gas): Provides the heat for soldering. A basic propane torch is sufficient for most home jobs.
- Lead-Free Solder & Flux: Use solder marked for potable water. Flux cleans the copper and helps the solder flow into the joint.
- Flame Shield: A piece of sheet metal to protect wood studs or other combustibles from the torch flame. This is a must-have safety item.
- Pipe Wrenches (Two): One to hold the fitting, one to turn the pipe. You always use them in pairs to prevent twisting other parts of your system.
- Emery Cloth or Sanding Pad: Cleans the outside of the pipe and inside of fittings to shiny, clean copper before applying flux.
Step-by-Step: How to Connect PVC Pipes
Connecting PVC is about the solvent weld. Follow these steps to make a leak-proof, code-compliant joint that will last for decades.
- Dry Fit Everything First. Assemble the pipes and fittings without glue. Make sure lengths are correct and everything fits. Mark the pipe and fitting with a line so you can align them quickly during the real glue-up.
- Cut the Pipe Square. Use your PVC cutter. A crooked cut leaves gaps in the joint that will leak.
- Deburr and Clean. Remove all plastic shreds from inside and outside the cut. Wipe the pipe end and fitting socket with a clean, dry rag to remove dust.
- Apply Primer. Swab an even coat of purple primer on the outside of the pipe and the inside of the fitting socket. This softens the plastic and is required by plumbing code. Let it dry for a few seconds.
- Apply Cement. Immediately apply a thin, even layer of cement over the primed areas on both the pipe and the fitting.
- Assemble and Quarter-Turn. Push the pipe fully into the fitting socket, then give it a quarter-turn to spread the cement. Hold it firmly together for about 15-30 seconds to prevent it from pushing out.
- Wipe and Cure. Use a rag to wipe off excess cement from the joint. The joint will set in 1-2 minutes, but you should wait at least 2 hours before pressurizing it with water. Full cure takes 24 hours.
You must support the pipe according to code to prevent sagging and stress on the joints. For standard 1/2″ or 3/4″ PVC, supports should be every 32 inches on horizontal runs. Use proper pipe hangers, not just duct tape or wire. A sagging pipe will eventually fail at a joint.
Step-by-Step: How to Solder Copper Pipes (Sweating)
Soldering, or “sweating,” copper is a fundamental skill. Done right, it creates a permanent, leak free seal. Done wrong, it’s a flood waiting to happen.
Gather Your Tools and Safety Gear
You need the right gear before you light a torch in your house. Get this together first.
- Propane or MAPP gas torch
- Lead free solder and flux
- Pipe cutter and deburring tool
- Emery cloth or sanding pad
- Heat shield cloth
- Leather gloves and safety glasses
- Two adjustable wrenches
Wear those gloves and glasses every single time, and always keep a fire extinguisher nearby.
The Soldering Process
Follow these steps in order. Rushing causes leaks.
- Cut and Clean: Cut the pipe squarely with your cutter. Use the deburring tool to remove the inside ridge, then sand the outside of the pipe end and the inside of the fitting until they shine bright copper.
- Apply Flux: Spread a thin, even layer of flux on the outside of the pipe. Slide the fitting on and give it a quarter turn to spread the flux. Wipe off any excess.
- Heat and Apply Solder: Open your valves and drain the line completely at the lowest point in your system. Open the highest faucet to let air in. If you’re just doing a small section, you can use a bread trick. Stuff a piece of white bread into the pipe upstream of your work area. It will temporarily block the water, and it dissolves when you turn the water back on.
- Cool and Inspect: Let the joint cool naturally. Do not spray it with water. Once cool, wipe away any remaining flux residue with a damp rag.
The Big Question: Can You Solder with Water in the Line?
No. It is impossible. Water conducts heat away from the joint faster than your torch can supply it. The pipe won’t get hot enough to draw in the solder, guaranteeing a failure.
You must drain the line completely at the lowest point in your system. Open the highest faucet to let air in and remove any air from the water lines. If you’re just doing a small section, you can use a bread trick. Stuff a piece of white bread into the pipe upstream of your work area. It will temporarily block the water, and it dissolves when you turn the water back on.
Red Flags: Spotting a Bad Solder Joint
Learn to recognize failure so you can fix it before the walls are closed up.
- Cold Joint: The solder looks dull, gray, and blobbed on top of the pipe. It didn’t melt and get drawn in. This happens when the pipe wasn’t hot enough.
- No Solder Draw: You can see a gap at the edge of the fitting. The solder didn’t capillary into the joint because of poor cleaning, not enough flux, or water in the line.
- Burnt Flux: The flux is black and crusty. You overheated the joint, which can break down the flux and prevent a good seal.
A good joint shows a thin, silver ring of solder all the way around where the fitting meets the pipe.
Specific Application: Connecting to a Water Heater
Most modern water heaters have dielectric unions. These are special fittings that prevent corrosion between the copper pipe and the steel tank nipple. Do not solder copper directly to the tank nipple.
Here’s the method. Screw the union’s steel half onto the tank nipple using pipe tape. Solder your copper pipe into the union’s copper half. Then join the two union halves together. This creates the necessary separation and is often required by code.
Running Your Water Lines Like a Pro
Connecting pipes is one thing. Running a clean, reliable line from point A to point B is another. Planning prevents headaches.
Planning and Measuring the Route
Don’t just start cutting pipe. Think it through on paper first.
Grab a tape measure and a notepad. Sketch your run from the source to the fixture. Mark all obstacles: joists, ducts, electrical wires, other pipes. The goal is a straight, clean run with as few fittings as possible. Every 90 degree elbow adds friction and reduces water pressure.
For drain lines (like from a water softener), you must have slope. Aim for a 1/4 inch drop for every foot of horizontal pipe. This ensures waste water flows away reliably.
For supply lines (the pipes bringing you fresh water), slope is not the concern. Support is. An unsupported pipe will sag, stress fittings, and eventually leak.
Hanging and Securing the Pipe
Once your route is mapped, you need to hang the pipe securely. This isn’t optional.
Use the right hanger for the material. For copper, use cushioned copper straps or J hooks. The cushion prevents corrosion from direct contact with other metals. For PVC, use plastic J hooks or PVC coated metal straps.
Spacing is critical and often dictated by local plumbing code. A solid rule of thumb is to support horizontal runs every 6 feet for 1/2 inch pipe and every 8 feet for 3/4 inch pipe. Support the pipe within 12 inches of every fitting or valve.
When drilling through studs or joists, drill the hole dead center. This protects the pipe from nails and screws. The hole should be at least 1/4 inch larger than the pipe diameter. For copper running through steel studs, you must use a plastic or rubber grommet to prevent abrasion.
Bridging the Gap: Connecting PVC to Copper
You will almost always need to connect these two materials, especially at appliances like a water heater. This is where DIY projects can fail if done wrong. The big enemy here is electrolytic corrosion, which happens when two different metals (or in this case, plastic and metal) are in contact with water. It eats away at the metal, causing leaks.
Recommended Fittings: Stopping Corrosion
You must use a fitting that electrically separates the PVC from the copper. The right fitting for this job is called a dielectric union, and it’s non-negotiable for a reliable connection. It has a plastic sleeve and a rubber gasket that stops the electrical current causing the corrosion. Some local codes also approve specific brass transition fittings. Always check your brass fitting to see if it’s listed for this purpose.
A Simple, Reliable Connection Method
For a standard repair at a water heater inlet, here is a bulletproof sequence. I used this exact method on my own heater last year, especially after I had to test and replace the water heater element.
- Cut the copper pipe cleanly with a tubing cutter.
- Solder a male threaded adapter onto the copper pipe.
- Glue a female threaded adapter onto the PVC pipe using PVC cement.
- Screw a dielectric union onto the male adapter on the copper side.
- Connect the other half of the union to the female adapter on the PVC side.
- Tighten the union’s large nut by hand, then give it a final snug turn with channel-lock pliers.
This method gives you a solid, code-approved connection that you can also take apart later if needed.
A Note on Electrical Grounding
If you are replacing a long section of copper with PVC, you might hear about grounding. Your home’s electrical system often uses the copper water pipes as a ground path. While the electrical code does allow grounding to a copper water line, modifying this system is a job for a licensed electrician. A pro will ensure your home’s grounding remains safe and up to code after your plumbing work.
Safety, Code, and When to Call a Pro
Working on your home’s water lines is serious. A mistake can cause thousands in water damage or create a safety hazard. Know your limits.
When NOT to Try This Yourself
Call a licensed plumber immediately for these jobs. It’s cheaper than the disaster you might cause.
- Any work involving the main water shut-off valve where it enters your house.
- Re-piping an entire house or a major section like all the hot water lines.
- Connecting to or modifying any gas lines for a water heater.
- Work inside walls where you cannot clearly see the entire run of pipe.
- If your home has polybutylene (gray plastic) pipes, as they require special knowledge.
Detailed Safety Precautions
If you are doing approved soldering or solvent welding, follow these rules.
For Soldering (Copper): Use a flame shield behind the pipe. Have a fire extinguisher ready. Clear all flammable materials (like insulation, wood, or rags) from the work area. Let pipes cool completely before touching them or turning water back on. This is especially important after working on pipes that are located in areas prone to freezing temperatures.
For Solvent Welding (PVC): Work in a well-ventilated area. Do not breathe the fumes. Wear gloves and safety glasses. The cement is highly flammable, so keep it away from any ignition source.
The Universal Rule: Find the correct shut-off valve and turn the water OFF. Open a faucet downstream to drain the pressure and confirm the water is off before you cut.
Permits and Inspections Are Not Optional
For any major work, like replacing a water heater or running new lines, you likely need a permit. Getting a permit and passing an inspection is your guarantee that the work is safe and won’t void your home insurance. The inspector is your free expert consultant. If you’re unsure if your project needs a permit, call your local building department. It’s a five-minute phone call that can save you massive headaches. When it comes to a water heater install, securing the right permit is essential to avoid rework or penalties. In the next steps, we’ll include a handy link to your local permit requirements and application basics.
Keeping It Flowing: Your Long-Term Maintenance Roadmap
Your new water lines are in. Good work. Now, forget about them. Well, not completely. A little planned neglect is fine, but a total lack of attention will cost you. This roadmap turns a big, scary “what if” into a five-minute check you can do with a flashlight.
Your Simple Maintenance Schedule
Think of this as changing the oil in your car. Do these simple checks, and your system will last for decades. I keep a note on my phone’s calendar for the annual check.
The Annual Walk-Through: What to Check
Once a year, grab a bright flashlight. Go to every spot where you have pipes – basement, crawlspace, under sinks, near the water heater. You are looking for three things: leaks, corrosion, and loose hangers.
- Leaks: Look for water droplets, stains, or chalky white deposits (scale). Feel the pipe joints for moisture with your hand. A leak at a solder joint on copper often starts as a tiny green spot.
- Corrosion: On copper, watch for green or blue-green crust. On steel hangers or fittings, look for flaky red rust. Corrosion weakens metal over time.
- Loose Hangers/Straps: Give pipes a gentle wiggle. They should not move more than an inch. A loose pipe bangs and strains its connections. I had to tighten a few in my own basement last spring; the constant hot/cold cycles had loosened the screws.
Finding a problem early means a ten-dollar tube of pipe thread sealant or a two-dollar strap can fix it, not a thousand-dollar repair for water damage.
For Drain Lines: Preventing Clogs
PVC drain lines don’t leak often, but they clog. Prevention is everything. Never pour grease down any drain. Use sink strainers. For kitchen sinks, once a month, pour a half-gallon of boiling hot water down the drain to melt fats.
If you notice slow drainage, act fast. For bathroom sinks and showers, remove the stopper or strainer and clean out the hair. For a preventative clean, use a biological drain cleaner or a cup of baking soda followed by a cup of vinegar, then flush with hot water. Avoid harsh chemical drain cleaners; they can damage PVC pipes with repeated use.
For Supply Lines: Pressure and Pinholes
This is where most hidden failures happen. Your supply lines are under constant pressure, 24/7.
First, know your pressure. You need a simple pressure gauge that screws onto a hose bib. Turn off all water in the house. Attach the gauge and open the bib. Your reading should be between 40 and 80 PSI. If your pressure is consistently above 80 PSI, you must install a pressure reducing valve; this is not optional, as high pressure will destroy appliances and cause joints to fail.
Second, watch for pinhole leaks in copper. These are tiny, high-pressure jets of water. They are often caused by corrosion from the inside, especially if you have acidic water. You might see a small green spot or hear a faint hissing in a quiet room. You’ll often find them on horizontal runs. A single pinhole means more are likely coming. The permanent fix is to replace that section of pipe.
Quick Answers
What’s the most common mistake when joining pipes?
For PVC, it’s not using primer or not holding the joint together long enough for the cement to set. For copper, it’s trying to solder a pipe with even a tiny bit of water inside. Both mistakes guarantee a leak. Always follow the full, proper process for your material.
Can I use the same fittings for hot and cold water?
No. For PVC, standard white pipe and fittings are for cold water only. You must use orange CPVC pipe and its matching cement for hot water lines. All copper fittings are fine for both, but always use lead-free solder.
What are the absolute essential tools I can’t skip?
For PVC: a sharp cutter, primer, and the correct cement. For copper: a quality tubing cutter, emery cloth, flux, and a torch. Skipping the cleaner or primer for either material is the fastest path to a failed joint.
What’s your top safety tip for a DIYer?
Find and confirm your main water shut-off valve works *before* you start. Then, keep a fire extinguisher and a bucket handy the entire time you’re working. This prepares you for the two biggest risks: uncontrolled water and fire from soldering.
When should I definitely call a professional?
Call a licensed plumber if you need to work on the main shut-off valve itself, run pipes inside finished walls you can’t fully access, or if you’re uncomfortable lighting a torch in your home. Their expertise is cheaper than fixing major water damage.
Get Your Pipe Connections Right the First Time
Always use a proper dielectric union or transition fitting when connecting copper to PVC. This single step prevents galvanic corrosion, which is the main cause of leaks and failures where these two materials meet. Get this connection right, and your work will last for years without trouble.