Sump Pump Pit Installation: Keep Your Basement Dry for Good
Your basement floods because water finds the easiest path in. A sloppy sump pit installation gives it one.
This article breaks down the job. We will cover pit location and depth, gravel base and lining, and connecting to proper drainage.
I’ve fixed flooded basements from bad pits for years and put one in my own house. Skip the shallow hole; depth is everything.
First, Plan Your Sump Pit Attack
Installing a sump pump isn’t just digging a hole. You’re building a complete water management system. It has four key parts: the pump, the pit that holds it, the liner that forms the pit walls, and the discharge pipe that carries water away. In the upcoming installation steps, we’ll walk you through each component. You’ll see how to position the pit, set the liner, install the pump, and route the discharge pipe for reliable drainage.
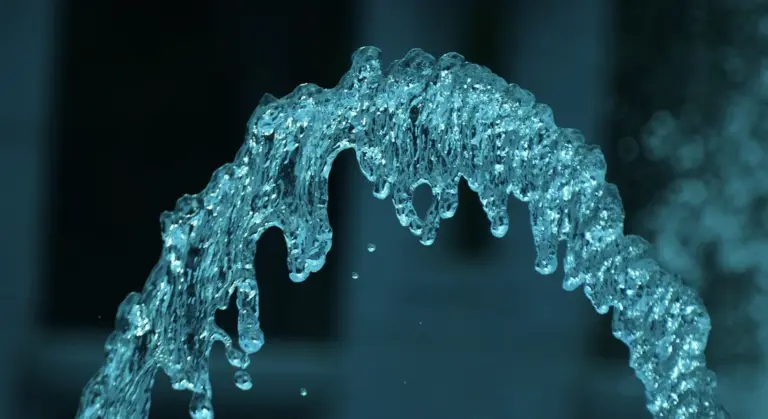
Forget the complexity; the core logic is simple. Groundwater or drainage water flows into the pit liner. When the water level rises high enough, it triggers a float switch on the pump. The pump motor turns on, sucks up the water, and pushes it through a pipe that ejects it safely outside, away from your foundation.
Gather your tools and materials before you start. You don’t want to be halfway through a concrete floor with a missing part.
- Tools: Hammer drill with a masonry bit, shovel, level, tape measure, hacksaw, screwdrivers, wire strippers.
- Materials: Sump pump liner (basin), sump pump, gravel, PVC discharge pipe and fittings, check valve, silicone caulk.
Before you touch a shovel, call 811 to have all public utility lines marked. This free service is non-negotiable. Hitting a gas, water, or electrical line is dangerous and expensive. Wait for the marks, then respect them when you dig.
Choosing the Pit’s Location, Size, and Liner
Find the lowest point in your basement floor. This is where water will naturally travel and pool during a flood. Look for existing moisture stains or a floor drain. In my own basement, the corner near the water heater was always damp, which made the choice obvious.
Some homeowners worry a sump pump hurts their foundation. The opposite is true. A properly installed system relieves hydrostatic pressure against your foundation walls. By collecting and removing water, you prevent the erosion and cracking that constant pressure can cause. The problem isn’t the pump; it’s the water it removes.
Your pit needs the right dimensions. A standard liner is 18 to 24 inches in diameter and 24 to 36 inches deep. This gives the pump enough room to sit correctly and provides a reservoir of water so the pump doesn’t cycle on and off too rapidly, which can burn out the motor.
You have two main choices for the pit liner: heavy-duty plastic basins or poured concrete. For nearly every homeowner, the plastic liner is the right answer. Plastic liners are the standard for DIY and pro installs because they’re lightweight, pre-formed, and won’t crack like concrete can over time. They’re also easier to remove and replace if you ever need to service the pit itself. Concrete pits are generally a specialty item for extreme, industrial-grade applications.
A sump pump cannot work on a flat surface. It needs a pit to collect water. The pump sits down in this collection point, allowing water to flow in from the perimeter drain tile or through holes in the liner’s sides. There are several sump pumps work types—submersible, pedestal, and battery-backup models—each suited to different basements and water conditions. Choosing the right work type matters for efficiency and reliability. The pit is the heart of the entire operation.
Digging the Pit and Setting Up Drainage
This is where the real work begins. A properly dug and prepared pit is the foundation of a reliable sump pump system. Skip these steps, and you’re building on sand.
Step-by-Step Digging Instructions
First, gather your tools: a sledgehammer, a concrete chisel (for slab floors), a shovel, a digging bar, a level, and a tape measure. Mark your pit location on the floor. The pit should be at the lowest point of your basement, typically near a perimeter wall where water naturally collects.
Use your sump pump liner as a template, trace its outline on the floor, and then add 6 to 8 inches all the way around for working room. This extra space is critical for adding gravel and making connections later.
If your basement floor is concrete, you must break through it. Score your marked circle deeply with a concrete blade on a circular saw, then use the sledgehammer and chisel to break it up. For a thicker slab, renting a small electric jackhammer is a back-saving move. I learned this the hard way on my own basement project.
Once you’re through the slab, start excavating the dirt. You need to dig deep enough so the top of your liner sits about 2 inches above the finished basement floor level. This prevents floor runoff from spilling into the pit. Check your liner’s height and keep a level handy to test the bottom of the hole as you dig.
Lining the Bottom for Drainage
You cannot just drop the liner into a dirt hole. Water needs a clear path to enter. After digging to the correct depth, pour 3 to 6 inches of clean, washed gravel (¾-inch stone works well) into the bottom of the hole.
This gravel layer acts as a reservoir and filter, allowing water to pool quickly while keeping silt from clogging the pump intake. Tamp it down firmly to create a stable, level base for your pit liner. Avoid using dirty “crusher run” or gravel with fine dust, as this will turn to mud and defeat the purpose.
Connecting to Drain Tile (If Present)
Many homes, especially newer ones, have a perimeter drill tile system buried around the footings. This pipe collects groundwater and needs a place to drain, which is your sump pit. To manage groundwater, the sump drainage line is often buried to divert water away from the foundation. This setup helps keep basements dry by channeling water away from the home.
Before backfilling around your liner, you need to make this connection. Locate the drain tile pipe. You will need to cut an inlet hole in the side of your sump pit liner, matching the pipe’s diameter. Use a hole saw or reciprocating saw.
Insert the drain tile pipe into the hole so it extends several inches inside the liner. Seal the connection thoroughly with a waterproof silicone or butyl sealant made for sump liners to prevent dirt from washing into the pit. The goal is for groundwater from the tiles to flow freely into the pit, not leak into the soil around it.
A Note on Exterior Grading
While we’re focused on the pit, remember it’s the last line of defense. Your first should be keeping water away from your foundation. The ground around your home should slope away for at least 6 feet. Ensure your gutters and downspouts are clear and extend at least 5 feet from the house.
A sump pump fights water that has already gotten in, but proper grading stops that water from arriving in the first place. Check this annually; soil settles and erosion happens. It’s a simple fix that dramatically reduces how hard your sump pump has to work. Sometimes, though, you’ll still see overflow signs like water pooling or a constantly running pump. These overflow causes and signs alert you to address the underlying issue before a flood.
Installing the Pump, Check Valve, and Discharge Pipe
Now for the good part. Getting the pump in the pit correctly is what separates a reliable system from a constant headache.
Setting the Pump on a Solid Base
Do not set your pump directly on the pit’s gravel or dirt floor. Sediment will get sucked in and kill it. You need a solid, level base.
I use a concrete paver from the hardware store. A few bricks work too. The goal is to lift the pump about an inch off the pit floor. This simple step keeps debris out of the pump intake and dramatically extends its life. Drop your paver in, set the pump on top, and make sure it sits level.
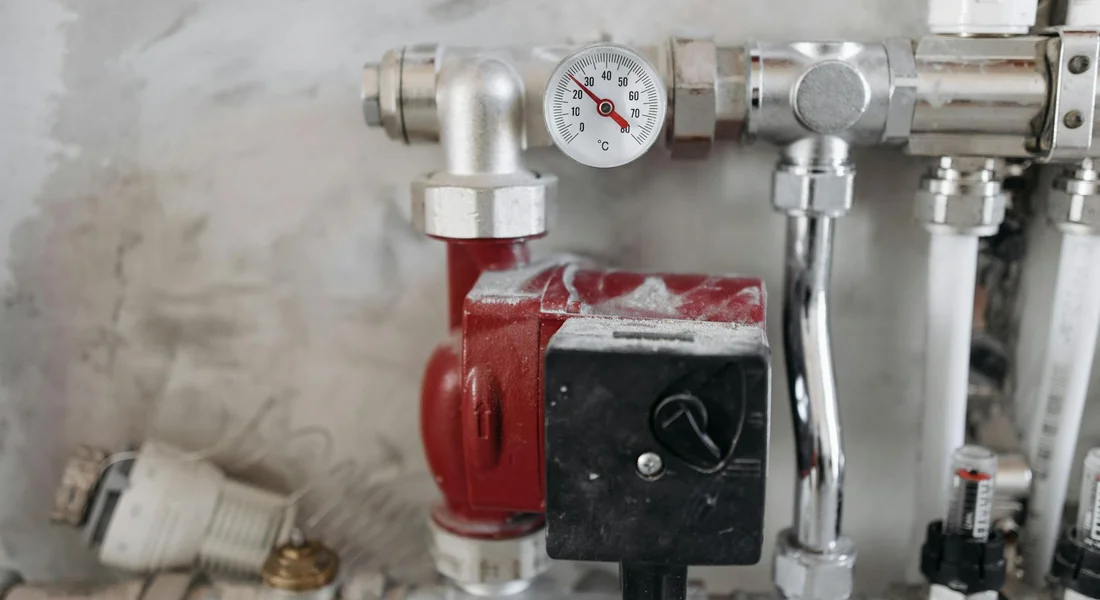
Installing the Check Valve Correctly
This small part does a huge job. The check valve only lets water flow one way-out. Without it, every time the pump shuts off, all the water in the vertical discharge pipe would rush back down into the pit. This causes the pump to short-cycle (turn on and off rapidly) and creates a loud banging known as water hammer.
- Install the check valve on the vertical section of PVC discharge pipe, within two feet of the pump discharge port.
- The valve has an arrow on the side. This arrow must point up, away from the pump, in the direction of water flow.
- Use hose clamps or PVC primer and cement (depending on your pipe type) to secure it. A loose valve is a leaking valve.
I see this mistake all the time. If the arrow is pointing down toward the pump, the valve is installed backward and will not work.
Routing the Discharge Pipe to Prevent Backflow
Where the water goes after it leaves the pump is critical. Your goal is to move water away from your foundation, permanently.
- The pipe must exit your home’s foundation wall or rim joist. Drill a hole using a core drill or hammer drill.
- Outside, the pipe must have a continuous downward slope away from the house. A proper slope ensures water can’t sit and freeze in the pipe, and prevents it from draining back toward your foundation.
- Terminate the pipe at least 10 to 20 feet from your foundation. Don’t let it dump right next to the house-that water just goes back into the ground and into your pit.
In my own setup, I ran the pipe out and into a buried pop-up emitter in the yard. This keeps the water invisible and directs it far away.
Meeting Code: Air Gaps and Freezing
Plumbing codes (like the IPC or UPC) have specific rules for sump discharge. Your local inspector is the final authority, but here are the universal principles.
First, an air gap is often required. This means the discharge pipe cannot be directly, permanently connected to a municipal sewer or storm drain. There must be a visible, physical air space to prevent contaminated city water from siphoning back into your basement.
Second, you must address freezing. In cold climates, the section of pipe outside but before the ground freezes is a problem. You have two choices: use insulated pipe and hope for the best, or install a vertical “ice guard” fitting that lets water drain out before the frozen section. The most reliable fix is to bury the discharge pipe below the local frost line so it never freezes. Check your local code for the required depth and follow frozen pipes prevention techniques.
Sealing and Waterproofing the Pit Area
The hole is dug and the liner is in. Your biggest job now is stopping water from going where it shouldn’t. Water is lazy. It will always find the easiest path, which is often the gap between your new pit liner and the concrete floor it sits in. If you don’t seal that rim, water will rush in around the sides, overwhelm the pump, and flood your basement. Sealing the rim of the sump pit is the single most important step to make the pump’s job easier and your basement drier.
Sealing the Rim: Hydraulic Cement vs. Pit Sealant Kits
You have two good options for creating a watertight seal at the floor. Both work, but they feel different to use.
Hydraulic cement is my go-to for permanent, rock-solid seals. It expands as it sets, actively forcing itself into cracks and gaps. You mix it to a thick, peanut butter-like consistency, pack it into the gap around the liner, and smooth it with a trowel. It sets fast, so only mix small batches. In my own basement, I used hydraulic cement, and years later, that seal is still perfect. The downside? It’s messy and you have to work quickly.
Pit sealant kits are the cleaner, simpler alternative. These typically come with a roll of bentonite clay rope or a expanding foam sealant. You press the clay rope into the gap, and when it gets wet, it expands to seal. It’s less messy than cement and very effective. For a DIYer who wants to avoid mixing cement, a quality pit sealant kit is a reliable choice that gets the job done.
The Critical Role of a Sealed, Vented Lid
An open pit is a problem waiting to happen. It’s a hole for debris to fall into, a source of musty moisture, and a potential entry point for radon gas. Your pit needs a proper lid.
A sealed lid keeps out dirt, dust, and insects that can clog the pump. It also reduces basement humidity by containing evaporating water from the pit. More importantly, a vented lid is a key safety feature for mitigating radon gas, which can seep from the soil and accumulate in your home. The vent allows this gas to be safely routed outside if you have a radon mitigation system.
My setup uses a heavy-duty polyethylene lid with a rubber gasket and a vent port. It snaps on tight, keeps everything out, and gives me peace of mind. Do not use a makeshift piece of plywood or an unsealed cover.
Pit Sealing vs. Basement Waterproofing: Know the Difference
This is where homeowners often get confused. Sealing the sump pit is a targeted, critical task. Waterproofing your basement walls is a separate, much larger project.
Think of it this way: sealing the pit is like putting a gasket on your sink drain. Waterproofing the basement is like re-tiling your entire shower and replacing the shower pan. Your sealed sump pit manages water that has already entered through the floor or walls; it does not stop water from coming through porous concrete or foundation cracks.
If your walls are weeping or you have active leaks, sealing the pit alone won’t solve it. That requires exterior excavation, interior drain tile, or wall sealants. For now, focus on making your sump pit a locked box for water. Get that right first. You can tackle wall waterproofing later if you need to.
Adding a Backup System and Testing It
A power outage during a storm is when your sump pump quits. That’s when you get a flooded basement. Your main pump is useless without electricity. You need a plan B.
Choosing Your Backup Power Source
The most common question is what kind of backup to get. You have three main choices: a battery backup unit, a water-powered backup pump, or a whole-home generator.
A dedicated battery backup is the most popular and reliable solution for most homes. It’s a separate pump and a large, sealed battery (like a marine or AGM battery) in a box. When the power fails, the battery takes over. Pros: It works instantly and is very effective. Cons: The battery only lasts for a set number of hours and needs replacement every 3-5 years.
A water-powered backup uses your home’s municipal water pressure to create a suction that pumps water out. It requires no electricity. The major drawback is it uses a huge amount of city water, which can get expensive, and it won’t work if you’re on a well.
A whole-house generator is the ultimate solution. It powers your entire home, including the primary sump pump. It’s also the most expensive option and requires professional installation and permits.
Here’s a simple comparison:
Are Two Sump Pumps Necessary?
One strong pump is often enough. But in areas with heavy rain or a high water table, two pumps provide real peace of mind. You run a primary pump and a separate backup pump. They can absolutely go in the same basin. You just need a dual float switch assembly.
The dual float switch sets different trigger levels: the primary pump activates first, and the backup pump kicks in only if the water rises higher. This prevents them from running at the same time and draining your backup battery too fast. In my own basement, I have a primary 1/2 HP pump and a battery backup unit with its own pump sitting right next to it in the 24-inch pit. They share the basin but operate independently.
How to Test Your Sump Pump
Don’t wait for a storm to find out your pump is broken. Test it every month during spring and fall. The process is simple.
- Locate the sump pit and make sure the pump is plugged in.
- Slowly pour about 5 gallons of water into the pit. You can use a bucket or run a hose slowly into the basin.
- Watch the float. As the water rises, the float should lift and trigger the pump to turn on.
- Listen and watch. The pump should run, move the water out through the discharge pipe, and shut off automatically once the water level drops.
If the pump doesn’t turn on, check the outlet with a lamp, then check the float for obstructions. If it runs but doesn’t move water, the impeller might be clogged or the check valve is stuck.
Basic Maintenance to Prevent Failure
A little upkeep prevents most emergencies. Follow this routine.
- Clean the Pit Annually: Unplug the pump. Scoop out any silt, gravel, or debris from the bottom of the pit. This keeps the pump intake clear.
- Test Monthly in Wet Seasons: Do the 5-gallon bucket test from April to November.
- Check the Discharge Outlet: Go outside and find where the water exits. Make sure it’s at least 10 feet away from your foundation and that the opening is clear of dirt, leaves, or ice.
- Listen for Odd Noises: A grinding or rattling sound when the pump runs can mean a worn impeller or motor bearing. It’s telling you it’s near the end.
This isn’t complicated work. An hour a year for cleaning and five minutes a month for testing is all it takes to keep your basement dry.
The DIY Verdict and Final Safety Check
Let’s be clear about what you’re getting into. This project gets a difficulty rating of 7 out of 10. It’s physically demanding, involving breaking concrete and moving a lot of dirt. You also need a solid grip on basic plumbing for the discharge pipe and comfort with simple electrical connections for the pump.
Where Your DIY Job Ends and the Pro’s Begins
A capable homeowner can handle the core physical work. You can dig the hole, set the liner, place the pump, and run the discharge pipe to the exterior. The line is crossed when you encounter complex drain tile systems, need to wire a new dedicated circuit, or are digging near foundational footings. If your basement already has a network of perforated pipes leading to a central point, tying a new pit into that system is a plumber’s job. The same goes for any electrical work beyond plugging a cord into an existing outlet.
In my own basement, I ran a new discharge line myself, but I hired an electrician to install the GFCI outlet on its own circuit. Knowing your limits keeps your house safe and dry.
The 5 Minute Final Safety Check
Before you consider the job done, run through this list. A mistake here can mean a flooded basement or an electrical hazard.
- Power Safety: The pump must be plugged into a Ground Fault Circuit Interrupter (GFCI) outlet. This is non-negotiable. Water and electricity are a deadly mix, and a GFCI will shut off power instantly if a fault is detected. Test the GFCI button now.
- Discharge Path: Go outside and trace your discharge line. Ensure the exit point is at least 10 feet from your foundation and that the water can flow freely away. Clear any debris from the pipe end and make sure the discharge area isn’t blocked by dirt, leaves, or snow.
- Pit Security: The pit cover must be firmly in place and sealed if required. A loose cover is a safety hazard and allows moist air, radon gas, and debris to enter your basement.
- Pump Test: Pour at least 5 gallons of water into the pit. The float should rise and trigger the pump to turn on, emptying the pit. Listen for normal pump operation. The pump should turn off automatically when the water level drops.
- Check Valve Sound: When the pump shuts off, you should hear a distinct thud. That’s the check valve closing to prevent water in the discharge pipe from flowing back into the pit. No sound means a faulty valve and a pump that works harder.
Get these five checks right, and you can walk away with confidence. A properly installed sump pit is a set-and-forget defender. It sits quietly in the corner, ready to fight a flood so you don’t have to.
Common Questions
What type of liner is recommended for the pit and why?
A heavy-duty plastic basin is the standard choice for homeowners. It’s pre-formed, lightweight, and resistant to cracking, making installation and future service much easier than dealing with a concrete pit. Plastic liners are durable enough for decades of reliable service in a residential setting.
How deep should the sump pump pit be for it to work properly?
Aim for a pit depth of 24 to 36 inches. This depth provides a sufficient reservoir of water so the pump doesn’t cycle on and off too frequently, which is the leading cause of motor burnout. The top of the liner should sit about 2 inches above your basement floor to prevent surface runoff from flowing in.
What is the best way to ensure proper drainage into the pit?
Start with a 3 to 6-inch base of clean, washed gravel in the bottom of the hole before setting the liner. This creates a stable foundation and acts as a filter, allowing water to pool quickly while keeping silt and debris from clogging the pump intake. Always connect any existing perimeter drain tile directly into the liner side, sealing it thoroughly.
What type of check valve should be used and why is it critical?
Use a high-quality, vertical-style PVC check valve designed for sump pumps. Install it on the discharge pipe within two feet of the pump, ensuring the arrow points upward. This valve prevents water from flowing back into the pit after the pump shuts off, which stops destructive short-cycling and protects your pump.
What backup power option is generally recommended for peace of mind?
For most homes, a dedicated battery backup system is the most reliable and practical solution. It provides immediate power during an outage to run a separate backup pump. While the battery needs replacing every few years, it’s a self-contained system that works independently of your home’s water supply or needing a full generator installation.
Keeping Your Basement Dry for Good
The single biggest factor in preventing a flood is building a pit that collects water efficiently and gives your pump room to work. Once it’s installed, test the entire system with water and mark a date on your calendar to check the pump every few months.
Bob McArthur
Bob is a an HVAC and plumbing industry veteran. He has professionally helped homeowners resolve issues around water softeners, heaters and all things related to water systems and plumbing around their homes. His trusted advice has helped countless of his clients save time, money and effort in home water systems maintenance and he now here to help you and give you first hand actionable advice. In his spare time, Bob also reviews home water systems such as tankless heaters, water softeners etc and helps home owners make the best choice for their dwelling. He lives around the Detroit area and occasionally consults on residential and commercial projects. Feel free to reach out to him via the contact us form.