Gas Water Heater Install: Your DIY Guide for A.O. Smith and Power Vent Models
Replacing a gas water heater looks tough, especially with brands like A.O. Smith and tricky power vents. You want hot water fast without causing a safety hazard.
This article walks you through the whole job. We will cover safety prep, tools you need, mounting the tank, hooking up gas and water lines, special venting for power models, and firing it up.
I fix these for a living and installed my own power vent unit. Do not skip the gas leak check with soapy water before you hit the ignition.
The DIY vs. Pro Verdict for Your Gas Water Heater
Let’s get straight to it. Installing a gas water heater is an 8 out of 10 on the DIY difficulty scale. The physical work isn’t the hardest part. The critical danger comes from the gas and combustion. A simple mistake here can lead to a fire, explosion, or carbon monoxide poisoning. Additionally, installation time can vary, a hidden factor from job to job. For many homes, venting and gas connections extend the timeline more than the physical work.
You can handle the heavy lifting and basic plumbing prep if you’re confident with tools. This includes turning off the gas and water, draining and disconnecting the old unit, moving it out, and placing the new one. Connecting the new water lines with flexible connectors or copper is also within reach for a skilled DIYer.
You must hire a licensed professional for the gas and venting work. This is not a suggestion. In nearly all jurisdictions, connecting the gas supply and installing the vent system legally requires a licensed plumber or gas fitter. They know the exact codes for drip legs, sediment traps, pipe sizing, and proper vent clearances. They will also test for leaks with a manometer, not just soapy water. The final permit inspection and sign-off must be done by them.
Think of the cost. Doing the prep work yourself might save you $500 to $1000 on labor. But if you botch the gas line and cause a leak, your homeowners insurance will likely deny any claim. Fines for unpermitted work can be steep. The financial and safety risk of DIY gas work is never worth the savings.
What You Need to Buy and Find Before You Start
Getting the right stuff and knowing the rules is 80% of the job.
Choosing the Right Size Gas Water Heater
Forget the tank size for a second. Look for the First Hour Rating (FHR) on the unit’s yellow energy guide label. This number tells you how many gallons of hot water it can deliver in one hour. Match this to your household’s peak morning demand. A family of four typically needs a 40-gallon or 50-gallon heater with a high FHR. That’s when you start thinking about the right water heater size capacity for your home. The upcoming steps will help you pick the exact capacity that fits your peak morning demand.
Atmospheric Vent vs. Power Vent Models
You need to know which one you have now to buy the right replacement.
Standard Atmospheric Vent heaters are common. They use a vertical metal flue pipe that relies on hot air naturally rising to vent outdoors. They must be installed in a space with ample combustion air and a perfectly drafted chimney. The new vent pipe must be the same size and type as the old one. Gas water heaters use various vent types, like direct-vent and power-vent. Each type has its own sizing and safety considerations.
Power Vent models (like many A.O. Smith units) use a fan to push exhaust out. This gives you flexibility, as you can vent horizontally through a sidewall with PVC pipe. The trade-off is they need a standard 120-volt electrical outlet nearby to power the fan. You cannot directly swap an atmospheric vent for a power vent without planning for this electrical requirement.
Tools You Will Need
- Two pipe wrenches (one to hold, one to turn)
- Adjustable wrenches
- Tubing cutter for copper (or a hacksaw)
- 4-foot level
- Gas leak detection solution (commercial spray, not dish soap)
- Voltage tester
- Pipe thread sealant or gas-rated Teflon tape (yellow)
- Hose for draining
- Bucket
Parts and Materials to Have Ready
- New flexible gas connector (often 1/2″ flare x 3/8″ NPT, 12″ or 24″ long).
- New water heater connector hoses (flexible corrugated copper or stainless steel braided).
- Dielectric unions or nipple kits if not using flex lines, to prevent corrosion.
- Vent pipe materials (type B double-wall for atmospheric, specific PVC for power vent) as needed to match existing system.
- Drip leg (sediment trap) for the gas line.
- Thread sealant.
- T&P valve discharge pipe (if replacing).
The Most Critical Step: Know Your Local Code
Before you buy a single part, call your local building department. Ask if a homeowner can pull a plumbing and gas permit for this work. Get a copy of the code they use (IPC or UPC). You are legally required to have a permit for a water heater replacement in almost every city and county. The inspection that follows is for your safety. Skipping this step can void your home’s insurance and create serious hazards. The pro you hire will handle this, which is another reason to use one.
Gas and Water Science: What’s Happening in the Tank
Think of the steel tank inside your water heater as a battery. Water wants to make it rust. To stop that, the tank needs a protector. That’s the anode rod.
The anode rod is a metal stick made of aluminum, magnesium, or zinc that screws into the top of your tank and sacrifices itself to corrosion so your tank doesn’t have to. Check it every three years. If it’s less than 1/2 inch thick, replace it. It’s the cheapest insurance for a long tank life. Frequency can vary based on water hardness and usage. A quick guide or your manual will show the right interval for your system.
Your water’s hardness is measured in Grains Per Gallon (GPG). One GPG equals a little pile of mineral grains in a gallon of water. If your water tests above 7 GPG, it’s hard.
Hard water is a heater killer. When you heat water, the minerals in it fall out of solution and turn to scale. This scale is your enemy. That buildup also harms heater efficiency, making the unit work harder and use more energy. Over time, it can raise energy bills and shorten the heater’s lifespan.
Scale coats the burner tubes, making the heater work harder, and it sinks to the bottom of the tank as sediment, which insulates the water from the flame and causes overheating. This wastes gas and cooks your tank from the inside out. A whole-home softener is the best fix, but yearly tank flushing is the bare minimum.
Burning gas makes three things: heat, water vapor, and carbon monoxide (CO). The heat warms your water. The other two need to get out of your house. That’s what the vent pipe does.
A proper vent uses the heat from the exhaust to create an upward draft, pulling all the combustion gases safely outside. If the vent is damaged, blocked, or improperly sized, that draft fails and deadly carbon monoxide can spill into your home. Water heaters can be a hidden source of carbon monoxide when venting fails. Regular maintenance helps reduce CO risks around your home water heater. Never mess with venting unless you’re certain. Install a CO detector in the same room as the heater.
Step-by-Step: How to Install Your Gas Water Heater
1. Safe Shutdown and Draining the Old Heater
Start by turning off the heater. Find the gas valve on the unit and turn it to the “OFF” position. Next, shut off the cold water supply valve feeding the heater.
Connect a standard garden hose to the drain valve at the base of the tank. Run the other end to a floor drain or outside. Before you open the drain valve, you must relieve the pressure inside the tank by opening a hot water faucet somewhere else in the house, like a bathroom sink. Now open the drain valve. Let it flow until empty.
2. Disconnecting and Removing the Old Unit
With a wrench, disconnect the water lines from the top of the heater. Have a bucket ready for leftover water. Use two wrenches on the gas line union-one to hold the stationary nut, one to turn the connecting nut-to avoid twisting the pipe. Disconnect the vent pipe from the draft hood.
The old heater will still have sediment and water inside, making it much heavier than it looks. Get a helper. Use a hand truck to move it carefully. Don’t damage your floor or walls.
3. Preparing the Location and Setting the New Unit
Clean the area. The new heater must sit level on a solid, non-combustible floor. If your floor is vinyl or wood, set the heater on a code-approved water heater pan. Roll the new unit into place. You have about one inch of play to get it perfectly level. Use shims under the pan if needed. A unit that isn’t level can cause improper burner operation and sediment buildup on one side of the tank.
4. Making the Water Connections
You have two main choices: flexible corrugated copper connectors or rigid copper pipe. Flex lines are faster and forgive minor misalignment. For a clean, professional look, I sweat copper.
Always install a new temperature and pressure relief valve in the designated port on the side of the tank. Run its discharge pipe down to within 6 inches of the floor. Connect the cold water inlet (marked with a blue tag) and the hot water outlet (red tag). Use pipe dope or Teflon tape on all threaded connections.
5. Connecting the Gas Line and Testing for Leaks
Apply pipe dope or Teflon tape made for gas to the threaded connections. Connect the gas line to the black iron pipe nipple on the heater’s gas valve. Tighten it firmly.
This is the most critical safety step. With the gas valve on the heater still in the “OFF” position, slowly turn the main gas supply back on. Mix dish soap with water in a spray bottle. Spray every single gas connection you touched-the union, the nipple, the valve inlet. Look closely for bubbles.
If you see bubbles, you have a leak. Tighten the connection slightly and test again. No bubbles means you’re safe. If you can’t stop the leak, turn off the gas and call a pro.
6. Installing the Vent Pipe (Atmospheric Vent Models)
Slide the draft hood over the flue collector on top of the heater. The vent pipe must be the same diameter as the draft hood outlet, usually 3 or 4 inches. Use single-wall galvanized or double-wall “B-vent” pipe as your local code requires.
Assemble the pipe sections so they slope upwards at least 1/4 inch per foot toward the chimney or exterior wall. Every horizontal joint must be secured with three sheet metal screws to prevent separation. The pipe must terminate properly outside, away from windows and soffits, to prevent exhaust gases from being pulled back in.
7. Special Requirements for Power Vent Water Heaters
Models like many A.O. Smith Power Vent units are different. They use a fan to push exhaust out through PVC pipe. This gives you more placement options, but adds steps.
You must have a dedicated, grounded 120-volt electrical outlet within the cord’s reach of the heater-you cannot use an extension cord. You’ll run specially certified PVC pipe (CPVC or PVC Schedule 40) for the vent and for bringing in combustion air. The lengths and number of elbows are strict; follow the manual’s table exactly.
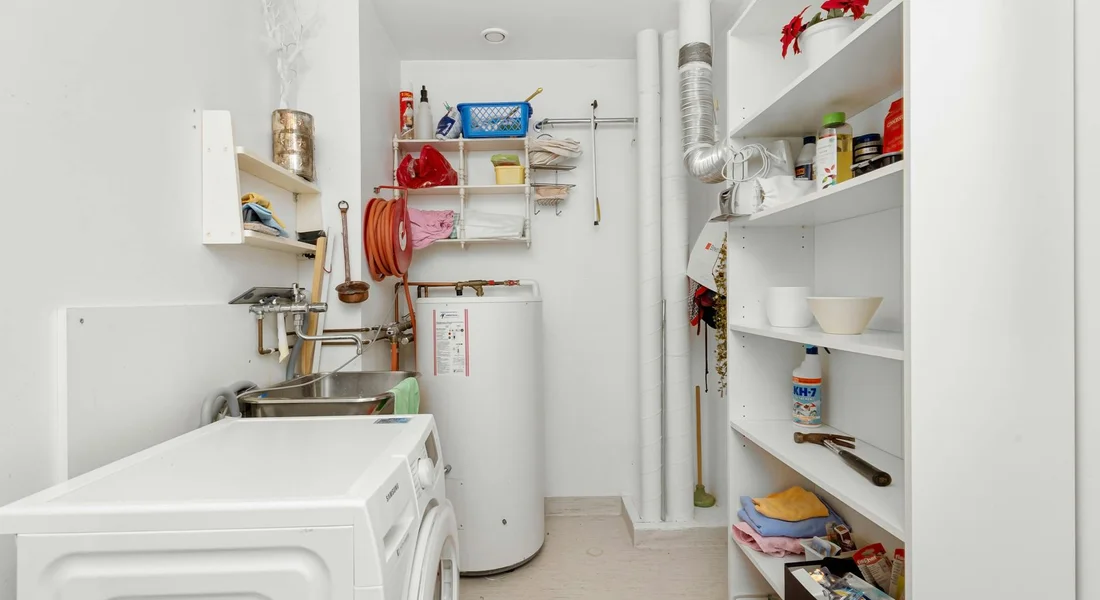
I installed one in my own basement utility room. The quiet hum of the fan is worth it for the placement flexibility, but getting the PVC slope right for condensation drainage took careful planning. The electrical connection is non-negotiable.
How to Turn On and Test Your New Gas Water Heater
Before you touch the gas valve, the tank must be full of water. An empty tank will burn out the heating elements in minutes. I learned that the hard way on an early service call.
Fill the Tank and Purge Air
- Ensure the tank’s drain valve on the bottom is fully closed.
- Open a hot water faucet somewhere in the house (like a bathroom sink). You’ll hear air hissing out.
- Slowly open the cold water supply valve on top of the heater all the way. Let water flow into the tank.
- Wait. When a steady stream of water (no more spitting air) comes from the open hot water faucet, the tank is full. Close the faucet.
Check all new plumbing connections for drips while the tank is pressurizing; a slow leak now is a flood later.
Light the Pilot on a Standard Model
This is for units with a manual gas control valve, usually labeled ON, OFF, and PILOT.
- Set the gas control knob to OFF. Wait five minutes for any residual gas to clear.
- Turn the knob to PILOT. Push it down firmly. This starts the gas flow to the pilot tube.
- While holding the knob down, press the igniter button repeatedly (or use a long lighter) until you see the pilot flame light through the viewport.
- Keep holding the knob down for 60 seconds after ignition, then release it. The pilot should stay lit.
- Turn the knob from PILOT to ON.
You’ll need to be bold and hold that knob down the full minute, or the thermocouple won’t heat up enough to keep the gas valve open. If the pilot goes out when you release, repeat the process, holding longer.
Turn On an A.O. Smith or Power Vent Model
Power vent units use a control board and an exhaust fan. There’s no pilot to light manually.
- Plug the unit’s power cord into a grounded outlet. You’ll hear the internal fan start.
- Locate the control panel. On most A.O. Smith models, press the POWER button once.
- The display will show codes or lights. A normal standby mode often shows a steady green light or a temperature readout.
- The control board will run a self-check. If all is well (proper water pressure, fan operation, no gas block), it will automatically open the gas valve and spark the igniter. You’ll hear the main burner whoosh on.
If the display shows an error code like “LO” (lockout) or “FF” (failure to ignite), the system has failed its safety check and will not turn on. You must address the underlying issue first.
Set the Temperature Safely
The factory setting is often too high. Scalding is a real risk.
- Find the temperature dial. On standard valves, it’s under a cover on the gas control. On power vent models, use the up/down buttons on the display.
- Set it to 120°F (49°C). This is hot enough for household use and slows mineral buildup in the tank.
- Wait at least an hour for the tank to fully heat, then test water temperature at a faucet farthest from the heater.
Setting the temperature to 120°F balances safety, efficiency, and helps prevent Legionella bacteria growth. Only go higher if a specific appliance like a dishwasher requires it.
Final Testing Checklist
Do not skip this. Walk through each point.
- Check for Water Leaks: Inspect the inlet/outlet connections, the drain valve, and the Temperature & Pressure (T&P) relief valve pipe. Feel for moisture.
- Confirm Proper Venting: On standard vents, hold a smoke match or incense near the draft hood. The smoke should be drawn up into the hood. On power vents, ensure the plastic vent pipe is secure and the fan runs quietly.
- Verify Burner Operation: Look at the flame through the viewport. It should be steady, blue, and mostly quiet. A flickering yellow or roaring orange flame is a problem.
The “Red Flag” Troubleshooting Guide for New Installations
Things go wrong. Here’s how to read the warning signs and what to do immediately.
Clear Danger Signs
- Smell of Gas (Rotten Eggs): This is an emergency. Do not flip switches. Shut everything down.
- Turn the gas control valve on the heater to OFF.
- Shut off the main gas supply valve to the heater.
- Extinguish any open flames.
- Ventilate the area.
- Call your gas company or a licensed plumber from outside the house.
- Yellow Burner Flame: Indicates incomplete combustion, producing carbon monoxide. Turn off the heater. The likely cause is a clogged air inlet or a problem with the burner assembly. This requires professional service.
- Soot Around the Vent: Another sign of poor combustion. Shut down the unit and check for a blocked vent pipe or a damaged heat exchanger.
- Pilot Won’t Stay Lit: On a standard model, this is almost always a bad thermocouple. It’s a $20 part, but replacing it requires disassembly of the burner assembly.
Common Water Issues
- No Hot Water: Confirm the gas is on and the pilot/main burner is lit. For power vents, check for error codes. If the burner is on but water is cold, you may have crossed the hot and cold water lines during installation.
- Inadequate Hot Water: The tank is likely too small for your demand, or the temperature is set too low. Verify it’s set to 120°F first. Also, a malfunctioning dip tube can send cold water to the top of the tank.
- Leaking T&P Valve: A small discharge during the first heat cycle is normal. Constant dripping or a steady stream means either the water pressure in your home is over 150 PSI, or the valve is faulty and needs replacement. Test your home’s water pressure with a gauge.
Power Vent-Specific Failures
- Fan Won’t Start: The unit will not ignite. Check that it’s plugged in. Listen for a hum. No power means the control board won’t start its sequence.
- Error Codes on Display: Consult your manual. Common ones:
- LO / LF: Ignition failure. Could be no gas, a blocked vent, or a faulty igniter.
- FF: Flame failure after ignition. Often a gas supply or flame sensor issue.
- CH: Overheating. Check for a closed water inlet valve or extremely high temperature setting.
- Ignition Failure (Clicking, No Flame): The system is trying but can’t light. Ensure the manual gas shutoff valve is fully open. The gas line may have air in it, which can take several ignition attempts to purge.
Keeping It Running: Your Gas Water Heater Maintenance Roadmap
Installation is just the first step. The real work is in the upkeep. A neglected water heater loses efficiency and dies young. Follow this straightforward schedule to get the longest, most trouble-free life from your unit.
Your Simple Annual Maintenance Checklist
Mark one day a year for this. I do mine every fall. Here’s the basic list.
- Drain the tank to flush out sediment.
- Test the Temperature & Pressure (T&P) Relief Valve.
- Check the area around the heater for flammable debris or obstructions.
- Listen for unusual noises (like rumbling) during heating cycles.
- Look for any signs of water on the floor or rust on the tank.
Sticking to a yearly routine is the single best way to prevent sudden failures and expensive repairs.
How and Why to Drain Sediment Yearly
Minerals in your water settle at the bottom of the tank. This sediment layer acts like an insulator between the burner and the water. Your heater works harder, your gas bill goes up, and that rumbling sound you hear is the sediment getting cooked. Draining removes it.
Here’s how to do it.
- Turn the gas control knob to the “Pilot” setting.
- Connect a standard garden hose to the tank’s drain valve. Run the other end to a floor drain, sink, or outside.
- Open a hot water faucet somewhere in the house (like a utility sink) to prevent a vacuum.
- Open the tank’s drain valve. Let it flow until the water runs clear, usually 2-5 gallons.
- Close the drain valve, remove the hose, and turn the gas back to its normal setting.
If only a trickle comes out, the valve is likely clogged with sediment. Gently poke a small wire or plastic pick into the valve opening to clear it, but be ready for a rush of water.
Checking the Anode Rod Every 3-5 Years
This is your tank’s secret weapon. The anode rod is a sacrificial metal rod that corrodes instead of your steel tank lining. Once it’s mostly gone, your tank starts to rust from the inside.
Check it every few years. You’ll need a 1-1/16″ socket and a long breaker bar or impact wrench.
- Shut off the gas and the cold water supply to the heater.
- Drain a few gallons of water (as described above) to lower the level below the top of the tank.
- Locate the anode rod’s hex head on the top of the tank. It’s often under a plastic cap.
- Loosen and remove the rod. It will be tight.
Inspect it. If the core wire is visible over much of its length or it’s less than 1/2 inch thick, replace it. If it’s coated in hard calcium, that’s normal; just clean it with a wire brush and reinstall it.
A new anode rod is far cheaper than a new water heater. Ignoring it is the most common reason for premature tank failure.
Testing the T&P Valve Annually
This is a critical safety device. If the tank pressure or temperature gets dangerously high, this valve opens to release water and prevent a potential explosion. It must work.
Testing is simple.
- Place a bucket under the discharge pipe connected to the valve.
- Lift the valve’s test lever all the way up for a few seconds.
You should hear a rush of hot water and steam into the bucket. When you release the lever, it should snap shut and stop the flow. If no water comes out, or if it continues to drip afterward, the valve is faulty and must be replaced immediately.
This is a non-negotiable safety check. A failed T&P valve is a hidden hazard in your home.
Recommended Products for Maintenance
Keep these items on hand to make jobs easier. You don’t need the premium version for basic upkeep.
- Anode Rods: Get a standard magnesium or aluminum rod that matches your tank’s thread size (usually 3/4″ NPT). Consider a powered anode if you have severe corrosion issues.
- T&P Valve Replacement Kits: These often include the valve and a new discharge pipe. Ensure the new valve has the same pressure and temperature rating (typically 150 PSI / 210°F) as the old one.
- Sediment Drain Hoses: A dedicated, reinforced 3/4″ garden hose. Leave it connected to the drain valve all year to make the annual flush a 30-second setup.
Common Questions
What is the single most important safety check after installing a gas water heater?
Before you even think about turning it on, you must test every new gas connection for leaks. With the heater’s gas valve OFF and the main supply ON, spray a commercial gas leak solution on all fittings. If you see any bubbles forming, tighten the connection and re-check; if it persists, shut off the gas and call a licensed professional immediately.
What’s the biggest practical difference between a standard and a power vent model?
The venting system. A standard atmospheric vent relies on natural draft and requires vertical metal piping. A power vent model uses a fan to push exhaust out, allowing you to use PVC pipe and vent horizontally through a sidewall, but it absolutely requires a nearby 120-volt electrical outlet to operate.
My new A.O. Smith power vent heater shows an error code and won’t start. What should I do first?
First, consult the manual for that specific code. Common codes like “LO” (lockout) or “FF” (ignition failure) mean the control board failed a safety check. Ensure the unit is plugged in, the gas supply valve is fully open, and the vent pipe is clear. If the code returns, the issue likely requires a pro.
Why does a power vent water heater need its own electrical outlet?
The exhaust fan is non-negotiable for safe operation. It must run before every ignition cycle to ensure proper venting. Using an extension cord is a fire hazard and against code. A dedicated, grounded outlet ensures the fan has consistent, reliable power to protect your home from combustion gases.
If I do the prep work myself, what part should I absolutely leave to a licensed pro?
Leave all gas and vent work to the licensed professional. This includes connecting the gas line, installing the drip leg, pressure-testing the system, and assembling the vent pipe to code. Their expertise and liability insurance are your guarantee against leaks, carbon monoxide hazards, and failed inspections.
Final Checklist Before Turning On Your Gas Water Heater
Before you ever light the pilot, your final job is to verify every connection is tight and correct. Start the water and inspect for leaks at every joint, then carefully check all gas fittings with soapy water for bubbles. If you detect any gas leaks, stop and address them before proceeding. Detecting and fixing gas water heater leaks now helps keep the unit safe when you start it. When you turn it on for the first time, listen carefully and smell the air around the unit to confirm it’s operating safely and smoothly.
Bob McArthur
Bob is a an HVAC and plumbing industry veteran. He has professionally helped homeowners resolve issues around water softeners, heaters and all things related to water systems and plumbing around their homes. His trusted advice has helped countless of his clients save time, money and effort in home water systems maintenance and he now here to help you and give you first hand actionable advice. In his spare time, Bob also reviews home water systems such as tankless heaters, water softeners etc and helps home owners make the best choice for their dwelling. He lives around the Detroit area and occasionally consults on residential and commercial projects. Feel free to reach out to him via the contact us form.