Shallow Well Jet Pumps Demystified: How They Get Your Water Out of the Ground
Your shallow well jet pump just lost prime or won’t build pressure, and you’re staring at a dry tap. Let’s cut through the confusion and get your water back.
We will cover the simple physics that pulls water up, the critical parts inside the pump, and how to spot and fix common failures.
I’ve torn down and rebuilt these pumps on my own property and on service calls for twenty years. Forget the fancy terms; if you understand suction, you can troubleshoot most problems.
The Simple Idea Behind a Jet Pump
Think of a jet pump as a machine that uses water to pull up more water. That might sound strange, but the concept is simple.
The core of how a shallow well jet pump works is using a fast-moving jet of water to create a powerful suction. It sends water down a pipe to create a vacuum that pulls well water back up.
You’ve seen this principle before. Put your thumb partly over the end of a garden hose. The water sprays out faster and farther, right? The jet in the pump does something similar, but instead of just spraying, that fast-moving stream is used to suck water from your well.
Don’t let the mechanics intimidate you. Once you see it, it makes perfect sense.
What is a Shallow Well Jet Pump, Anyway?
A shallow well jet pump is an above-ground pump designed to pull water from a well with a depth of 25 feet or less. It’s the unit you’ll see sitting in a basement, utility room, or well house.
You need to know how it differs from its cousins:
- Shallow Well Jet Pump: One pipe goes down into the well. It’s simple and common for older homes or cabins with shallow water tables.
- Deep Well Jet Pump: This is a type of pump for wells down to about 100 feet. It uses two pipes down the well. One sends water down, the other brings it up.
- Submersible Pump: The entire pump motor is underwater in the well. It pushes water up instead of pulling it. This is the standard for most modern, deep residential wells.
Are modern well pumps jet pumps? For new, deep wells, almost always no. Submersibles are quieter and more efficient for depths over 25 feet. But for shallow sources, repair projects, or budget setups, the shallow well jet pump is still a reliable, understandable workhorse. I keep one as a backup system for my garden. At greater depths, submersibles typically outperform jet pumps in depth efficiency while jet pumps lose efficiency as depth increases. This depth-efficiency comparison is what the next steps will explore.
How a Jet Pump Lifts Water from Your Well
Here’s the step-by-step of the suction process. The pump must first be primed, meaning its casing and the suction pipe are full of water.
- The electric motor spins an impeller inside the pump.
- The spinning impeller pushes water at high pressure into a narrow nozzle called a jet, located in the jet assembly.
- This high-speed jet of water shoots through a sealed chamber. As it speeds up, its pressure drops, creating a partial vacuum (this is the venturi effect).
- That vacuum has suction power. It pulls water from the well pipe into the chamber, where it mixes with the drive water.
- The combined water flow is then pushed by the impeller into your home’s pressure tank and plumbing lines.
The venturi effect is the magic, but all you need to know is that the fast water creates a suction that pulls the well water up. This method is powerful, but it has a physical limit. Atmospheric pressure can only support a suction lift of about 25 feet in perfect conditions. In the real world, with friction and imperfections, the practical limit for a shallow well jet pump is 25 feet from the pump to the water level. Go deeper than that, and you’re looking at a deep well jet pump (with the jet assembly in the well) or a submersible pump.
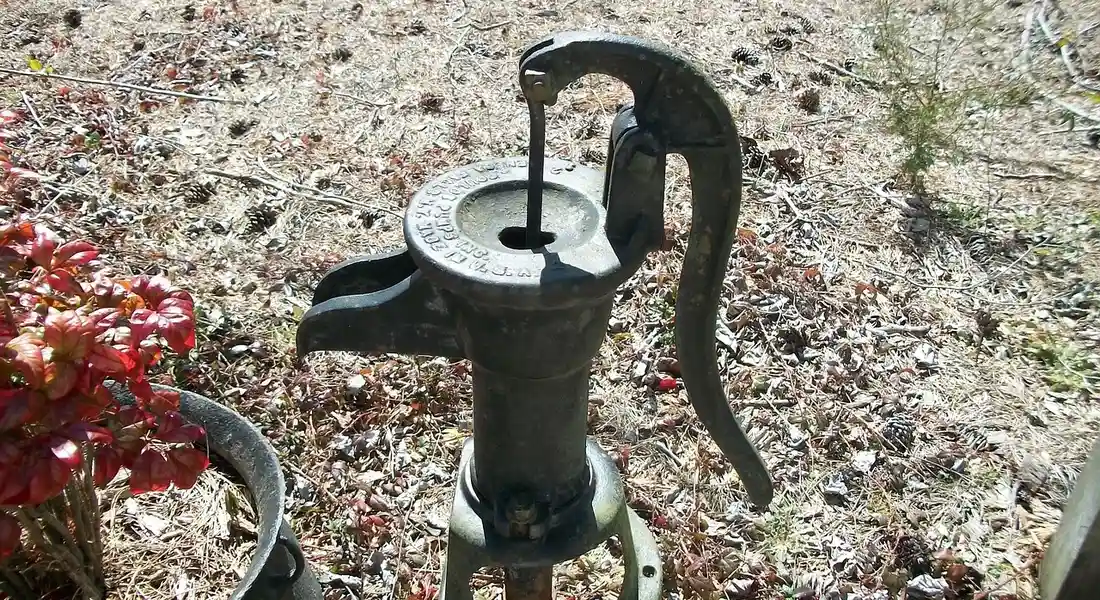
The Key Parts of Your Shallow Well Jet Pump
Knowing the main pieces helps you understand what’s happening when you hear a strange noise or lose pressure. Let’s look at what you can see and touch on a typical unit.
The Pump Motor and Impeller (The Heart)
The motor’s only job is to spin the impeller at a high speed. It’s a simple, single-speed induction motor.
The impeller is a disc with curved blades inside a sealed volute (a snail-shaped casing). When the impeller spins, its blades fling water outward, creating pressure that moves the water through the system. This is where all the motion happens. It’s also where most of the pump’s noise comes from, a distinct hum or grind you’ll learn to recognize. If the motor seizes or the impeller breaks, the heart stops. Keep the motor clean and ventilated.
The Jet Assembly and Venturi (The Magic Trick)
This is the component that makes it a “jet” pump. It’s often a brass or plastic fitting that bolts onto the pump housing.
The jet assembly contains the critical nozzle and venturi tube that create the suction lift. The nozzle focuses the water into a high-speed stream. The venturi tube is the wider chamber where that stream creates the vacuum to pull in well water. Because the nozzle is very small, it’s the most likely part to clog with sand, silt, or mineral scale. If your pump runs but won’t move water, a clogged jet is a prime suspect.
The Pressure Switch and Tank (The Brain and Buffer)
These two parts manage the pump’s workload and your water pressure.
The pressure switch is a small box with an electrical connection and a water line connection. It has an internal diaphragm that senses water pressure. When you use water and pressure drops to a preset low (like 40 PSI), the switch closes to turn the pump on. When pressure builds to a high setting (like 60 PSI), it opens to turn the pump off. If your pump short cycles or won’t start, check the switch first. If the settings seem off, adjust the pressure switch settings accordingly.
The pressure tank (usually a blue or gray tank) stores water under pressure. Its main job is to act as a buffer so the pump doesn’t have to start every time you open a faucet. It holds several gallons, allowing for small water uses without triggering the pump. This reduces wear and saves energy. We’ll cover later how the pressure tank works with the jet pump to give you steady water flow. Understanding this is part of the broader topic of residential water tank types and their purposes. Different tanks serve different roles, from buffering and steady flow to storage and backup water.
Installing Your Shallow Well Jet Pump
Getting your pump from the box to providing water is a methodical process. The steps are physically straightforward, but every connection must be perfect. A single air leak can stop the whole system. The core sequence is mount, plumb, wire, and prime. That last step, priming, is what makes a jet pump different from other pumps and is absolutely non-negotiable.
Gathering Your Tools and Choosing a Location
Start with the right gear. You do not need specialty tools. Your basic plumbing kit will cover it.
- Two pipe wrenches (one to hold, one to turn)
- Adjustable wrenches
- Teflon tape (for all threaded connections)
- Hose clamps
- A short length of garden hose for priming
- A bucket and clean water for priming
- A level
- Wire strippers and electrical tape for the final connection
Now, pick your spot. You want a dry, protected location like a basement, utility room, or a dedicated pump house. It must stay above freezing. Ensure there’s enough space around it for air flow and future service. Bolt it securely to a solid floor or a heavy board to minimize vibration.
If you’re asking, “do they make a quiet shallow well jet pump?” the answer is about setup, not a special model. All pumps with a spinning motor make noise. You can dampen it significantly by mounting it on a rubber mat, securing all pipes so they don’t rattle, and placing it in an enclosed space. The motor housing is just a metal shell, it’s your installation that controls the sound.
The Critical Steps: Piping, Wiring, and Priming
Follow this order. Do not skip ahead. Double-check every thread for Teflon tape before you tighten.
- Mount the Pump. Secure it to your prepared base. Use a level to make sure it’s sitting square.
- Connect the Suction Pipe. This is the pipe that goes down into the well. Use the correct size pipe (usually 1 1/4″). Apply Teflon tape generously to all threads. The connection at the pump’s suction port must be 100% air tight. A leak here means the pump can never pull water up.
- Connect the Discharge Pipe. This is the high-pressure pipe that sends water to your pressure tank and house. Install a union fitting near the pump outlet. This lets you remove the pump later without cutting pipe. Install the pressure switch and pressure gauge on this line as per the manual.
- Wire the Pump. Connect the pump wires to the pressure switch, and run the supply wires from the switch to your dedicated electrical circuit. This is where you stop if you’re not comfortable with electrical work. All connections must be tight and protected in a proper electrical box.
- The Essential Prime. Before you ever hit the power, the pump must be full of water. Find the priming plug on the pump housing (it looks like a large pipe plug). Open it. Using your hose and bucket, pour clean water into the pump until it overflows from the plug hole. Quickly replace and tighten the plug. If you don’t prime it, the pump will just spin dry, overheat, and burn out in minutes.
DIY vs. Pro Verdict: When to Call for Help
I rate this a 6 out of 10 for difficulty. The mechanical parts are simple, but the margin for error is small.
A confident DIYer with experience soldering or threading pipe can handle:
- Mounting the pump unit.
- Connecting pre-measured and cut pipe runs.
- Wiring the pump to an existing, nearby, and correctly sized outlet or disconnect.
- Performing the initial prime and startup test.
You need to call a licensed professional for three specific things: running a new electrical circuit from your panel, pulling and resealing the well cap or seal at the wellhead, or if you suspect your well’s water yield is too low for the pump. If you’re unsure who to call for well pump service, start by seeking licensed local technicians. These jobs require permits, specialized tools, and carry real risk. It’s cheaper to hire this out than to fix a mistake.
Keeping Your Jet Pump Running Smoothly
Think of maintenance as cheap insurance. Ten minutes of attention a few times a year can prevent a weekend of panic and a thousand-dollar repair. A jet pump system is simple, so the checks are simple too.
Simple Monthly and Annual Checkups
What maintenance does a shallow well jet pump require? Not much, but be consistent.
Every month, just listen. When the pump kicks on, the sound should be a steady hum. Any new grinding, screeching, or banging is a red flag. Do a visual scan for any moisture or leaks at the pipe connections and the pump seals.
Once a year, do a full check:
- Test the Pressure Switch: Listen for the click when the pump turns on and off. The cut-on pressure is usually 30-40 PSI, and cut-off is 50-60 PSI. Watch your pressure gauge to confirm.
- Check the Pressure Tank: Shut off the pump, drain all water pressure from the system, and check the tank’s air charge with a tire gauge. It should be 2 PSI below the pump’s cut-on pressure. If there’s no air or it’s full of water (you’ll hear a solid thud, not a hollow sound), the tank’s bladder is shot.
- Inspect the Prime: If you have to add water to the priming port more than once a year, you have a small air leak to find.
The Red Flag Troubleshooting Guide
When your water acts up, compare it to this list. These symptoms mean stop what you’re doing and investigate.
- Pump runs but delivers no water. You lost prime, have a clogged foot valve in the well, or a major suction line leak.
- Pump cycles on and off rapidly (every few seconds). This is called “short cycling.” Your pressure tank is waterlogged and needs replacement, or the pressure switch is failing.
- Noticeable drop in water pressure throughout the house. The pump impeller or jet assembly could be worn out, or the pressure setting has drifted low.
- Pump motor hums but won’t start. The motor capacitor might be dead, or the pump shaft is seized from sediment or burnout.
Fixing Common Problems: Prime, Pressure, and Power
Always diagnose in this order. It’s the fastest way to the fix.
1. Check Power First. Is the breaker tripped? Is the pressure switch getting power? Use a multimeter to verify 120V or 240V at the switch terminals.
2. Restore the Prime. If you have no water, this is the most likely culprit. Follow the same priming procedure as initial installation. If you have to re-prime constantly, the leak is in the suction line, foot valve, or well seal.
3. Adjust or Replace the Pressure Switch. If the pump is short-cycling but the tank is good, the switch needs attention. You can adjust the cut-on and cut-off pressures by turning the nuts on the large spring inside the switch. Turn the big nut for the overall range, the small nut for the differential. If that doesn’t work, the switch contacts are pitted. Replace the whole switch, they cost under $30. Shut off all power before you touch it.
How the Pressure Tank Works with Your Jet Pump

Think of your pressure tank and jet pump as a team. If the pump is the heart, the tank is the lungs. One moves the water, the other stores the energy. More pump problems start in the tank than you might think.
Imagine a water balloon inside a closed metal tank. The air pressure in the tank squeezes the balloon. When your pump fills the balloon (the actual rubber bladder inside the tank), it compresses the air around it. This stored, pressurized water is what comes out of your faucet first.
The Tank’s Job: More Than Just Storage
A tank is not a simple holding bucket. Its main job is to prevent the pump from cycling on and off every time you use a cup of water.
When you open a tap, the compressed air pushes water from the bladder into your pipes. The pump stays off. Only after you’ve used enough water and the pressure drops to a preset low point (like 30 or 40 psi) does the pump kick on to refill the bladder and recharge the air pressure.
This cycle control is what saves your pump motor from an early death.
Starting a motor is the hardest part of its job. Letting it run for a solid minute to fill the tank is much easier on it than starting and stopping 50 times a day.
Checking and Adjusting the Tank’s Air Charge
This is the most critical maintenance step for your entire system. You need a standard tire pressure gauge.
- Turn off the pump’s power at the breaker.
- Open a faucet to drain all water pressure from the pipes and tank. Let it run until no more water comes out.
- Find the tank’s air valve Schrader core (it looks exactly like a tire valve).
- Press your tire gauge onto the valve and get a reading.
Here is the rule. The air pressure in the empty tank must be set to 2 psi below your pump’s cut in pressure.
If your pump turns on at 30 psi, your tank’s air charge should be 28 psi. If it cuts in at 40 psi, set the air to 38 psi. Use a bike pump or small air compressor to adjust it.
A waterlogged tank, where the bladder is ruptured and full of water, will destroy a jet pump fast.
The pump will short cycle, turning on and off every few seconds, because there’s no air cushion. You will hear this rapid clicking. The motor will overheat and fail. If your tank feels completely heavy and full of water when drained, the tank is bad.
Recommended Products for Your Well System
You can make a jet pump system more reliable and last longer with a few smart additions. Focus on protection and information.
Essential Add Ons: Filters and Gauges
Install a big sediment filter housing right after the pressure tank. Use a 20-inch or 4.5-inch x 20-inch cartridge style housing. This is your pump’s first line of defense.
A pleated sediment filter catches sand and grit before it can wear out the jet assembly’s tiny nozzle and venturi.
That abrasive material is what eventually causes a loss of pressure and prime. I use a clear housing on my own system so I can see when the filter is dirty.
Also, install a simple pressure gauge on a tee fitting. A $15 gauge lets you see your system’s actual pressure at a glance. Is it struggling to reach the cut off point? Is it short cycling? The gauge tells you instantly instead of guessing.
People ask if companies still use jet pumps. They do, especially for shallow wells. The key is often pairing them with robust pre filtration to handle sandy conditions, particularly for shallow well applications.
Considering Your Next Pump
Your jet pump wears out. When it does, you have a choice. Stick with a jet pump or switch to a submersible.
For a reliable shallow well under 25 feet deep, a modern convertible jet pump is a great choice. New models are quieter and more efficient than old ones. They are also easier for a homeowner to service above ground. When considering well water pump types selection, the well depth and yield help guide the best pump choices. This ensures you pick a model that fits your needs and maintenance preferences.
Choose a submersible pump if your well is deeper than 25 feet or if you want the pump noise completely out of the house. Submersibles push water, which is more efficient for depth, but they require pulling the entire pump from the well for any service. Depth directly influences the flow and pressure a submersible well pump can deliver. Matching the pump to your well depth and desired flow helps ensure consistent performance and efficiency.
If your water level is deep, you will need to understand how a deep well jet pump works with two pipes down the well. That is the next step in well water mechanics.
Quick Answers
What is the practical depth limit for a shallow well jet pump?
The absolute maximum is 25 feet from the pump to the water level. In reality, aim for less. Beyond this, atmospheric pressure can’t support the suction lift, and the pump will lose prime or fail to draw water, requiring a different system.
What’s the real difference between a shallow well and a deep well jet pump?
A shallow well pump has one pipe going down and houses all its parts above ground. A deep well jet pump uses two pipes and places the jet assembly down in the well to overcome greater depths. If your water level is deeper than 25 feet, you need the deep well type.
What’s the single most important annual maintenance task?
Check the air charge in your pressure tank. A waterlogged tank causes rapid pump cycling, which burns out the motor. Shut off the pump, drain the system, and use a tire gauge to ensure the tank’s air pressure is 2 PSI below your pump’s cut-on pressure.
How do I safely prime the pump if I lose all water?
First, cut power to the pump. Locate the priming plug, fill the pump casing completely with clean water until it overflows, and quickly reseal it. Never let the pump run dry; without water for cooling and lubrication, it will overheat and seize in minutes.
My pump is short-cycling (rapid on/off). What’s the first thing to check?
Your pressure tank is almost certainly waterlogged. Drain the system completely and check the tank’s air charge. If it reads 0 PSI or you hear a solid thud instead of a hollow sound when tapped, the internal bladder has failed and the tank must be replaced.
Essential Pump Care for Homeowners
Always remember that a shallow well jet pump relies on a sealed suction line and a clean jet assembly to pull water efficiently. Make it a routine to check for air leaks and listen for sputtering sounds, as these are your first signs to take action.
Bob is a an HVAC and plumbing industry veteran. He has professionally helped homeowners resolve issues around water softeners, heaters and all things related to water systems and plumbing around their homes. His trusted advice has helped countless of his clients save time, money and effort in home water systems maintenance and he now here to help you and give you first hand actionable advice. In his spare time, Bob also reviews home water systems such as tankless heaters, water softeners etc and helps home owners make the best choice for their dwelling. He lives around the Detroit area and occasionally consults on residential and commercial projects. Feel free to reach out to him via the contact us form.