Winter Sump Pump Guide: How It Works and What It Needs
Worried your sump pump might freeze up and fail? You should be. A cold snap can turn a reliable pump into a basement flood in hours.
We will cover how a sump pump operates in winter, its specific needs in the cold, and the maintenance steps to keep it running.
I’ve serviced these systems for years. The main takeaway: a frozen discharge line is your biggest winter enemy.
Why Your Sump Pump Doesn’t Get a Winter Break
Many homeowners think their sump pump is a springtime tool. That’s a dangerous assumption. Your basement doesn’t care what season it is, especially during hurricane season.
Water finds a way in year-round. Here’s where it comes from in the cold months:
- Snowmelt from your foundation. Even in freezing air, heat from your house can melt snow right against the basement walls. That water runs down into the ground and heads for your sump pit.
- Rain on thawed ground. A winter warm spell can thaw the top layer of soil. If it rains, that ground can’t absorb the water, so it becomes runoff that seeks your foundation.
- A high water table. If the water table under your home is naturally high, it stays high. It doesn’t magically drop because it’s January.
- Household drainage. This is a big one. Your water softener regenerates and discharges brine. Your furnace condensate line produces water. These appliances drain into your sump pit all winter long, keeping the pump active.
The core risk is simple: a pump that activates against a frozen or blocked discharge line will burn its motor out trying to push water that has nowhere to go, or it will simply fail and let your basement flood. Winter doesn’t give your pump a break, so you can’t give its maintenance a break either.
Where and How Your Sump Pump Can Freeze
Freezing doesn’t happen in the warm pit. It happens in the pipes outside your home’s insulation. Two spots are critical.
The Discharge Pipe
This is the pipe that carries water from the pump, through your basement wall, and away from your house. After every pump cycle, a small amount of water remains in the section of pipe outside. When the temperature drops, that trapped water freezes and expands.
Think of it like a clogged artery. The first freeze creates an ice plug. The next time the pump runs, it hits this solid block. The water has no exit.
The Check Valve
This one-way valve is installed in the discharge pipe inside your basement, usually just above the pit. Its job is to stop pumped water from flowing back down into the pit after the pump shuts off. If this valve freezes in the open position, it can fail to seal, allowing water to backflow into the pit and trigger the pump to run again in a short, destructive cycle. If it freezes shut, the pump cannot push water out at all.
Several factors make freezing more likely:
- Pipe Material: Corrugated plastic pipe is common but risky. Its ribbed interior holds more residual water and is more prone to freezing solid than smooth PVC pipe.
- Exposure: A long horizontal run of pipe above ground before it drains is a huge target for cold air.
- Lack of Slope: The discharge pipe must slope continuously down from the house so water drains out completely. Any low spots or sags will pool water and guarantee an ice block.
Your goal is to get every drop of water out of that exit pipeline after each cycle. Any water left behind is a problem waiting to freeze, especially in RV water lines.
Your Pre-Winter Sump Pump Action Plan
Treat this like your furnace check. Do it before the ground freezes. The goal is simple: make sure water flows into the pit, gets pumped out, and can leave your property without freezing solid. Follow these steps in order.
- Inspect and clean the pump and pit.
- Winterize the discharge line. This is critical.
- Verify your backup power source works.
Step 1: The Inspection and Cleanout
Start with safety. Unplug the pump from the wall outlet. You are reaching into water and electrical equipment.
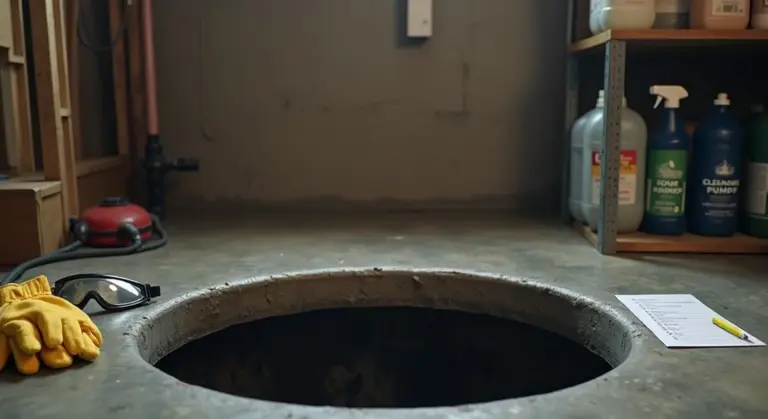
Reach into the sump pit and pull out any debris. You are looking for small rocks, silt, and sand. This grit wears down the pump’s impeller. While you are in there, feel for the bottom of the pump to ensure it is sitting level and not buried in muck.
Find the pump’s inlet screen, usually near the base. Clear any clinging sediment. Then, manually lift the float arm or ball. It should move up and down freely without catching on the pit wall or the discharge pipe. A stuck float means a pump that won’t turn on.
Plug the pump back in. Now, test it. Slowly pour a 5-gallon bucket of water into the pit. Watch the float rise. The pump should kick on before the water reaches the top of the pit and run until the water level drops significantly. Listen for smooth operation, not grinding.
Step 2: Discharge Line Winter Prep
This step prevents 90% of winter sump pump failures. A frozen or blocked discharge line turns your pump into a useless mixer, recirculating water back into your basement. Prevent, thaw, and repair frozen sump pumps to ensure reliable operation.
First, check the outside slope. The pipe must run downhill from your house foundation to the outlet. Any dips or sags will trap water and freeze. Standing water in the pipe is your enemy; it needs to drain completely after each pump cycle.
If you have a removable hose, disconnect it. Drain all the water out and store it indoors for the winter. For permanent PVC pipes, you have two main options.
Install a freeze-proof discharge kit, often called an “ice guard.” This is a specialized one-way valve that installs where the pipe exits your house. It lets water push out but prevents cold air from coming back in, so the pipe stays empty and can’t freeze. This is one option within frozen pipes prevention solutions. Other steps, such as insulation and heat tracing, can further protect your pipes.
For pipes in vulnerable, unheated spaces (like a crawlspace), wrap them with UL-listed heat tape (pipe heating cable). Follow the manufacturer’s instructions exactly. Never overlap the tape on itself, and plug it into a GFCI outlet. Insulate over the top of the heat tape with foam pipe sleeves.
Never, ever pour automotive antifreeze into your sump pit or discharge line. It is toxic and contaminates groundwater. The only safe product is non-toxic, propylene glycol-based sump pump antifreeze, and you only need it if your pit and drain tile cannot fully drain, leaving standing water that could freeze and trap the pump. Beyond antifreeze, there are approved sump pump maintenance chemicals designed to keep the system clean and running smoothly when used as directed. We’ll point you to safe options and usage guidelines in the next steps.
Step 3: Backup Power Check
A winter storm often means a power outage. Your primary pump is just a paperweight without electricity.
If you have a battery backup system, press the test button now. It should switch to battery power and run the pump. For systems with serviceable batteries (like golf cart or marine batteries), check the water levels in each cell and top them off with distilled water if needed. Most backup batteries need replacement every 3-5 years, so note the install date.
Consider a water-powered backup pump. It uses your home’s municipal water pressure to create suction and pump water, no electricity required. It’s a great cold-weather option, but you must check with your local code authority first, as they are not allowed everywhere.
Tools & Materials You’ll Need
Gather these items before you start. You probably have most of them.
- 5-gallon bucket (for the water test)
- Garden hose (to flush the pit if very dirty)
- Screwdriver (for hose clamps or access panels)
- Pipe insulation (foam sleeves or tubular wrap)
- Heat tape (only if your pipe run is prone to freezing)
- Sump pump antifreeze (non-toxic, propylene glycol type)
- Plumber’s tape (Teflon tape, for resealing threaded connections)
For pipe insulation, you have a simple choice. Foam sleeves are split lengthwise; you just snap them over the pipe. They are great for straight runs. Tubular wrap is a foam or fiberglass tape you spiral around the pipe, which is better for covering valves, elbows, or pipes already wrapped with heat tape.
Ongoing Winter Vigilance and Troubleshooting
Your job isn’t done after fall prep. Winter demands a watchful eye. You need to monitor two main areas: the discharge point and the pump’s activity.
After every major snowmelt or heavy winter rain, take two minutes to walk your discharge line’s path. Look for ice dams or any new blockage where water exits. Listen for unusual pump behavior, like constant running or rapid cycling, which is your first clue something’s wrong. A quick visual check of the pit for debris and a test of the pump by pouring in a bucket of water every few weeks will keep you ahead of most problems.
The Red Flag Guide: Signs of a Winter Problem
Your pump will tell you when it’s in trouble. Learn its language.
- The pump runs but no water comes out the discharge end. This is a classic sign of a frozen pipe. The impeller is churning against a solid ice plug, which can burn out the motor quickly.
- The pump cycles on and off very rapidly. A frozen or stuck-open check valve is often the culprit. Water flows back into the pit immediately after the pump shuts off, triggering it to start again in a useless, damaging loop.
- You hear the pump motor humming but it doesn’t start. The impeller is likely frozen to the pump’s volute casing. The motor is trying to turn but can’t. Unplug it immediately to prevent burnout.
- Visible ice forming on or around the discharge pipe where it exits the wall. This is a direct warning that the pipe’s slope is insufficient or the exit is in a shaded, cold spot. It will freeze shut completely if not addressed.
How to Thaw a Frozen Discharge Pipe
If you face a frozen pipe, stay calm and work safely. Do not let the pump run against the ice.
- Unplug the sump pump from its electrical outlet. This is non-negotiable for safety.
- Locate the frozen section, usually where the pipe exits the house or at a sagging low point.
- Use a standard hair dryer or a heat gun on its lowest setting. Start applying heat at the exterior opening of the pipe, slowly working your way back toward the house. Never use a propane torch or open flame, as it can melt PVC piping and is a major fire hazard.
- As the ice melts, you may hear water start to trickle. Keep the heat moving until full flow is restored.
- Once thawed, plug the pump back in and test it. Verify water flows freely all the way to the discharge point. This is the time to re-check the pipe’s slope and add more insulation or heat tape to prevent an immediate re-freeze.
DIY Difficulty Rating: When to Call a Pro
Be honest with yourself about your skills and local codes. Getting in over your head can cause flooding or code violations.
Rating: 2/10 (Easy) This covers basic winter tasks. Inspecting the pit, cleaning the grate, testing the pump by pouring water in, and wrapping exposed pipes with foam insulation sleeves. Any homeowner can and should do this.
Rating: 6/10 (Moderate) This is for more involved installations. Running a new discharge line, installing a proprietary freeze-proof outlet kit, or properly applying waterproof heat tape and thermostat. These jobs require drilling through siding, sealing openings against moisture, and understanding basic electrical connections. If you’re not comfortable with that, stop here.
Call a licensed plumber for:
- Any electrical issue with the pump or its dedicated outlet.
- Re-grading a permanent, buried discharge pipe to fix a chronic freezing point.
- Connecting or servicing a water-powered backup pump, as it ties directly into your home’s main water line and pressure.
Improper discharge that floods a neighbor’s property or a public sidewalk can get you a fine. A pro knows the local plumbing code for discharge distance and termination, which protects you from liability.
Your Sump Pump’s Year-Round Maintenance Roadmap
Treat your sump pump like a teammate. You wouldn’t ask a teammate to run a marathon without checking their shoes first. A simple, seasonal schedule keeps it ready for any challenge. Make a habit of often testing your sump pump to confirm it responds when water rises. A quick test now can prevent bigger problems later.
Spring: The Full Shakedown
Once the thaw is over and things are dry, give your pump a complete physical. This is the best time for the messy work, especially after winterizing your well pump and water system.
- Test it under load. Don’t just listen for the hum. Pour at least 5 gallons of water into the pit until the float triggers the pump. Watch it move water out of the discharge line. The pump should start automatically, run until the water is low, and shut off cleanly.
- Clean the pit completely. Unplug the pump first. Scoop out any gravel, silt, or debris. A shop-vac works great for the final cleanout. This prevents clogs and helps the float move freely.
- Inspect the power cord for any fraying or damage. Make sure the grounded plug is secure in its outlet.
Fall: The Pre-Winter Checklist
This is your critical cold-weather prep. A frozen or blocked pump can’t do its job, turning your basement into a wading pool.
- Trace and clear the entire discharge line. Follow the pipe from the pump to where it ends outside. Remove any leaves, dirt, or rodent nests from the opening. Ensure the water can exit far away from your home’s foundation.
- Check for a buried discharge line. If your line runs underground and pops up in your yard, it can freeze shut. Before winter, disconnect and bypass this buried section if possible, letting water discharge directly from a visible above-ground pipe. Just remember to reconnect it in the spring.
- Test the battery backup like your basement depends on it. Unplug the main pump from the wall to simulate a power outage. The battery system should kick in immediately and pump water. If it’s weak or dead, replace the battery. A backup battery typically lasts 3 to 5 years.
- Ensure the discharge line has a slight downward slope all the way to the exit. Any low spots can trap water that will freeze and create a blockage.
Every 2-3 Years: The Professional Eye
Some parts wear out from constant use and need a trained look. Consider hiring a pro to inspect the internal check valve and the pump impeller. A worn check valve lets water flow back into the pit, making the pump work harder every cycle. A damaged impeller reduces pumping power. They can spot issues you might miss and often prevent a total pump failure during the next big storm.
Knowing When It’s Time to Replace
Pumps don’t last forever. The average primary sump pump gives you 7 to 10 years of service. If yours is older, cycles on and off constantly, runs for very long periods, or makes new grinding noises, it’s likely retiring. Pair a new pump with a fresh battery for your backup system. Replacing an aging pump before it fails is always cheaper than repairing water damage.
Common Questions
Can my sump pump really freeze if it’s inside my warm basement?
The pump itself in the pit is safe. The danger is in the discharge pipe and check valve located outside your home’s insulation. Water trapped there after a cycle will freeze solid, creating a block.
What’s the single most important winter maintenance task?
Ensuring your discharge pipe is completely empty after every pump cycle. This means checking its slope for proper drainage and protecting it with a freeze-proof outlet or insulation. A dry pipe can’t freeze shut.
Is it safe to use regular automotive antifreeze?
Absolutely not. It is toxic and contaminates groundwater. The only safe product is a non-toxic, propylene glycol-based sump pump antifreeze, and it’s only needed in specific cases where standing water in the pit or tiles cannot drain.
How often should I test my battery backup in winter?
Test it monthly during cold months. Press the test button to confirm it switches on and runs the pump. A backup is useless if the battery is dead when a winter power outage hits.
What should I do the moment I suspect my discharge line is frozen?
Immediately unplug the pump to prevent motor burnout. Then, carefully thaw the pipe using a hair dryer, starting at the exterior outlet. Never let the pump run against an ice plug or use an open flame.
Keeping Your Sump Pump Running in Freezing Weather
The single most important thing you can do is stop the pump and discharge line from freezing solid. Disconnect that outdoor hose, insulate exposed pipes, and verify your discharge point allows water to flow away without pooling. Before any major winter storm or thaw, always check that your pump is plugged in, the pit is clear, and the float moves without any obstructions. Taking these steps will help prevent freezing damage to your well pump.
Bob McArthur
Bob is a an HVAC and plumbing industry veteran. He has professionally helped homeowners resolve issues around water softeners, heaters and all things related to water systems and plumbing around their homes. His trusted advice has helped countless of his clients save time, money and effort in home water systems maintenance and he now here to help you and give you first hand actionable advice. In his spare time, Bob also reviews home water systems such as tankless heaters, water softeners etc and helps home owners make the best choice for their dwelling. He lives around the Detroit area and occasionally consults on residential and commercial projects. Feel free to reach out to him via the contact us form.