Well Pump Freezing: Stop It Before It Stops Your Water
Your well pump freezing up is a fast track to no water and a big repair bill. I’ve pulled cracked pumps out of icy wells, and you don’t want that headache.
This article gives you the straight talk on proven prevention tricks, the specific damages to expect, and what to do right now if you’re worried.
I’ve been installing and fixing these systems for two decades. My own submersible pump sits 150 feet down, and I still check the above-ground wiring pit every fall. Get your insulation done before the first hard frost, no excuses.
Why You Can’t Ignore a Frozen Well Pump
Your water stops in January. This is not a minor hassle. It is a household emergency. Without water, you cannot cook, clean, or use the bathroom. Your heating system that relies on water could shut down. A frozen well pump means you are instantly back to pioneer living, and in the cold.
The problem splits into two costly headaches: wrecking your equipment and paralyzing your home. First, ice physically destroys pipes and components. The repair bill can hit thousands. Second, the disruption forces you out of your house until it’s fixed. You pay for lodging, meals, and lost time.
This risk applies to every type of pump. Submersible pumps deep in the well, shallow or deep jet pumps in the basement, even old hand pumps. They all connect to pipes that bring water into your house. Those pipes are the weak link when the temperature plummets.
How a Well Pump Actually Freezes: It’s Not Just the Pump
Let’s clear this up right now. A submersible well pump, the motor and impellers, sits hundreds of feet down. Ground temperature there is a steady 50 degrees or so. It will not freeze. The real danger is everything between that pump and your faucet, where cold air can reach. You are protecting the delivery system, not the pump itself. To guard against freeze damage, shield the above-ground components and pipes from cold air. Simple steps like insulating the well cap and keeping exterior piping warm can help protect the pump.
The Vulnerable Points in Your System
Cold attacks specific spots. You need to know where to look.
- The Drop Pipe: This is the pipe running up the well casing from the pump to the ground level. The top several feet, just before it exits the casing, can freeze if not deep enough.
- The Pitless Adapter: This fitting is the underground elbow where the drop pipe turns to run horizontally to your house. It’s often the shallowest point in the system. If installed above the frost line, it freezes solid.
- The Pressure Tank and Switches: These are usually in a basement, garage, or crawlspace. If that space gets below freezing, the water inside the tank and the small pipes on the switch can ice up.
- Exposed Plumbing Lines: Any pipe running through an unheated crawlspace, attic, or along an exterior wall is a prime target for freezing.
The Simple Science of the Problem
Water expands when it turns to ice. This is not a gentle process. In a confined space like a pipe or a valve, the expanding ice creates tremendous force. That force has only two outcomes: it either finds a weak spot to burst open, or it seizes moving parts permanently. Plastic cracks. Brass fittings split. Even copper can rupture. A pressure switch diaphragm can be destroyed. Once thawed, the broken part floods your mechanical room.
Direct Answers to Your Questions
Can a submersible well pump freeze? The pump unit itself, no. But the water inside the pipes connected to it absolutely can. When those pipes freeze, your pump cannot move water to your house. The effect is the same: you have no water, and you likely have a large repair waiting for the thaw. To prevent this, winterize your well pump and water system before the cold snaps hit. A quick winterization keeps the water flowing and can save you a big repair bill later.
Can cold weather affect well water pressure? Yes, dramatically. Before a full freeze, you might see sputtering faucets or a drop in pressure. This is a major warning sign. It means ice is forming inside the line, restricting flow. If you notice this, you must act immediately to add heat to the vulnerable areas before the line seals shut completely.
Your Winter Defense Plan: Prevention by Pump Type

This is not a complex engineering project. Think of it as a checklist of straightforward tasks. Your approach changes based on what kind of pump you have, so start by knowing your system. Next, a step-by-step sump pump installation guide will walk you through the process. It will help you apply these tasks with confidence.
Protecting a Submersible Pump System
A submersible pump sits deep in the well, safe from freezing. The danger points are above ground. You need to protect the well head, the pitless adapter, and the pipe run into your house.
Your main job is to insulate the well casing where it exits the ground. The pitless adapter connection is inside this casing and is the most common freeze point for these systems.
- Buy a pre-formed well casing insulation cover, or use a large foam pipe sleeve slit lengthwise.
- Wrap the exposed well casing (the 6- to 12-inch pipe sticking from the ground) tightly.
- Seal the seam with waterproof foil tape or heavy-duty zip ties. Make sure the cover extends down to the soil line.
- For extra security in severe climates, place a insulated bucket or trash can over the entire insulated casing.
The buried discharge line running to your house should already be below your local frost line. If you’re having freeze issues at the house entry point, that’s a separate insulation project for the basement or crawlspace piping.
Winterizing a Jet Pump (Above-Ground)
A jet pump system is the most vulnerable to freezing. The pump, pressure tank, and all pipes are often in an unheated space like a basement corner, garage, or well house. Shallow well jet pumps work by drawing water from a shallow source using a jet. The intake and piping are exposed to cold, increasing freezing risk.
These components are full of water and will burst if they freeze, making them your top priority.
If the space is lightly heated, add insulation and a safe heat source.
- Wrap all pipes, including the pressure switch, with foam pipe insulation.
- Install thermostat-controlled heat tape on the water line between the pump and the pressure tank. Follow the manufacturer’s instructions exactly-improper installation is a fire hazard.
- Keep the area enclosed. Use foam board to seal off drafts from windows or doors in a pump house.
If the building will have no heat (like a seasonal cabin), you must drain the system completely.
- Turn off the pump’s electrical power at the breaker.
- Open a faucet inside the house to relieve pressure.
- Locate the drain plug on the pump housing and on the bottom of the pressure tank. Place a bucket underneath and open these drains.
- Open all unions or connections on the suction and discharge sides of the pump to let every bit of water out.
Don’t Forget the Hand Pump and Well House
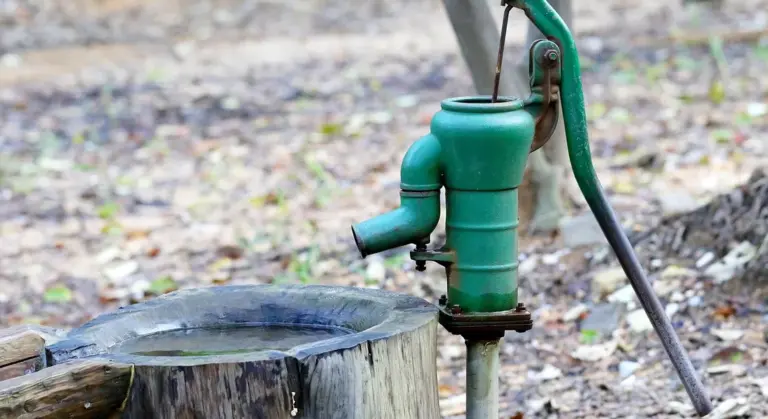
Yes, a well hand pump valve can pop open in winter. The water in the pump cylinder and spout freezes and expands. This pressure has to go somewhere, and it often forces the check valve open or cracks the pump housing.
Insulating a small well house uses the same principles as insulating a jet pump area. The goal is to keep the interior space above freezing. I lined mine with 2-inch foam board, sealed the seams with spray foam, and used a thermostatically-controlled ceramic heater set to 40°F.
If you won’t use the hand pump all winter, the surest fix is to winterize it. Pump RV antifreeze (the non-toxic, propylene glycol kind) through it according to the product instructions. This displaces the water and prevents any freeze damage. Also, if you have a sump pump, add it to your winter maintenance checklist so it’s ready when the thaw comes. Regular checks of the pump, float switch, and discharge line help prevent overflows and keep it functioning through the season.
Tools & Materials Checklist for Winterizing
Get this stuff at any hardware store. Don’t overcomplicate it.
- Insulation: Foam pipe insulation sleeves (correct diameter), foam board panels, spray foam can for gaps.
- Heat Sources: Thermostat-controlled heat tape, heavy-duty outdoor extension cord. A simple incandescent trouble light placed safely inside an enclosure can work as a last-resort heat source.
- Tools: Utility knife, zip ties, electrical tape, pipe cutters, Teflon tape.
- Safety Gear: Work gloves, safety glasses.
Your Seasonal Well Pump Maintenance Schedule

Think of this like changing your car’s oil. A regular schedule prevents catastrophic failure. Here is your timeline.
Late Fall (Before First Hard Freeze)
This is your most important work window. Do not wait until the snow flies.
Start with a full system inspection. Look for any existing cracks, rust, or moisture around pipes and fittings. Moisture now means a bigger problem later.
Apply insulation to every exposed water line. This includes the pipe from the well to the house and all piping in an unheated well house or basement.
- For pipes, use foam insulation sleeves. Slit them lengthwise and snap them on.
- For well houses, consider fiberglass batts for the walls and ceiling.
- Do not pack insulation tightly around the pressure switch. It needs air to operate correctly.
Install or test heat tape. Wrap it on pipes according to the manufacturer’s instructions. Plug it in and use your hand to feel for warmth after 15 minutes. Never overlap heat tape on itself. This also applies to water pipes and hoses that run through unheated spaces. For outdoor hoses, follow the same heat tape guidelines and precautions.
During Winter
This is about vigilance, not heavy work. Set a calendar reminder for the first of each cold month.
Monthly, check the temperature in your well house or pump area. It must stay above 32°F (0°C). A simple thermometer works.
Verify your heat tape is still working. Feel the pipe it’s wrapped on. It should be distinctly warm, not cold or hot to the touch.
Look for new drafts, rodent damage to insulation, or ice accumulation on pipes. These are red flags.
Early Spring
When consistent above-freezing temps return, do your spring cleaning.
Remove any temporary covers, tarps, or portable heat sources you added for winter.
Perform a damage inspection. Look closely for:
- New cracks or splits in pipes.
- Corrosion or green stains (from leaking copper) around fittings.
- A pressure tank that “logs” water (you hear a hollow sound followed by a splash).
This inspection finds small problems before they become summer emergencies. I found a cracked PVC elbow last spring in my own system. Catching it then saved me from a flooded equipment pad in July.
What Damage Happens When It Freezes?
Water expands when it freezes. This expansion has incredible force. It doesn’t just burst pipes, it destroys specific, expensive components, such as backflow preventers in sprinkler systems.
Cracked Brass Fittings
The brass fittings at your pressure switch and tank tee are common failure points. They are strong, but not against ice. A cracked fitting will spray water everywhere the second the ice thaws and the pump turns on.
Split PVC or Copper Piping
Pipes split at their weakest point. This is almost always at an elbow, tee, or union. A split pipe inside your well casing means pulling the entire pump. A split in the house means a major leak.
Shattered Pressure Tank
Modern tanks have a rubber bladder. If the water inside freezes, the bladder can rupture. An old-style diaphragm tank can split its steel seam. You will know this happened if your pump short cycles, turning on and off every 30 seconds.
Sheared Well Seal or Pitless Adapter
This is a critical and costly failure. The well seal sits at the top of your well casing. The pitless adapter is the fitting below the frost line where the pipe exits to your house. Ice can shear the bolts or crack the brass. Repairing this often requires an excavation and a well technician.
The Cascading Effect
One small crack can cause a domino effect. Imagine a split fitting in your basement. When the pump turns on, it pushes water out of that crack instead of to your faucets. The pump will run non-stop, trying to build pressure. It will pump every gallon from your well into your basement until the well is dry or the pump burns out. This single failure can destroy your pump, flood your home, and drain your water supply.
Found Damage? Your Repair or Replace Roadmap
So you think your pump froze. The first thing is to stay calm. Panic makes every job harder. Your goal is to safely find the problem and make a smart fix-it-or-replace-it decision.
Step 1: The Safe Thaw
You can’t assess damage if everything is a block of ice. Power and water must be off before you start.
- Turn off the circuit breaker for the well pump.
- Shut the main water valve coming from the pressure tank.
- Open a faucet to relieve any remaining pressure.
Now, apply gentle heat. I keep a heavy-duty hair dryer and a work light with an incandescent bulb in my truck for this. Move the heat source slowly along the frozen pipe, starting near the faucet or tank. Never use an open flame like a torch; you will damage pipes and create a serious fire hazard. Patience is key here. Last winter, I spent 45 minutes with a hair dryer on a frozen exterior spigot line before it finally let go. Once the line thaws, I also focus on prevention—insulating exposed pipes and sealing gaps to keep them from freezing again. This ties into the broader approach of thawing when needed and preventing future freezes.
Step 2: Assess and Decide: Repair or Replace?
Once water is flowing, look for leaks. Where the leak is and what the part is made of tells you your next move. Think of it like this:
Scenario: A Small Crack in Accessible PVC Pipe
This is a common and fixable DIY job. If the crack is on a straight section of pipe in your basement or well house, you can cut it out and splice in a new section with couplings.
This is a repair job you can likely handle yourself with a PVC cutter, primer, and cement. The key word is “accessible.” If the crack is buried in a wall or tight against a joist, the job complexity goes up.
Scenario: A Cracked Brass Fitting or Valve
This often means replacement. Brass is strong, but when it cracks from freezing, the damage is usually severe. Threads can be stripped or the body can be fractured in ways you can’t see.
Replacing the entire fitting is safer and more reliable than trying to patch a cracked brass component. You’ll need two pipe wrenches and some pipe dope or Teflon tape.
Scenario: Water in the Pressure Tank or No Pressure
This points to a failed bladder inside the tank. When ice expands, it can rupture this internal bladder. You’ll notice the pump cycles on and off rapidly, or you get a burst of air from your faucets.
A waterlogged pressure tank cannot be repaired, it must be replaced. This is a heavier job involving draining the tank, disconnecting plumbing, and wiring, but a competent DIYer can do it.
Step 3: Weighing the Cost: DIY vs. Pro
Your choice often comes down to skill, tools, and budget. Here’s a rough breakdown:
- DIY Parts: A PVC coupling is $2. A new brass tee fitting might be $15. A roll of Teflon tape is $1. A new pressure tank starts around $150.
- Pro Service Call: A plumber or well technician typically charges a trip fee plus hourly labor. For a single repair like replacing a cracked fitting, expect a bill of $200 to $500. Replacing a pressure tank professionally can run $500 to $900 installed.
The math is simple, but your comfort level is the real factor. If you own a few basic tools and can follow instructions, fixing a PVC pipe can save you hundreds.
Step 4: When You Absolutely Must Call a Professional
Some problems are beyond the scope of DIY. Do not hesitate to call a pro for:
- Any issue inside the well casing itself (like a suspected frozen submersible pump). This requires specialized pull equipment.
- If you have extensive leaking or flooding you can’t control.
- When you are unsure about electrical connections to the pump control box.
- If you attempt a repair and it fails or leaks again immediately.
Messing with the well seal or drop pipe can introduce contaminants or drop components into your well, creating a much more expensive problem. I’ve been on service calls where a homeowner’s well-meaning fix led to a $2000 recovery job. Knowing your limits is the mark of a smart homeowner.
Quick Answers
Should I leave my pump running to prevent freezing?
No, this is a myth and can burn out your pump motor. A properly installed and insulated system does not need a constant trickle. Your focus should be on insulating vulnerable pipes and spaces, not on wasting electricity and equipment life.
Can I use a space heater in my pump house?
Use extreme caution. Only use a heater with a tip-over switch and a sealed thermostat, like an oil-filled radiator. Never use open-coil heaters. Ensure the area is clear of dust and debris, and plug directly into a GFCI outlet-avoid extension cords if possible.
Is heat tape safe for plastic pipes?
Yes, but you must use the correct type. Only use heat tape rated and approved for plastic pipe. Follow the installation instructions exactly: never overlap the tape, and use the included clips or tape to secure it-don’t use metal clamps that can damage the line.
What’s the first thing I should check if I suspect a freeze?
Check the pressure gauge on your tank. If it’s much lower than normal or at zero, ice may be blocking the line. Immediately shut off the pump’s power at the breaker to prevent damage from it running dry, then inspect the most vulnerable spots you insulated for signs of frost.
Besides broken pipes, what’s the most expensive damage?
A burned-out pump motor. If ice blocks the line but the pump keeps trying to run, it will overheat and fail. Replacing a submersible pump requires pulling it from the well, which makes labor the biggest cost. Protecting the system protects this major investment.
Stop the Freeze Before It Starts
Get insulation on your pump and its housing before the temperature drops. A frozen pump cracks casings and pipes, a repair bill that also leaves you without water.
Written by Bob McArthur. Bob is a an HVAC and plumbing industry veteran. He has professionally helped homeowners resolve issues around water softeners, heaters and all things related to water systems and plumbing around their homes. His trusted advice has helped countless of his clients save time, money and effort in home water systems maintenance and he now here to help you and give you first hand actionable advice. In his spare time, Bob also reviews home water systems such as tankless heaters, water softeners etc and helps home owners make the best choice for their dwelling. He lives around the Detroit area and occasionally consults on residential and commercial projects. Feel free to reach out to him via the contact us form.