Sprinkler Backflow Preventer: Your DIY Guide to Installation and Upkeep
If your backflow preventer fails, your lawn fertilizer and chemicals can flow right back into your house’s drinking water. That’s not a guess, it’s how the plumbing works.
I’ll walk you through the entire process. We will cover selecting the right type for your codes, the tools and steps for a leak-free install, simple annual maintenance, and how to spot a failing valve.
I’ve replaced more of these than I can count, both on jobs and at my own house. Here’s the takeaway: install it correctly once and test it every year, or you’re just waiting for a problem.
What a Backflow Preventer Does (And Why You Can’t Skip It)
Think of your home’s drinking water and your sprinkler system as two separate roads. A backflow preventer is a traffic cop that only allows water to flow one way: from your house pipes out to the sprinklers. It never lets it reverse back into your home’s supply.
This one-way street is your main defense against contamination. Your sprinkler lines sit in soil full of fertilizers, animal waste, and bacteria. Without a working preventer, that dirty water can get sucked back into the pipes feeding your kitchen sink and shower.
Backflow happens for two main reasons. Back-siphonage occurs when there’s a sudden drop in main water pressure, like during a nearby water main break or when a fire hydrant is used. It creates a vacuum that can suck water backward from your yard. Back-pressure is when pressure downstream becomes higher than the supply pressure, forcing water the wrong way. This can happen if a booster pump is used on your irrigation line.
In most areas, installing a code-approved backflow preventer isn’t optional; it’s the law. Plumbing codes like the IPC and UPC require a tested device on any irrigation system connection. You’ll likely need a permit for installation and annual testing by a certified professional.
Watch for these red flags that your device is failing. Catch them early to avoid a code violation or, worse, contaminated water.
- Constant dripping from the relief valves: A test cock or relief valve that drips non-stop, not just during system start-up or shut-down, means an internal seal has failed.
- Visible debris or heavy scale: Crusty white mineral buildup or bits of grit inside the device body impede the moving parts.
- Reduced sprinkler pressure: A severely clogged or failing preventer acts like a kinked hose, strangling the flow to your heads.
- Standing water in the device housing: You should never see puddles inside a PVB’s plastic hood or an RPZ’s relief valve enclosure. It means it’s not draining properly and may be stuck open.
Picking the Right Backflow Preventer for Your Sprinklers
For residential lawns, you’re typically choosing between two types: the Pressure Vacuum Breaker (PVB) and the Reduced Pressure Zone (RPZ) assembly. The right choice depends on your specific risk level.
A PVB is the standard for most basic in-ground sprinkler systems. It’s installed above ground, usually higher than your highest sprinkler head. It protects well against back-siphonage. I have one on my own home’s system because I don’t use any chemical injectors.
An RPZ assembly is for high-hazard applications. It provides protection against both back-siphonage and back-pressure. You need an RPZ if you have a pump on your irrigation line or if you inject fertilizers, pesticides, or any chemicals directly into your sprinkler system. It’s the only device rated for that cross-contamination risk.
Ignore the shiny packaging and focus on the certification mark. For a PVB, look for the ASSE 1013 stamp. For an RPZ, it must be ASSE 1015 certified. This is your guarantee it’s been independently tested to perform correctly. No mark, no buy.
Recommended Products: Getting the Right Size
Forget brands for a minute. Getting the correct type and size is more important. Sizing is based on your sprinkler system’s demand, which relates to the number of zones.
- For systems with 1-3 zones, a 3/4-inch device is usually sufficient.
- For 4-6 zones, step up to a 1-inch device. This is the most common size I install.
- For very large properties with 7 or more zones, you might need a 1 1/2-inch device. Check your system’s designed flow rate (GPM) to be sure.
When in doubt, match the size of the existing main irrigation line coming from your water source. A device that’s too small will choke your water pressure every time the sprinklers turn on.
Your Toolbox: What You Need to Install or Repair It
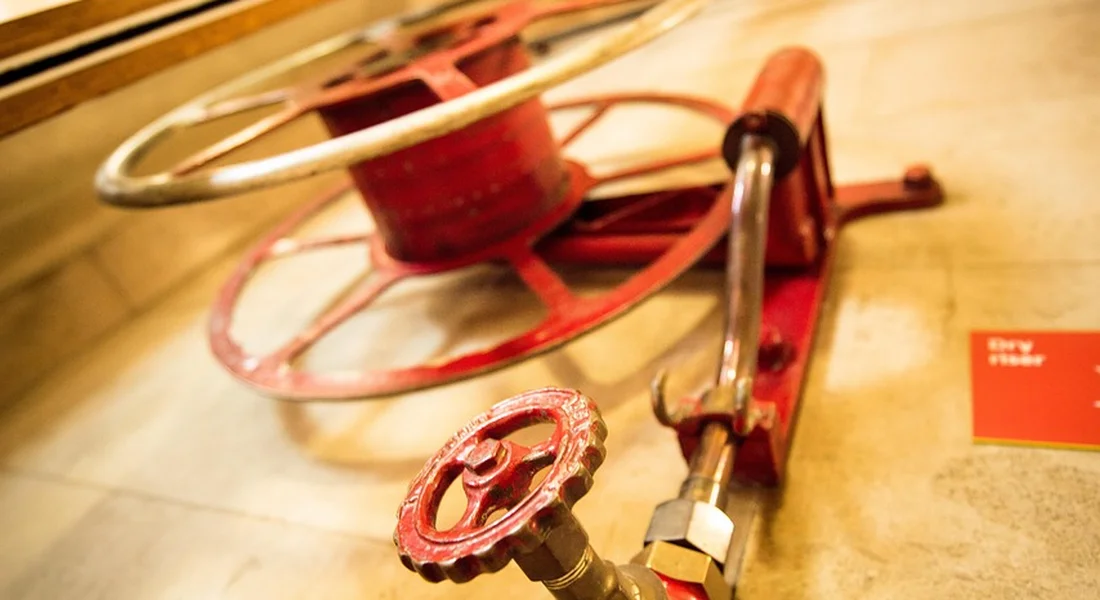
You do not need a truck full of tools for this job. A focused, basic plumbing kit gets it done. Get everything on the counter before you turn the water off.
Tools & Material Checklist
- Pipe Cutters: For PVC or copper. A simple tubing cutter gives a cleaner, squarer cut than a hacksaw.
- Two Adjustable Wrenches: You always need two, one to hold the fitting and one to turn the nut. Channel locks work in a pinch.
- Teflon Tape & Pipe Dope: Use both. Wrap the male threads with tape, then brush on a sealant like RectorSeal #5. It’s cheap insurance against leaks.
- Hose Bib Vacuum Breaker: This cheap little device screws onto an outdoor faucet. You use it later to test your backflow preventer is working.
- Pressure Gauge: Helps you verify your system pressure is within the preventer’s operating range after install.
The Right Fittings Make the Job
Do not try to force the wrong fittings together. The backflow preventer needs to connect to your main sprinkler line. If you are installing or removing a hose bib backflow preventer, verify the fittings before connecting. This will help ensure a leak-free, secure connection to the main line.
- Adapters: You will need male or female adapters (brass or durable plastic like Dura) to transition from your pipe type (PVC, copper) to the device’s threaded ports.
- Unions: Install a union on each side of the preventer. This single tip saves you hours of frustration later if you ever need to remove the unit for service or replacement without cutting the pipes again.
- Shut-off Valves: One before the preventer, one after. Ball valves are best. They let you isolate the device for winterization or repairs without killing water to the whole house.
DIY vs. Pro Verdict
I rate installing a standard Pressure Vacuum Breaker (PVB) a 6 out of 10 on the DIY difficulty scale. A confident homeowner who has sweated copper or glued PVC can handle it. The steps are straightforward.
Installing a Reduced Pressure Zone (RPZ) assembly or performing the required annual certification test on any preventer is not a DIY task. This work must be done by a licensed professional. The liability and code requirements are too high to mess with.
Step-by-Step: How to Install a Backflow Preventer
Follow these steps in order. Rushing leads to leaks and callbacks.
1. Shut Off Main Water and Drain Pipes
Turn off the main water valve to your house. Open the lowest faucet in your home (like a basement sink) and several outdoor hose bibs to drain the pipes. You need to work on a dry line. Verify the water is off by trying to open a faucet upstream of your work area; no water should come out.
2. Cut Into the Main Sprinkler Line
Locate the main line feeding your sprinkler system, usually coming off your house’s main after the meter. Measure twice. Use your pipe cutter to make a clean, straight cut. You need enough space to install the preventer and the shut-off valves on each side.
3. Dry-Fit the Device and Adapters
Do not use sealant yet. Assemble the entire section: pipe -> shut-off valve -> union -> adapter -> backflow preventer -> adapter -> union -> shut-off valve -> pipe. Make sure everything fits and is oriented correctly. The preventer must be installed vertically and at least 12 inches above the highest sprinkler head in that zone (check your local code, some require more).
4. Seal Threads and Make Final Connections
Disassemble your dry-fit. Now, apply Teflon tape and pipe dope to all male threads. Reassemble everything, tightening firmly with two wrenches. Do not overtighten, especially on plastic fittings. You want them snug, not cracked.
5. Install Shut-Off Valves Before and After the Device
You should have already done this in the dry-fit. These valves are non-negotiable for proper maintenance and protecting your home’s plumbing. The valve before the preventer lets you work on it. The valve after it lets you drain the sprinkler lines for winter without affecting the preventer.
6. Turn Water On Slowly and Check for Leaks
Close all the drain faucets you opened. Slowly turn the main house water valve back on. This prevents a surge of pressure, or water hammer, from damaging the new assembly. Listen as the pipes fill. Inspect every single connection you made for drips. Tighten a quarter-turn more if you see a leak, but be careful.
FAQ: How to Add More Sprinklers to the Backflow Preventer Valve
You do not add sprinklers directly to the backflow preventer. The preventer protects your entire irrigation system. You add new zones at the manifold, which is the cluster of valves located *after* the preventer in your water flow. Adhering to backflow preventer installation location orientation guidelines helps ensure reliable protection and easy maintenance.
Every backflow preventer has a maximum flow rate (like 8 or 10 GPM). If you add too many sprinkler heads and exceed this flow, the device will fail and contaminate your water. Check your device’s specs and your sprinkler heads’ GPM before expanding your system. Different backflow prevention methods and devices can fit different setups, helping you choose the right protection for your irrigation system.
When NOT to Try This
Call a licensed professional immediately if:
- Your main supply pipe is old galvanized steel. Cutting and threading it is a specialist job.
- You are unsure of your local code’s height requirements for the device’s installation.
- Your municipality requires a Reduced Pressure Zone (RPZ) assembly instead of a PVB. RPZs are complex and legally require a pro.
Testing, Bleeding, and Blowing Out Your System
Think of your backflow preventer like the brakes on your car. You check the fluid level yourself, but a mechanic needs to certify they work. The law requires a certified backflow assembly tester to perform an official test every year. They use special gauges to measure the pressure differentials inside the device to prove it will stop contamination. You cannot do this test yourself. Keep the test report from the professional; your local water authority will ask for it to prove compliance.
You can and should perform your own visual and functional checks between those professional tests. Do this when you start your system each spring.
- Look for any water leaking from the device’s body, test cocks, or relief valve.
- Check for mineral buildup or corrosion on the brass components.
- While the system is running, slowly turn each test cock one full turn open and then closed. You should see a steady stream of water from each. If water spurts or nothing comes out, it could indicate an internal problem.
How to Test and Bleed a Backflow Preventer
The FAQ “how to bleed sprinkler backflow preventer” usually comes up after winterizing. When you refill the system in spring, air gets trapped inside the preventer. You must purge it, especially after winterizing the backflow preventers to avoid freeze damage.
- Turn the main water supply to the sprinkler system back on slowly.
- Starting with the test cock closest to the water supply, open it about one full turn. Let water (and air) shoot out until it runs steady and clear.
- Close that test cock.
- Move to the next test cock downstream and repeat. Do this for all test cocks on the device.
- Finally, open the main valve on the downstream side of the preventer all the way. This allows the entire device to pressurize and the internal checks to seat properly.
Can I Blow Out Sprinklers Through the Backflow Preventer?
Yes, but with a major warning. You can use an air compressor to blow water out of your lines for winter, but you must never connect the air hose directly to the backflow preventer’s test cocks or inlet.
The high-pressure air will slam the internal check valves shut with destructive force, breaking seals and ruining the device. The correct method is to disconnect the downstream piping from the preventer’s outlet and connect your air compressor there, or use a dedicated blow-out adapter installed downstream. This sends air through the sprinkler lines only, keeping the sensitive backflow assembly safe.
Seasonal Care: Winterizing and Annual Maintenance
Follow this simple maintenance roadmap to avoid freeze damage and keep your system legal.
- Each Spring: Visual inspection and manual bleed (as described above).
- Once a Year: Professional test by a certified technician.
- Before First Freeze: Full system winterization, including draining the backflow preventer.
How to Winterize a Backflow Preventer
Winterizing is about getting all the water out. The steps vary by type. You’ll need a flathead screwdriver for the test cocks. Winterizing a well pump and water system typically involves additional procedures to ensure they don’t freeze and get damaged.
- Shut off the main water supply valve to the sprinkler system.
- Open every sprinkler zone valve on your controller to relieve downstream pressure.
- Drain the device.
For a Pressure Vacuum Breaker (PVB):
- Open both test cocks (usually labeled #1 and #2).
- Pull up on the relief valve lever (the one on the top of the dome) and lock it in the open position. Water will drain out of the test cocks and the valve.
- Leave everything open for the winter.
For a Reduced Pressure Zone (RPZ) Assembly:
- Open all four test cocks (#1, #2, #3, and #4).
- The relief valve on an RPZ should open automatically as the pressure drops, draining the middle chamber. You’ll hear it discharge water.
- Leave all test cocks open for the winter.
After draining, consider insulating the device with a foam cover. Do not wrap it in plastic, as this traps moisture. What helped me? I use bright red tape on the ‘In’ port from the house and blue tape on the ‘Out’ port to the sprinklers. I also put a small numbered tag on each test cock. It saves me ten minutes of head-scratching every single fall when I go to winterize.
Fixing Common Problems: A Troubleshooting Guide

Even a good backflow preventer can act up. Here’s how to troubleshoot the most frequent issues yourself, safely.
Problem: Device is Constantly Dripping Water.
This is the most common complaint. A steady drip from the relief valve ports means something isn’t sealing. Do not cap these ports. Instead, find the cause.
- Likely Cause #1: Debris on a seal. A tiny piece of sand or grit can keep a check valve from closing fully.
- Likely Cause #2: Stuck relief valve. The relief valve itself can get jammed open by sediment or mineral scale.
- Likely Cause #3: High water pressure (water hammer). A sudden pressure spike can pop the relief valve open.
Safe Fixes to Attempt:
- Turn off the water supply to the sprinkler system at the main shut-off valves.
- Slowly open the test cocks (the small brass taps on the device) one at a time to relieve any pressure and flush out loose debris.
- Turn the water back on. Sometimes this flush is enough to reseat the valve. If the drip stops, you got lucky with a simple fix.
- If it still drips, the internal parts likely need cleaning or replacement.
Problem: No Water Flow to Sprinklers.
Your controller is on, but nothing happens. The backflow preventer is a prime suspect.
- Likely Cause #1: Shut-off valves are closed. It sounds obvious, but always check both the inlet and outlet shut-off valves are fully open.
- Likely Cause #2: Severely stuck check valve. Debris or a broken spring can lock a check valve in the closed position.
- Likely Cause #3: Frozen or physically damaged device. If it wasn’t drained for winter, internal ice can crack and block flow.
Safe Fixes to Attempt:
- Confirm the two main shut-off valves are parallel to the pipe. Give them a full turn to ensure they’re open.
- Check that all test cocks on the backflow device are firmly in the closed position (turned perpendicular to the pipe).
- Inspect the device for visible cracks or heavy corrosion. If you see damage, do not use the system.
Problem: Low Water Pressure in Zones.
Your sprinklers spray weakly, or one zone is much worse than others. This points to a partial blockage.
- Likely Cause #1: Partial debris clog. Sediment has built up in the check valves, restricting but not stopping flow.
- Likely Cause #2: Failing pressure-reducing valve (if you have one). Some systems have a PRV upstream. If it fails, it can lower pressure to the entire zone.
- Likely Cause #3: Undersized or corroded piping. This isn’t the backflow preventer’s fault, but the problem shows up at the sprinklers.
Safe Fixes to Attempt:
- Perform a flush by turning off the water, opening all test cocks, then turning the water on briefly to blast water out each port. This can dislodge minor clogs.
- Check the pressure at other outdoor spigots on the same house line. If they’re also low, the issue is with your home’s main pressure, not the sprinkler system.
When to Seek Professional Help
Know your limits. If basic flushing doesn’t stop a drip or restore flow, the internal components need attention. This is where you call a certified backflow tester or irrigation pro.
- They have the specialized test kits to diagnose which specific valve or spring has failed.
- They can disassemble the device for a thorough cleaning and replace worn seals, springs, and check valves.
- They will recalibrate the device and provide the required annual test report for your local code office.
Attempting a full rebuild without the proper tools and gauges often leads to leaks or, worse, a device that fails silently and doesn’t protect your water.
Keeping It Working: Long-Term Maintenance
Think of your backflow preventer like a smoke detector. You test it yearly and do basic upkeep to ensure it works when needed.
Annual Testing is Not Optional
A certified professional must test it every year. They attach gauges to measure the precise pressure differential that keeps your water safe. This test log is your legal proof of compliance and a great record for home resale. Keep the paperwork.
Owner Maintenance Between Tests
You don’t need to be a pro to do these simple checks. I do them every spring and fall at my house.
- Flush It: Before starting your system each spring, shut off the water and open each test cock to let any settled sediment drain out.
- Check the Vents and Ports: Look for spider webs, mud dauber nests, or debris blocking the air inlets and relief valve openings. A pipe cleaner works well here.
- Inspect the Mounting: Make sure the device is still level and securely mounted. A leaning preventer can strain internal components.
- Protect It: Keep grass and weeds trimmed back. Be careful with string trimmers and lawnmowers. A cracked plastic cover or dented brass body means it’s time for a replacement.
Understand Its Limitations
Nothing lasts forever. The internal springs lose tension and rubber seals dry out and crack over time, even if the outside looks fine. Perfect maintenance slows this down but can’t stop it.
Plan for a full device replacement every 10 to 15 years. If you’re constantly troubleshooting the same unit year after year, the cost of repairs will likely surpass the cost of a new, reliable model.
Common Questions
How do I make sure my backflow preventer is installed in the correct orientation?
It must be installed vertically and level. For a Pressure Vacuum Breaker (PVB), the critical rule is that it must be at least 12 inches above your highest sprinkler head-check your local code, as some require more. Incorrect height or a tilted install will cause it to fail and leak continuously.
Can I test my backflow preventer myself, or do I need a pro?
You can perform a basic functional check by opening the test cocks to see if water flows, but this is not a pass/fail test. The law requires an annual performance test with special gauges, which must be done by a certified backflow assembly tester. Keep their report for your water authority.
What’s the single most important step when winterizing my backflow preventer?
After shutting off the water supply, you must manually open the relief valve to let all internal water drain out. For a PVB, pull the lever up and lock it open; on an RPZ, open all test cocks. If water stays inside and freezes, it will crack the brass body, requiring a full replacement.
My backflow preventer is dripping constantly. What should I *never* do to try and fix it?
Never, under any circumstances, cap the relief valve ports or test cocks to stop the drip. This defeats the entire safety mechanism and will contaminate your drinking water if backflow occurs. The drip is a symptom of a failed internal seal that needs professional cleaning or repair.
Besides the annual pro test, what’s one quick maintenance check I should do every season?
Every spring and fall, do a visual inspection for debris. Check the air inlet screens (on a PVB) and relief valve openings for spider webs, mud, or insect nests that can block proper operation. A clear path for air and water is essential for the device to function safely.
Final Steps for Reliable Backflow Prevention
Your main job is to schedule an annual test with a certified professional; that single action keeps your system legal and your water safe. For everything else, remember that clean parts, correct winterization, and knowing when to call for backup are what keep this critical device working for years.