Sump Pump Not Pumping or Running Constantly? Your Quick Fix Guide
Your sump pump stopped working during a storm. Water is rising in your basement, and you need it fixed fast.
This guide walks you through the common causes and fixes. We will cover checking power and the outlet, testing the float switch, clearing pump blockages, and diagnosing a constant run cycle.
I’ve serviced hundreds of these units on job sites and in my own home. Always disconnect the power before you inspect anything.
The DIY vs. Pro Verdict: What You Can Handle
Not every sump pump problem needs a professional. I rate basic cleaning and float switch checks a 4 out of 10 for difficulty. Tasks like motor disassembly or a full pump swap are more complex, hitting a 7 out of 10.
A homeowner with common tools can safely handle these jobs:
- Clean the pit of mud, gravel, and debris.
- Test the float arm or tethered switch for free movement.
- Check the discharge line for clogs or ice from the outside outlet.
- Replace a cracked or stuck check valve on the vertical discharge pipe.
You must call a licensed plumber for three specific situations.
- Any major electrical work, like rewiring the pump’s dedicated circuit.
- Diagnosing a seized motor inside the sealed pump housing.
- If the concrete pit needs to be enlarged or the discharge plumbing must be rerouted to meet local code.
In my basement, I handle the yearly clean-out, but I called my usual guy when the old pump’s impeller shaft sheared off. Internal damage is a job for a pro.
Red Flags: Signs Your Sump Pump is Failing Now
If you notice any of these five signs, stop troubleshooting. Your pump is giving its final warning.
- Pump runs for over a minute without lowering the water level. The impeller is likely clogged or too worn to move water.
- Strange grinding or screeching noises. Grinding means the impeller or bearing is gone.
- Frequent circuit breaker trips. The motor is drawing too much current, often because it’s seizing up.
- Visible rust or cracks in the pump casing. The housing is compromised and will soon leak or fail.
- Noticing a little water on the floor near the sump pump consistently. This points to a failed seal or a hairline crack in the unit.
These red flags mean you should start planning for a repair or replacement immediately. Ignoring them almost guarantees a flooded basement.
Troubleshooting: The Pump Won’t Run or Pump

Follow these steps in order. Start with the simplest fix and work your way down.
No Power, No Action: The Pump Won’t Turn On
Why is my sump pump not turning on? The problem is almost always electrical or mechanical, not the pump’s brain.
First, check the outlet. Your sump pump should be plugged into a GFCI (Ground Fault Circuit Interrupter) outlet. Find it and press the “Reset” button. You should hear a click. If it trips again immediately, you have a wiring problem or a short in the pump itself.
Next, go to your home’s main electrical panel. Find the breaker labeled for your basement or sump pump and make sure it’s in the “On” position. If it’s tripped, flip it off and then back on.
If power is good, look inside the pit. Is the float switch jammed against the pit wall or the discharge pipe? Move it to free it up. Also, check that the pump’s “piggyback” plug (where the float switch plugs into the pump cord) is fully connected and dry.
To test the float switch, unplug the pump. You can lift the float arm by hand. If the pump doesn’t kick on, the switch is likely bad. For a more precise test, use a multimeter on the switch’s terminals to check for continuity when the float is lifted. No continuity means a dead switch.
Humming But No Water: The Pump is Stuck
Why is my sump pump running but not pumping water? A humming sound means power is reaching the motor, but it can’t spin. This usually points to a jammed impeller, the spinning fan that moves water. What does it mean if my sump pump is humming but not pumping? It means stop. Unplug it right now.
- Unplug the pump completely.
- Reach into the pump’s intake grate (where it sucks water) and feel for debris like small stones, gravel, or packed silt.
- Clear anything you find.
- Take a long screwdriver. Insert the tip into the center of the impeller through the intake grate and try to turn it. It should spin freely. If it’s locked up, you’ve found the jam.
A pump struggling like this will get hot. It should be warm to the touch during normal operation. If the casing is too hot to hold, the motor is overheating. A continuously humming, hot pump can burn out the motor in minutes, not hours.
Water is Coming Back: The Check Valve is Faulty
How do I check for a stuck sump pump check valve? Listen. After the pump shuts off, do you hear a sudden gurgle or splash in the pit? That’s water draining back down the discharge pipe. This symptom is the classic sign of a failed check valve. Its job is to act like a one-way gate, letting water out but not back in.
How to fix water draining back into sump pump pit? You must inspect or replace the valve. It’s the valve in the vertical discharge pipe, usually above the pit lid. If the valve checks out, a clogged sump pump drain discharge pipe can still cause backflow. You may need to unclog the discharge pipe to restore proper drainage.
- Unplug the pump.
- Locate the check valve. There’s an arrow on the side showing flow direction (pointing up and away from the pump).
- Disconnect the pipe on both sides of the valve.
- Look inside. The flapper should move freely and seal tightly. A broken spring or a flapper stuck open with debris is the culprit.
- Replace the entire valve. They are inexpensive and not worth trying to repair.
Tripping the Breaker or Motor Failure
Why is my sump pump tripping the circuit breaker? This is a serious fault. A tripping breaker protects your home from a short circuit. The cause could be water inside the pump’s motor housing or damaged, frayed wires. Do not keep resetting a breaker that trips instantly, as this is a fire hazard.
How can I tell if my sump pump motor is burned out? Use your senses. Smell the pump’s motor area. A distinct, sharp burnt odor is a dead giveaway. Visually, look for blackened or melted areas on the cord or housing. Finally, if the pump has power (you’ve checked the outlet and breaker) and a working float switch but does absolutely nothing, the motor is gone. This is a replacement job, not a repair.
Troubleshooting: The Pump Runs Non-Stop or Cycles Wildly
Now for the opposite problem, too much action. This wastes energy and wears out the pump fast.
Why Does My Sump Pump Run Constantly?
There are four common reasons. First, a stuck float switch. The tether or rod is caught in the “on” position, or the switch mechanism itself has failed internally. Second, a misadjusted float. It’s set to trigger at too high a water level, so it never lets the pit drain down enough to shut off.
Third, you might have an undersized pump. It simply can’t move water out as fast as it’s coming in during a heavy rain. Fourth, you live in an area with a naturally high water table. The ground is always saturated, providing a continuous water supply to the pit. Constant running means the pump never reaches its shut-off point, while short cycling means it shuts off but immediately turns back on.
Short Cycling: On, Off, On, Off
What causes a sump pump to short cycle? This maddening loop is usually a plumbing issue, not a water volume issue. The number one cause is that faulty check valve we already discussed. Could water be coming back up the sump pump discharge? Yes. If the check valve fails, water flows back into the pit the moment the pump stops. This refills the pit just enough to re-trigger the float switch, starting the cycle again. It’s just one of the common sump pump failure causes.
The other main cause is the float switch position. If it’s hanging directly over the pump’s intake, the water it just pumped out gets sucked right back in, creating a tiny, turbulent cycle. Adjust the float so it’s away from the intake current.
Clogged or Frozen Discharge Lines
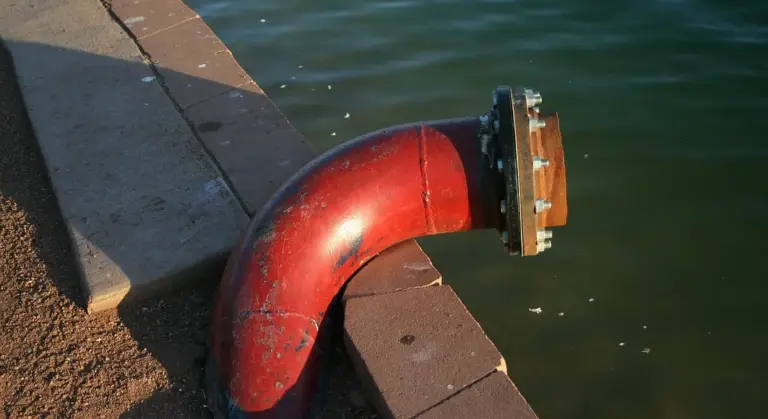
How do I check my sump pump discharge line for clogs? Start outside. Find where the white PVC pipe exits your house and discharges water. It should be clear of mud, leaves, and vegetation. If it’s buried, the end might be clogged with dirt or, in winter, ice. A clog acts like a closed valve, the pump runs but can’t push water out. This is especially important if your sump pump discharge line is far from the house.
What should I do if my sump pump is frozen? This is an emergency because the pump will run against a sealed ice block and burn out. Never use an open flame to thaw the pipe. Is hot water safe for thawing a sump pump line? Carefully, yes. Pour warm (not boiling) water over the frozen exterior section. You can also wrap the pipe in towels soaked in warm water. After thawing, prevent future freezes by insulating exposed pipes. If freezing recurs, seek professional repair.
Can hot water damage a sump pump? Pouring boiling water directly onto cold PVC pipe can cause thermal shock and crack it, creating a bigger leak and repair job. The goal is gradual thawing, not a sudden temperature blast.
The Water Science Snippet: Understanding Hydrostatic Pressure
Groundwater is not just sitting there. The soil around your foundation holds it like a sponge. When that sponge gets saturated, the weight of everything above it creates hydrostatic pressure. This is just a technical term for the force pushing that water into any available space.
Your sump pit is your home’s pressure relief valve. The pump’s main job is to relieve hydrostatic pressure before it wins the battle against your concrete floor. When the pit fills and the pump kicks on, it lowers the water level and eases that pressure. If the pump fails, the pressure builds. It will find the path of least resistance, which is usually the tiny cracks in your floor or the joint where the wall meets the slab.
This is why you sometimes see a little dampness or a small puddle on the floor near the pit, even if the pit itself looks dry. The pressure is already pushing water through microscopic openings. A constantly running or non-pumping pump isn’t just a nuisance. It’s a direct threat to your home’s structural integrity and a guaranteed path to mold and major water damage.
Cleaning, Testing, and Maintenance Roadmap
You can solve most sump pump problems with three simple habits: cleaning, testing, and scheduled maintenance. Let’s break down exactly how to do each one. For a deeper, step-by-step walkthrough, refer to our sump pump inspection maintenance guide.
Step-by-Step Pit and Pump Cleaning
A clogged pump is a useless pump. Dirt, gravel, and debris wash into the pit and can jam the impeller or block the intake screen. Here is how to clean it safely.
- Disconnect the power. Unplug the pump from the outlet. If it’s hardwired, turn off the circuit breaker at your main panel.
- Disconnect the discharge pipe from the pump. Have a bucket ready for any water that drains back.
- Remove the pump from the pit. Lift by the handle or its body, not by the power cord or discharge pipe.
- Use a wet/dry vacuum to remove standing water and sludge from the pit.
- Scrub the inside of the empty pit with a stiff brush and hose it out.
- Clean your pump. Focus on the intake screen at the bottom. Remove any debris stuck in the impeller vanes (the spinning fan inside). A small brush or an old toothbrush works well.
- Inspect the check valve on the discharge pipe. Make sure the internal flapper moves freely and isn’t stuck open or closed.
- Reinstall the pump, reconnect the discharge pipe, and restore power.
Wear rubber gloves and old clothes. This is a dirty job. Doing this twice a year keeps everything flowing.
How to Test Your Sump Pump Properly
Don’t wait for a storm to find out your pump is dead. Test it every season with the bucket method.
Get a 5-gallon bucket of water. Use cool or lukewarm water from a tap or hose. Never use hot water from your water heater, as it can warp the plastic pump housing and switches.
Slowly pour the water into the sump pit. Watch the float or trigger mechanism. It should rise with the water level and activate the pump. Listen for the motor to kick on. The water should be pumped out forcefully. Keep watching until the pump turns itself off. These checks are part of the sump pump components installation steps. Later steps will walk you through installing and wiring each component.
You are checking for three things: that it starts, that it pumps with good pressure, and that it shuts off automatically when the water is low. If it fails any of these, you have a clear problem to fix.
Your Annual Sump Pump Maintenance Schedule
Set calendar reminders for this. It takes minutes and prevents thousands in water damage.
- Quarterly (Every 3 Months): Perform the 5-gallon bucket test. Do this at the start of each season.
- Bi-Annually (Spring and Fall): Clean the pit and pump as described above. Inspect the check valve.
- Annually: Conduct a full inspection. Go outside and check the discharge line outlet. Make sure it’s clear of leaves, dirt, or ice. The water should be directed at least 10 feet away from your home’s foundation. Check that the pipe is securely attached and hasn’t sagged.
Most quality sump pumps last 8 to 10 years. If yours is in that range and starts acting up, replacement is often smarter than repeated repairs. Think of it as cheap insurance for your basement.
Choosing a Replacement Pump and Code Compliance
You’ve tried the fixes. Sometimes, the pump is just done. When repair costs add up or reliability is gone, you need a new one. Here’s how to pick a good pump and install it right.
Signs It’s Time for a New Pump
Don’t wait for a flood to make the decision. Look for these clear signs.
- Age: Most pumps last 7-10 years. If yours is older, replacement is smarter than another repair.
- Constant Repairs: Fixing the float switch one month and the motor the next is a money pit. A new pump is more cost-effective.
- It Can’t Keep Up: If the water level keeps rising during a storm and the pump runs non-stop, its capacity is insufficient for your home’s water load.
- Visible Damage: Look for heavy corrosion on the housing or a cracked casing. Rust on a cast iron pump is normal, but flaking, pitted metal is a failure point.
- Loud or Strange Noises: Grinding, screeching, or loud rattling often signals internal bearing or impeller damage. The repair cost usually isn’t worth it.
One repair is fine. A second major issue on an old pump means it’s time to shop.
What to Look For in a New Sump Pump
Not all pumps are equal. Your choices affect noise, lifespan, and how often you’ll need to service it.
Submersible vs. Pedestal:
- Submersible: Sits underwater in the pit. Quieter, out of sight, and generally less prone to switch jams. This is what I install in my own home and recommend for most basements.
- Pedestal: The motor sits above the pit on a long column. It’s cheaper and easier to service the switch, but it’s louder. Good for shallow, narrow pits.
Housing Material:
- Cast Iron: Durable and dissipates motor heat well, leading to a longer motor life. It will rust on the surface, but that’s normal. This is the professional’s choice for heavy use.
- Thermoplastic: Lightweight, corrosion-proof, and often less expensive. It can be more prone to cracking in very cold pits or if debris strikes it.
Horsepower (HP): Bigger isn’t always better. A 1/3 HP pump handles most residential jobs. Step up to 1/2 HP if you have a very deep pit, a high water table, or frequent heavy flooding.
Key Features:
- Vertical Float Switch: This is crucial. A tethered float can get stuck on the pump or pit wall. A vertical switch moves straight up and down and is far more reliable.
- Removable Filter Screen: Lets you easily clean out debris that could clog the impeller. A simple feature that saves headaches.
- Check Valve: Your new pump must have one. It prevents water in the discharge pipe from flowing back into the pit after the pump shuts off, which causes short cycling and wear.
For a trouble-free setup, choose a 1/3 HP submersible pump with a cast iron base and a vertical float switch.
Code & Compliance Check
Getting the pump running is only half the job. The installation must be safe and legal.
- Discharge Location: Plumbing code (IPC/UPC) requires the water to be discharged away from your home’s foundation. It must drain to a storm sewer, dry well, or daylight where it won’t flow back. It is almost always illegal to connect a sump pump directly to a home’s sewer or septic line.
- Electrical Connection: The pump must be plugged into a Ground Fault Circuit Interrupter (GFCI) outlet. This is a safety must for any device near water. For dedicated reliability, it should be on its own circuit to avoid tripping from other appliances.
Your local building department has the final say. If you’re unsure about discharge rules, give them a call.
Installation: The Final Step
If you’re comfortable with basic plumbing and electrical, you can install it. If the wiring or complex piping makes you pause, hire a pro. It’s cheaper than water damage.
- Power Down: Unplug the old pump and turn off the circuit breaker.
- Prep the Pit: Remove the old pump. Clean out all silt, gravel, and debris. Place a solid, level base in the bottom, like a few bricks or a patio block. This keeps the pump off the bottom where silt collects.
- Connect Discharge Pipe: Use rigid PVC or flexible reinforced hose. Secure it to the pump’s discharge port with a hose clamp. Connect the other end to the existing discharge line using a proper coupling. Every connection must be tight and watertight.
- Install the Check Valve: Place it on the vertical discharge pipe, about 12 inches above the pump outlet. Ensure the arrow on the valve points up, away from the pump.
- Position the Pump: Set the pump on the base. Ensure the float switch has clear space to move up and down without obstruction.
- Power Up: Plug the pump into the GFCI outlet. Slowly pour a 5-gallon bucket of water into the pit. Watch the float rise, activate the pump, and lower again. Listen for smooth operation.
If you have water near sump pump after a new install, the discharge connection is likely the culprit. Check every clamp and threaded connection for drips. A small leak at the pump’s discharge port can spill water back into the pit, making it seem like the pump isn’t working. For a methodical check, see our sump pump install test troubleshoot guide. It provides step-by-step testing and common discharge issue fixes.
Common Questions
How do I safely test my sump pump if the pit is dry?
Use the bucket test. Slowly pour a 5-gallon bucket of cool water into the pit to manually raise the float. The pump should activate, move the water, and shut off automatically. Never use hot water, as it can damage plastic components.
What are the clear signs my sump pump impeller is clogged?
The pump will hum loudly but not move water, or it will run without lowering the water level. You may also see reduced or no water flow from the discharge pipe outside. Immediately unplug the pump and clear the intake grate of debris.
How often should I clean my sump pump and pit?
For reliable operation, clean the pit and pump intake screen at least twice a year, typically in early spring and fall. Always disconnect power first, and wear gloves-it’s a dirty job. Refer to our detailed cleaning guide for safe, step-by-step instructions.
What is the average lifespan of a sump pump, and when should I plan to replace it?
Expect 7 to 10 years of service from a quality unit. Plan for replacement if your pump is approaching this age, requires frequent repairs, or shows any of the “Red Flag” failure signs listed in the guide. Proactive replacement is far cheaper than a flooded basement.
My pump has power and a working float, but does nothing. Is it dead?
Very likely, yes. If you’ve confirmed power at the outlet and a functioning switch, a completely unresponsive pump typically indicates a burned-out motor. Smell for a sharp burnt odor near the motor housing as confirmation. This is a replacement job, not a repair.
Staying Ahead of Sump Pump Problems
When your pump acts up, always check the float switch and your power supply first, as these are the most common culprits. A quick test run every few months and a visual inspection of the pit and discharge line will catch most problems before they lead to a wet basement.
Bob McArthur
Bob is a an HVAC and plumbing industry veteran. He has professionally helped homeowners resolve issues around water softeners, heaters and all things related to water systems and plumbing around their homes. His trusted advice has helped countless of his clients save time, money and effort in home water systems maintenance and he now here to help you and give you first hand actionable advice. In his spare time, Bob also reviews home water systems such as tankless heaters, water softeners etc and helps home owners make the best choice for their dwelling. He lives around the Detroit area and occasionally consults on residential and commercial projects. Feel free to reach out to him via the contact us form.