Water Heater Reset Guide: Fix Buttons, Tankless Units, and Rheem Models
Your water heater stopped working? A simple reset might get your hot water back in minutes.
This article shows you how to safely reset any heater. We will cover standard reset buttons, tankless units like Rinnai, Takagi, and EcoSmart, and specific fixes for Rheem heaters.
I’ve turned wrenches on these units for years. Always kill the power before you touch anything.
Reset 101: Understanding Your Water Heater’s Reset Button
First things first. Let’s clear up a common point of confusion. Your home’s main circuit breaker and your water heater’s reset button are not the same thing.
The main breaker protects your home’s entire electrical circuit. The reset button, often called a high-limit reset or an ECO (Energy Cut Off), is a safety switch dedicated only to your water heater. It’s a second line of defense. If the main breaker is your home’s security guard, the reset button is the personal bodyguard for your water heater.
The reset button is a dedicated, extra-sensitive circuit breaker just for your water heater, designed to trip if the water gets dangerously hot or an element fails.
Where to Find the Reset Button
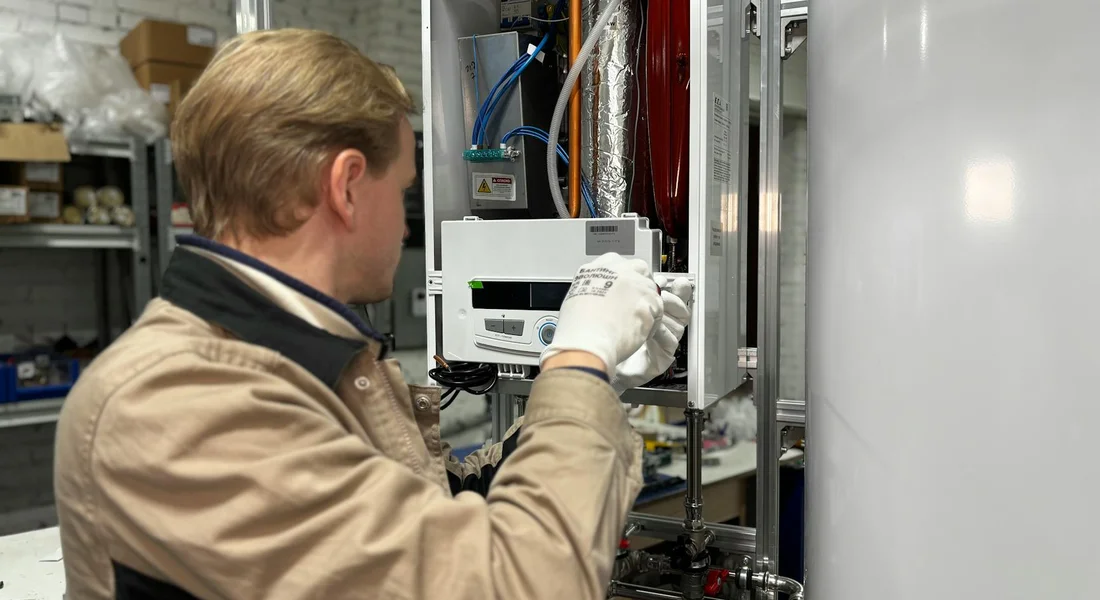
On a standard electric water heater, the reset button is tucked behind an access panel. You’ll usually find two panels on the side of the tank one for each heating element. The reset button is almost always under the top panel.
- Turn off the power to the water heater at your home’s main breaker panel. Safety first.
- Use a screwdriver to remove the metal access panel. There’s often a small insulation flap behind it.
- Look for a red button, usually near the upper thermostat. That’s your reset.
Does a Gas Water Heater Have a Reset Button?
No. A standard gas water heater does not have an electrical reset button. Instead, it uses a pilot light (older models) or an electronic ignition system (newer models) to create the flame that heats the water.
If your gas heater isn’t making hot water, you’re checking for a pilot light or listening for the click of an ignitor, not pushing a button. Gas units have their own safety devices, like a thermocouple, which shuts off the gas if the pilot goes out.
Difficulty Rating: When Should You DIY a Reset?
For the simple act of pressing a reset button on an electric water heater, the DIY Difficulty Rating is a 2 out of 10. It’s straightforward if you follow basic safety.
Scenarios You Can Handle
You can confidently manage these situations:
- Pressing the red reset button one time after ensuring the unit has power and cool water in the tank.
- Checking and resetting the correct breaker for the water heater at your home’s main electrical panel.
- Verifying that a gas unit’s pilot light is lit or that the gas supply valve is in the ‘on’ position.
Pressing the reset is a diagnostic step, not a repair. If it works and the heater runs normally, you’re likely done.
When to Call a Professional
Stop and call a licensed plumber or electrician immediately if:
- The reset button trips again the moment you push it in. This signals a continuing fault, often a failed heating element or a bad thermostat.
- You smell gas or suspect any issue with the gas valve, burner, or combustion on a gas water heater.
- The tank is leaking from the body itself. No reset will fix a corroded tank.
- You are uncomfortable working with electrical components or high-voltage access panels.
Repeated resets on an electric heater mean something is wrong inside. Continuing to force it can be a fire hazard. For gas, any ignition or flame issue requires a pro for safety. Know your limits.
Tools & Safety Checklist Before You Start
Gather these four items before you walk to the heater. They are not optional.
- A bright flashlight. You will be looking into a dark access panel.
- A non-contact voltage tester. This is your most important safety tool. Do not skip it.
- A standard screwdriver. Often a Phillips head, but sometimes a flathead.
- A pair of work gloves. They protect your hands from sharp metal edges inside the unit.
You cannot reset a water heater with the power on. Anyone telling you otherwise is giving dangerous advice. Your first and most critical step is to go to your home’s main breaker panel and turn off the circuit breaker for the water heater.
Label that breaker if it isn’t already. Forgetting which one controls the heater is a common mistake. After you flip the breaker off, go back to the water heater. Use your non-contact voltage tester on the wires going into the unit. Confirm there is no power. This double-check has saved me from a nasty shock more than once on service calls.
Standard electrical codes, like the National Electrical Code (NEC), require a dedicated disconnect for appliances like this. You might see a small switch on a nearby wall or a pull-out disconnect block by the unit itself. Using the breaker is the surest method, as it guarantees power is off to the entire circuit.
How to Reset an Electric Water Heater Step-by-Step
You asked, “How do you reset a water heater’s reset button?” This is a common fix for when your heater stops making hot water. The button is a safety device called a high limit switch. It trips and cuts power if the water gets too hot, often because of a faulty thermostat. Resetting it is simple, but you must do it safely.
Always kill the power at your home’s breaker panel before touching the water heater’s electrical components. I keep a small padlock on my breaker box for jobs like this, so no one accidentally flips the power back on while I’m working.
- Power Off at the Breaker
Find your main electrical panel. Locate the breaker labeled for the water heater (it’s usually a double-pole 30-amp breaker). Switch it firmly to the OFF position. For extra safety, put a piece of tape over it or use a breaker lock.
- Locate and Remove Access Panel(s)
Your electric water heater has one or two metal or plastic access panels on the side, held on by screws. You may need to pop off a thin insulation blanket first. My home’s unit has two panels, one for each heating element. Use a screwdriver to remove the screws and carefully set the panel aside.
- Use a Voltage Tester to Confirm No Power
This step is non-negotiable. Before you touch anything inside, use a non-contact voltage tester. Carefully move it near the wires you can see inside the panel. The tester should not light up or beep. If it does, you did not kill the right breaker. Go back to step one.
- Press the Red Reset Button Firmly
Peel back the insulation inside the panel. You’ll see one or two thermostats. On the upper thermostat, you will find a bright red button. Push it in firmly until you feel it click. It might be slightly recessed if it has tripped.
- Replace the Panel
Carefully tuck the insulation back over the components. Align the access panel and screw it back on securely. You don’t want any gaps where dust or moisture can get in.
- Restore Power
Go back to your breaker panel. Remove your tape or lock and flip the water heater breaker back to the ON position.
A successful reset is quiet-you’ll usually hear a faint click from inside the unit, and within an hour, you should have hot water again. Listen for the normal hum of the heating elements working. If the button trips again immediately or within a day, you have a recurring problem. The high limit switch is doing its job because a thermostat is stuck or a heating element is failing. A one-time reset is a fix; a button that keeps tripping is a symptom. At that point, you need to test the thermostats and heating elements with a multimeter.
How to Reset a Tankless Water Heater (Rinnai, Takagi, EcoSmart)
Forget looking for a red button. Tankless water heaters are different. They run on a computer brain, not a simple thermostat. When something goes wrong, they flash an error code on a small display. Resetting a tankless heater usually means rebooting its electronic control board to clear a temporary glitch.
Before you hunt for model-specific steps, try this universal fix. Go to your home’s main electrical panel and flip the circuit breaker for the water heater to the OFF position. Wait a full 60 seconds. This lets any residual power drain from the unit’s memory. Flip the breaker back ON. This hard reboot clears many minor electronic hiccups. If the unit lights up and runs normally, you’re done.
Resetting a Rinnai Tankless Water Heater
So, how do you reset a Rinnai tankless water heater? The method depends on your model and if you have the remote. For units with a wireless remote, press the “On/Off” or “Power” button. Some remotes have a dedicated “Reset” function. If you don’t have the remote, look at the unit’s control panel. Many Rinnai models reset by pressing and holding the “Power” and “Hotter” buttons simultaneously for a few seconds until the display resets.
This reboot can clear transient errors. If a specific error code like 11 (ignition failure) or 73 (fan error) comes back immediately, the reset didn’t fix it. The unit is telling you it has a real problem with gas, air flow, or a sensor. A repeating error code needs a technician’s diagnosis.
Resetting a Takagi Tankless Water Heater
How do you reset a Takagi tankless water heater? Start with the universal power cycle at the breaker. If the error persists, look at the front panel. Many Takagi units have a physical “Reset” switch or button. It’s often a small, recessed button you might need a pen to press. Push and hold this reset button for 3-5 seconds while the unit has power. The display should blink or show the normal standby temperature.
If your model lacks a dedicated button, the power cycle is your primary reset. Takagi units are robust, but a code that won’t clear usually points to a blocked air intake, a faulty flame sensor, or a water flow issue.
Resetting an EcoSmart Tankless Water Heater
How do you reset an EcoSmart tankless water heater? This is often the simplest case. Most EcoSmart electric tankless models do not connect to your home’s breaker panel in a standard way. Your reset button is the small circuit breaker switch built directly into the side of the unit.
If the unit stops heating, first check that display is on. If it’s dead, look at the side. You’ll see one or more breaker switches (for multi-unit models) that have tripped to the middle position. Flip each one firmly to OFF, then back to ON. This is your complete reset. If it immediately trips again, you have an electrical fault inside the heater that requires service.
Rheem Water Heater Reset and Troubleshooting Guide
A lot of folks land here with one simple question: How do you reset a Rheem water heater? The answer depends entirely on whether your unit is electric or gas. I’ve pulled my share of access panels on both types. The process is different, and confusing them won’t get you any hot water.
Resetting a Rheem Electric Water Heater
You reset a Rheem electric water heater the same way you reset any standard electric model. Follow the general electric heater steps covered earlier in this guide. The key steps are cutting power at the breaker, removing the upper access panel, and pressing the red reset button on the upper thermostat. If your unit uses a Honeywell control panel, the same steps apply when you turn the water heater back on after a reset. In the next steps, we’ll link to model-specific Rheem/Honeywell guides for turning and testing the unit.
On most Rheem electric heaters, that upper reset button is a small red disc you’ll find tucked behind the insulation once the metal cover is off. Push it firmly until you feel a click. If the button doesn’t stay in, that usually means the high-limit switch has failed permanently and the thermostat needs replacement. It’s a common failure point I see often.
Resetting a Rheem Gas Water Heater
Here’s the critical difference. Your Rheem gas water heater does not have an electrical reset button. If it’s not heating, the “reset” procedure involves getting the burner to light again.
- For older standing pilot models: You need to relight the pilot light. Turn the gas control knob to “PILOT,” press it down, and use a long lighter to ignite the pilot at the burner assembly. Hold the knob down for 60 seconds before releasing. If it goes out, the thermocouple is likely bad.
- For modern electronic ignition (IPI) models: There’s no manual lighting. If it won’t fire, your “reset” is to turn the gas control valve or unit power off for 30 seconds and then back on. The control board will attempt its startup sequence. If it fails, you’ll need to consult the manual for diagnostic codes.
I always tell homeowners, if you smell gas at any point, stop. Shut off the gas supply valve and call a pro.
General Rheem Troubleshooting
Before you assume you need a reset, look for clues. Many newer Rheem units, especially hybrid heat pump or condensing gas models, have digital displays. An error code on the display is your best starting point for troubleshooting. It tells you exactly what the control board thinks is wrong.
Common codes you might see are things like E04 (ignition failure on gas), F11 (low water flow), or sensor faults. Grab your model’s manual or look it up online using your unit’s model number (found on the rating plate). The code will point you to a specific check, like a blocked air intake, faulty flame sensor, or water pressure issue. This saves you from guessing and replacing the wrong part.
The Red Flag Guide: When a Reset Is a Symptom, Not a Fix
Pressing the reset button is easy. The hard part is knowing when that button is trying to tell you something serious. If your heater needs a reset more than once or twice a year, you have a problem that the button cannot fix. Ignoring these red flags can lead to no hot water, a huge repair bill, or even a tank failure.
Signs Your Water Heater Needs Professional Help
Watch for these warnings. If you see one, a simple reset is just a temporary bandage.
- The reset button trips again within hours or days. This is your heater’s main safety switch screaming that something is dangerously wrong inside the unit. Continuously resetting it is like silencing a smoke alarm.
- Water is not hot, or it is scalding hot. Lukewarm water often points to a failed heating element or gas valve. Water that’s too hot means the thermostat or temperature control has failed, which is a major safety hazard.
- You hear loud popping, rumbling, or banging from the tank. This is the sound of trouble. It usually means a thick layer of sediment is at the bottom of the tank, overheating and cracking like popcorn. The resulting steam bubbles are what cause the noise and can damage the tank lining.
- You see any visible water leaking from the tank. Water on the floor means a leak from the tank, a valve, or a connection. A reset button does nothing for a physical leak. Corrosion and high internal pressure cause leaks, and the tank may need replacement.
- Error codes persist after a reset (for tankless or smart units). If your Rinnai, Takagi, or EcoSmart displays an error like 11, 12, or 10, and it comes back after a reset, the unit has detected a fault in ignition, water flow, or a sensor. The reset cleared the memory, but the hardware problem remains.
The Science of Sediment: Why Your Heater Overheats
The most common cause of a tripping reset button is sediment buildup. Here is how it works.
Minerals in your water, like calcium and magnesium, settle out when the water is heated. In areas with hard water or high Total Dissolved Solids (TDS), this happens fast. The sediment forms a thick, rocky layer on the tank bottom.
This layer acts like a blanket between the burner flame or electric element and the water. The heat gets trapped in the steel of the tank bottom instead of transferring efficiently into the water. The tank metal itself gets dangerously hot, triggering the high-limit safety switch (the reset button) to shut everything down.
Think of a crusty electric kettle. The scale makes the heating element glow red hot and takes forever to boil water. It is the same principle, but inside a closed, pressurized tank.
The solution is not more resets. It is removing the sediment. For most tank heaters, this means an annual flush. If the popping sounds have already started, a flush might help, but the damage to the tank lining may already be done.
Water Heater Maintenance Roadmap to Prevent Resets
Let’s be clear. A water heater that needs constant resetting is a water heater crying for maintenance. That high limit trip didn’t happen for no reason. Following a simple schedule stops the small problems that lead to big headaches and cold showers. I follow this same checklist for my own 50-gallon unit in the basement.
Your Simple Homeowner Maintenance Schedule
You don’t need to be a pro. You just need a calendar reminder. Break it down into tasks you do once a quarter, twice a year, and once a year.
Do This Quarterly: The 5-Minute Visual Inspection
Every three months, take a flashlight and look at your water heater. You’re checking for three things:
- Water on the floor or under the tank.
- Signs of rust or corrosion on the tank body or pipes.
- That the area around the heater is clear of clutter (like boxes or paint cans).
Catching a small leak early can prevent a catastrophic failure that definitely triggers a reset, or worse, a flood.
Do This Every 6 Months: Test the Temperature & Pressure (T&P) Relief Valve
This is your water heater’s most important safety device. If it fails, pressure can build up and cause the unit to shut down or become dangerous. Testing it is easy.
- Place a bucket under the discharge pipe connected to the valve (usually a copper pipe running down the side of the tank).
- Lift the valve’s test lever straight up for a few seconds. You’ll hear a rush of hot water and air into the bucket.
- Release the lever. It should snap back down and the water flow should stop completely.
If water continues to drip from the valve after you release the lever, the valve is faulty and must be replaced immediately by a professional. A leaking T&P valve can also cause the tank to cycle on and off, mimicking reset problems.
Do This Annually: Flush the Tank to Remove Sediment
This is the number one task to prevent unnecessary high limit trips and resets. Sediment (sand, minerals, scale) settles at the bottom of the tank. It acts like an insulator between the water and the burner or heating element. The heater works harder, overheats the bottom of the tank, and trips the reset button.
- Turn off the power to an electric heater (at the breaker) or set a gas heater’s control knob to “Pilot”.
- Connect a standard garden hose to the tank’s drain valve at the bottom. Run the other end to a floor drain or outside.
- Turn off the cold water supply valve to the tank.
- Open a hot water faucet somewhere in the house (like a sink) to prevent a vacuum.
- Open the tank’s drain valve and let the water flow until it runs clear. This may take 5-10 gallons.
- Close the drain valve, remove the hose, turn the cold water supply back on, and let the tank refill. Once water flows steadily from the open hot water faucet, close it. Turn the power or gas back on.
Annual flushing clears the sediment that causes overheating, which is the direct path to a tripped reset button. The first time you do this, the water may be shockingly dirty. That’s proof it’s working.
The Pro Job: Anode Rod Replacement (Every 3-5 Years)
You can flush your tank perfectly and still get a reset from a rotted-out tank. The anode rod is a sacrificial metal rod that attracts corrosive elements in your water, corroding itself to protect the steel tank liner. Once it’s fully eaten up, the tank starts to rust from the inside.
Replacing the anode rod is a pro job for most homeowners. It requires draining the tank partially, using a large breaker bar or impact wrench on a very tight fitting that’s often in a cramped space, and knowing how to properly seal the new rod. A corroded rod can also snap off, creating a much bigger repair.
Hire a technician to check and replace it every 3 to 5 years. Tell them if you have a “rotten egg” sulfur smell, as a spent magnesium anode rod can cause that. They might recommend an aluminum-zinc rod instead. This single service extends your tank’s life by years and maintains efficient operation.
What Helped Me: A Pro Tip on Persistent Trips
I have a 40-gallon electric water heater in my own basement. For a week, it kept tripping its high-temperature cutoff button. Pressing the red reset worked for a day, then it would trip again. The reset button itself felt warm to the touch. I knew it wasn’t the thermostat. The real fix was simple. That pattern is a clue to common water heater reset-trip causes, from overheating to a failing element or mineral buildup. Narrowing down the cause is key to finding the right solution.
Why Loose Wires Make Your Heater Trip
Loose wire connections on the heating elements create resistance. This resistance causes heat to build up right at the terminal, not in the water. That extra heat travels up the wire and can fool the high-limit switch into thinking the tank is dangerously hot, causing it to trip the reset button. It also causes arcing, which damages the terminal over time and is a fire hazard.
How to Check and Fix It (Safely)
This is a job for anyone comfortable with basic electrical safety. If you’re unsure, stop and call a licensed technician.
- Turn off the breaker for the water heater at your main electrical panel. Do not skip this. Use a non-contact voltage tester to confirm power is off at the unit.
- Remove the access panels on the side of the tank. You’ll see insulation behind them. Pull the insulation back to expose the thermostats and heating elements.
- Look at the wires connected to the heating element terminals. You might see discoloration, melting, or a white powdery residue (corrosion).
- Using the correct screwdriver, firmly tighten the terminal screws holding the wires. Do not overtighten and strip them. Just make them snug.
- If the terminal or wire end is badly corroded or burned, you will need to replace the heating element and potentially cut back the wire to clean copper. This is a more advanced repair.
- Once connections are tight, replace the insulation and access panels. Restore power at the breaker.
Tightening those connections solved my problem for good, and it’s the first physical check I do on any electric heater that keeps tripping. It’s a ten-minute fix that most people never think to look for.
When This Isn’t the Problem
If you tighten the connections and the heater still trips, the issue is elsewhere. The next likely culprits, in order, are:
- A failing heating element (it can short out internally).
- A bad thermostat that’s not shutting off the element, causing real overheating.
- A deteriorated dip tube causing unusual temperature swings.
For these, you’re looking at part replacement. If your reset button feels cool when it trips, the problem is almost certainly a faulty thermostat or element, not a loose wire.
Recommended Products for Care and Troubleshooting
Having the right tools on hand turns a panic moment into a simple repair. Based on countless service calls, these are the items I keep in my own basement. They’re affordable, universally useful, and prevent bigger problems.
A Good Non-Contact Voltage Tester
This is your first line of defense. Never assume the power is off. Before you touch any wires or press any reset button, you must verify the circuit is dead. A non-contact tester beeps or lights up when it detects voltage through the insulation of a wire.
Use it to check for power at the water heater’s electrical connection before you attempt any reset or inspection.
- Test it on a known live outlet first to ensure it’s working.
- Check both the incoming wires at the heater’s connection point and the terminals on the upper thermostat.
- If the tester indicates power but the heater is dead, you’ve likely found a failed heating element or thermostat.
A Basic Water Heater Draining Kit
Every tank-style heater needs to be flushed annually to remove sediment. A draining kit is just a short, reinforced hose and a standard garden hose adapter. Sediment buildup is a top cause of overheating and tripping the high-limit reset button.
Attach this hose to the drain valve at the bottom of the tank for safe, mess-free flushing and draining.
- Turn off the power or gas to the heater.
- Connect your garden hose to the adapter on the draining kit.
- Open a hot water faucet upstairs to break the vacuum.
- Open the tank’s drain valve and let it run until the water runs clear.
The most common mistake is using a cheap vinyl hose that kinks or melts from the hot water. Get one made for hot water use.
Descaling Solution for Tankless Units
Tankless water heaters like Rinnai, Takagi, and EcoSmart require regular descaling. Mineral scale inside the heat exchanger causes poor performance, error codes, and shutdowns. A dedicated descaling solution is more effective and safer for the unit’s internal components than plain vinegar. Regular cleaning and descaling routines help maintain efficiency and extend the unit’s life. A practical guide on cleaning and descaling tankless heaters provides detailed instructions for this maintenance.
Annual descaling with a pump kit and proper solution is the single best maintenance for a tankless unit’s longevity.
- Buy a descaling pump kit; it includes tubing, a submersible pump, and buckets.
- Use a solution recommended by your manufacturer (some warranties require it).
- Always follow the specific flush procedure in your owner’s manual. It involves isolating the unit and circulating the solution through the heat exchanger.
A Quality Element Wrench for Future Repairs
If your electric heater’s reset button keeps tripping, a bad heating element is a probable cause. You need a proper element wrench to remove it. Standard sockets or channel locks will just round off the square element head, creating a huge headache.
This single-purpose tool provides the correct fit and leverage to remove a corroded heating element without damaging the tank’s opening.
They come in 1.5-inch and 1.25-inch sizes. Check your old element or your heater’s manual for the correct size before you buy. When replacing an element, always replace the gasket too, and hand-tighten plus a quarter-turn with the wrench. Overtightening can strip the threads in the tank.
When NOT to Try This: Limitations and Professional Help
Resetting a water heater is a first step. It is not a magic fix for every problem. Knowing when to stop trying is just as important as knowing how to push the button.
If you see any of these red flags, stop immediately and do not attempt a reset. Your safety is more important than a hot shower.
- Water Leaking from the Tank Itself: A drip from a pipe connection is one thing. A steady leak or seepage coming from the tank’s steel body is a death sentence. The internal glass lining has failed and the tank is corroding through. No reset will fix a hole.
- The Smell of Gas (For Gas Models): If you smell rotten eggs or sulfur near the unit, you likely have a gas leak. Do not touch any electrical switches, including the reset button. Evacuate the area and call your gas company or a licensed pro from outside the house.
- Burned or Melted Wiring: If you open the access panel and see blackened insulation, melted wire nuts, or a charred smell, you have an electrical fault. Pushing the reset on a compromised circuit is a fire risk.
- You Are Uncomfortable: If looking at the wiring makes you nervous, stop. Working on 240-volt circuits or gas lines is not for beginners. Trust your gut.
Defining “When to Seek Professional Help”
Sometimes the issue isn’t an emergency, but it’s still beyond a simple reset. Calling a professional is the smart, cost-effective move in these situations.
After One Failed Reset Attempt
You pressed the button. The heater worked for an hour, maybe a day, then tripped again. This is a clear signal. The high-limit switch is doing its job, shutting things down because a core component has failed or a dangerous condition persists. Continuing to reset it is like hitting snooze on a smoke alarm.
For Any Gas-Related Issue
Gas water heaters add layers of complexity with the burner assembly, thermocouple, and gas valve. If you have no hot water and the pilot light is out, you can try relighting it by strictly following the manual’s instructions. But if the pilot won’t stay lit, the burner won’t ignite, or you see soot (carbon buildup) around the window, the problem is with the gas controls. This is not a DIY diagnosis for most people.
For Diagnosing Internal Components
If the reset won’t stay in or the unit has no power, the problem is often inside. On an electric heater, this means a failed heating element or a bad thermostat. On a gas unit, it could be a faulty gas control valve. Diagnosing this requires a multimeter and knowing how to safely test live components. Replacing a heating element also requires draining the tank, which is a messy job if you’re not prepared. I’ve been to homes where a well-meaning homeowner caused a flood in their own basement trying this. It’s always best to follow a reliable troubleshooting guide for your gas water heater.
For Replacing the Unit
If your tank is leaking or simply too old (most last 10-15 years), resetting is pointless. You need a new heater. Professional installation is highly recommended. It ensures proper sizing, up-to-code plumbing and venting, and safe handling of the old unit. A bad install can lead to poor performance, leaks, or even carbon monoxide hazards with gas models.
Quick Answers
My reset button keeps tripping. What should I do?
Stop resetting it. A button that trips repeatedly is a major safety warning, usually for a failed heating element or thermostat. Continuing to force it is a fire hazard; this is the time to call a professional.
I have a tankless unit showing an error code. Will a reset fix it?
A power cycle (turning the breaker off/on) can clear temporary glitches. If the specific error code returns immediately, the reset didn’t work. The unit has a real issue with gas, water flow, or a sensor that needs a technician’s diagnosis.
How do I know if my water heater needs a professional instead of a reset?
Call a pro if you see water leaking from the tank body, smell gas, or find burned wiring. That’s exactly the kind of issue covered by water heater leak causes troubleshooting to pinpoint the source. Later steps will walk through common leak sources and quick checks. For electric heaters, if the reset button won’t stay in or trips again within a day, you have a faulty internal component that requires repair.
What’s the most important safety step before pressing any reset button?
Turn off the power at your home’s main circuit breaker-not just a wall switch. Then, double-check that the power is off using a non-contact voltage tester on the heater’s wires. Never work on a live unit.
My Rheem heater isn’t working. How do I know if it’s gas or electric to reset it correctly?
Look for an access panel with a red button (electric) or a gas valve and burner assembly (gas). Rheem electric models reset with that button. Rheem gas models reset by relighting the pilot or cycling power to the ignition system; they do not have an electrical reset button.
Keeping Your Water Heater Efficient
Always check the main reset button on an electric heater first, before digging into other problems. For any tankless or high-tech unit, remember that its error code is your first and best clue to what went wrong.
Routine attention prevents most reset scenarios, so make annual flushing and inspection a non-negotiable part of your home maintenance. Knowing when a problem is beyond a simple reset-like repeated trips or error codes you can’t clear-is the key to avoiding bigger damage and knowing when to call in a technician.
Bob McArthur
Bob is a an HVAC and plumbing industry veteran. He has professionally helped homeowners resolve issues around water softeners, heaters and all things related to water systems and plumbing around their homes. His trusted advice has helped countless of his clients save time, money and effort in home water systems maintenance and he now here to help you and give you first hand actionable advice. In his spare time, Bob also reviews home water systems such as tankless heaters, water softeners etc and helps home owners make the best choice for their dwelling. He lives around the Detroit area and occasionally consults on residential and commercial projects. Feel free to reach out to him via the contact us form.