Why Is My Water Heater Leaking? Common Causes and Troubleshooting
Your water heater is leaking. Let’s find out why and stop it before you have a bigger mess.
We will cover common causes, sources, and troubleshooting steps.
I’ve repaired these for years. First thing, turn off the power and cold water supply to the unit.
First Thing: Don’t Panic, Do This Immediately
Water on the floor is alarming. Your first job is to stop the situation from getting worse.
Shut Off Power and Water
Do this right now, in this order.
- Turn Off the Power:
- Electric Heater: Go to your main electrical panel and flip the breaker labeled for the water heater to OFF.
- Gas Heater: Find the gas shut-off valve on the black flexible gas line leading to the heater. Turn the valve handle a quarter-turn so it is perpendicular to the pipe.
Cutting power stops the heating elements or burner from trying to fire, which is a major electrical and fire risk if water gets where it shouldn’t.
- Shut Off the Water: Find the cold water inlet pipe on top of the heater. There will be a valve on it (a lever handle or a round knob). Turn the lever 90 degrees or turn the knob clockwise until it stops. This stops new cold water from entering the tank and feeding the leak.
Contain the Leak
If the leak is a slow drip or seep, grab a bucket, old towels, or a wet/dry vacuum. Place a bucket under the leak source if you can see it, or surround the base of the heater with thick towels to soak up water and protect your floor. For a big puddle, the vacuum is your best friend to get the bulk of the water up fast.
Is a Leaking Water Heater Dangerous? What Should I Do?
Yes, ignoring it is dangerous. The immediate risk is water contacting electrical components, which can cause a short or shock hazard. Over time, constant water leads to mold, structural damage to floors, and if the tank itself is leaking, it could eventually rupture. A leaking water heater also creates immediate safety risks, including electrical shock where water contacts wiring and burns from hot water. Addressing the leak quickly minimizes those dangers. What you should do is exactly what we just covered: shut off power, shut off water, and contain the mess. That’s your safe stopping point to assess the problem.
How to Find the Leak: A Plumber’s Step-by-Step Hunt
Now that the system is safe, you need to play detective. Water can travel along pipes and seams, so the drip you see isn’t always the leak’s origin. Next, we’ll cover how to detect a leaking home water line. This will help you pinpoint the true source before you start repairs.
Dry Everything and Get Your Tools
Use an old towel to completely dry the top of the tank, all pipe connections, valves, and the tank’s sides. You need a bone-dry starting point. Grab a bright flashlight and a clean, white paper towel or a dry cloth.
The Top-Down Inspection Method
Think of this like finding a roof leak inside your attic. You look for the highest point where the water is coming from. Start at the very top of the water heater and work your way down, inch by inch.
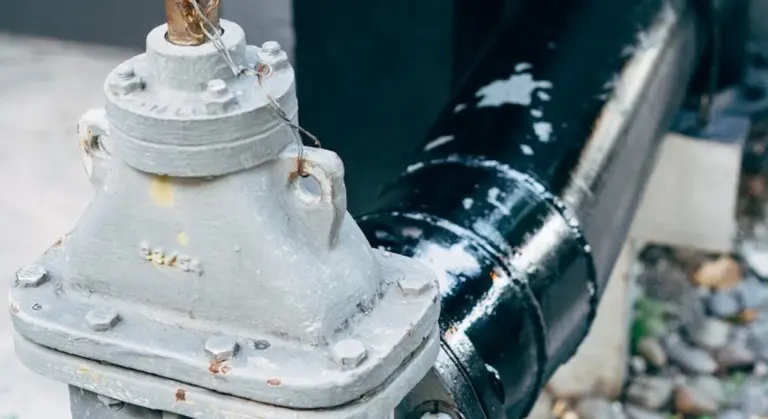
- Check the Pipe Connections: Feel and look at the cold water inlet and hot water outlet connections on top of the tank. Check the temperature and pressure relief valve (TPR valve) pipe. Look for drips or corrosion.
- Check the Valves: Inspect the drain valve at the bottom of the tank. Is it fully closed? Wipe it with your paper towel.
- Check the Tank Seams: Look at the weld seams, especially around the top and bottom where the steel is joined. On gas heaters, check around the burner access panel at the bottom.
- Use the Paper Towel Trick: Run your dry paper towel along each pipe, joint, and seam. Even a tiny seep will show up as a damp spot on the towel, pinpointing the exact source before a visible drip forms.
Where Is the Leak Coming From? How Do I Identify It?
You identify the source by this process of elimination. Common sources are:
- From Top Fittings: Usually a loose plumbing connection or a faulty TPR valve. Often a simple fix.
- From the Drain Valve: The valve stem seal is worn. Tightening might work, but replacement is better.
- From the Tank Body (a seam or a pinhole): This is the worst news. If the steel tank itself is leaking, the water heater needs to be replaced. It cannot be reliably repaired.
Trace the moisture back to its highest point. Where your paper towel gets wet first is your culprit.
Common Leak Sources, From Easy Fix to Tank Failure

Find the water first. Grab a flashlight and a dry rag. Wipe every pipe, valve, and seam on the heater from top to bottom. Start with the easy stuff. The source of the drip tells you everything about the fix, from a simple five minute job to calling for a replacement.
Leaky Pipe Connections (Inlet, Outlet, T&P Valve Pipe)
Look at where the water pipes connect to the heater. You will see a big nut, called a union. Check the cold water inlet (right side) and hot water outlet (left side) connections. Also check the pipe coming from the Temperature & Pressure (T&P) relief valve. If everything seems fine but the water still isn’t heating, refer to our troubleshooting guide for water heaters that are not heating.
If you see drips forming at these threaded joints, you have found the best possible leak. This is the most common false alarm. The fix is straightforward. Turn the water supply off. For the inlet and outlet, try tightening the union nut a quarter turn with a wrench. For the T&P valve pipe, you may need to disconnect it and apply fresh pipe thread sealant (Teflon tape or dope) to the threads. Do not crank down on the nuts. Over-tightening can crack the fittings and create a bigger leak. This is a simple DIY fix with a difficulty of 2 out of 10.
A Dripping Temperature & Pressure (T&P) Relief Valve
This valve is a brass fitting on the top or side of your tank with a small pipe running down the side. Its only job is to open if the temperature or pressure inside the tank gets dangerously high. A steady drip or small stream from the valve’s discharge pipe means it is doing its job because pressure is too high, or the valve itself has failed and cannot reseal.
Here is how to test it. Place a bucket under the discharge pipe. Carefully lift the valve’s test lever straight up for a few seconds and let it snap back. You should hear a rush of water and air into the bucket, then it should stop completely when you release the lever.
If the dripping continues after you release the lever, the valve is bad and must be replaced. Replacing a T&P valve is a mid level DIY task. You must turn off the power and water, drain the tank partially, and swap the valve. If the test stops the drip, your system pressure is too high. This leads to our snippet. Next, you can test the valve to confirm the issue and troubleshoot any remaining drip. The following steps cover test, troubleshoot, and replace the TP valve.
Water Science Snippet: Water expands when heated. In a closed system, this thermal expansion has nowhere to go, so pressure builds. A properly functioning expansion tank on your cold water line absorbs this pressure. If you don’t have one, or yours is waterlogged, the T&P valve becomes the only pressure relief, causing it to drip.
A Faulty or Loose Drain Valve
This is the spigot at the bottom of the tank used for flushing sediment. The valve has a stem that opens and closes. A leak here usually shows as a drip from around the stem itself, not from the hose thread outlet.
For a brass valve, you can sometimes fix a stem drip by gently tightening the packing nut just behind the handle. Use a wrench, but only turn it an eighth of an inch. If it still leaks, or if you have a cheap plastic valve, the whole valve needs replacement. Contrast this with water gushing from the hose thread outlet, which just means the valve is accidentally left open or the hose washer is bad, a much simpler fix.
Corrosion at the Top or Bottom Nipples
Look where the inlet and outlet pipes enter the tank. These connections are called nipples and are welded to the tank’s steel shell. Corrosion here looks like rust streaks, white mineral deposits (like hardened chalk), or a distinct pinhole leak spraying or weeping water.
This is a serious red flag, answering the question, “can a hot water heater leak from the bottom?” Absolutely. A leak at the bottom nipple often means sediment has settled and corroded the interior weld from the inside out. This is not a connection leak. It is a sign the tank’s internal lining has failed at that spot. The tank itself is actively failing. If the unit is gas-fired, any sign of leakage is a serious safety concern and demands immediate attention. Detecting and fixing gas water heater leaks should be handled by a licensed professional.
The Internal Tank is Corroded Through
If you see water actively seeping or streaming from the middle of the tank’s steel shell, the game is over. You might see a rust blister weeping, or a steady flow from a seam. There is no patch, no sealant, no repair for this.
This is the source that demands a full water heater replacement. Contrast this with all the connection leaks above. A connection leak is external. A tank leak is internal corrosion that has breached the steel. Once the tank’s glass lining is compromised, the steel rusts rapidly. Your only action is to schedule a replacement before it bursts.
What About a Tankless Water Heater Leak?
Yes, a tankless water heater can leak, but the sources are different. Since there is no storage tank, you will not see tank corrosion. Leaks usually come from internal connections: where the copper tubing connects to the heat exchanger, or from the condensate drain line on high efficiency gas models.
You might see water dripping from the bottom of the unit’s enclosure. Diagnosing and repairing internal leaks on a tankless unit is almost always a job for a professional technician with specific training. The complexity of disassembly and the risk of damaging sensitive components makes this a difficulty of 9 out of 10 for a DIYer.
Your Troubleshooting Steps for Each Type of Leak
Grab your tools: an adjustable wrench, a roll of pipe thread tape, a bucket, and a good flashlight. This is your basic leak-hunting kit. Now, let’s run through the fixes for the most common leak sources you’ll find.
Leaking Temperature & Pressure (T&P) Relief Valve
This valve is a critical safety device, so take it seriously. A slow drip from the discharge pipe is often normal. A steady stream is a problem.
- Place your bucket under the valve’s discharge pipe (usually a copper pipe running down the side of the tank).
- Carefully lift the valve’s test lever for a few seconds to flush it. Let it snap back. If water continues to drain afterwards, the valve is failing.
- If the dripping stops after flushing, the valve likely just had debris in it and reseated properly. Keep an eye on it.
- If it keeps dripping, you must replace the valve. Shut off the water and power to the heater, drain some water from the tank to relieve pressure, and unscrew the old valve with your wrench. Wrap the threads of the new valve with pipe tape and screw it in tightly.
Leaking Drain Valve
This is one of the easiest and most common fixes. The plastic or brass valve at the bottom of the tank can wear out.
- Confirm the leak is from the valve stem, not the pipe connection. Tighten the connection with your wrench if needed.
- For a leak from the stem, try gently tightening the valve’s screw or handle. Don’t over-tighten plastic valves.
- If tightening doesn’t work, the washer inside is shot. You’ll need to replace the entire valve.
- To replace it, shut off the water and power, connect a hose to the valve, open a hot faucet upstairs, and drain the tank completely. Unscrew the old valve and install the new one with pipe tape on the threads.
Leaking Inlet or Outlet Connections (Hot & Cold Pipes)
Water at the top of the tank usually means a bad connection at the pipes.
- Dry the connection point thoroughly with a rag. Use your flashlight to watch for the exact source of the drip.
- If it’s leaking at the threaded nipple going into the tank, shut off water and power. Drain the tank below the connection. Unscrew the pipe, apply fresh pipe tape to the threads, and reconnect.
- If it’s leaking at a flexible hose connection or union, try tightening it a quarter-turn with your wrench.
- For corroded fittings, replacement is the only permanent fix. I had to replace the brass flex lines on my own heater last year after spotting green corrosion.
Leaking from the Tank Itself
This is the worst-case scenario. Internal corrosion has created a pinhole in the steel tank.
- Dry the entire exterior of the tank. Look for rust trails or water actively seeping from the tank wall, not from a connection.
- Check if the leak is coming from the weld seam at the top or bottom. Sometimes, a seam leak can be repaired by a pro, but it’s rare.
- A leak from the main tank body means the heater is finished and must be replaced immediately. No patch kit or sealant is a safe, long-term fix for a pressurized tank.
The “Red Flag” Troubleshooting Guide
Some situations are too dangerous or severe for DIY. If you see any of these, stop and call a professional plumber right away.
- Water Actively Streaming from the Tank Body: This is a catastrophic failure. Turn off the water supply and power at the breaker immediately.
- Smell of Gas (for gas heaters): If you smell rotten eggs near the heater, you may have a gas valve or line leak. Get everyone out, do not turn any lights on or off, and call your gas company from outside.
- Major Water Pooling: A large puddle (more than a gallon) suggests a rapid leak that could cause structural damage or an electrical hazard.
- T&P Valve That Won’t Stop Dripping After Replacement: This indicates a dangerous over-pressure or over-temperature condition in the tank that the valve is correctly responding to. The heater’s thermostat or the home’s water pressure may be faulty.
- Water Spraying from Electrical Access Panels: On an electric heater, this is a severe electrocution risk. Cut power at the breaker before approaching.
Repair or Replace? Making the Call
Finding the leak is only half the battle. Now you need to decide your next move. The choice comes down to two things: where the leak is and how old your heater is.
Use this simple rule: if the leak is from a pipe, valve, or fitting, you can usually fix it. If the leak is from the tank body itself, you must replace the entire unit. To fix a leaking toilet tank, you may want to check the tank seals and flush valve first. The next steps will guide you through a step-by-step fix.
The Simple Decision Matrix
Follow this logic. First, confirm the leak source you identified earlier.
- Leak from a Connection or Valve (Inlet/Outlet, Drain, T&P, Element Gasket): These are component failures. You can replace the faulty part. If you fix it successfully, the tank can stay.
- Leak from the Tank Body (Seam, Weld, or a Pinpoint Hole on the Steel): This is a tank failure. The internal glass lining has failed, and corrosion has eaten through the steel. You cannot seal this. The tank must be replaced.
I had a customer once try to patch a pinhole leak with epoxy. It held for a week, then the tank split open like a soda can. A leaking tank is a pressure vessel giving way. If you hear running water from the tank or notice a damp area around the toilet, those are telltale toilet tank leak signs. Do not attempt a permanent repair.
The Age Factor: Is Your Heater on Borrowed Time?
Even if the leak is from a fixable part, the age of your heater matters. The average tank water heater lasts 8 to 12 years. Even if you fix the leak, it might not be worth it if the unit is nearing the end of its lifespan.
Check the manufacturer’s label on the side of the tank. Look for a serial number. Often, the first four digits are a month/year code (like 0521 for May 2021). If your unit is over 10 years old and leaking, replacement is often the smarter long-term investment.
Fixing a minor leak on a 13-year-old heater is like putting a new battery in a phone with a cracked screen and no storage left. It works, but you’re not solving the bigger problem. The next failure is likely just around the corner.
Can I Fix a Leaking Water Heater Myself?
Yes, for some leaks. Your success depends entirely on the source and your comfort with basic plumbing.
Replacing a drain valve or tightening an inlet connection is straightforward. Swapping a T&P valve or a heating element gasket is intermediate work. It requires draining the tank, using pipe wrenches, and ensuring a perfect seal.
If you have any doubt about your ability to safely work with water and high-voltage electrical connections (for electric heaters) or gas lines (for gas heaters), stop. A mistake can cause major water damage or create a safety hazard. Always follow proper water heater safety guidelines to prevent accidents.
When Should I Call a Professional?
Call a pro immediately for any leak from the tank body. You should also call one if:
- The leak is at the gas valve or burner assembly (gas heaters).
- The leak involves the electrical element threads and you are not confident wiring it.
- You have diagnosed the issue but lack the tools or strength to complete the repair (e.g., stubborn pipes that won’t budge).
- The leak is large and you cannot safely shut off the water or power.
DIY vs. Pro Verdict & Difficulty Rating
Here’s a clear breakdown of common fixes. Be honest with yourself about your skill level before starting.
| Repair Type | DIY Difficulty (1-10) | Verdict |
| Tightening Loose Pipe Connections | 2/10 | DIY. Use two wrenches: one to hold, one to turn. |
| Replacing a Standard Drain Valve | 3/10 | DIY. Drain tank, unscrew old valve, wrap threads with seal tape, screw in new valve. |
| Replacing T&P Relief Valve | 5/10 | DIY (Caution). Must drain tank fully. Ensure new valve has same pressure/temperature rating. Test immediately after. |
| Replacing Electric Heating Element Gasket | 6/10 | DIY for experienced. Requires power lock-out, draining, and proper torque on the element. Risk of cross-threading. |
| Repairing a Leak from the Tank Itself | 10/10 | CALL A PRO. This is not a repair. The entire unit needs replacement. |
| Full Water Heater Replacement | 10/10 | CALL A PRO. Involves plumbing, potential electrical or gas work, heavy lifting, and code compliance. |
How to Prevent the Next Leak (It’s All About Maintenance)
Here’s the straight talk: a water heater leak is almost always a failure of maintenance, not the equipment. Treat it like your car. You change the oil. You check the tire pressure. Do a few simple things every year, and your heater will run for its full lifespan. Neglect it, and you’re buying a new one way sooner than you should. A simple water heater maintenance schedule helps you stay on top of these tasks. It tells you what to check and when.
The most common question I get after a repair is, “How do I prevent my water heater from leaking in the future?” The answer isn’t complicated. It comes down to three key tasks. Do them, and you’ll sleep better at night.
1. Annual Draining and Flushing
This is job one. Over time, minerals and sediment from your water settle at the bottom of the tank. It acts like sand in a engine, constantly grinding against the steel. This sediment blanket also forces your burner or elements to work harder, wasting energy.
Flushing this grit out once a year is the easiest way to fight corrosion and keep your heater efficient. Here’s how:
- Turn off the power (breaker for electric, gas valve for gas) or set it to “Pilot.”
- Connect a standard garden hose to the drain valve at the tank’s base. Run the other end to a floor drain or outside.
- Open a hot water faucet somewhere in the house to prevent a vacuum.
- Open the drain valve. Let it run until the water runs clear. If nothing comes out, the valve is likely clogged with sediment-a sign you waited too long.
2. Testing the Temperature & Pressure (T&P) Relief Valve
This valve is your last line of defense against a tank explosion. It’s designed to open if the internal temperature or pressure gets dangerously high. If it’s seized shut from mineral buildup, it can’t do its job.
Testing this valve every year is a critical safety check, not just a maintenance item. Lift the test lever on the valve for a few seconds. You should hear a loud gush of water into the discharge pipe, then see it stop when you release the lever. If it just drips or doesn’t stop flowing, the valve is faulty and must be replaced immediately.
3. Checking the Anode Rod (Every 3-5 Years)
This is the secret weapon, and most homeowners don’t even know it exists. The anode rod is a long metal rod (usually magnesium or aluminum) screwed into the top of your tank.
Water Science Snippet: The Sacrificial Hero
Steel rusts in water. An anode rod uses a principle called “galvanic corrosion” to protect the tank. The rod is made of a metal that is more “active” or “sacrificial” than steel. The minerals in your water attack this rod first, eating it away over years. By sacrificing itself, the anode rod corrodes instead of your expensive steel tank lining, effectively extending the tank’s life by a decade or more. Once the rod is completely consumed, the tank walls are next. Checking and replacing a worn rod is the single most impactful thing you can do to prevent a leak.
To check it, you need a 1-1/16″ socket and a long breaker bar. Shut off the water and power, drain a few gallons from the tank, and unscrew the rod from the top. If it’s less than 1/2″ thick or coated in calcium, replace it. It’s a $50 part that saves you an $800+ tank.
When and How to Call a Professional Plumber
Sometimes the best tool is your phone. Knowing when to call a pro saves you time, money, and prevents a small problem from flooding your basement.
Scenarios That Require a Professional
Do not attempt these fixes yourself. Your safety and your home’s integrity are on the line.
- Gas Line or Valve Leak: If you smell gas (a rotten egg odor) or suspect a leak on a gas water heater, evacuate the area and call your gas company or a licensed plumber immediately. This is not a DIY situation.
- Any Tank Body Leak: If water is seeping from the tank’s steel shell, the tank has failed. A leaking tank cannot be repaired; it must be replaced. This is the most common reason for a full unit swap.
- Lack of DIY Confidence: If you’re unsure about shutting off power, draining the tank, or sweating copper pipes, call someone. A botched install can lead to water damage or electrical hazards.
- Complex Diagnostics: You’ve checked the easy stuff (drain valve, T&P valve, inlet connections) and the leak persists from an unclear source. A pro has the experience to trace it quickly.
What to Tell Your Plumber for an Accurate Quote
Good information gets you a better estimate and the right technician. Have these details ready.
- Fuel Type: Is it natural gas, propane, or electric?
- Tank Size: Look for the gallon rating on the label (e.g., 40-gallon, 50-gallon).
- Leak Location: Be specific. “It’s leaking from the bottom near the drain valve,” or “Water is dripping from the pipe on top near the pressure relief valve.”
- Age of Unit: Find the manufacture date on the serial number. This tells the plumber if repair is even worth considering versus replacement.
Put it all together: “I have a 10-year-old, 50-gallon natural gas water heater leaking from the tank itself near the bottom.” This tells the plumber you likely need a full replacement.
Reassurance on Professional Replacement
Replacing a whole water heater is a standard job for any plumbing company.
Calling a professional for a tank swap is the smart, normal choice. They handle the heavy lifting, ensure the new unit is up to local code, and properly connect gas, water, and venting. Most quotes include hauling away your old unit, which is a headache you don’t need. When I replaced mine, the peace of mind knowing the gas line was pressure-tested and the expansion tank was properly supported was worth every penny.
Quick Answers
Is a leaking water heater dangerous?
Yes, it can be. The immediate risk is water contacting electrical components or a gas burner, creating a shock or fire hazard. Always shut off the power (breaker or gas valve) and the cold water supply to the unit as your first step.
Can I fix a leaking water heater myself?
Sometimes. If the leak is from a loose pipe fitting or a faulty drain valve, a confident DIYer can often handle it. If the leak is from the tank body itself, it is not repairable and requires a full replacement-call a pro.
When should I call a professional for a water heater leak?
Call a pro immediately for any leak from the tank’s steel shell, for leaks involving gas lines, or if you lack the tools or confidence for safe plumbing/electrical work. When in doubt, making the call is the safest choice.
What is the most common cause of a leaking water heater?
External connections failing. Leaks from the inlet/outlet pipes, the Temperature & Pressure (T&P) relief valve, or the drain valve are very common and often fixable. These are usually due to worn seals, loose fittings, or normal part failure.
What is the single best thing I can do to prevent a future leak?
Check and replace the anode rod every 3-5 years. This “sacrificial” rod protects your tank’s steel from corrosion. Once it’s gone, the tank rusts out, which is the main cause of catastrophic tank failure leaks.
Keeping Your Water Heater Dry and Reliable
Always start by finding the exact leak source with a flashlight and paper towel to avoid unnecessary part replacements. I mark my calendar every spring to check my own unit’s pressure valve and connections, a simple habit that prevents most surprises.
Bob McArthur
Bob is a an HVAC and plumbing industry veteran. He has professionally helped homeowners resolve issues around water softeners, heaters and all things related to water systems and plumbing around their homes. His trusted advice has helped countless of his clients save time, money and effort in home water systems maintenance and he now here to help you and give you first hand actionable advice. In his spare time, Bob also reviews home water systems such as tankless heaters, water softeners etc and helps home owners make the best choice for their dwelling. He lives around the Detroit area and occasionally consults on residential and commercial projects. Feel free to reach out to him via the contact us form.