Refrigerator Door Removal: Don’t Mess Up the Water Line
You need to get that fridge door off, but the water line has you worried about a leak. Get it right the first time.
This guide walks you through the safe process, from prep to reconnection. We will cover shutting off the water, disconnecting the line correctly, and detaching the door without stripping screws or breaking plastic.
I’ve pulled more fridge doors in kitchens and basements than I can count. Here’s the rule: water off before you touch anything.
What You Need Before You Start: Your Tool Checklist
Gather these tools on the floor before you crawl behind the fridge. A frantic search for a screwdriver with wet hands is how small messes become big problems.
- Adjustable Wrench: This is for the compression nut on the saddle valve. An adjustable wrench grips that hexagonal nut perfectly.
- Phillips and Flathead Screwdrivers: Your fridge door’s interior panel and any trim pieces are held on with screws. You need both types to be ready.
- Slip-Joint Pliers: Sometimes a stubborn water line connection needs more grip than a wrench can provide. My old Channellocks have saved many jobs.
- An Old Towel: Lay this on the floor directly under the water line connection. It will soak up the inevitable few drips that escape.
- A Small Bowl: Place this bowl on the towel, right under the connection point. It catches the water that remains in the line after you shut it off, keeping your floor dry.
Having every tool within arm’s reach turns a potentially frustrating job into a simple ten minute task.
Step One: The Golden Rule – Shut Off the Water Supply
Never disconnect a water line under pressure. Water will spray everywhere. You have two places to shut the water off.
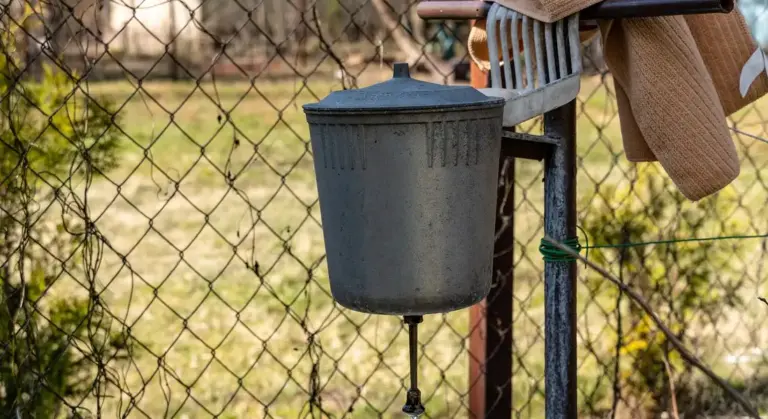
Option 1: The Dedicated Saddle Valve (Most Common)
This small valve is typically on the copper or plastic water line directly behind or near the refrigerator. It pierces the main pipe to feed the fridge. Be sure to install it carefully, especially if it is a ball valve.
Look for a small handle. To close it, turn the handle clockwise until it stops. This is usually a quarter turn. The handle will be perpendicular to the water pipe when it is fully closed. If there’s no handle, you may need to turn a small screw on the valve stem clockwise with a flathead screwdriver.
Option 2: The Main House Valve
If you can’t find a saddle valve, you must shut off the main water supply to your home. Find this valve, often located where the main water line enters your house (basement, crawlspace, or near the water heater). Turn the valve clockwise to close it completely.
Shutting the main valve affects every fixture in your house, so let other household members know.
The Critical Next Step: Relieve the Pressure
Shutting the valve stops new water from entering the line. But water is still trapped in the line between the valve and your fridge dispenser.
Go to your refrigerator and dispense water from the interior water dispenser or through the door. Hold a cup under it. You will get a short burst of water, then it will slow to a trickle, and then stop. When no more water comes out, the pressure in the line is gone, and it is safe to disconnect. This simple step prevents a surprise splash when you loosen the fitting. From here, you can proceed to disconnect the water supply lines from the fixture. Have towels ready to catch any residual drips.
How to Actually Disconnect the Water Line from Your Fridge
This is the main event. Doing this wrong can mean a flooded floor. Follow these steps in order.
Step 1: Get to the Connection Point
First, unplug the refrigerator from the wall. Pull the fridge straight out carefully. You’ll see the water line running into the back, usually near the bottom. If you’re planning to install water supply lines for appliances, this back area is where you’ll connect the new line. The next steps will guide you through installing those lines and securing them to prevent leaks.
The connection is almost always hidden behind a plastic kickplate at the bottom rear of the fridge. You might need to remove a couple of screws or just give it a firm tug to pop it off. Once it’s off, you’ll see where the skinny 1/4″ water line connects to the fridge.
The goal here is to expose the connection clearly, giving you room to work with both hands.
Step 2: Turn Off the Water Supply
Do not touch the fridge connection yet. Trace that 1/4″ line back to its source. It will connect to a shut-off valve, typically:
- Behind the fridge, low on the wall.
- Under the kitchen sink.
- In the basement or crawlspace directly below.
Turn that valve clockwise until it stops. This shuts off water pressure to the line.
Step 3: Identify Your Fitting Type
Look at the connection on the back of the fridge. You have one of two common types. Knowing which one dictates your next move.
Type 1: The Plastic Compression Nut
This is a simple nut that threads onto a brass fitting. It’s common on copper tubing. The nut is often white or gray plastic.
If you see a plastic nut threaded onto a metal sleeve, you have a compression fitting.
Type 2: The Quick-Connect (Push-To-Connect)
This fitting has a colored collar (often blue) and you won’t see any threads to unscrew. The water line pushes straight into it. These are standard on plastic or polymer tubing.
If the line disappears into a colored collar with no visible nut, you have a quick-connect fitting.
Step 4: Disconnect the Water Line
The method changes based on your fitting type.
For a Plastic Compression Nut:
- Place an adjustable wrench on the flat sides of the brass fitting behind the fridge. This is your backup wrench to keep it from twisting.
- Use a second wrench (or channel-lock pliers) to grip the plastic compression nut.
- Hold the backup wrench firmly still. Turn the plastic nut counterclockwise with the other wrench.
- Once loose, finish unscrewing it by hand. The line will pull free.
Using two tools is non-negotiable; turning the brass fitting can kink or break the copper tubing inside your wall. A little water will dribble out of the line, so have a towel ready.
For a Quick-Connect Fitting:
- Push the colored plastic collar firmly toward the refrigerator body.
- While holding the collar pushed in, firmly pull the water line straight out.
- It should release with a slight tug. If it doesn’t, push the collar in harder and try again.
Do not twist or yank the line. The mechanism releases by pushing the collar to disengage internal locking teeth. On my own kitchen fridge, I have to push the blue ring almost flush with the body before the line lets go.
Step 5: Cap the Open Line (Optional but Smart)
With the line disconnected, water is off at the shut-off valve. For extra safety, screw a 1/4″ compression cap onto the open brass fitting if you have a compression style, or plug the quick-connect port with a manufacturer’s plug. This prevents any accidental drips if the shut-off valve is ever bumped open.
Now the water line is free. You can safely remove the refrigerator door without straining or damaging the plumbing.
Removing the Door Itself: A Hinge-by-Hinge Guide
Now for the main event. The door is disconnected from the water, but it’s still a big, heavy piece of hardware. Treat it with respect.
Refrigerator doors are heavier and more awkward than they look, so get a second person to help you. Trying to manage it alone is a great way to damage your floor, the door, or yourself.
Step-by-Step Door Removal
The process is straightforward, but the order matters. Do not just start yanking on bolts.
- Remove the hinge cover. This is usually a plastic cap that snaps or slides off. Some are held by a single screw underneath. Set it and any screws aside.
- Have your helper support the full weight of the door. They should hold it firmly in the closed position. This takes all the stress off the hinges.
- Using the correct socket or wrench, unbolt the hinges. Start with the top hinge on a top-freezer model, or the bottom hinge on a bottom-freezer. Leave one bolt slightly snug until you’re ready.
The Critical Warning
Here is the moment most people get surprised. As you loosen the final bolt, the door is no longer constrained and can swing open violently under its own weight. Your helper must be braced and ready to control this motion. A sudden swing can tear the remaining water line connection or smash into a wall.
Top-Freezer vs. Bottom-Freezer Considerations
The main difference is which door you start with and the hinge type.
- For a top-freezer unit, you remove the refrigerator door first. The freezer door above it often has a brace or interlocking hinge. After the fridge door is off, you can usually access the freezer hinge bolts more easily.
- For a bottom-freezer or French door model, you typically remove the refrigerator doors first. The bottom freezer drawer usually slides out on tracks and may have a simpler release mechanism once the upper section is clear.
In both cases, the principle is the same: support the door, unbolt methodically, and control the release. If you encounter a hinge pin instead of bolts, a punch and hammer are used to drive the pin out upward while supporting the door.
Handling the Loose Water Line: Don’t Just Let It Dangle
You turned off the water and disconnected the line at the fridge. Good. Now you have a loose plastic or copper tube with water in it. This is where folks make a big mistake. You cannot just let it hang, you need to clean and flush the lines.
Leaving it loose guarantees two problems: it will leak residual water all over your floor, and the open end will suck in dirt and debris that will ruin your ice maker or water dispenser later.
Step 1: Cap That Line Immediately
Do not use tape. Tape is not a seal. It will leak and leave a sticky residue.
You need a mechanical cap. The fitting on almost every refrigerator water line is a standard 1/4″ compression fitting. Go to any hardware store and ask for a 1/4″ compression cap. It’s a tiny brass or plastic cap that costs less than a dollar.
Simply screw this cap onto the threaded end of the disconnected water line. Hand-tight is fine. This creates a perfect seal. No drips, no dirt.
Step 2: Secure the Line to the Wall or Fridge
With the line capped, you must secure it. If it falls behind the fridge, it can get kinked or pinched when you slide the unit back. A kinked line is a restricted line, which means low water pressure and a sad ice maker. It’s especially important to make sure there are no kinks when you winterize water lines.
Here’s what I do in my own garage when I pull my spare fridge out:
- Use a simple plastic cable clip or a loop of painter’s tape.
- Fasten the water line to the wall, the nearby cabinetry, or the back of the fridge cabinet itself.
- Leave a gentle service loop of slack. Don’t pull it taut.
Securing the line keeps it visible, accessible, and prevents damage from pinching when you move the appliance. It’s a two-minute task that saves a $150 service call for low ice production.
Step 3: Do a Quick Check for Damage
While you have the line in your hands, inspect it. Look for any cracks, deep crimps, or worn spots, especially near the fittings. If the plastic looks brittle or the copper is green with corrosion, now is the time to replace it. A new 20-foot copper or plastic line is a $15 insurance policy against a future leak behind your cabinets.
Your goal is to have a capped, secure, and undamaged water line waiting for you when the door work is done and you’re ready to reconnect. Doing this right means you turn the water back on with confidence, not a prayer.
Putting It All Back: Reinstalling the Door and Reconnecting Water
You got the door off, you did your work. Now you need to get it sealed up tight. The process is the reverse of removal, but you have one shot to get the alignment perfect and the water connection leak free. Rushing here is how you end up with a wonky door or a puddle.
Reverse the Removal Process with Key Adjustments
Start by bringing the door close to the fridge. Have a helper hold it steady if you can. If you’re solo, prop the bottom of the door on a small block of wood to take the weight off your arms. The key adjustment is to loosely thread the hinge bolts back in by hand first, before you try to lift the door into its final position. This gives you the wiggle room you need for perfect alignment.
Aligning the Door Correctly Before Tightening
This step separates a professional-looking job from a hack one. With the hinge bolts finger-tight, lift the door into place. Let it rest against the fridge cabinet.
- Look at the gap between the door and the cabinet frame. It should be even from top to bottom.
- Check that the door seal (gasket) makes full, even contact all the way around.
- Open and close the door slowly. It should swing smoothly without rubbing or catching.
Only when the door is perfectly aligned do you take your wrench and snug down the hinge bolts. Alternate between the top and bottom bolts, tightening each a little at a time. This prevents you from pulling the door out of alignment. A misaligned door won’t seal, wasting energy and letting warm air in.
Reconnecting the Water Line
Now for the plumbing. Find the water line connection you uncapped. You should see the valve’s threaded connector (usually a 1/4″ compression fitting).
- Remove the protective cap from the valve.
- Inspect the ferrule (the small brass ring) on the water line. If it looks crushed or damaged, replace the entire supply line. A bad ferrule will always leak.
- Slide the water line’s nut onto the valve’s threads and start threading it on by hand. Hand-tighten it until it is firmly snug and you can’t turn it easily with your fingers anymore.
Grab your adjustable wrench. Place it on the water line nut. Give it one clean, additional quarter-turn. Do not crank on it. Overtightening is the most common cause of failure here, as it can crack the plastic valve or deform the ferrule, creating a leak path. A quarter-turn past hand-tight is almost always sufficient for a brass or plastic compression fitting.
The Vital Leak Check Procedure
Do not, under any circumstances, push the fridge back without testing for leaks. You will not see a leak behind the appliance.
- Turn the water supply valve back on slowly.
- Immediately get down on the floor with a bright flashlight.
- Look at the connection you just made. Run your fingers around it to feel for moisture.
- Place a dry paper towel under the connection. Wait for two full minutes. Any drip, no matter how small, will show up.
If the paper towel is dry after two minutes, your connection is good. You can now slide the refrigerator back into place. If you see a drip, turn the water off, tighten the nut *slightly* (an eighth of a turn), and test again. If it still leaks, you likely need a new supply line.
Once the fridge is back, run the water dispenser for a minute to clear any air from the line. Listen for odd noises. A few sputters are normal, but persistent hammering in the pipes might mean you need an arrestor. That’s a project for another day. For now, enjoy your working fridge and leak free floor.
Common Problems and Simple Fixes
Tackle a Stuck Plastic Compression Fitting
Those plastic compression nuts on the water line love to seize onto the valve stem. It’s a common headache. Do not force it with pliers, as you will crack the nut or crush the soft copper line. Instead, apply gentle heat to expand the plastic nut slightly.
Grab a common hair dryer. Set it on its highest heat setting and aim it directly at the stuck nut for 45 to 60 seconds. Keep the dryer moving to avoid concentrating heat in one spot. The plastic will become more pliable. Now, try turning the nut by hand. It should break free. If it’s still stuck, another 30 seconds of heat usually does the trick.
Address a Leaking Saddle Valve and How to Tighten It
A saddle valve pierces your copper water pipe to make a connection. They are notorious for weeping over time. If you see water dripping from the valve body after reconnecting everything, you can try a simple fix first.
- Ensure the refrigerator water valve is in the OFF position.
- Place an adjustable wrench on the valve’s main body to hold it steady.
- Use a second wrench to gently tighten the packing nut, which is the large nut directly behind the handle. Turn it clockwise about one-eighth to one-quarter of a turn.
- Turn the water back on and check for leaks.
If the leak is coming from the piercing needle itself or tightening doesn’t work, the valve’s internal seal is shot and the entire saddle valve must be replaced. This is a very common failure point I see on service calls.
Solve a Door That Won’t Sit Square After Re-hanging
If your door is crooked or won’t close flush, the hinge alignment is off. This happens when the door’s weight shifts during removal. The fix is straightforward. You need to adjust the hinge plates on the refrigerator cabinet.
Loosen the screws on the upper hinge plate just enough so you can move the plate with gentle pressure. Do not remove the screws completely. Have a helper hold the door in its correct, square position against the cabinet. While they hold it, tighten the hinge plate screws back down. Check the door swing. You may need to repeat this for the lower hinge as well. Proper door alignment is critical for the water line connection at the back of the door to seat correctly and not leak.
Explain What to Do if Water Leaks After Reconnection
You’ve got everything back together, turned the saddle valve on, and now there’s a drip. Don’t panic. The most likely culprit is the compression connection at the valve.
- First, shut the water supply valve off immediately.
- Check that the water line’s plastic ferrule (the little ring) is seated properly against the valve and isn’t cracked.
- Disconnect the line, inspect the ferrule and the valve seat for debris or cuts, then reconnect.
- Hand-tighten the compression nut, then give it another quarter to half turn with a wrench. Over-tightening will deform the ferrule and cause a worse leak.
If the leak persists, the ferrule is compromised and you must cut the damaged end off the water line and install a brand-new compression fitting. This is why keeping a spare 1/4″ compression fitting in your toolbox is a smart move for any homeowner.
When This Job Gets Tricky: Signs You Should Call a Pro
You can handle a lot yourself, but some problems are loud alarms to stop. Recognizing them separates a simple DIY task from a flooded kitchen floor. Here are the clear red flags.
Spot the Red Flags
If you see any of these, put your tools down and pick up the phone.
- A corroded or broken shut-off valve. If that little valve under your sink or behind the fridge is green with crust or won’t turn, don’t force it. The stem inside is likely fused shut or the packing is gone. Forcing it will almost certainly cause a leak you cannot stop.
- A kinked or badly bent copper supply line. Copper work-hardens. A sharp kink weakens the metal, making it brittle. Trying to unscrew a nut from a kinked line can cause it to snap off clean. You’ll be holding a piece of tubing with water spraying from the wall.
- A persistent leak you can’t stop. If you shut off the water, disconnect the line, and water still drips from the valve body, you have a failed valve. This isn’t a door issue, it’s a plumbing issue that needs repair at the source before anything else happens.
Know Your Limits
This isn’t just about broken parts. Be honest about your skills and the job’s physical demands.
Call for help if you lack confidence with basic plumbing. Connecting a water line isn’t like plugging in a lamp. It requires knowing how seals work, how much to tighten a compression fitting (it’s “snug,” not “muscle”), and how to check for leaks properly. If that sounds foreign, a pro will save you money in the long run.
Call for help if the refrigerator door is very large or heavy. Modern French door or side-by-side units have massive, unwieldy doors. One wrong twist while you’re supporting its weight can strip the hinge mechanism, damage the cabinet, or cause a personal injury. Some jobs need two skilled sets of hands.
The Smart, Cost-Saving Decision
Calling a professional plumber or appliance technician for these situations is not a failure. It’s an investment.
A single small, steady leak behind a refrigerator can cause thousands of dollars in damage to your flooring, subfloor, and drywall before you ever see it. Mold remediation is incredibly expensive. The service call fee to have a pro diagnose a sticky valve or replace a supply line is cheap insurance against that disaster.
Think of it this way: you’re not paying them just to turn a wrench. You’re paying for their trained eye to spot the other potential issues you might miss, and for the guarantee that the job is done right with no hidden leaks. That peace of mind is worth every penny.
Thinking Ahead: Installing a New Refrigerator Water Line
Once that old fridge is out of the way, you’ll probably want a water line for your new one. The process of installing a fresh line is actually simpler than carefully disconnecting an old, crusty one. You get to start clean.
DIY Kits vs. Professional Copper Lines
You have two main paths. The first is the common DIY route with a plastic or PEX tube kit. The second is a professional-grade copper line.
Plastic or PEX kits are cheap and sold at any hardware store. They are flexible and easy to run through walls or under cabinets. The big trade-off is that the plastic tubing is more vulnerable to punctures from pets, furniture, or stray screws over the long term. I used a braided stainless-steel-covered PEX line for my own kitchen update, which offers a good balance of DIY ease and extra protection.
A rigid copper line is the pro standard. It’s incredibly durable and resists damage. The catch is you need to know how to solder, which is a specific skill. For a clean, permanent install behind a finished wall, a plumber running copper is often the best call.
The Rule You Can’t Ignore: Local Plumbing Codes
Before you drill a single hole, check your local plumbing code. Many areas have strict rules about how and where you can run a water line. Some municipalities ban certain types of plastic tubing entirely for in-wall use. A quick call to your city’s building department can save you a failed inspection or a costly re-do later.
How to Install a Refrigerator Water Line
Here is the basic sequence for a standard DIY installation using a saddle valve or tee valve kit. Always shut off the main water supply before starting.
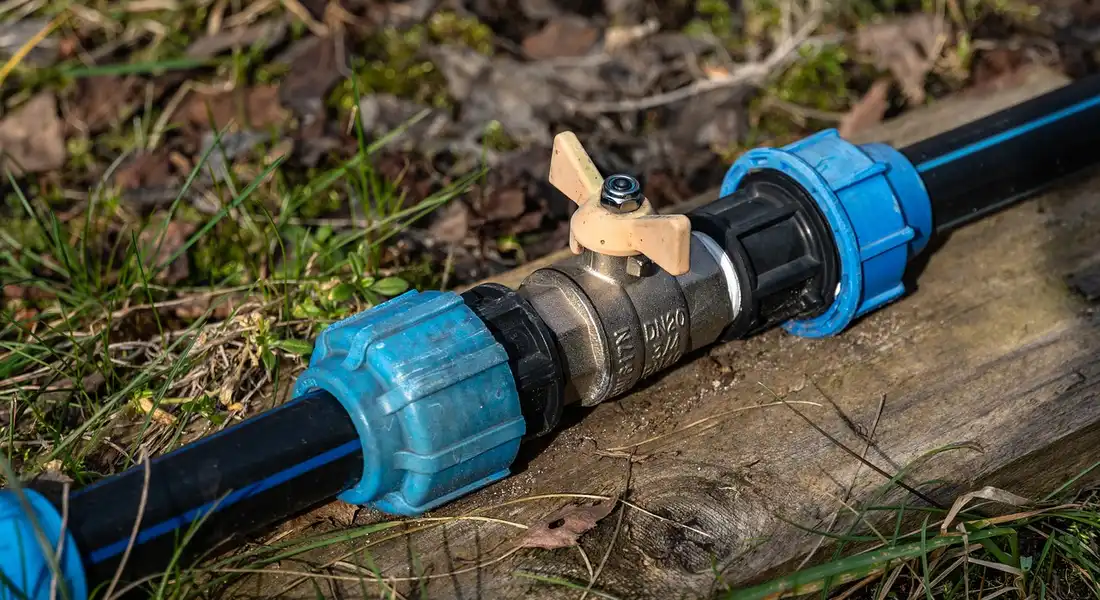
- Find Your Source: The easiest connection is usually at the cold water line under the kitchen sink. You’ll install a self-piercing saddle valve or, better yet, a proper tee fitting that replaces a section of pipe.
- Run the Tube: Drill a small hole (use a drill bit sized for the provided grommet) from under the sink into the cavity where the fridge sits. Carefully feed the plastic or PEX tubing through. Leave several feet of slack coiled behind the fridge.
- Make the Connections: Connect one end of the tubing to your new valve under the sink. At the fridge end, connect it to the quarter-turn shutoff valve that should come with your kit. Never connect the water line directly to the refrigerator; that final connection always needs a accessible shutoff valve.
- Check for Leaks: Turn the main water back on. Slowly open the new valve under the sink. Check every connection point for drips. Let it sit for an hour and check again. Tighten fittings if needed, but don’t over-tighten plastic.
The most common mistake is kinking the plastic tubing when pushing the fridge into place. Those coils of slack are vital. Another pitfall is not securing the line with clamps or straps, letting it rub against a sharp cabinet edge for years until it fails.
Common Questions
What’s the most common mistake people make with the water line during removal?
They skip the critical step of relieving the water pressure after shutting off the valve. They shut the valve and immediately start unscrewing the line, which leads to a surprising splash of trapped water. Always dispense water from the fridge until the flow stops completely before touching any fittings.
Can I just use pliers instead of an adjustable wrench?
You can, but you risk damaging the soft brass fittings or plastic nuts. An adjustable wrench grips the flat sides of the fitting perfectly without rounding them off. Using the correct tool gives you a controlled, secure grip and prevents a stripped connection that could lead to a leak.
What should I do with the water line immediately after disconnecting it?
Cap it and secure it. Screw a 1/4″ compression cap onto the open end to prevent drips and keep dirt out. Then, fasten the capped line to the wall or cabinet so it doesn’t fall behind the fridge and get kinked.
How do I know if my shut-off valve is failing before I start?
Check for corrosion, mineral buildup, or any sign of moisture around the valve body. If the handle is very stiff, hard to turn, or feels loose, the internal seals may be compromised. A failing valve is a red flag; call a plumber to replace it before attempting the door removal.
Is it safe to leave the water line disconnected for a long period?
Yes, if you prepare it properly. With the main valve shut off and the line securely capped, it’s perfectly safe. Just check the cap periodically to ensure it’s still tight, and avoid placing any heavy weight on the line while the fridge is out.
Shut the Water Off Before Anything Else
Find and close the dedicated shut-off valve for your refrigerator’s water line as your very first step. This action is the absolute best way to prevent a messy and expensive leak while you work on the door. Remember, it’s always good to know the steps for emergency shut-off for any situation.
Bob McArthur
Bob is a an HVAC and plumbing industry veteran. He has professionally helped homeowners resolve issues around water softeners, heaters and all things related to water systems and plumbing around their homes. His trusted advice has helped countless of his clients save time, money and effort in home water systems maintenance and he now here to help you and give you first hand actionable advice. In his spare time, Bob also reviews home water systems such as tankless heaters, water softeners etc and helps home owners make the best choice for their dwelling. He lives around the Detroit area and occasionally consults on residential and commercial projects. Feel free to reach out to him via the contact us form.