Refrigerator Ice Maker Water Line Sizes: Pick the Right One and Avoid Leaks
You’re about to hook up your ice maker and have no idea what size water line to buy. A wrong guess here means water damage or a fridge that won’t make ice.
We will cover the standard size every homeowner should know, the pros and cons of different line types, and how to choose based on your specific setup.
I’ve run these lines in my own kitchen and on a hundred service calls. Here’s the short takeaway: for 99% of homes, you need a 1/4-inch line.
The Short Answer: Are Refrigerator Water Lines Universal?
No, refrigerator water lines are not all the same. Calling one size “standard” in plumbing usually means it’s the most common one you’ll find at any hardware store, not the only one that exists.
For connecting your fridge to water, the overwhelmingly common standard is a 1/4-inch outside diameter plastic or copper tube. Think of it like a garden hose. Almost every house has the same hose thread, but the hose itself can be different materials and lengths. The connection point for your fridge works the same way. That same sizing idea also applies to size water supply line fixtures—valves and adapters come in common sizes. Using the right size helps ensure a tight seal and easy connections when you add or replace fittings.
People often get confused because the supply valve behind their toilet looks similar. A toilet typically uses a 3/8-inch compression fitting on a 7/8-inch valve. Your fridge kit will also have a 3/8-inch compression fitting, but it connects to a 1/4-inch tube. The valve size is the same, the tube going to the appliance is smaller.
The Two Standard Sizes You’ll Actually Find
You will primarily deal with two measurements: the Outside Diameter (OD) of the tube itself and the size of the fitting that connects it to the water valve.
The 95% Solution: 1/4-inch OD Line
If you buy a refrigerator water line kit off the shelf, it will almost certainly contain 1/4-inch OD tubing. This is the default for modern refrigerators. The material is usually one of three types:
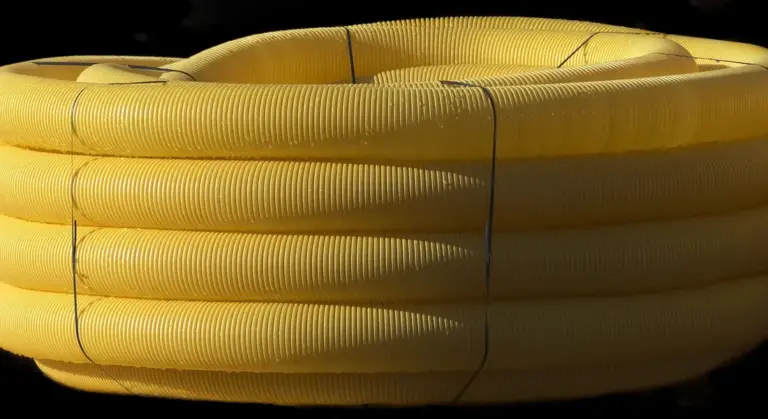
- Polyethylene (PE): The white or blue plastic flexible tube. It’s cheap, easy to work with, and perfectly fine for most homes.
- Copper: A small, rigid copper tube. It’s more durable but harder to route if your fridge isn’t in a straight line from the valve.
- PEX: A more flexible, durable plastic often used behind walls. You might use a short PEX run if connecting to your home’s existing PEX system.
When you go shopping, just grab a 1/4-inch OD kit in your preferred material and the length you need. You will almost always be right.
The Less Common 3/8-inch OD Line
A 3/8-inch OD line is much rarer. You might find it on some very old refrigerator installations or in specific commercial settings. The water flow is greater, but a fridge’s tiny inlet valve doesn’t need that much volume.
You probably have a 3/8-inch line if an old copper tube looks noticeably thicker than a pencil. If you’re replacing it, you can usually adapt it down to the standard 1/4-inch line at the refrigerator’s connection point with a simple reducing ferrule inside the compression fitting.
Line Size vs. Valve Connection: Don’t Mix Them Up
This is the most important part to get right. The tube can be 1/4-inch or 3/8-inch OD, but the nut that screws onto your water supply valve is almost always a 3/8-inch compression fitting.
Here is how to check what you have:
- Find the water shut-off valve (usually under the sink or behind the fridge).
- The valve outlet will have threads. A standard saddle valve or angle stop valve for an ice maker has 7/8-inch external threads.
- The plastic nut from your fridge kit screws onto those threads. That nut is designed for a 3/8-inch compression connection.
- Inside that nut, a brass ferrule (or olive) compresses onto the 1/4-inch tube to create the seal.
The valve connection is standard. The tube size feeding the fridge is what varies. Just ensure your new tube’s OD matches the ferrule and compression nut in your kit. When in doubt, take the old tube with you to the hardware store for a perfect match.
How to Choose the Right Line Size for Your Fridge
Picking the right water line isn’t complicated if you follow the right steps. Let’s walk through them.
1. Check the Refrigerator Manual (First and Always)
Your refrigerator’s installation guide has the final answer. Manufacturers specify the exact inlet connection size and type required, and using anything else can void your warranty or cause a leak. The information is usually in the “Installation” or “Connecting Water Supply” section. If you lost the paper manual, search online for your fridge’s exact model number followed by “installation manual PDF.” I keep a folder in my garage for all my appliance guides, and it’s saved me hours of guesswork.
2. Identify the Connection on the Back of Your Fridge
Once you know what the manual says, look at the fridge. The water inlet is a small brass or plastic fitting on the back, usually near the bottom. There are two common types you’ll find, especially when you remove the fridge door with the water line attached.
A compression fitting has a threaded nut that you tighten onto the fridge’s inlet valve with a wrench. You’ll see a small brass ferrule (a compression ring) that gets crushed onto the tubing to create the seal. These are very common and reliable, but you must not overtighten them.
A quick-connect fitting is a simple plastic or brass collar you push the tube into until it clicks. To disconnect it, you push the collar inward toward the fridge while pulling the tube out. My current fridge uses a 1/4″ quick-connect, and it took about two seconds to click the line into place—much like connecting a hose to a water tank for a pressure washer.
Take a flashlight and get a clear look. Match what you see to the description in your manual. This tells you what kind of fitting you need to buy for the fridge end of your water line. From here, you’ll be ready to learn how to connect the fridge water line properly. The next steps will walk you through the connection process to ensure a secure, leak-free setup.
3. Replacing an Old Line vs. Installing From Scratch
What you do next depends on whether you’re swapping an existing line or running a brand new one.
If you’re replacing an old line, your job is mostly about matching what’s already there. Shut off the water supply at the saddle valve under the sink or at the main shutoff. Disconnect the old line at both ends. Take it with you to the hardware store. You need to match three things: the diameter (like 1/4″), the connection type at the fridge, and the connection type at the water source. This is the easiest path, assuming the old installation was correct. These same steps apply when you install water supply lines for appliances. In the next steps, we’ll cover installing water supply lines for appliances.
If you’re installing from scratch, you have more choices to make. First, decide on your water source tap. A saddle valve tapped into a copper supply line under the sink is common, but many pros now prefer tapping into a proper 1/4″ shutoff valve for more reliability. From that source valve, you’ll run a line to the fridge location. For this, I always use 1/4″ OD (outside diameter) polyethylene or PEX tubing. It’s flexible, durable, and the standard size for all modern refrigerator icemakers. As part of a thorough install, perform a clean flush of the fridge water dispenser lines. This helps ensure clean, safe water from the first use. You’ll then need to attach the correct fittings to each end of your chosen tubing to connect to your water source and your fridge’s inlet.
When running new line, avoid sharp bends and keep it away from hot surfaces like the condenser coils on the back of the fridge. Leave a gentle service loop of extra tubing behind the fridge so you can pull it out for cleaning without stressing the connection. The same care applies to steam dryer water lines. A dedicated steam dryer water line guide offers model-specific routing and connection tips.
Water Line Materials: Plastic, Braided, or Copper?
Picking the right line isn’t just about the size. The material determines how long it lasts and how much headache you might have later. I’ve replaced all three types on service calls and in my own projects.
Polyurethane Plastic (PE) Tubing: The DIY Standard
This is the clear, flexible tubing sold in coils at every home center. For most refrigerator installs, it’s the go-to choice.
The big win with plastic is its flexibility; you can easily route it through tight spaces behind cabinets and appliances without special tools. It’s also the most affordable option by a long shot. You connect it with simple brass compression fittings that tighten with a wrench.
But it has weaknesses. It can be punctured by errant screws or chewed by pests. I once found a mouse had gnawed a pinhole leak in a line running through an unfinished basement ceiling. It also tends to kink if you bend it too sharply, which will stop your ice maker cold.
Use polyurethane plastic for straightforward, accessible runs from your water source to the fridge, especially if you’re doing it yourself for the first time. Just keep it away from high-traffic areas where it could get damaged.
Braided Stainless Steel Lines: The Upgrade
Think of this as the armored version. A braided stainless steel line has a flexible plastic core (often PEX) wrapped in a stainless steel mesh sheath.
The stainless steel braiding provides excellent protection against punctures, abrasion, and even some UV light if the line is exposed. This braiding also makes the line very kink-resistant, giving you a reliable flow every time. The ends come with pre-attached, threaded connectors, making hookup a simple screw-on affair.
The trade-off is cost. A braided line costs several times more than plain plastic tubing. It’s also less flexible, so snaking it through a complex path can be tougher.
Choose a braided stainless line for any run where the tubing might be exposed, vulnerable to damage, or if you just want the most durable, “install it and forget it” option. I used one to connect my own fridge because the line runs near my basement workbench.
Solid Copper: The Permanent Professional Route
Solid copper tubing is what a plumber will often use for a permanent, in-wall installation. It’s extremely durable and resistant to both punctures and UV degradation.
Copper is the most professional and permanent solution, typically used when a water line is being installed inside a wall during a kitchen remodel or new construction.
For a DIYer, it’s the most challenging option. Installing it requires soldering (sweating) joints with a propane torch, which is a skill in itself and a fire risk if you’re not experienced. It’s also rigid, so your routing options are limited, and it can be damaged by freezing if it’s in an unconditioned space.
Unless you’re comfortable with a soldering torch and doing a built-in installation, stick with plastic or braided stainless for a refrigerator hookup. Leave the copper to the pros for permanent plumbing runs.
| Material | Best For | Watch Out For |
|---|---|---|
| Polyurethane Plastic (PE) | Standard DIY installs, tight budgets, simple routes. | Punctures, kinks, pest damage. |
| Braided Stainless Steel | Exposed lines, areas with abrasion risk, maximum durability. | Higher cost, less flexibility for complex paths. |
| Solid Copper | Permanent, in-wall professional installations. | Requires soldering skills, rigid, can freeze and burst. |
Your Ice Maker Water Line Toolkit
Gathering the right gear before you start is the difference between a one-hour job and a whole-day disaster. Here’s everything you need on your workbench.
The Tools You Need
You don’t need a truck full of professional gear, but these tools are essential.
- Adjustable Wrenches (Two of them): You need two to properly tighten compression fittings. One holds the valve body, the other tightens the nut. Using one wrench will twist and kink your new line.
- Tubing Cutter (for copper or brass) or Sharp Utility Knife (for plastic/PEX): A clean, square cut is everything. A ragged end from dull cutters will leak.
- Drill & Drill Bits: You’ll likely need to drill through a cabinet kickplate or floor. A 3/8-inch bit is standard for running a 1/4-inch line. Always check for wires or pipes first.
- Bucket & Towels: For the cup of water that will inevitably drain when you disconnect the old line. Have them ready.
- Flashlight: To see clearly in the dark space behind your fridge and under the sink.
- Tape Measure: Measure the exact path from your water source to the fridge. Add an extra 3 feet for slack and connections.
Get your two wrenches and your tubing cutter ready first, because you can’t make a proper connection without them.
The Materials You Need
Buy quality parts here. A cheap fitting can lead to a $10,000 water damage claim.
- Water Supply Line (Tubing): The standard size is 1/4-inch outside diameter (OD). You have three main choices:
- Copper Tubing: Durable and classic, but can kink if you’re not careful.
- Polyethylene Plastic Tubing (often blue): Flexible and common in DIY kits. It’s what I used in my own kitchen.
- Braided Stainless Steel Hose: Very durable and kink-proof, but often more expensive.
- Dedicated Shut-Off Valve: This is not optional. An angle-stop valve with a 1/4-inch compression outlet is the standard. Get a quarter-turn ball valve, not an old multi-turn gate valve.
- Compression Fittings: These connect your tubing to the valve and to the refrigerator inlet. They usually come with the valve and tubing kit. Make sure the ferrule (the small brass ring) is the correct size for your 1/4-inch OD tube.
- Mounting Brackets or Clips: Use these to secure the tubing along its run. Don’t let it dangle or get pinched behind the fridge.
- Thread Seal Tape (for NPT threads): Only use this on the threaded *inlet* side of the shut-off valve where it screws into your home’s pipe. Never use it on compression fittings.
Your choice of tubing material is less critical than ensuring every connection uses the correct, undamaged fitting.
The Non-Negotiable Item: The Shut-Off Valve
Installing a dedicated, easy-to-reach shut-off valve is the most important part of this job. I’ve seen a cheap plastic supply line burst and flood a kitchen because the homeowner had to run to the basement main to turn the water off.
This valve needs to be installed on the cold water line, usually under the kitchen sink. You must be able to reach it without moving the refrigerator. When you install it:
- Turn off the main water supply to the house and open a faucet to drain pressure.
- Cut into the existing cold water pipe (copper or PEX) and install a tee fitting.
- Mount the new quarter-turn angle stop valve onto the tee.
Test this valve by turning it on and off several times after installation, before you even connect the fridge. This valve lets you fix a leaky ice maker or replace the fridge without affecting the rest of your home’s water. Check it once a year to make sure it turns freely.
A Plumber’s Step-by-Step Installation Guide
Stage 1: Shut Off the Water and Plan Your Route
Your first move is always to kill the water supply. Find your main shut-off valve. It’s usually where the water line enters your house, near the water meter, or in the basement. Turn the valve clockwise until it stops. If you have a local shut-off under the kitchen sink, you can use that instead for this job. Just confirm no water comes out of the faucet after you turn it off.
Test the faucet to make absolutely sure the water is off before you touch any pipes. This simple check prevents a messy flood.
Now, plan the path for your water line. You’re typically running from under the sink to the refrigerator location. Look for the easiest route behind cabinets or through a drilled hole in the floor. Avoid running the line near the dishwasher’s heat source or the oven’s exhaust. In my own home, I ran the line behind the kickplate of the base cabinets to keep it hidden and protected.
Best practices for routing the line are straightforward.
- Use a 1/4-inch OD plastic or copper tubing, which is the standard for ice makers.
- Keep bends gentle to maintain water flow. Sharp kinks will block water.
- Secure the tubing every couple of feet with plastic clips. This stops it from vibrating or getting pulled.
- Leave a little slack, a small loop, behind the fridge. This lets you pull the refrigerator out for cleaning without straining the connection.
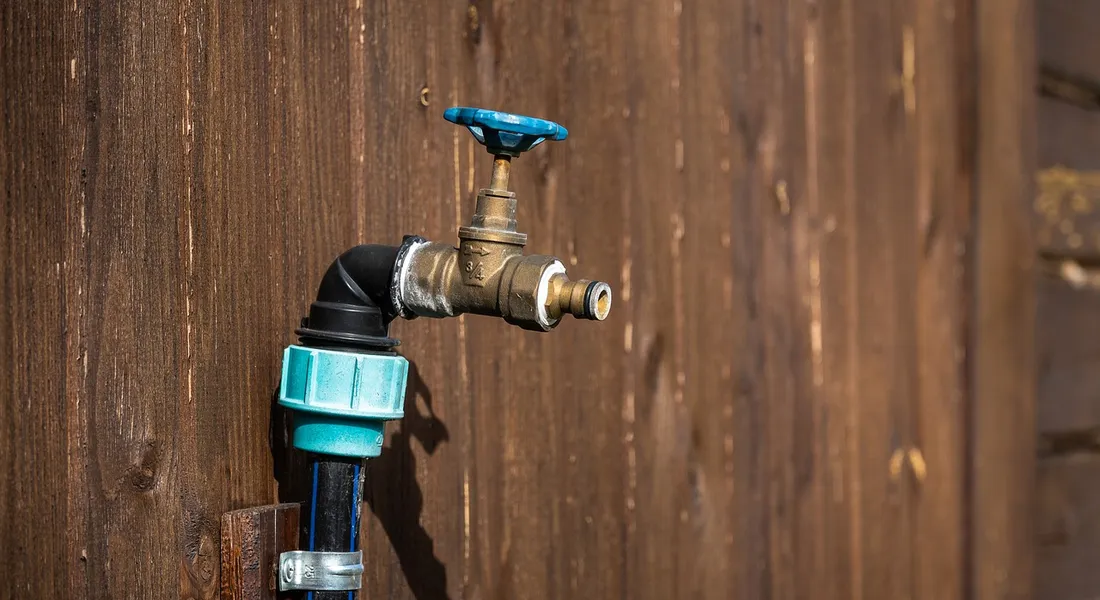
Stage 2: Installing the Saddle Valve or Dedicated Stop
Many DIY kits include a saddle valve. It pinches onto a copper pipe and has a piercing needle to tap the water line. I never use them on my service calls. Saddle valves are notorious for developing slow leaks and clogging over time, which is why professional plumbers avoid them. The puncture hole can corrode, and the seal often fails.
Install a dedicated shut-off valve with a tee-fitting. It’s more reliable and gives you a solid point to turn the ice maker water on and off. You’ll need a tee, a quarter-turn angle stop valve, and some pipe or fittings that match your existing supply line, which is usually 1/2-inch copper or PEX.
Here are the clear steps for a proper installation under your sink.
- Drain the pipes. After shutting off the water, open the sink faucet to release pressure.
- Identify a straight section of the cold water supply line. Measure and mark where you’ll cut it for the tee.
- Cut the pipe using a tubing cutter for copper or a PEX cutter for PEX tubing. Get a clean, square cut.
- Install the tee fitting. For copper, use a compression tee or solder it if you’re skilled. For PEX, use a crimp or push-to-connect tee. Follow the manufacturer’s instructions.
- Attach the new quarter-turn shut-off valve to the outlet of the tee. This valve will control the flow to your refrigerator.
- Ensure all connections are tight. Do not overtighten compression fittings; snug is enough.
Stage 3: Connecting to the Refrigerator
With the valve installed, run your 1/4-inch tubing from the valve to the back of the refrigerator. Keep it clipped and neat. Now, make the final connection. Make sure to follow proper installation guidelines especially if you are connecting it to a water softener system.
Walk through cutting the tubing and attaching the compression fitting. First, push the tubing into the new shut-off valve and tighten the compression nut by hand, then give it a quarter-turn with a wrench. Do not crank it down. Next, at the refrigerator, you’ll see the water inlet valve, usually on the lower back panel. Cut the tubing to length with a tubing cutter, leaving some extra.
Always use a tubing cutter for a clean cut; scissors or a knife will deform the tube and cause leaks. Attach the refrigerator’s specific coupling or another compression fitting to the tube end, then connect it to the fridge’s inlet. Hand-tighten, then a quarter-turn with a wrench.
The job isn’t done when the water is on. Post-installation steps are critical. Slowly turn the new shut-off valve to start the water flow. This prevents a surge that can burst weak connections. Check every joint you made under the sink and behind the fridge with a paper towel. Look for any drips or moisture.
You must check for leaks for several hours. Let the ice maker run through a few cycles and inspect the connections again after an hour and then again before you go to sleep. A slow leak can cause major damage over time. Once you’re confident it’s dry, push the refrigerator back into place carefully, ensuring the water line isn’t pinched.
The DIY vs. Pro Verdict and Difficulty Rating
Running a new water line for your fridge is a classic weekend project, but it’s not always a simple one. The difficulty depends almost entirely on your home’s layout and your ability to locate and shut off water lines.
Assigning a Difficulty Rating
Let’s break it down into three common scenarios:
- Easy Run (Difficulty: 3/10): Your refrigerator is on the same wall as your kitchen sink. You can tap into the cold water line under the sink with a saddle valve or a proper tee fitting and run the plastic tubing a few feet behind cabinets. This is a two-hour job, tops.
- Moderate Run (Difficulty: 6/10): The fridge is across the room from the sink. You’ll need to run a line through cabinets, across a basement ceiling, or down an interior wall. This involves more drilling, securing the line properly, and possibly navigating insulation.
- Complex Run (Difficulty: 8/10): Your kitchen is on a slab foundation with no basement or crawlspace access below. The nearest water source is in a bathroom on the other side of the house. This often requires cutting drywall, drilling through floor plates, and potentially installing a new shut-off valve. This scenario quickly shifts from a DIY task to a professional plumbing job.
Scenarios a Handy Homeowner Can Handle
You can confidently tackle this if your situation meets all these criteria:
- You have a clear, accessible water source within 15 feet (like under the kitchen sink or a nearby basement laundry room).
- The path for the 1/4″ plastic tubing is clear: through unfinished basement or crawlspace joists, or through accessible kitchen cabinetry.
- You are comfortable drilling small (1/2″ to 3/4″) pilot holes through cabinet backs or floor plates to route the line.
- You commit to using the right fittings. A saddle valve (a self-tapping valve that punctures a copper line) is a common DIY shortcut, but a proper tee fitting with a dedicated shut-off valve is more reliable and is the standard a pro would use.
The process is straightforward: shut off the main water, drain the lines, install your tee or valve, run and secure the plastic tubing, and connect it to the fridge. A simple leak test with paper towels at all connections is your final, crucial step – it’s important to detect any leaks in your home water lines before regular use.
When You Absolutely Must Call a Licensed Plumber
Know your limits. Call a pro immediately if any of these are true:
- There is no accessible cold water line within a reasonable distance of the refrigerator location. Creating a new water source from your main line is plumber’s work.
- The only route requires drilling through exterior walls, fireblocks, or load-bearing members. A pro knows where it’s safe to drill.
- You are working with old galvanized steel pipes. Cutting into these often leads to bigger, unexpected problems.
- The thought of drilling into your cabinets or floors fills you with genuine dread. A botched hole is more expensive to fix than the initial service call.
- Your local building code requires a permit for plumbing modifications. A licensed plumber will handle this.
I had to call a colleague for my own basement bar fridge install because the only logical water line was behind a finished wall. The $250 I spent was worth every penny to avoid tearing out drywall and potentially hitting something I shouldn’t.
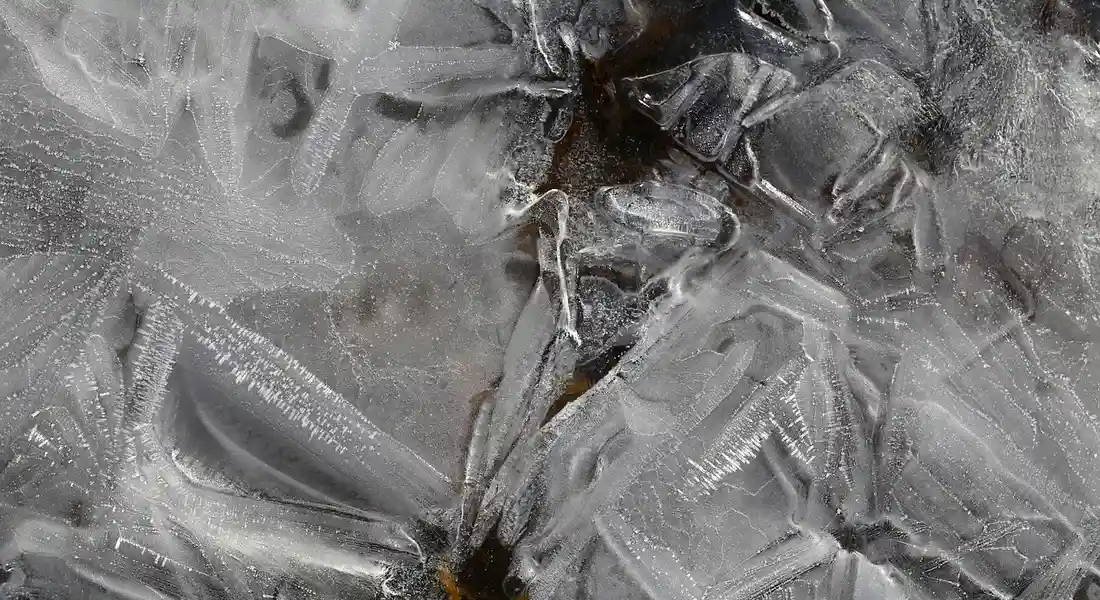
Water Science Snippet: What’s in Your Ice?
You want clear, hard ice cubes, not cloudy, mushy ones. The main culprit is usually your water’s TDS, or Total Dissolved Solids. This is just a measure of all the minerals, like calcium and magnesium, dissolved in your water.
When water with high TDS freezes, those minerals don’t fit neatly into the ice crystal structure. They get trapped as the ice forms, creating millions of tiny scatter points for light. That scattering is what makes your ice look cloudy or white instead of crystal clear.
Those same minerals cause another headache: scale. As water sits in your ice maker’s supply line between cycles, minerals can precipitate out and stick to the inside of the tube. Over months or years, this scale buildup slowly restricts water flow. I’ve seen 1/4″ lines choked down to a pinhole, leading to a slow-filling ice maker or a complete blockage.
pH and the Taste of Your Ice
TDS isn’t the only factor. Your water’s pH level-whether it’s more acidic or alkaline-plays a big role in taste. Water with a low pH (acidic) is corrosive. If your home has copper plumbing, acidic water can slowly dissolve copper ions into your water, giving your ice a distinct metallic or bitter taste.
This doesn’t mean copper lines are bad. In my own home, I have copper runs. But I know my water’s pH is neutral, so it’s not an issue. If your ice tastes like coins, your water’s pH and pipe material are the first things to consider.
Why Your Water Line Choice Matters for Filters & Softeners
This science lesson directly affects your hardware choices. If you’re dealing with high TDS (hard water) or problematic pH, you might install an under-sink filter or a whole-house softener to treat the water feeding your ice maker.
Your water line must be compatible. A standard polyethylene or PEX line works fine. If you use a copper line, ensure any filter you install is rated to handle copper particulate, as some cartridges can be fouled by it.
Also, know what’s in your water before you choose a filter. If you have ferrous iron (clear water iron), a standard sediment filter won’t remove it before it hits your ice maker and oxidizes into rusty stains. You need the right treatment upstream.
Troubleshooting Common Ice Maker Line Problems
Even with the right line size, you can still run into issues. Most problems boil down to leaks or no water. Here’s how to handle them.
Diagnose and Fix a Leaking Connection at the Valve or Fridge
First, find the leak. Dry everything with a towel. Turn the water supply back on and watch. The leak will show itself in seconds.
If it’s leaking at the saddle or shut-off valve, the nut connecting the water line to the valve is likely the culprit. Turn the water off. Use two wrenches-one to hold the valve body steady, the other to tighten the compression nut on the water line. Give it a gentle quarter-turn tighter. Do not over-tighten, especially on copper tubing, or you’ll crush the ferrule and create a bigger leak.
If the leak persists, you need to reseat the connection. Turn the water off and disconnect the line. Inspect the plastic ferrule for cracks or deep grooves. Replace it. When reconnecting, make sure the tubing is fully inserted into the valve before tightening the nut.
Leaking at the fridge connection is common. Behind your fridge, where the water line meets the inlet valve, is another compression fitting. The fix is the same: ensure the line is fully seated and the compression nut is snug. Never use Teflon tape on these compression fittings; it can cause leaks.
Solve for No Water Flow: Checking Shut-Off Valves, Kinked Lines, and Clogged Filters
No ice? Follow this checklist in order.
- Check the Local Shut-Off Valve: Make sure the small valve behind your fridge or under the sink is fully open. It’s easy to bump it closed when cleaning.
- Trace the Line for Kinks: Pull the fridge out carefully. Look at the entire length of the water line, especially the first few feet. A sharp kink will stop flow. Straighten it. If the plastic is permanently creased, replace that section.
- Inspect Your Water Filters: This is a huge one. A clogged refrigerator water filter or whole-house sediment filter will stop water dead. Replace the fridge filter first. If you have a whole-house system, bypass it temporarily to see if flow returns.
- Beware of the Saddle Valve: If your line is tapped into copper pipe with a self-piercing saddle valve, it can clog. The internal piercing needle gets blocked with debris. You can try turning the valve off, disconnecting the line, and turning it on briefly to flush it into a bucket. Often, the real fix is replacing the saddle valve with a proper 1/4″ shut-off valve tee’d into the line.
Always start with the simplest check-the shut-off valve-before assuming you have a major clog or appliance failure.
Can a Fridge Make Ice Without a Water Line?
Only if you fill it manually. Some older or basic models have a removable ice tray. You pour water into the tray, the freezer freezes it, and you twist the tray to release cubes. No automatic ice maker works without a pressurized water supply.
For a modern fridge with an automatic ice maker, a connected water line is non-negotiable.
Can You Use the Fridge Without Connecting It?
Yes. You can use the refrigerator compartment normally. You just need to disable the ice maker so it doesn’t try to cycle and error out. There’s usually a simple lever or switch to flip on the ice maker unit itself. Consult your manual. This leaves the water dispenser inoperable too, but the fridge will cool just fine.
Making It Work With Water Filters and Softeners
If you have a water treatment system, the location of your ice maker tap is non-negotiable. You need to protect your ice maker and your appliances.
Where to Tap Your Water Line
Your goal is to feed your ice maker the cleanest, safest water your system can provide. The rule is simple: Your ice maker line must branch off after your final point of treatment.
For a whole-house system like a water softener or a whole-house filter, you tap into a cold water line anywhere after the system’s outlet. This ensures every drop going to your fridge is treated.
- Look for a convenient 1/4-inch or 3/8-inch shut-off valve on a cold water line in the area behind or near your refrigerator.
- If one doesn’t exist, you’ll install a saddle valve or a proper tee fitting on a line that you have confirmed is downstream from your softener or filter.
Under-sink filters are a different story. Your refrigerator line should connect to the dedicated filtered water port on the faucet or the filter housing itself. Do not tap the regular cold water line under the sink if that water is unfiltered. I helped a client who had cloudy ice for months because their fridge was mistakenly connected to the raw water line before their under-sink carbon filter.
Material Warnings for Softened Water
Pay close attention to your water softener’s manual. Many manufacturers explicitly warn against using certain metals with softened water.
Softened water can be slightly more corrosive due to its lack of minerals. This is why:
- Many brands advise against using brass fittings and valves in the treated water lines.
- They often recommend using polymer/PEX, copper, or stainless steel components instead.
Check your manual. If it says “no brass,” use a polymer compression fitting or a stainless steel braided supply line for your final connection to the refrigerator valve. Using the wrong material can lead to pinhole leaks or blue-green staining over time.
The Benefit of Clean, Filtered Ice
Connecting your ice maker to filtered water isn’t a luxury, it’s a practical move for your appliance and your glass.
Filtered water protects the ice maker’s internal valves and solenoid from sediment and scale buildup. This means fewer service calls and a longer lifespan for a component that’s notoriously annoying to repair.
More importantly, it makes better ice. Filtering removes chlorine, sediments, and other contaminants that give ice a strange smell or an off taste. The ice in my own kitchen comes from a line after my whole-house filter and softener. The difference in clarity and taste, especially in a plain glass of water, is instantly noticeable. You’re not just making frozen water, you’re making a clean, neutral ingredient for your drinks.
Common Questions
Does the water line size affect how fast my ice maker fills?
No, the ice maker’s inlet valve controls the flow, not the tube diameter. A standard 1/4-inch line provides more than enough volume. Your choice of material and a kink-free installation are far more important for reliable performance.
What’s the single most important safety check I can do?
Before you even buy parts, locate and test your water supply shut-off valve. You must have a dedicated, working valve you can reach quickly. If you only have an old saddle valve or no valve at all, installing a proper quarter-turn shutoff is your first and most critical job.
If 1/4-inch is standard, why would I ever choose a different material?
The 1/4-inch size is constant, but the material protects against different risks. Use affordable polyethene for simple, protected runs. Upgrade to braided stainless for exposed lines or areas with abrasion risk. Choose copper only for permanent, in-wall installations handled by a professional.
How does my water filter or softener change what line I need?
It doesn’t change the line size, but it dictates where you tap in. Your ice maker line must connect *after* any filter or softener to get treated water. Also, check your softener’s manual; some warn against using brass fittings with softened water, directing you to polymer or stainless components instead.
I’m holding a new line kit. What’s my final pre-installation check?
Match the kit’s fittings to both your water valve and your fridge’s inlet. Ensure you have two wrenches to properly tighten connections without twisting the line. Finally, plan a route with gentle bends and secure the tubing-a sharp kink is the most common cause of a “no flow” problem after installation.
Getting Your Ice Maker Line Right
Start by verifying the 1/4-inch standard with your refrigerator’s manual. Matching this size with a quality line and tight fittings is your best defense against leaks and unreliable ice.
Bob McArthur
Bob is a an HVAC and plumbing industry veteran. He has professionally helped homeowners resolve issues around water softeners, heaters and all things related to water systems and plumbing around their homes. His trusted advice has helped countless of his clients save time, money and effort in home water systems maintenance and he now here to help you and give you first hand actionable advice. In his spare time, Bob also reviews home water systems such as tankless heaters, water softeners etc and helps home owners make the best choice for their dwelling. He lives around the Detroit area and occasionally consults on residential and commercial projects. Feel free to reach out to him via the contact us form.