How to Replace Your Water Heater & Filter System Cartridges
Thinking about swapping your water filters and worried you’ll flood the basement? It’s not as hard as it looks.
We will cover critical safety prep, the exact steps for your water heater filter, how to tackle a whole-house filter, and getting your system running clean again.
I’ve been a water systems tech for years. Here’s the first thing you need to know: the housing doesn’t need to be gorilla-tight, just snug.
Water Heater or Filter: Which Job Are You Really Doing?
Let’s get this straight right away. Swapping a whole water heater and changing a filter cartridge are not the same league. One is major surgery on your home’s plumbing. The other is basic preventative maintenance.
Replacing a water heater means disconnecting water lines, a gas line or high voltage electrical wires, and often dealing with heavy lifting and precise fittings. It’s a full appliance replacement. Changing a filter is unscrewing a housing, swapping a spent cartridge for a new one, and screwing it back together. It’s a consumable part change. Even when looking at water heater repair vs replace, the complexity of each task is quite different.
Skill, Time, and Safety Face-Off
Look at it side by side.
- Skill Level: A filter change needs a wrench and five minutes of your time. A water heater swap requires knowledge of plumbing codes, proper venting for gas models, and safe electrical or gas line work. One mistake with a gas line or wiring can be dangerous.
- Time Commitment: You can change most filters during a coffee break. A full water heater replacement is a half-day or full-day project for a pro, often involving draining, hauling, soldering or threading pipes, and testing.
- Safety Considerations: Filters involve cold water and maybe a small spill. Water heaters involve scalding hot water under pressure, natural gas or 240-volt electricity, and the risk of a catastrophic leak if not installed correctly.
The rule is simple: if you are not 100% confident in swapping an identical model in the exact same spot with the exact same connections, call a licensed pro for the water heater. A filter change is almost always in the DIY wheelhouse.
Know the Red Flags: Signs Your System Needs Attention
Systems talk to you. You just need to know the language. Ignoring these signs turns a simple fix into a big, wet, expensive problem.
Your Water Heater is Crying for Help
These are not suggestions. They are warnings.
- You find a puddle of water around the base of the tank. This is often the tank itself corroding through. The clock is ticking.
- You hear loud rumbling, banging, or popping noises from the tank. This is sediment buildup hardening and overheating. It stresses the tank walls.
- Hot water runs out faster than it used to, or it’s not as hot. This points to a failing heating element or excessive sediment.
- Your hot water looks rusty or has a metallic smell. The interior glass lining has likely failed, and the steel tank is corroding.
- You see visible rust on the tank exterior or the water connections. External rust can hint at internal problems.
Your Water Filter is Begging for Retirement
Filter cartridges have a finite life. They don’t last forever.
- Water pressure from your faucets or showerheads noticeably drops. A clogged filter is the most common culprit.
- The water develops a funny taste or smell, often like chlorine, sulfur, or dirt. The media is exhausted and can’t adsorb contaminants anymore.
- It takes forever to fill a pot or a bathtub. This is the pressure drop in action.
- You see visible sediment or discoloration in water from a filtered tap. The filter is overwhelmed and is now bypassing gunk.
- Your filter housing has a bypass valve, and you find yourself using it just to get enough flow. That means the filter is done.
One specific troublemaker is the sediment pre-filter, sometimes called a silt filter. This is a simple cartridge or spin-down filter that catches sand and grit before it hits your softener or other filters. If you have very sandy water, this filter can get completely packed and stuck in its housing, which is a common headache we can tackle separately.
Gearing Up: The Tools and Parts You’ll Need
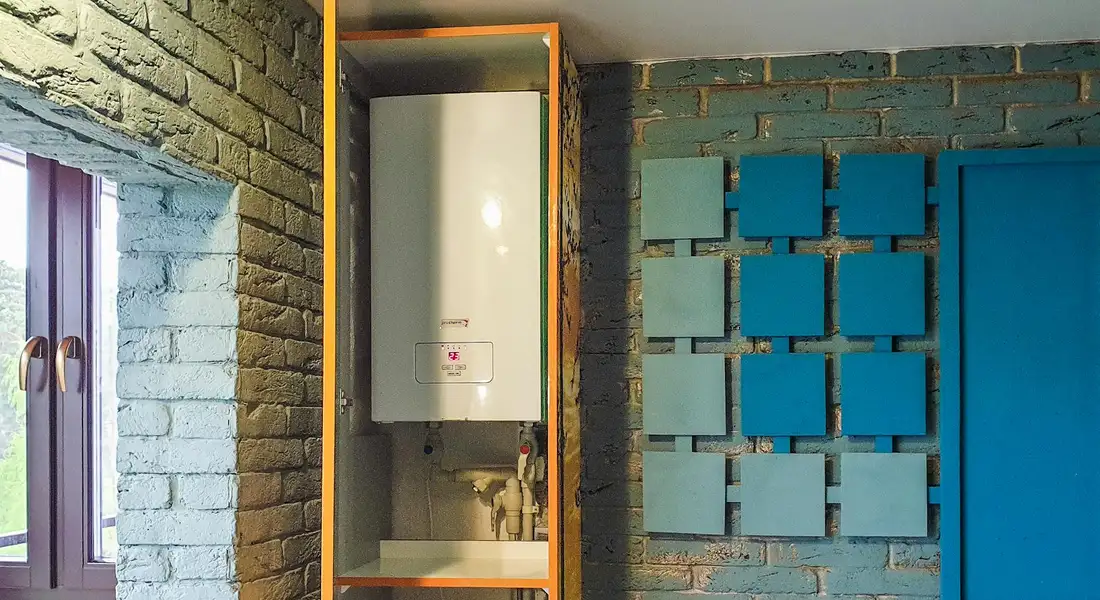
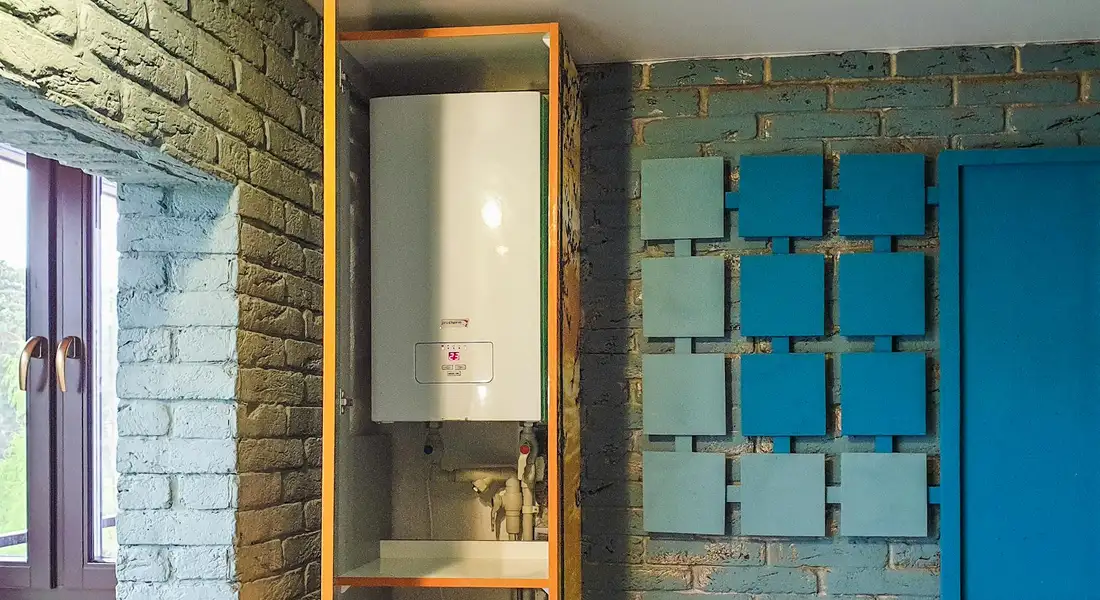
Getting the right gear before you start prevents mid-job trips to the hardware store. The tools for a water heater are different from those for a filter change, so I’ve split them up.
For Water Heater Replacement
Replacing a whole heater is a bigger job. You’ll need more than just a wrench. Here’s what I have in my bag for a standard tank replacement.
- The new water heater unit (correct fuel type and size).
- Two new flexible water connector hoses (stainless steel braided are reliable).
- A garden hose long enough to reach a drain or outside.
- Adjustable wrenches (two are best) or channel-lock pliers.
- Pipe thread sealant (pipe dope) or Teflon tape rated for gas and water.
- A pipe cutter or hacksaw if you need to trim copper pipes.
- New dielectric unions or fittings if your old ones are corroded.
- A gas line leak detection solution (soapy water in a spray bottle works).
- Work gloves and safety glasses.
Before you touch anything, know your power source and shut it off correctly. For a gas heater, find the dedicated gas shut-off valve. For an electric unit, you must trip the correct double-pole circuit breaker at the main panel.
For Water Filter Changes
Swapping a cartridge is simpler, but doing it wrong can cause a leak or let dirty water through. I keep these items under my sink.
- The exact replacement cartridge model for your system. Check the old one for numbers.
- A filter wrench (the blue or green plastic kind). Do not try to use a strap wrench or pliers.
- A large bowl or bucket to catch residual water.
- Old towels or rags.
- Food-grade silicone lubricant to grease the o-rings (optional but recommended).
The most common mistake is using the wrong cartridge or forcing the housing with the wrong tool, which cracks it. Always turn off the water supply to the filter system and relieve pressure by opening a downstream faucet before you start.
Step-by-Step: How to Replace Your Water Heater
Follow these steps in order. Rushing leads to floods or gas leaks. I timed my last basement install at about four hours, taking my time.
Step 1: Shut Everything Down and Relieve Pressure
Turn off the cold water supply valve to the heater. Go to a utility sink or tub and open the hot water faucet. This relieves pressure in the tank so it doesn’t spray when you disconnect lines. Now, shut off the energy source: turn the gas valve to ‘off’ or flip the dedicated circuit breaker to ‘off’.
Step 2: Drain the Old Tank Completely
Connect your garden hose to the drain valve at the bottom of the tank. Run the other end to a floor drain or outside. Open the valve. To help it drain faster, open the temperature and pressure relief valve on the side of the tank. Let it drain until nothing comes out. This water can be very hot and full of sediment, so be careful.
Step 3: Disconnect the Plumbing and Fuel Lines
Use your wrenches to disconnect the hot and cold water lines from the top of the tank. Cap the lines if you need to. For a gas heater, disconnect the flue piping and the flexible gas line at the union fitting. For electric, remove the access panel, take a picture of the wiring, then disconnect the wires.
Step 4: Remove the Old Unit
An empty 50-gallon tank still weighs over 100 pounds. Get a helper or use a heavy-duty appliance dolly. Move it out of the way. This is a good time to clean the area and check the floor for level.
Step 5: Set the New Heater and Make Connections
Position the new heater. Using new flexible hoses or copper fittings, connect the water lines. Apply pipe dope or tape to the threads. Reconnect the gas line or electrical wires exactly as they were on the old unit. For gas, this is where you use soapy water later to check for leaks. Reconnect the flue pipe securely.
Step 6: Fill the Tank and Restore Power
Close the tank’s drain valve. Turn the cold water supply back on to fill the tank. Leave a hot water faucet open upstairs to purge air from the lines. Once water flows steadily from the faucet with no sputtering, the tank is full. For a gas unit, follow the manufacturer’s lighting instructions. For electric, restore power at the breaker.
Step 7: Test for Leaks and Check Operation
Inspect every connection you made for drips. For gas lines, spray your soapy water solution on fittings; bubbles indicate a leak that needs tightening. Allow the tank time to heat (about an hour). Then, check that the hot water faucet delivers hot water.
Step-by-Step: How to Change a Water Filtration System Filter
This is your universal guide for standard whole-house or under-sink cartridge systems. Think of brands like Whirlpool UltraEase, Culligan, or most generic blue canisters. The process is nearly identical.
Step 1: Turn Off the Water Supply
Find the valves for your filter system. They are usually right before and after the filter housing. Turn the handle so it is perpendicular to the pipe. If you only have one valve, turn off the main water supply to your house. This is non-negotiable. You do not want a geyser in your basement or under your sink.
Step 2: Relieve System Pressure
Now, go to a sink or tub faucet located after the filter in your plumbing line. Turn it on to cold. Let it run for a second until the water stops. This bleeds off the pressure trapped in the filter housing, making it safe and much easier to open.
Step 3: Open the Filter Housing
Place a bucket or towels under the housing. Use a filter wrench, the big plastic cup or strap tool that often comes with the system. Fit it onto the housing cap and turn it counter-clockwise. If it’s stuck, do not use a pipe wrench or excessive force.
For a stubborn housing, tap the wrench handle gently with a rubber mallet to break the seal, or wrap the housing in a hot towel for a minute to expand the plastic slightly.
Step 4: Remove the Old Cartridge and Clean
Lift out the old filter. It will be heavy and full of water and gunk. Dump it into the bucket. Now, inspect the inside of the clear plastic canister. Use a clean rag or paper towel to wipe out any sediment or slime. Check the black O-ring or gasket seated in the cap. Remove it, clean it, and look for nicks or cracks.
Step 5: Install the New Cartridge
Take your new filter cartridge. Make sure it’s the correct one. Before you insert it, lubricate the cleaned O-ring with a tiny amount of silicone grease, petroleum jelly, or even a dab of vegetable oil. This simple step prevents the O-ring from pinching and causing a major leak. Drop the new cartridge into the housing. It should seat firmly at the bottom.
Step 6: Reassemble, Pressurize, and Flush
- Screw the housing cap back on by hand until it’s snug. Do not use the wrench yet.
- Slowly turn your water supply back on. Listen for the housing to fill.
- Watch the seam of the housing cap for leaks. If you see a drip, tighten it a quarter-turn with the wrench. Hand-tight is usually enough if the O-ring is lubricated.
- Go to a cold water tap and let it run for five full minutes. This flushes air and carbon fines from a new carbon filter.
Finding your filter model is the most important step before you even start. The number is printed on the label of the old cartridge. If it’s worn off, the model number is always on the housing itself or in the system’s manual. Take a picture of it with your phone before you go shopping.
The Water Science Behind Your Maintenance
Changing a filter isn’t just a chore. You are actively removing specific problems from your water. Here is what you are fighting. Some contaminants can affect your health over time. Filtration helps reduce these risks for you and your family.
Total Dissolved Solids (TDS)
Think of TDS as the “dust” in your water you cannot see. It is minerals like calcium, magnesium, and sodium. A standard sediment filter does not remove dissolved solids. For that, you need a softener or reverse osmosis system. A carbon filter, however, soaks up other dissolved contaminants like chlorine, improving taste and smell.
Sediment and Pressure Drops
That sandy, gritty stuff is sediment. It comes from your well or aging city pipes. Over months, it packs into your filter cartridge like mud in a straw. The water has to force its way through. This is why your shower pressure seems weak when the filter is old. Changing the pre-filter cartridge restores full flow and protects everything downstream.
Scale and Your Water Heater
Hard water is full of dissolved calcium and magnesium. When you heat it, those minerals solidify into scale, like the crust in your kettle. Inside your water heater, scale coats the heating element or gas burner tubes. It acts like an insulating blanket. The heater works harder, uses more energy, and fails years earlier. A water softener is the primary defense against scale, but a good filtration system protects the softener and handles the other gunk. It is a team effort to save your appliances. Regular descaling and a good filtration plan can prevent scale buildup in hard-water appliances. A simple maintenance routine keeps heaters and other devices running efficiently.
Your Home Water System Maintenance Roadmap
Think of maintenance like changing the oil in your car. You do it on schedule to avoid a much bigger, more expensive problem later. A simple plan keeps everything running right and makes any job, like replacing a water heater, far smoother.
Your Filter Change Schedule
Filters are not “set it and forget it.” They clog. A clogged filter strains your pump, lowers your pressure, and lets sediment through that can damage appliances. Here’s a straightforward schedule based on average home use.
| Filter Type | Replacement Frequency | Visual Check |
|---|---|---|
| Sediment Filter (Pre-filter) | Every 3-6 Months | Cartridge will look dirty, brown, or clogged. A clear housing makes this easy. |
| Carbon Block Filter (Taste/Odor) | Every 6-12 Months | You can’t always see it, but you’ll taste it. Water may start to smell or taste off. |
| Whole House Water Softener Resin | Every 5-10 Years | Salt usage increases, water feels hard (soap doesn’t lather), and spots appear on glass. |
| Reverse Osmosis Membrane | Every 2-3 Years | Water production slows to a trickle, or the TDS (total dissolved solids) meter reading climbs. |
My own rule is simpler: I change my whole-house sediment filter every 4 months and my under-sink carbon filters every year on the same weekend I check my smoke detectors. You won’t forget if you link it to another routine task.
How Long a Water Heater Really Lasts
The textbook says a standard tank water heater lasts 8 to 12 years. In the real world, I’ve seen them fail at 6 and others chugging along at 15. The difference almost always comes down to two things: your water quality and one cheap part. For a quick benchmark, an average water heater lifespan guide is a handy reference. It helps you gauge whether your unit is aging on schedule and when to plan maintenance.
The single biggest factor in water heater lifespan is the condition of the anode rod, which is a sacrificial metal component that corrodes instead of your tank. If you have hard water or certain minerals, that rod gets eaten up fast. Once it’s gone, the tank itself starts rusting from the inside out. The water from your taps directly decides how fast this happens. Hard water reduces heater efficiency due to buildup on the heating elements, causing longer heating cycles and higher energy use. In short, mineral deposits strain the system and raise maintenance needs and costs.
Other factors that shorten life include constantly high water pressure (above 80 PSI) and a lack of simple annual flushing to remove sediment.
The Annual Checkup You Must Do
Once a year, spend 20 minutes on your water heater. This can add years to its life. Here’s what to do.
- Check the Pressure Relief Valve: Lift the lever on the valve (usually on the side or top) for a few seconds. You should hear a rush of air or water out of the discharge pipe. If nothing happens, the valve is bad and must be replaced immediately. This is a critical safety device.
- Inspect the Anode Rod: Shut off the power and cold water supply. Drain about 5 gallons of water from the tank. Use a 1-1/16″ socket and a long breaker bar to unscrew the rod from the top of the tank. If less than 1/2 inch of the core wire is thick or the rod is heavily crusted, replace it. This $50 part can save you from buying a whole new $1,200 heater.
- Flush the Tank: Hook a hose to the drain valve at the bottom. Run water out into a bucket until it runs clear, with no more sediment. This prevents buildup that insulates the water from the burner or elements, making your heater work harder.
Filters Are Your Heater’s First Defense
That new water heater is a big investment. Protect it from day one. The sediment filter and water softener upstream of it catch sand, grit, rust, and scale before they can settle in the bottom of the tank or coat the heating elements, which kills efficiency.
Consistent filter changes are the cheapest insurance policy you can buy for your entire water system, especially the heater. Clean water entering the tank means less sediment to flush, less wear on the anode rod, and more efficient heat transfer. Ignore the filters, and you’ll be shopping for a replacement heater much sooner than you planned. That could lead to dealing with one of the most common water heater repair options.
Common Questions
Can I replace my water heater and my filters at the same time?
Yes, but tackle them as separate projects. Always do the water heater replacement first and confirm it’s operating leak-free for at least 24 hours. Changing the filters afterwards ensures no sediment from the new plumbing installation immediately clogs your fresh cartridges.
What’s the one step I should never skip?
Relieving the system pressure. Before opening any filter housing or disconnecting a water heater line, you must shut off the supply and open a downstream faucet. Skipping this causes a dangerous, high-pressure spray of water the moment you loosen a fitting.
My filter housing is stuck. How do I get it off without breaking it?
First, double-check that pressure is fully relieved. Then, wrap the housing with a hot, wet towel for a minute to expand the plastic slightly. Use the correct filter wrench and tap its handle gently with a rubber mallet to break the seal. Never use pipe wrenches or excessive force.
How can I be absolutely sure my new connections don’t leak?
For plumbing, pressurize the system and visually inspect every new fitting for drips for at least 30 minutes. For gas lines, this is non-negotiable: mix dish soap and water, spray it on all fittings, and look for bubbles. Any bubbles mean you must tighten the connection and test again.
What’s a simple way to remember my filter change schedule?
Link it to an existing routine. Change your main sediment filter every time you adjust your clocks for daylight saving time. Inspect your water heater’s anode rod and pressure relief valve annually on a memorable date, like your birthday or the start of a new season.
Keeping Your Water Heater and Filters Efficient
Mark your calendar for the next filter change the moment you finish this one. Write the installation date directly on the new filter housing or your water heater with a permanent marker, so you never have to guess when maintenance is due. Keep a visible water heater maintenance schedule handy to stay on top of future checks. That way you’ll always know when the next service is due.