
Your Sump Pump Guide: Basics, Jobs, and Picking the Right One
Your basement is flooding, or you’re worried it will. A sump pump is your main line of defense, and you need to know how it works.
We will cover how a sump pump works, what it actually does, the main types you can buy, and how to choose one.
I’ve been a water systems tech for 15 years. I’ve pulled more failed pumps out of pits than I can count. The one in my own house has saved me thousands in water damage. Get this right, and you stop problems before they start.
What a Sump Pump Does for Your Home
A sump pump exists for one job. It automatically removes collected water from a sump pit to stop your basement or crawl space from flooding. Think of it as your home’s automatic safety net against water damage.
It handles water from outside your foundation, not from inside your drains. The common sources are groundwater that seeps through the walls or floor and stormwater from heavy rain or melting snow. A sump pump is not designed for sewage or wastewater from your toilets, sinks, or showers. That requires a different, more specialized pump.
Every system has four basic components that work together.
- The Sump Pit (or Basin): This is the hole in the ground, usually lined with plastic or concrete. It’s the collection point where all the water gathers.
- The Pump Unit: This sits inside the pit. Its motor spins an impeller to create the force that pushes water up and out.
- The Float Switch (Actuator): This is the pump’s “brain.” It’s a plastic ball or a small lever that rises with the water level to trigger the pump to turn on.
- The Discharge Pipe: This is the exit route. It’s the pipe that carries the pumped water away from your home’s foundation.
You need one because concrete and block foundations are not waterproof. They are water-resistant at best. Over time, hydrostatic pressure builds up in the soil, and water will always find the path of least resistance. It will seep through cracks, porous concrete, or the cove joint where the floor meets the wall. A sump pump is used to remove water that has seeped in through the foundation, managing a problem that is nearly impossible to fully prevent.
How a Sump Pump Works: A Simple Step-by-Step
The cycle is automatic and brilliantly simple. Here’s how it plays out every time it rains.
- Water from the surrounding soil enters the sump pit through perimeter drains or simply by seeping in.
- As the water level in the pit rises, it lifts the float switch.
- When the float reaches a preset “on” height, it activates an internal switch that turns the pump motor on.
- The motor spins the impeller, creating a centrifugal force that draws water into the pump and pushes it forcefully into the discharge pipe.
- The water is ejected out of the pipe, away from your home. The water level falls, the float drops, and the switch turns the pump off until the next cycle.
You can think of it like a bathtub drain that turns itself on when the tub gets too full. Instead of just draining down, it actively pumps the water up and out to a safe distance.
That safe distance is critical. The discharge pipe sends the water to a designated spot like a storm drain, a dry well (a buried pit filled with gravel), or simply to your yard, well away from the house. Where you send this water is governed by local building codes, which you must follow to avoid legal issues or sending the water right back toward your foundation.
The Water Science Snippet: Understanding Flow and Pressure
When you’re sizing a pump or figuring out why one is struggling, you’ll hear two key terms. They define the pump’s capability.
GPM (Gallons Per Minute) is the flow rate. It tells you how much water the pump can move. A basement in a wet area needs a higher GPM rating than one that only gets a trickle.
‘Head’ Pressure (or Total Dynamic Head) is the resistance the pump must overcome. It’s not just the vertical height it must lift the water. It also includes the friction from all the elbows and length of the discharge pipe running horizontally. A pump might lift water 10 feet up, but if it then has to push it 50 feet across your yard, that creates significant additional head pressure.
A pump must be sized correctly for both your home’s peak water volume (GPM) and the total head pressure of your specific discharge setup, or it will fail when you need it most. A big pump with weak pressure can’t push water up and out. A small pump with high pressure can’t keep up with the volume. You need the right balance.
Main Types of Sump Pumps for Residential Use
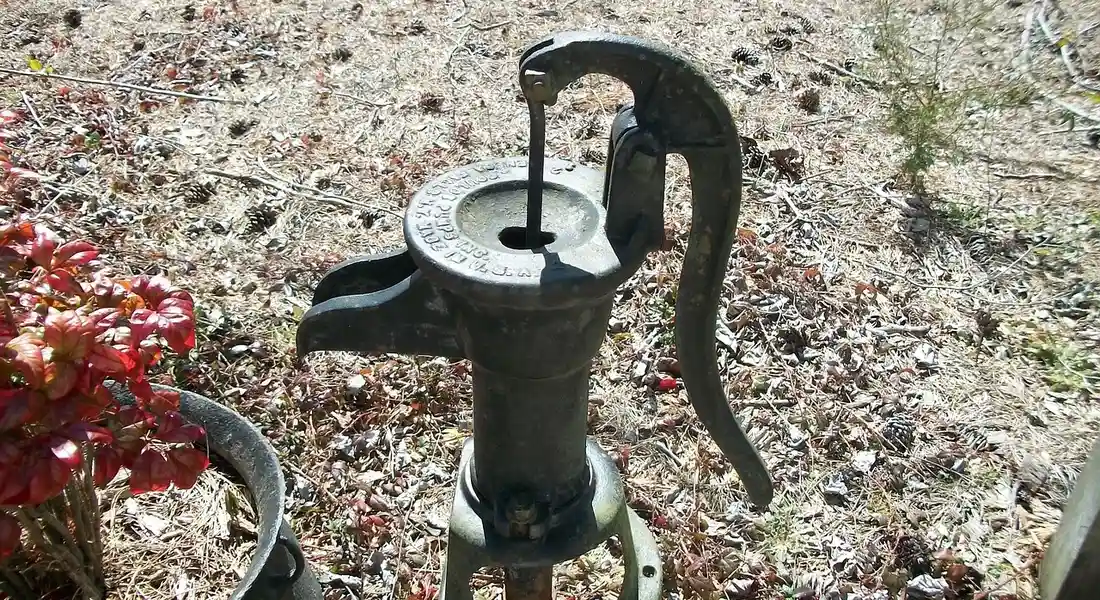
For your home, you really only need to know about three setups: submersible, pedestal, and battery backup. They all move water, but they do it in very different ways.
Submersible, Pedestal, and Battery Backup
A submersible pump sits right down in the sump pit, underwater. The entire motor and pump are sealed in a waterproof housing. It’s the workhorse you’ll find in most modern basements, and there are many types of submersible pumps for home water systems.
A pedestal pump has its motor mounted on a long column (the pedestal) above the pit. Only the intake pipe goes into the water. Think of it like a straw with the motor sitting high and dry on the basement floor.
A battery backup system is your insurance policy. It’s a second, separate pump that kicks in when the main pump fails or the power goes out. If your basement floods during a storm, it’s usually because the primary pump lost power, which makes a battery backup critical.
Submersible vs. Pedestal: Side-by-Side
| Feature | Submersible Pump | Pedestal Pump |
|---|---|---|
| Noise Level | Quieter. The water in the pit muffles the sound. | Louder. The motor is out in the open. |
| Placement & Space | Fits inside the pit, out of sight. Needs a wider pit. | Motor sits above the pit, taking up floor space. Fits in narrow pits. |
| Typical Lifespan | 5-10 years. Being submerged can shorten life if seals fail. | 15-25 years. The motor stays dry and runs cooler. |
| Average Cost | Higher initial cost. | Lower initial cost. |
I usually install submersibles for finished basements where noise matters. In my own utility room with a shallow pit, I use a pedestal. It’s been clicking on and off for almost 20 years.
A Note on Other “Pumps”
Don’t confuse these with sewage ejector pumps or effluent pumps. Sewage pumps are for moving solid waste from a basement bathroom up to the main sewer line. Effluent pumps handle greywater from things like a laundry sink. They are for specific waste jobs, not general groundwater flooding.
Choosing the Right Sump Pump: Capacity, Power, and Features
Buying the wrong pump is a fast track to a wet basement. You need to match the pump to your home’s specific water problem.
Sizing: Horsepower and Water Volume
Horsepower (HP) isn’t everything, but it’s a good starting point.
- 1/3 HP: Good for average-sized homes with moderate water seepage. This is the most common size I install.
- 1/2 HP: Choose this for larger homes, homes in areas with a high water table, or if you’ve had flooding issues before. It moves more water faster.
- 3/4 HP or 1 HP: Typically for severe, constant water intrusion or commercial settings. Most homes don’t need this much pump.
The real test is Gallons Per Minute (GPM) and Head Pressure. Here’s how to estimate it:
- Measure Vertical Lift (Head): From the bottom of your sump pit straight up to where the discharge pipe exits your house.
- Add Horizontal Run: For every 10 feet of horizontal pipe after the exit, add 1 foot of head. So a 10-foot vertical lift plus 30 feet of horizontal pipe equals 13 feet of Total Dynamic Head.
- Check the Pump Chart: Every pump has a performance chart. At your Total Dynamic Head (say, 13 feet), the pump listing will show how many GPM it can move. You want a pump that can handle your worst-case inflow.
Key Features for Reliability
Look beyond the basic specs. These features prevent failures.
- Alarm Systems: A water alarm in the pit or an alarm on the pump itself screams when water gets too high. It’s your first warning something is wrong.
- Dual Float Switches: The float tells the pump when to turn on and off. Two floats are better. If the primary float fails, the secondary backup float takes over.
- Corrosion-Resistant Materials: A pump with a cast-iron or stainless-steel housing will outlast one with a plastic housing. It costs more but rusts less.
Recommended Product Categories
When you’re shopping, focus on these dependable categories instead of getting lost in brand names.
- Cast-Iron Submersible Pumps: This is the durable choice. The heavy-duty housing resists corrosion and heat buildup. It’s what I’d put in if I wanted a primary pump to last.
- Pedestal Pumps for Shallow Pits: If your pit is less than 12 inches deep, a pedestal is often your only practical option. The motor doesn’t need to fit underwater.
- Integrated Primary/Backup Combo Systems: These kits come with a primary AC pump and a dedicated battery-powered backup pump in a single unit. They’re designed to work together, which simplifies installation and is more reliable than rigging two separate pumps.
Essential Sump Pump Maintenance You Can Do
Neglect is the number one reason a sump pump fails. Understanding common sump pump failure causes helps you flag issues early. Being proactive with checks saves you from costly repairs. A few minutes of basic care twice a year keeps it ready for a downpour.
Do these tasks every spring and fall.
- Clean the pit. Unplug the pump, bail out any water, and remove all debris like gravel, silt, and leaves. A shop vacuum works great for the final cleanout.
- Test the float switch. Slowly pour a 5-gallon bucket of water into the pit. Watch the float rise. The pump should kick on, lower the water level, and shut off automatically. If it doesn’t, you found a problem before a storm hits.
- Inspect the discharge line. Follow the pipe from the pump to where it exits your house. Make sure it’s intact, firmly connected, and points water away from your foundation. Clear any leaves or insect nests from the outlet.
Adjust your checklist with the seasons.
- Before spring thaw or the rainy season: Focus on the discharge line. Ensure it’s not blocked by winter debris and that the ground is graded to carry water away.
- Before winter: This is critical. Disconnect and drain any above-ground discharge piping to prevent freezing. A frozen pipe will block the pump and likely burn out the motor.
Your sump pit is for groundwater only, not a trash can. I’ve pulled pumps choked with everything from wrappers to, yes, a surprising number of condoms. This debris can jam the float, clog the pump intake, and lead to a smelly, failed system. A clean sump pump pit prevents these issues and makes maintenance easier. Regular checks help keep it that way. Keep the pit clean.
Troubleshooting Sump Pump Problems and Failures
When your sump pump acts up, start with the simple fixes. Most issues are basic.
- Pump not running: Check power first. Is the plug secure? Is the GFCI outlet tripped? Did the circuit breaker blow? Listen closely. If you hear a hum but no pumping, the impeller might be jammed or the pump is seized.
- Running constantly: The float switch is likely stuck on something in the pit or the adjustment rod is set too high. A faulty switch that won’t turn off is also common.
- Noisy operation: Grinding or rattling often means a worn bearing or debris in the impeller. A loud hum usually points to a jammed or failing motor.
- Motor burnout: This is typically the result of frequent jamming, a blocked discharge line, or the pump trying to run dry for too long. You’ll usually smell it before you see it.
The “Red Flag” Troubleshooting Guide
Some signs mean stop and fix it now.
- Heavy rain is falling and your pump is silent.
- You see water in the pit but the pump never activates.
- You hear strange grinding, screeching, or metallic noises from the pit.
- The pump cycles on and off every few minutes without rain.
- The GFCI outlet for the pump trips repeatedly.
Any one of these red flags means your basement is at immediate risk of flooding. Investigate the cause right away.
The DIY vs. Pro Verdict: What You Can Fix
Be realistic about your skills. My rule is simple: if it involves new pipe connections to your house main or complex electrical work, call a pro.
- DIY Difficulty (4/10): Cleaning the pit, testing the system, replacing a standalone float switch, or unclogging an accessible discharge line. These are homeowner tasks.
- Pro Territory (8/10): Replacing the entire pump, installing a new discharge line through your foundation wall, wiring a new dedicated circuit, or diagnosing a seized internal motor. This is for a licensed plumber.
You can handle maintenance and simple switch swaps. A full replacement or anything behind your walls needs a licensed plumber. Getting this wrong leads to flooding or electrical hazards. It’s not worth the risk.
Common Questions
How often should I test my sump pump, and what’s the best way?
Test it at least every three months, and always before a big storm. The best method is to slowly pour a 5-gallon bucket of water into the pit to trigger the float and ensure the pump runs a full cycle. If it doesn’t activate or drain the pit, you’ve caught a failure before it costs you. Testing regularly is key to reliable performance.
Is a battery backup system really necessary?
Yes, if you want true protection. The primary reason basements flood during storms is a power outage, which silences your main pump. A backup is your essential insurance policy, giving you critical pumping capacity for hours until the electricity returns, especially during a storm when pump failures can be most damaging.
What are the clear signs my sump pump needs replacing?
Listen for constant cycling, strange noises like grinding or rattling, or visible rust and corrosion. If the pump is over 7-10 years old, starts tripping its breaker, or simply can’t keep up with water inflow, plan for a replacement immediately. Don’t wait for a failure. Frequent breaker trips can point to a faulty pressure switch. If you notice repeated trips, have the pressure switch—along with the wiring and pump—inspected to determine if a repair or replacement is needed.
How do I choose between 1/3 HP and 1/2 HP for my home?
Base it on your water volume, not just horsepower. A 1/3 HP pump is perfect for average seepage. Upgrade to 1/2 HP if you have a high water table, a history of wetness, or a larger basement area to protect-it moves more water faster under pressure.
Should I install a water alarm for my sump pit?
Absolutely. An alarm is a low-cost early warning system. It shrieks when water rises too high, alerting you to a pump failure, a stuck float switch, or an overwhelmed system long before the flooding reaches your floor.
Your Sump Pump Action Plan
Start by matching your pump’s type to your home’s flood risk-this decides its job and your maintenance routine. Pour water into the pit to test it now and before wet seasons, and scoop out any debris so it never fails you. For best results, follow best practices for sump pump pit installation to ensure the pit is properly sized and vented.