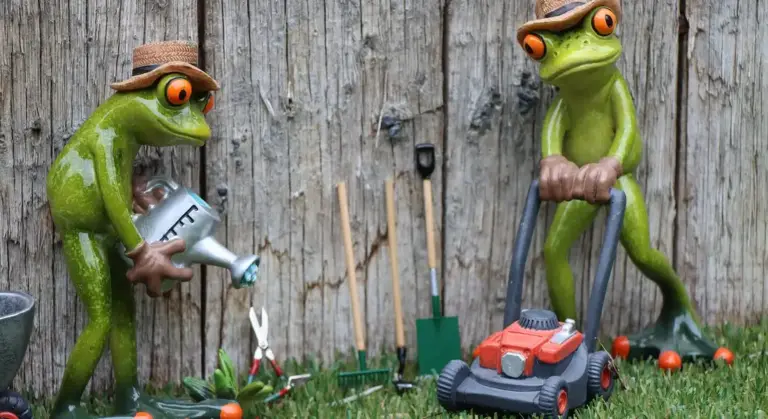
Submersible Pump Types: A Homeowner’s Practical Guide
Your pump choice decides if your basement stays dry or your taps run. Get it wrong, and you’re facing a wet mess or no water at all.
We will cover the main submersible pump types, their specific home uses, and how they are defined for your water system.
I’ve pulled and replaced more pumps than I can count, in my own well and on service calls. Here’s the straight talk: skip the guesswork and match the pump to the job.
What Exactly Is a Submersible Pump and How Does It Work?
Think of a submersible pump as a sealed electric motor with a propeller on the end. You drop the whole unit down into your well water. It sits right at the bottom, often hundreds of feet down, and pushes water straight up the pipe to your house.
It’s like the pump in a fish tank, but scaled up to run your home’s plumbing instead of a tiny aquarium. The big difference is where the work happens. An above-ground jet pump has to suck water up from below, which takes a lot of energy. A submersible pump avoids that hard pull by already being in the water, making it much more efficient for deep wells.
Because the entire motor is submerged, the seal is everything. A single leak means a dead pump. This need for a perfect, watertight seal defines its rugged, cylindrical construction. I’ve pulled pumps where a failed seal let in just a cup of water, and that was enough to ruin a $900 motor.
Decoding the Specs: Head, Horsepower, and Flow Rate
Pump shopping means reading specs. Get these three things wrong, and you’ll have low pressure, a burned-out motor, or a huge electric bill.
Understanding Total Dynamic Head
“Head” isn’t just your well depth. It’s the total resistance the pump must overcome. You add up:
- The vertical distance from the pump to your pressure tank.
- The friction from water moving through hundreds of feet of pipe.
- The pressure your tank is set to (like 40/60 PSI).
Total Dynamic Head is the real measure of the pump’s lifting power, and if you underestimate it, your water will just trickle out. For my house, with a 180-foot well and the tank in the basement, my total dynamic head calculation came out to about 230 feet.
Making Sense of Horsepower for Home Use
Horsepower (HP) is the motor’s strength. Bigger isn’t better. A half HP pump might be perfect for a standard home. A 1 HP pump might be needed for deeper wells or larger properties.
An undersized pump will run constantly, overheat, and fail early. An oversized pump is a waste. It costs more upfront, uses more electricity, and can shorten the life of your system by cycling on and off too rapidly. Match the horsepower to your calculated head and flow needs, don’t just guess.

Calculating Your True Flow Rate Needs
Flow rate is measured in gallons per minute (GPM). It’s how much water the pump can deliver at your required pressure. Household demand varies:
- Shower: 2.5 GPM
- Kitchen faucet: 2.2 GPM
- Washing machine: 3 GPM
- Lawn sprinkler: 4 GPM
Add up what might run at once. A shower and a sprinkler? That’s at least 6-7 GPM you need. Your pump’s flow rate must meet your peak demand, not just your average use. A manufacturer’s chart will list specs, but you verify your home’s math. A pump that can’t keep up is as useless as one that’s too big.
The Main Submersible Pump Types for Your Home
For a homeowner, the word “pump” can mean a dozen different things in the basement or yard. Let’s define the core types you’ll actually deal with. Every submersible pump has two main parts: the motor, which is sealed in a waterproof housing, and the impeller, which is the spinning fan-like part that actually moves the water. The impeller’s design is what decides the pump’s job.
- 4-inch Well Pump: Pumps clean drinking water from your well.
- Sump Pump: Removes groundwater from a basement or crawlspace sump pit.
- Sewage/Grinder Pump: Moves raw sewage and solid waste from a bathroom or basement utility sink.
- Drainage/Effluent Pump: Handles relatively clean “gray water” from a laundry sink, dishwasher, or floor drain.
Here’s a key distinction right away: not every sump pump is submersible. Pedestal sump pumps have a motor that sits above the pit, with only a shaft going into the water. They’re common, but submersible sump pumps sit entirely in the water and are typically quieter and more discreet. Also, most small pumps for clearing a pool cover or a flooded backyard are indeed simple submersible utility pumps.

4-Inch Well Pumps: Your Drinking Water Source
This is the workhorse for homes on a well. Its specific job is to lift potable water from hundreds of feet underground and push it into your pressure tank and house pipes. It’s defined by its narrow, cylindrical shape designed to fit inside a 4-inch or larger well casing.
The motor is long and sealed in stainless steel. The impeller isn’t just one piece; it’s a stack of multiple, staged impellers. Each stage boosts the water pressure a bit, so a pump with more stages can lift water from a deeper well. You might hear these called “submersible deep well pumps.”
When one fails, you don’t repair it. You pull the entire unit and drop in a new one. A common sign of trouble is the pump short cycling-turning on and off rapidly-which usually points to a problem with the pressure tank or switch, not the pump itself. Always check those first before assuming the pump is bad.
Sump Pumps: Basement and Crawlspace Saviors
A sump pump’s job is simple: keep your foundation dry by automatically pumping out water that collects in a sump pit. A submersible model sits right in that pit, out of sight. It’s defined by a rugged, cast iron or thermoplastic housing that can handle sitting in water for years. When choosing a basement sump pump, key factors include pit size, drainage needs, power availability, and backup options. These factors guide your selection for a basement pump.
The impeller is usually a vortex or semi-open style. This design creates a swirling funnel of water that allows small solids (like silt or small gravel) to pass through without jamming the pump. This tolerance for debris is critical, as sump water is rarely perfectly clean.
Test your sump pump every spring by pouring a bucket of water into the pit. It should activate immediately, pump the pit dry, and shut off automatically. The most common reason for failure is a stuck float switch (the part that tells the pump to turn on). Giving the float arm a nudge during your test can confirm it’s moving freely. Other common sump pump failure causes include a clogged discharge line and power issues. Knowing these can help you troubleshoot before a flood.
Sewage and Grinder Pumps: Handling the Tough Stuff
You need one of these if you have a bathroom, laundry, or kitchen sink in a basement below the level of your main sewer line. Their job is to macerate solid waste and toilet paper and pump the slurry uphill to the main drain.
This type is physically defined by its cutting mechanism. A grinder pump has a rotating cutter plate that shreds solids before they hit the impeller. The impeller itself is a hardened, recessed design that can push the thick slurry. Never confuse a sewage pump with a sump pump; putting solids into a sump pump will destroy it instantly.
These pumps are built tough with a dual-sealed motor. If it fails, you’re looking at a messy replacement. To avoid clogs, never flush anything other than toilet paper and human waste, even if it says “flushable.” Wipes and feminine hygiene products will bind the grinder up every time.
Drainage and Effluent Pumps: For Gray Water and Floods
These handle water that’s dirtier than groundwater but not as harsh as raw sewage. The specific job is moving “gray water” from sources like a washing machine, floor drain, dehumidifier, or air conditioner condensate line. They’re also what you’d rent to drain a flooded yard after a storm.
Physically, they look like a heavy-duty sump pump but often with a larger outlet hose (1-1/2″ or 2″). They use a semi-open or vortex impeller that can pass small solids, typically up to about 1/2 inch in diameter. The housing is durable plastic or cast iron.
The main difference between an effluent pump and a sewage pump is the solid-handling ability. Effluent pumps are for water with suspended particles, not for human waste. Here’s a quick side-by-side look:
| Pump Type | Handles Solids Up To | Typical Use Case |
|---|---|---|
| Effluent / Drainage Pump | 1/2 inch diameter | Laundry sink, floor drain, yard water |
| Sewage / Grinder Pump | 2+ inches (after grinding) | Toilet, shower, kitchen sink waste |
For a simple flood in the garage, a submersible utility or drainage pump is the right tool. For a basement bathroom, you must install a sewage ejector or grinder pump system.
Safety, Voltage, and Important Codes
Are 240v submersible pumps safe? Yes, absolutely. The voltage itself isn’t dangerous if the installation is correct. The real danger is a bad electrical connection or faulty grounding. A properly installed 240-volt pump, like the one I upgraded to for my deep well, is efficient and reliable. Safety comes from the details: a dedicated circuit, correct wire gauge, waterproof conduit, and most importantly, a verified equipment grounding conductor bonded to your home’s grounding system.
A pump can be perfectly safe at 240v or deadly at 120v if it’s wired wrong, so always respect the electricity and get help if you’re unsure.
Electrical Safety for DIY Installation
If you’re tackling the electrical side yourself, follow this sequence. Missing a step can lead to pump failure or a shock hazard.
- Turn off the main breaker to the well circuit at your home’s breaker panel. Use a voltage tester to confirm the power is off at the pressure switch and control box.
- Run the correct wire. For a 1 HP 240v pump, you typically need 12-gauge copper wire in a waterproof (UF) cable or within conduit.
- Connect the ground wire. This green or bare copper wire must connect to the ground terminal in the control box, the pressure switch, and the pump motor itself. This path directs fault current safely into the earth.
- Use a correctly sized circuit breaker. A 1 HP pump usually needs a 20-amp double-pole breaker. An oversized breaker won’t trip during a fault, creating a fire risk.
- Protect the wiring. All wiring from the house to the wellhead must be in conduit to prevent damage from moisture, sunlight, and pests.
Certifications and Plumbing Code Checkpoints
Look for these marks on the pump or its documentation. They are your shortcut to knowing a product meets baseline safety and material standards.
- UL Listing (Underwriters Laboratories): This is non-negotiable for the electrical components. It means the motor and controls have been tested for fire and electrical shock risk.
- NSF/ANSI 61 or NSF/ANSI 372: For any pump moving drinking water, this certification ensures the wetted materials (like impellers and seals) don’t leach harmful contaminants into your water.
Plumbing codes are about preventing system failures that cause property damage or health hazards. For submersible pumps in home water systems, two key rules always apply.
The International Plumbing Code (IPC) and Uniform Plumbing Code (UPC) both mandate a check valve to prevent backflow, usually installed near the pump discharge. This stops water from flowing backward into the well, which protects the pump and maintains prime. For wastewater ejector pumps, codes are strict about air gaps, sealed lids, and alarm systems to prevent sewage backups into your basement.
A quick note on other pump types: most bilge pumps and Flojet diaphragm pumps are not true submersibles. Bilge pumps are often submersible but designed for dirty, intermittent use. A Flojet is a shallow, self-priming pump usually mounted outside the water source. They serve different jobs than a sealed, deep-well submersible designed for constant pressure.
Choosing the Right Pump: A Simple Matchmaking Guide

Picking a pump is not about finding the fanciest one. You need the tool that fits your specific job. Get this wrong, and you waste money or face a flooded basement.
Follow this three step process. It works for every home water situation.
Step 1: Diagnose Your Water Situation
First, ask yourself one question: where is the water coming from or going to? The answer tells you the pump’s basic job.
- Water Source: Is it a drilled well, a shallow point well, or are you moving water from a cistern?
- Water Problem: Is it flooding in a basement (sump), wastewater from a toilet (sewage ejector), or gray water from a laundry sink (effluent)?
Your water source defines the “lift” or depth the pump must work against, while the problem defines the type of waste it must handle.
Look at your own setup. My well is 180 feet deep, so I need a powerful 4″ submersible. My neighbor’s sump pit is only 8 feet deep, so a simple 1/3 HP sump pump does the job. Think about submersible well pump depth and how it affects head. Then consider the resulting flow and pressure for your setup. Start by writing down your scenario.
Step 2: Match the Pump to the Liquid
Not all water is the same. Pumps are built to handle specific types. Using the wrong one will clog or break it fast.
Think of it like this: you wouldn’t use a coffee filter to strain pasta. Match the tool to the material.
| Liquid Type | Contains | Correct Pump Type | Home Use Example |
| Clean Water | Just water. Maybe tiny sand. | Well Pump, Utility Pump | Supplying house from a well or cistern. |
| Dirty Water | Silt, sand, small debris. | Stainless Steel Sump Pump, Effluent Pump | Basement sump pit, window well drainage. |
| Sewage / Solids | Waste, toilet paper, solids. | Sewage Ejector Pump (Grinder Pump if needed) | Basement bathroom or laundry below the main sewer line. |
A standard cast iron sump pump will fail quickly if you use it for sewage; it lacks the impeller design to chop and pass solids. For my basement bathroom project, I installed a sewage ejector with a 2″ discharge line, not a sump pump.
Step 3: Size It With Your Specs
You know the job and the pump type. Now, get the size right. This means two things: pressure (“Head”) and flow (“GPM”).
- Calculate Total Dynamic Head (TDH): This is the total pressure the pump must create.
- Vertical Lift: The depth from the pump to the discharge point. For a well, this is the water level plus the height to your pressure tank.
- Friction Loss: Pressure lost pushing water through pipe. For home systems, add about 10% of the vertical lift.
Example: My well pump lifts water 180 feet (vertical). With friction, my TDH is roughly 200 feet. I chose a pump rated for 200+ feet of head.
- Determine Your Flow Needs (GPM): How much water do you need per minute?
- For Well Pumps: Size for peak household use. A family of four typically needs 8-12 GPM.
- For Sump Pumps: Match it to your pit’s water inflow rate. A 1/3 HP pump moves about 35 GPM, which handles most residential pits.
Always choose a pump where your required flow and head meet in the middle of its performance curve, not at the very top. This gives you a safety margin and longer pump life.
Finally, check the electrical specs (voltage) and the discharge size. A 1.5″ sump pump outlet needs 1.5″ pipe. Connecting it to a smaller hose will choke the pump and burn out the motor. It is a simple match, but you have to check every detail, especially when connecting the pump to the discharge hose.
Installing a Submersible Pump: What to Expect
Putting in a submersible pump follows a universal sequence: secure the pump, connect the pipe and wire, then test it. The main difference between projects is scale and consequence-a mistake on a well pump costs thousands, while a sump pump error might just flood your basement. For your safety and the pump’s longevity, never skip the prep work or the safety steps, especially with electricity and water.
Pre-Installation Site Preparation
This step prevents most callbacks. You’re setting the stage for a pump that works for years, not months.
- Power Down: Go to your main electrical panel and turn off the circuit breaker for the pump. Then, use a non-contact voltage tester at the installation point to double-check wires are dead. This is non-negotiable.
- Clean the sump pit or well casing. Remove all debris, gravel, and sediment. A clean base prevents clogs and ensures the pump’s intake screen doesn’t suck in junk.
- Verify the pit depth. For a sump pump, the pit must be deep enough so the pump sits fully submerged on its base, not perched on debris. An overly shallow pit causes short cycling and burns out the motor fast.
- Gather your tools and parts: correct pipe (usually 1.25″ or 1.5″ PVC for sumps), PVC primer & cement, hose clamps, a check valve, and waterproof wire connectors or a splice kit.
The Core Hooking-Up Process
Now you connect everything. Precision here avoids leaks and electrical faults.
- Secure the Pump: Place the pump upright on the bottom of the clean pit. If it’s a convertible pump (can be vertical or horizontal), ensure it’s set for the correct orientation per the manual.
- Connect the Discharge Pipe: Thread the PVC pipe into the pump’s discharge port. Use Teflon tape on the threads. You must install a check valve on the vertical discharge pipe, about a foot above the pump. This valve stops water from flowing back into the pit after the pump shuts off, which prevents destructive “water hammer” and stops the pump from cycling endlessly.
- Run and Secure the Pipe: Route the pipe to your drainage point. Use brackets to secure it to a wall or the pit liner so the pump’s weight isn’t hanging by the pipe.
- Make the Electrical Connection: This is critical. Use only wire connectors rated for submersion. Follow the wiring diagram in your manual exactly. For a 3-wire pump, you’ll connect the ground (green), the neutral (white), and the hot (black) wires. For a 2-wire pump, it’s just the hot and ground. Seal the connection with a waterproof splice kit or a properly sized rubber wire nut cover filled with silicone sealant.
- Manage the Cord: Never use the electrical cord to lift or lower the pump. Secure the power cord to the discharge pipe every few feet with UV-resistant zip ties to prevent it from snagging.
Testing and Initial Startup
Don’t just flip the switch and walk away. A proper test run confirms your installation is solid.
- Slowly fill the pit with a garden hose. Watch for leaks at the pipe connections. A small drip now is a big problem later.
- Plug the pump into its dedicated outlet (for sumps) or restore power at the breaker. The pump should start automatically once the water reaches the float or sensor’s activation level.
- Listen. The motor should hum smoothly without grinding or screeching. The water should flow strongly out of the discharge line.
- Check the cycle. The pump should turn off completely once the water level drops. If it turns on and off rapidly (short cycles), the check valve is likely missing or faulty, or the float is getting caught.
Installing a deep well submersible is almost always a job for a licensed pro—it requires pulling heavy drop pipe, setting the pump at precise depths, and complex electrical work. Replacing a basement sump pump, however, is a very common and manageable DIY project if you respect the electrical safety steps and install that check valve. I’ve done both in my own home, and the peace of mind from doing the sump myself was worth the afternoon’s work.
Tools, Materials, and Ongoing Maintenance
Having the right gear makes any pump job easier and safer. This isn’t about having a fancy workshop. It’s about having reliable, purpose-built tools that prevent stripped fittings, bad connections, and flooded basements.
Your Plumbing Toolbox for the Job
Gather these tools before you start. Trying to improvise with the wrong tool often creates a bigger problem.
- Two Pipe Wrenches: You always need two-one to hold the fitting, one to turn the pipe. A 14-inch and an 18-inch wrench cover most household sizes.
- PVC Primer & Cement: This is for solvent-welding discharge pipe. Don’t just use cement alone. The primer cleans and prepares the PVC for a permanent, leak-proof bond.
- High-Density Teflon Tape: Use the thick, pink tape for water applications. Wrap male pipe threads 5-6 times clockwise. This creates a reliable seal on threaded connections and prevents leaks at fittings.
- Wire Strippers & Crimpers: A good pair strips insulation without nicking the copper wire. The crimper is for attaching waterproof wire connectors securely.
- Multimeter: This is your electrical detective. Use it to check for power at the pressure switch and to test for continuity in pump wires. It can tell you if the problem is electrical before you pull the pump.
Pipe and Fitting Materials Checklist
Quality materials here prevent failures down the line. What you bury in the ground or submerge shouldn’t be the bargain-bin option.
- Schedule 40 PVC Pipe: This is the standard for discharge lines. It’s strong, corrosion-proof, and rated for the pressure. Don’t use thin-wall or drainage pipe.
- Stainless Steel Safety Cable: Your primary pump support should be the discharge pipe. The safety cable is a backup. Galvanized cable will rust and snap. Only use stainless.
- Waterproof Wire Connectors: Look for the gel-filled, screw-on type. They seal out moisture permanently, which is critical for submerged electrical connections.
- Brass or Stainless Steel Fittings: At the pitless adapter or tank tee, use solid brass or stainless fittings. Cheap malleable iron fittings corrode quickly and can snap.
- Pipe Thread Sealant: For metal-to-metal threaded connections (like at the pressure switch), a liquid pipe sealant is often better than tape. It fills gaps more completely on tapered threads.
Easy Maintenance to Avoid Costly Repairs
Most pump failures give you warning signs. A little routine attention keeps water flowing and avoids a $2,000 replacement bill.
Clean the pump intake screen annually. For pumps in wells or open bodies of water, sediment and debris clog the screen. This makes the pump work harder, overheat, and fail. Turn off power, pull the pump up just enough to access the bottom, and brush the screen clean.
Listen to your system every month. You learn its normal sounds-the click of the pressure switch, the hum of the pump. A new grinding noise means bearing wear. Rapid clicking at the switch could indicate a waterlogged pressure tank. Investigate odd sounds immediately.
Test the float switch quarterly if you have one in a sump or ejector pit. Manually lift the float arm to trigger the pump. Make sure it starts, runs, and shuts off automatically when you let go. A stuck float is the number one reason for basement flooding.
Check the pressure tank’s air charge every six months. With the pump off and a faucet open to drain pressure, use a tire gauge on the tank’s schrader valve. It should read 2 psi below the pump’s cut-in pressure (e.g., 28 psi for a 30/50 switch). Low air causes short cycling and burns up the pump motor.
You can handle cleaning, listening, and basic testing yourself. Call a professional when the work involves well digging, major electrical diagnostics at the control box, or pulling a deep well pump. If you hear the pump running but get no water, or if you have a persistent leak at the well seal, it’s time to make the call. Electricity and deep, confined spaces are not DIY territory.
Common Questions
How long should a submersible pump last, and what shortens its life?
A quality well pump should last 15-25 years, while sump and sewage pumps average 5-10 years. The biggest life-killers are improper sizing, which makes it run constantly, and sediment clogging the intake. Protect your investment by matching the pump to your exact head and flow needs, and keep the intake screen clean.
What’s the most common reason a sump pump fails during a storm?
A stuck float switch is the usual culprit. Debris or an improperly adjusted arm prevents it from rising to trigger the pump. Test it monthly by lifting the float manually and clean the pit annually to ensure nothing obstructs its movement.
Can my well pump cause cloudy or sandy water in my house?
Yes, if it’s placed too low in the well or if the well screen is failing, it can stir up sediment. A sudden appearance of sand often signals a failing pump seal or a drop in the water table. Install a sediment filter on your main line and consult a pro if it persists.
Is it okay to use my old sump pump to drain the pool or a flooded yard?
Only if it’s truly clean water. Sump pumps are designed for groundwater, not chlorine or chemicals, which can degrade seals. For chlorinated pool water, use a utility pump labeled for that purpose to avoid damaging your basement’s emergency equipment. Also, if you’re draining a pool, route the water through the sump pump drain and keep the line clear as part of routine pool maintenance.
When should I absolutely call a professional instead of DIYing a pump repair?
Always call a pro for deep well pump issues, any major electrical diagnostics at the control box, or if you smell sewage near an ejector pit. For your safety and to avoid costly system damage, respect the limits of working with deep, confined spaces and hazardous waste.
Final Thoughts on Choosing Your Submersible Pump
The best pump for your home is the one that matches your specific water system, not the one with the most features. Start by identifying your well’s depth and your household’s water demand to narrow your choices between a 3-wire or 4-wire, standard or convertible model. Getting this match right from the start prevents frequent cycling, poor pressure, and costly repairs down the line.
Bob McArthur
Bob is a an HVAC and plumbing industry veteran. He has professionally helped homeowners resolve issues around water softeners, heaters and all things related to water systems and plumbing around their homes. His trusted advice has helped countless of his clients save time, money and effort in home water systems maintenance and he now here to help you and give you first hand actionable advice. In his spare time, Bob also reviews home water systems such as tankless heaters, water softeners etc and helps home owners make the best choice for their dwelling. He lives around the Detroit area and occasionally consults on residential and commercial projects. Feel free to reach out to him via the contact us form.