Hot Water Tank Replacement: Where to Buy, How to Install, and Navigating Returns
Your water heater quit. Now you need a new one, and you’re not sure where to start.
This guide walks you through where to buy a tank, your replacement options, and exactly how stores handle returns and installation services.
I’ve swapped more tanks than I can remember. Skip the headache and follow these steps.
Your First Step: Diagnose the Problem and Know Your Options
Before you spend money, figure out if you need a band-aid or a new leg. A simple repair fixes a single failed part. A full replacement means the tank itself is finished.
You can often replace a thermostat, a heating element, or a pressure relief valve. These parts fail independently. The tank is just the metal container holding water. If the container is compromised, you replace everything.
The core rule is simple: you repair parts, but you replace the tank.
The “Red Flag” Troubleshooting Guide
Ignore these signs and you’re asking for a flood. Here are five clear signals your tank needs immediate replacement.
- Rusty Water from the Hot Side. Run only hot water into a white bucket. If it’s discolored, rust is flaking from the tank’s interior lining. The tank is rotting from the inside out. This is a death sentence.
- A Leak from the Tank Body. Water dripping from a pipe connection is usually a fixable seal. A persistent leak or sweat from the tank’s steel shell is not repairable. The metal has failed.
- Loud Rumbling or Popping Noises. That’s sediment buildup at the bottom getting superheated. It reduces efficiency and overheats the tank floor, weakening the steel. It’s a precursor to failure.
- No Hot Water at All. First, check for a tripped breaker or a pilot light. If power and gas are fine, you could have two bad elements or a severely compromised tank. If simple part swaps don’t work, the tank is likely done.
- A Puddle That Won’t Stop. A small drip from the tank drain valve might be fixed by tightening it. A constant flow or a growing puddle originating from the tank itself means get a new one now. Do not wait.
DIY vs. Pro Verdict
This job gets a difficulty rating of 8 out of 10. It involves plumbing, electrical or gas work, and heavy lifting. One wrong connection can cause major damage.
You need a licensed plumber or gas fitter by law if your work involves gas lines, venting, or requires a building permit. Most municipalities require a permit for a water heater installation. The pro handles that. If you’re unsure about permit needs for a water heater install, check with your local building department. They can confirm whether a permit is required and what inspections apply. If you have an electric tank and advanced DIY skills, you might manage it. For 99% of homeowners, especially with gas, hire a professional.
Where to Shop: A Plumber’s Guide to Retailers and Suppliers
You have four main choices. Each has different trade-offs for price, advice, and what happens after the sale.
Big-Box Stores (Home Depot, Lowe’s)
These are the most common spots for homeowners. They stock major brands like Rheem, A.O. Smith, and Bradford White.
The big advantage is upfront price and availability, but the in-store “expert” might just be a clerk reading a box.
- Pros: Competitive prices. Immediate pickup. Easy return policies on unopened items. They often have installation services you can book.
- Cons: Limited to common residential models. Advice can be hit or miss. They rarely carry specialized or high-recovery commercial-grade tanks.
Does Costco sell hot water tanks? Sometimes, but usually online only. Their deal often bundles delivery and basic installation. Read the fine print on what that “basic” install includes, as it may not cover code upgrades like a new pan or venting.
Online Retailers (Amazon, SupplyHouse.com)
You can find everything here, from cheap parts to whole units.
Buying a full tank online is great for selection, but getting a 400-pound box delivered to your driveway is your problem.
- Pros: Vast selection. User reviews can be helpful. Often the best price on specific models and repair parts.
- Cons: No local expert advice. Shipping damage is a real risk. You are your own installer and returns coordinator. Never a good first choice for a full system.
Local Plumbing Supply Houses
This is where the pros shop. Ferguson, Hajoca, or your local independent supplier.
Walking into a supply house gets you pro-grade equipment and advice from people who deal with installs every single day.
- Pros: Expert staff. Access to professional brands (like Bradford White) often not sold at big-box stores. They know local code requirements. They have specialized parts in stock.
- Cons: Prices may be higher (they cater to contractors with volume discounts). Some are “trade only” and won’t sell to homeowners, but many will.
Direct-from-Manufacturer
You usually don’t buy a standard tank this way. It’s for custom or commercial orders. Some manufacturers, like Navien for tankless units, have certified dealer networks for sales and install.
The Rental Question: “Does Enbridge Rental?”
In some areas, yes. Gas utilities or third-party companies often offer rental plans. You pay a monthly fee forever, and they cover repair/replacement.
Renting is almost always more expensive long-term, but it transfers repair risk and might make sense for short-term ownership. Do the math. Buying a quality tank and maintaining it is almost always cheaper over 10 years than a rental fee. I own mine. I control the maintenance and the cost.
How to Pick the Right Hot Water Tank: More Than Just Size
You need enough hot water for back-to-back showers. You also need the tank to fit in your basement. Start with the gallon size.
For a family of four, a 50-gallon tank is the standard starting point. A couple might get by with a 40-gallon. For larger families or homes with big tubs, look at 65 or 80 gallons.
Think about your peak hour demand, which is how much hot water you need in your busiest hour. A 50-gallon tank might only deliver 70-80 gallons in that first hour because it reheats water while you use it. Check the tank’s First Hour Rating (FHR) on the spec sheet.
Understanding the Spec Sheet
Look past the price tag. Three numbers tell you about quality and performance.
- Recovery Rate: This is how many gallons the heater can reheat per hour. A high recovery rate means faster refills after heavy use.
- Energy Factor (EF): This measures efficiency. A higher EF (like 0.67 vs. 0.60) means less wasted fuel or electricity. It directly impacts your utility bill.
- Warranty Length: This is the manufacturer’s confidence gauge. A 6-year warranty tank often has a better anode rod and thicker insulation than a 3-year model.
Water Science Snippet: The Anode Rod
Inside every tank is a metal rod called the anode. It’s made of magnesium or aluminum. Water, especially with high Total Dissolved Solids (TDS), wants to corrode the steel tank lining. The anode rod sacrifices itself instead. It corrodes first, protecting the tank. This is why checking or replacing your anode rod every few years is the best maintenance you can do to extend your tank’s life.
Recommended Products: Picking a Category
Not all water heaters are built the same. Your home’s setup dictates your choice.
- Standard Atmospheric Vent (Gas): The most common. It uses a vertical metal chimney to vent exhaust. You need an existing, proper chimney. Best for standard replacements in homes with good draft.
- Power Vent (Gas): Uses a fan to push exhaust out through a sidewall with PVC pipe. No chimney needed. Great for tight spaces or modern, airtight homes. Costs more upfront but offers more installation flexibility.
- Hybrid Heat Pump (Electric): Pulls heat from the surrounding air to heat water. It uses about 60% less electricity than a standard electric model. Needs installation in a space that stays between 40-90°F with at least 750 cubic feet of air (like a basement or garage). Best for homeowners in mild climates looking to cut energy costs.
Tank Type Deep Dive: Gas, Electric, and Heat Pump
Your fuel source is usually fixed, but knowing the differences helps you plan.
Gas models (Natural Gas or Propane) heat water faster (high recovery rate) and usually cost less to operate than standard electric. They require a gas line, proper venting, and a combustion air supply. Installation is more complex. Fuel prices and efficiency affect total cost. When comparing gas vs electric, look at long-term operating costs.
Standard Electric models are simpler to install-just water lines and a heavy-duty electrical circuit. Their operating cost is typically higher than gas. Recovery can be slower.
Code & Compliance Check: Venting and electrical are not DIY guesses. A gas heater needs the correct type and size of vent pipe. An electric heater needs the right wire gauge and breaker size, often a dedicated 30-amp or 40-amp 240-volt circuit. Getting this wrong is a fire or carbon monoxide risk. Ensure you’re following all electrical and venting requirements for heaters.
The Replacement Process: From Drain Valve to Power-Up
If your old tank is leaking from the tank itself, replacement is the only fix. This job is heavy, wet, and involves gas, water, and electricity. If you’re not very comfortable with all three, hire a pro.
Tools & Material Checklist
- Two pipe wrenches (or one wrench and a large channel-lock)
- Tubing cutter for copper or a hacksaw
- Hose for draining
- Bucket
- Teflon tape (for threaded fittings) and pipe dope (for gas connections)
- New flexible water heater connector hoses (often 3/4″)
- Dielectric unions (if not using pre-coated connectors) to prevent pipe corrosion
- New temperature & pressure relief valve (a good practice)
- Expansion tank (if required by code)
- Drain pan (if required by code)
The Step-by-Step Roadmap
Step 1: Shut Everything Down. Turn off the water supply to the heater. For electric, shut off the breaker at the main panel. For gas, turn the gas control valve to “Pilot” or “Off”. If you’re headed out on vacation, turning off the heater now can save energy and prevent leaks. The next steps will cover vacation-specific settings and checks.
Step 2: Drain the Old Tank. Connect a hose to the drain valve at the bottom. Run it to a floor drain or outside. Open the valve. Open a hot water faucet somewhere in the house to break the vacuum and let it drain completely. This can take 20 minutes.
Step 3: Disconnect. Once empty, disconnect the water lines (hot and cold) and the gas line or electrical wires. Have your bucket ready for residual water.
Step 4: Remove and Prep. Get help to move the old tank out. Place the new tank in position. Install the new T&P relief valve into the designated port on the side or top.
Step 5: Connect the Water. Use your new flexible connectors or copper with dielectric unions. Connect the cold water line to the cold inlet (marked with a blue tag). Connect the hot water line to the hot outlet (red tag). Next, you’ll install and adjust the electric water heater settings. The following steps will walk you through properly installing and adjusting the unit.
Step 6: Code & Compliance Check. Many local codes, following the International Plumbing Code (IPC), now require an expansion tank on the cold water line to handle thermal expansion. They also often require a drain pan underneath, piped to a drain. Check your local rules.
Step 7: Fill and Check for Leaks. Close the tank’s drain valve. Turn the cold water supply back on slowly. Let the tank fill completely by opening a hot faucet until water flows steadily without sputtering. Check every new connection for leaks.
Step 8: Restore Power and Start-Up. For electric: Restore power at the breaker. For gas: Follow the lighting instructions on the unit’s label exactly to relight the pilot. Set the thermostat to 120°F (49°C) for safety and efficiency.
The tank will take about an hour to heat a full load of water. Listen for normal operation-the gentle hum of an electric element or the *whoosh* of a gas burner lighting. If you smell gas at any point, turn the valve off immediately and call a professional.
Returns, Warranties, and What “Handling Installation” Really Means
You bought the unit. Now, what happens if there’s a problem right away or in five years? The policies can be confusing.
Demystifying Retailer Return Policies
Can you return a water heater to Home Depot or Lowe’s? Usually, yes. Both major retailers generally allow returns on new, uninstalled water heaters within a standard 90-day window with your receipt. Once it’s installed and filled with water, that return window slams shut for a full refund. The store can’t resell it as new. This matters when you’re weighing repair versus replacement. It helps compare costs and warranties. Can you return a Rheem water heater to Home Depot? Yes, the same rule applies. Home Depot is the retailer, Rheem is the manufacturer. The store handles the short-term return, Rheem handles the long-term warranty.
Store Return Window vs. Manufacturer Warranty
This is the most critical difference to understand. The store’s 90-day policy is for buyer’s remorse or a Dead-On-Arrival unit. The manufacturer’s 6, 9, or 12-year warranty is a promise to repair or replace parts if the tank fails due to defect. A quick Rheem water heater warranty coverage check can confirm whether your specific model and installation date are still covered. This helps you navigate claims and understand your rights under the warranty. If your 6-year-old Rheem heater springs a leak, you call Rheem, not Home Depot. The store’s role ended 5 years and 9 months ago.
What Store Installation Services Actually Include
Big box stores “handle installation” by subcontracting to local plumbing companies. The basic service is just that, basic. It typically includes:
- Hauling away the old unit.
- Installing the new one in the same spot.
- Basic water and gas/electrical hookup.
- Disposal of the old heater.
What it almost never includes is bringing your setup up to current building code. If your old heater wasn’t on a stand, lacks a drip pan, or needs new venting, that’s an extra charge. You must get a detailed quote listing all possible add-ons before work begins.
Keeping Paperwork and Processing Warranty Claims
Staple these three documents together and put them in a file you won’t lose: the store receipt, the warranty certificate (you often mail it in), and the installation invoice. When you need the warranty:
- You call the manufacturer’s warranty line, not the store.
- They will ask for the model and serial number from the label on the tank.
- They will typically dispatch a certified technician from a local service company to diagnose the issue.
- If the failure is covered, they will provide the parts or a pro-rated replacement unit based on the warranty terms.
The installer’s paperwork proves professional installation, which is almost always required to keep the manufacturer’s warranty valid.
Keeping It Running: Your Post-Installation Maintenance Roadmap
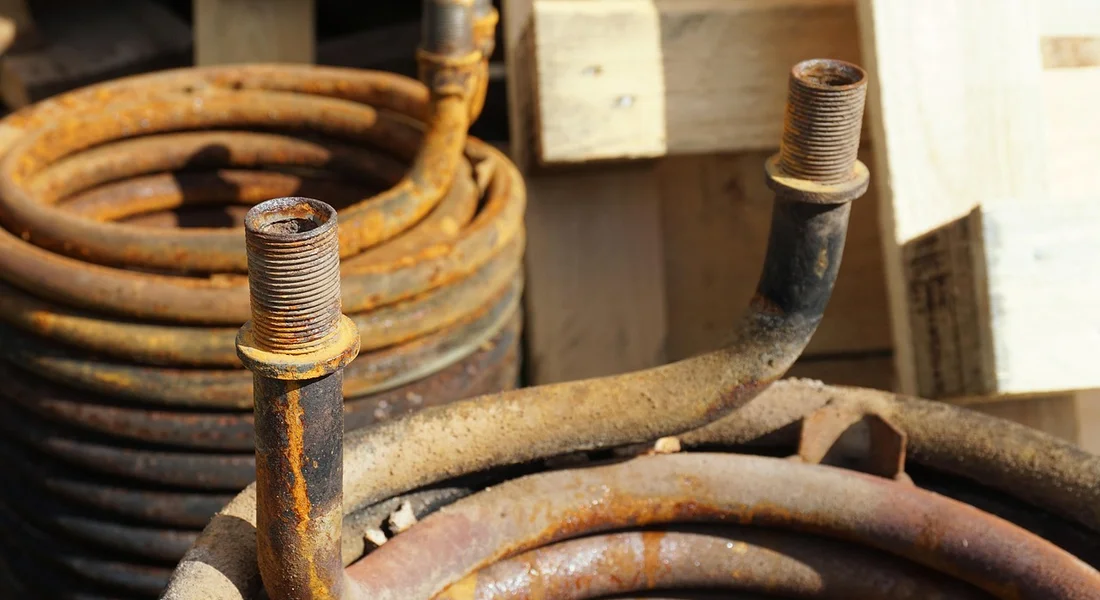
A water heater is not install-and-forget. A little maintenance prevents most major failures. Follow this simple roadmap.
Your System Maintenance Roadmap
| Task | Frequency | Key Notes |
|---|---|---|
| Flush the Tank | Every 12 Months | The #1 most important task. Removes sediment that causes noise, inefficiency, and failure. |
| Test T&P Relief Valve | Every 6 Months | A quick lift of the lever to ensure this critical safety device isn’t stuck. |
| Check for Leaks & Noise | Every Month | Visual and audio inspection of the tank, valves, and connections. |
| Inspect Anode Rod | Every 3-5 Years | This rod sacrifices itself to protect your tank from corrosion. |
Annual Tank Flushing
Sediment is like sludge in your tank’s arteries. Here’s how to flush it:
- Turn off the power (breaker) or gas (shut-off valve) to the heater.
- Connect a garden hose to the drain valve at the tank’s base. Run the hose to a floor drain or outside.
- Open a hot water faucet in the house to break vacuum.
- Open the tank’s drain valve and let it flow until the water runs clear (usually 3-5 gallons).
- Close the drain valve, refill the tank by turning the water supply back on, then restore power or gas.
Flushing yearly can easily double the life of your heater by preventing sediment from baking onto the tank bottom.
Testing the Temperature & Pressure (TPR) Valve
This valve is your last line of defense against a tank explosion. Test it every six months.
- Place a bucket under the discharge pipe connected to the valve.
- Lift the valve’s test lever straight up for a few seconds.
- You should hear a rush of air or see hot water and steam discharge into the bucket.
- Release the lever. It should snap back into place and the flow should stop completely.
If no water comes out, or if it continues to drip after you release the lever, the valve is bad and must be replaced immediately.
Anode Rod Inspection
The anode rod attracts corrosive elements in the water, corroding itself instead of your steel tank. After 3-5 years, shut off the water and power, drain a few gallons, and use a long socket to remove it from the top of the tank. If it’s less than 1/2 inch thick or the steel core wire is visible, replace it. Using a powered anode or a combination of aluminum and magnesium rods in my own house has given me over 15 years of tank life so far.
Reiterating the Red Flags to Monitor
Your maintenance checks should include looking for the early warning signs of failure. If you see rusty water coming only from the hot side, hear rumbling or popping noises, find puddles around the tank’s base, or notice a drastic drop in hot water supply, your system is telling you something is wrong. Catching these signs early during a routine check often means a simple repair instead of a full emergency replacement.
Final Reality Check: Cost, Time, and Making the Call
Before you drive to the store, run the numbers. The price tag on the tank is just the start.
Breaking Down the Real Total Cost
You need to budget for everything that goes into the swap. Here’s what that looks like.
- Unit Price: A standard 40- or 50-gallon electric tank runs $500-$1,000. A similar gas model is $600-$1,200. High-efficiency or hybrid heat pump models start around $1,500 and go up fast.
- Materials & Parts: You will need supplies. For a simple like-for-like swap, budget $100-$250 for things like new flexible supply lines, pipe dope, Teflon tape, a relief valve, dielectric unions, and possibly a new pan or drain line.
- Permit Fees: Many localities require a permit for water heater installation. The fee is usually $50-$150. This isn’t a suggestion; it’s often code. An inspection ensures it’s done safely, especially for gas.
- Professional Labor: If you hire out, this is your biggest cost. A pro installation typically adds $800-$1,500 to the price of the unit. The total installed price for a standard tank often lands between $1,200 and $2,500.
The bottom line is simple: a DIY replacement might cost $600-$1,400 all-in, while a professional job will likely be double that. That professional price includes their expertise, warranty on labor, and the liability they assume.
Your Weekend vs. Their Workday
Time is the other big factor. Be honest about your skills and schedule.
- DIY Time Estimate: For a competent DIYer with all the tools and parts ready, a straightforward swap can take 4 to 8 hours of focused work. For a first-timer dealing with stubborn old fittings or unexpected issues, plan on a full weekend. Draining, disconnecting, hauling the old one out, setting the new one, connecting, filling, and testing takes time.
- Professional Time Estimate: A two-person crew from a reputable company can often do a standard replacement in 2 to 4 hours. They have the experience, muscle, and tools to handle problems quickly. They show up, get it done, and you have hot water by lunch.
Ask yourself if saving a day’s labor fee is worth your entire Saturday and the stress of potential complications. There’s no wrong answer, just the right one for you.
When Calling a Plumber is the Smart Move
Picking up the phone isn’t a DIY failure. It’s a strategic decision to protect your home and your time. Call a local pro if any of these are true:
- You’re switching fuel types (electric to gas or vice versa).
- The new tank needs to be relocated or the gas/electrical lines must be significantly modified.
- Your current setup is complex, with recirculating pumps or indirect firing from a boiler.
- You are uncomfortable soldering copper pipes or making gas line connections.
- The job requires navigating tight corners or steep stairs that make hauling the old tank out risky.
- Your local building department has strict code requirements you don’t fully understand.
Think of professional installation as an investment in peace of mind. You’re paying for a correct, permitted, and warrantied job. That’s a good purchase. I’ve installed my own, but I’ve also called a plumber for a family member’s house where the gas line was a mess. It was the right call, and the bill was worth every penny to know it was safe.
Quick Answers
What’s the real difference between a big-box store and a plumbing supply house?
The difference is expertise and product grade. Big-box stores offer convenience and price on common models, but supply house staff are industry pros who understand local codes and can recommend professional-grade equipment, like specific Bradford White models, that often last longer.
Can I return a water heater after it’s been installed?
Almost never for a simple refund. Once the unit is installed and filled with water, retailers cannot resell it. Your protection shifts from the store’s return policy to the manufacturer’s warranty, so ensure it’s installed correctly to keep that warranty valid.
If I buy “installation” from a retailer, what won’t it cover?
Their basic service typically won’t cover bringing your setup up to current code. This often means extra charges for a required expansion tank, drain pan, updated venting, or new gas line components. Always get a detailed, line-item quote upfront.
As a homeowner, can I even buy from a plumbing supply house?
Often, yes. While some are “trade-only,” many will sell to homeowners. Just be prepared-they cater to pros, so know your exact model or detailed specs (fuel type, gallon capacity, vent style) before you walk in to get the best help.
Who do I call if my brand-new water heater has a problem: the store or the manufacturer?
Call the store *only* if the unit is Dead-On-Arrival (DOA) or uninstalled within the return window (e.g., 90 days). For any issue after installation, you must call the manufacturer’s warranty line. Have your model number, serial number, and proof of professional installation ready.
Making Your Water Heater Project a Success
Always verify the retailer’s installation and return policies before you buy. Matching the new unit to your home’s setup prevents headaches down the road.