Well Pump Breaker Size: Electrical Requirements Explained
You’re worried about burning up your well pump or tripping breakers constantly. Getting the breaker size wrong risks expensive damage and safety hazards.
We will cover how to find your pump’s specs, calculate the correct breaker amperage, and handle the wiring safely.
I’ve wired more well pumps than I can count. Check the pump’s nameplate first; that’s your bible for this job.
How to Figure Out Your Well Pump Breaker Size
Horsepower gives you a ballpark, but the breaker size is based on how many amps your pump actually pulls. I have seen two pumps with the same horsepower from different brands draw completely different currents.
Your breaker must be sized for the pump’s amp draw, not its horsepower rating.
Use this electrician’s rule: find the Full Load Amps (FLA) on your pump’s nameplate and multiply that number by 1.25. This 25% cushion handles the brief surge when the motor starts.
The golden rule is Breaker Size = Full Load Amps (FLA) x 1.25.
This table shows common values. These are estimates for new, standard pumps. Your model may differ.
| Pump Horsepower | Voltage | Typical FLA | Breaker Size (FLA x 1.25) |
|---|---|---|---|
| 1/2 HP | 120V | ~9.8 amps | 15 amp |
| 1/2 HP | 240V | ~4.9 amps | 15 amp |
| 3/4 HP | 120V | ~13.8 amps | 20 amp |
| 3/4 HP | 240V | ~6.9 amps | 15 amp |
| 1 HP | 120V | ~16 amps | 20 amp |
| 1 HP | 240V | ~8 amps | 15 amp |
Now for your specific questions. Is a 35-amp breaker too big? For nearly every residential well pump, yes. A breaker that large will not trip during an overload or short. This can let the motor burn out. It is a safety risk.
A 35-amp breaker is almost always too large and fails to protect a standard well pump motor.
How many amp breaker for a 3/4 HP well pump? Check the voltage first. For a common 240V, 3/4 HP pump, a 15-amp breaker is standard. For a 120V model, you will likely need a 20-amp breaker. The chart above shows this.
These numbers are guides. The only way to know for sure is to look at your specific pump. Find the metal nameplate on the motor housing. It lists the exact voltage and Full Load Amps. The manual has the same info.
The nameplate on your pump motor or its official manual is the final, correct source for all electrical specs.
Understanding Well Pump Electrical Specs: Voltage, Amps, and Wire
Voltage is the electrical pressure. Amperage, or amps, is the amount of current flowing. A 120V system uses one hot wire. A 240V system uses two. Most modern submersible pumps run on 240V because it is more efficient.
Voltage is the push, and amperage is the flow of electricity to your pump.
Full Load Amps (FLA) is the current the pump draws while running normally. Locked Rotor Amps (LRA) is the much higher current needed for a split second to start the motor spinning. Think of FLA as a car’s idle and LRA as the crank of the starter.
FLA is the running current; LRA is the brief, powerful startup surge.
Your breaker must not trip on the LRA surge, which is why we size it above the FLA. If your breaker trips every time the pump starts, the LRA might be too high for the circuit.
Wire size is critical for safety. The wire gauge must be thick enough to carry the breaker’s amperage without overheating. For a 15-amp breaker, 14-gauge copper wire is the minimum, but 12-gauge is better for any distance. For a 20-amp breaker, you must use 12-gauge wire or larger.
The wire gauge must match or exceed the capacity of your circuit breaker to prevent fire.
Does a well pump need a special breaker? Usually, no. A standard circuit breaker in your panel is fine. Some installers use a time-delay breaker, which ignores the short LRA startup surge. This can prevent nuisance trips. If the pump still trips, it may be due to the pressure switch signaling a cut-off. Understanding how the well pump pressure switch and breaker interact can reduce unnecessary trips.
Well pumps do not typically require a special type of circuit breaker.
Is the breaker for a well pump single or double pole? This depends on voltage. A 120V pump connects to one hot wire and uses a single-pole breaker. A 240V pump uses two hot wires and requires a double-pole breaker.
Use a single-pole breaker for a 120V pump and a double-pole breaker for a 240V pump.
When I ran wire to my own well pump, I used 10-gauge wire for a 20-amp breaker because the run was over 100 feet. Longer distances need thicker wire to avoid voltage drop. A common mistake is using wire that is too thin for the length of the run, especially for well pumps and sump pumps.
Check all connections at the pressure switch and breaker panel annually. Look for discoloration or loose wires. Corrosion here can cause overheating and failure.
Regularly inspect electrical connections for tightness and signs of heat damage.
Choosing the Right Wire and Circuit Protection
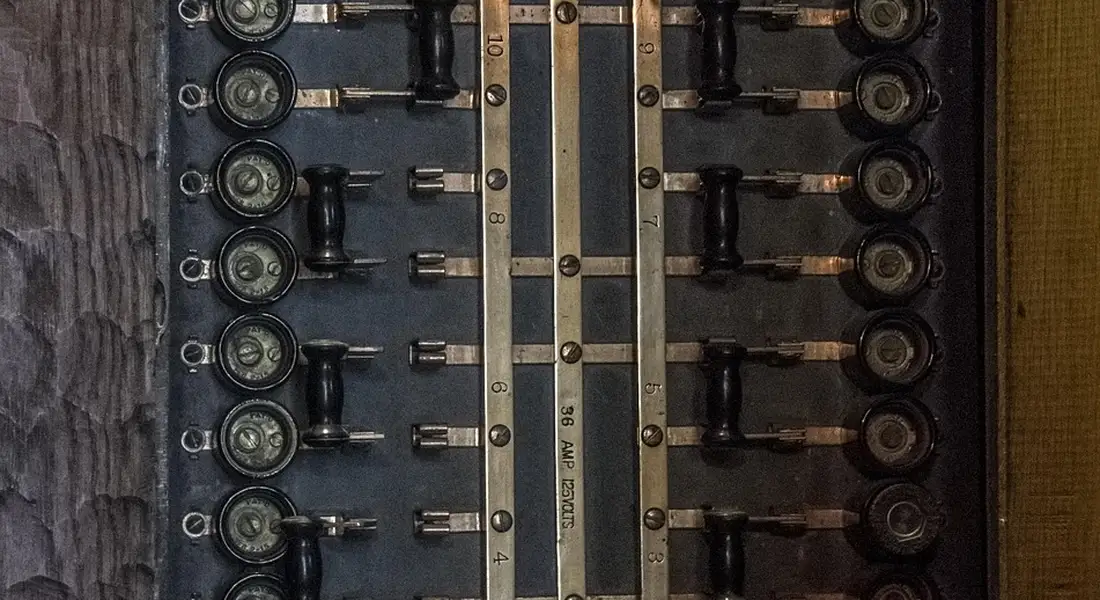
Getting power to your pump is a simple chain. You need to plan it in order. Think breaker first, then wire, then a disconnect, and finally the pump.
The breaker’s only job is to protect the wire from overheating, not the pump. You must match the breaker size to the wire size, not the pump’s horsepower. A 1 HP pump on a 15-amp circuit needs wire and a breaker rated for at least 15 amps.
From the breaker panel, the wire runs to a disconnect switch near your pressure tank.
The GFCI Question for Well Pumps
The National Electrical Code now often requires GFCI protection for outdoor and underground equipment, including well pumps. A GFCI breaker can save your life if there’s a ground fault.
The downside is that older pumps or long wire runs can cause nuisance trips, shutting your water off without a real fault. If you have constant, unexplained trips on a new GFCI, an electrician may need to install a standard breaker. Always check your local code first.
Why You Need a Disconnect Switch
The disconnect switch is non-negotiable. It’s a simple on/off switch or pull-out block mounted near your pressure tank.
This switch is a critical safety rule so anyone can kill power right at the equipment for service. If your pump needs work or your pressure switch is buzzing, you flip this disconnect instead of walking back to the main panel. My own setup uses a simple pull-out disconnect. It’s cheap, reliable, and keeps me safe.
Indoor Wire vs. Underground Feed
There are two wiring legs to understand. The wire from your panel to the disconnect and control box is standard indoor electrical wire (like NM-B or Romex).
The wire that goes from the control box out to the submersible pump in the well is a special, sealed underground cable. It’s called UF cable or a dedicated pump cable. This wire is designed to be buried and is water-resistant. Never use indoor Romex in the ground.
Submersible Pump vs. Jet Pump: Key Electrical Differences
These two common pumps work differently and have different electrical needs. Here’s the direct comparison.
| Feature | Submersible Pump | Jet Pump |
|---|---|---|
| Location | Submerged deep in the well. | Sits in your basement or well house. |
| Typical Voltage | Almost always 240 volts. | Shallow wells: often 120v. Deep wells: usually 240v. |
| Control Box | Most have one. It houses the start capacitor. | No control box. Components are built onto the motor. |
| Best For | Deep wells (over 25 feet). | Shallow wells or where pulling a pump isn’t practical. |
The voltage difference is key: plan for a 240-volt circuit for a submersible, but check your jet pump’s label to be sure.
The Role of the Submersible Pump Control Box
That gray box on the wall near your pressure tank is the pump’s control box. Its most important part is the capacitor.
The capacitor gives the pump motor the extra torque it needs to start spinning against water pressure. When a submersible pump hums but won’t start, a failed capacitor in the control box is the most common culprit. Replacing it is a simple, inexpensive fix.
Electrical Deep Well vs. Shallow Well Requirements
People ask this to figure out what they need. “Deep well” usually means a submersible pump. It needs 240V, a properly sized control box, and that heavy-duty underground feed wire. Understanding well pump wiring types and voltages will help you pick the right setup.
A shallow well setup, typically a 120v jet pump, has simpler wiring similar to a large appliance. The real electrical requirement is defined by the pump type you have, not just the well depth. Always wire according to the pump’s nameplate, not a generic rule. Knowing how shallow well jet pumps work helps explain the wiring variations. They work by drawing water through a jet and venturi, which affects motor load and startup current.
How to Wire a Well Pump: A Safety-First Guide

Difficulty Rating: 7/10
This is not beginner-level electrical work. Your main goal here is to know where to draw the line.
- Define the DIY limit: Homeowners can safely replace a surface-mounted disconnect switch or reconnect above-ground wiring if power is confirmed OFF at the source. This is a like-for-like swap.
- State the Pro requirement: Any work inside the well casing, at the submersible pump itself, at the pressure switch, or inside the main electrical panel must be done by a licensed electrician or well professional. They have the tools and training you don’t.
On my own property, I’ll swap out a rusted disconnect box in the basement. I will not, under any circumstance, open the well cap or touch the main breaker panel for this job. That’s the electrician’s domain.
Essential Tools You’ll Need
If you’re doing a simple disconnect replacement, gather these first:
- A reliable non-contact voltage tester.
- Wire strippers.
- Flat-head and Phillips screwdrivers.
- Work gloves and safety glasses.
Step-by-Step: Replacing a Well Pump Disconnect Switch
This assumes you are replacing an old, broken switch with an identical new one. The wires are already the correct size.
- Turn off the breaker for the well pump at the MAIN HOUSE PANEL. This is not optional.
- Go to the old disconnect switch. Use your voltage tester on the wires coming INTO the switch from the panel. Confirm there is NO POWER. Test it on a known live outlet first to verify the tester works.
- Take a picture of the existing wire connections. Which wire goes to which screw? This is your map.
- Loosen the terminal screws and carefully disconnect the wires from the old switch.
- Remove the old switch from its enclosure.
- Mount the new switch in the enclosure.
- Following your photo, reconnect each wire to the exact same terminal on the new switch. Ensure each connection is tight and no bare wire is exposed.
- Once everything is secure and double-checked, you can close the switch enclosure.
- Go back to the main panel and turn the well pump breaker back on.
- Test the pump by running water in the house to see if it cycles on normally.
A Crucial Warning on Wire Size and Connections
Using undersized wire or making a poor connection creates a major fire hazard and can burn up your expensive pump motor. The wire size (like 12-gauge or 10-gauge) is determined by the pump’s amp draw and the distance from the panel. If you are running new wire for any reason, you must follow the National Electrical Code or have an electrician do it. A loose connection creates heat and resistance, which is how electrical fires start. If you are not 100% confident in matching the existing setup, stop and call a pro.
Troubleshooting Well Pump Electrical Problems
The Red Flag Guide: Signs Your Pump Needs Immediate Attention
Listen to your system. It tells you when something is wrong.
- Breaker trips the moment the pump starts. This points to a dead short in the wiring or the pump motor itself.
- Breaker trips after running a few minutes. This is often an overload from a failing pump motor or wiring that’s too small for the load.
- You hear a loud humming but get no water. The pump is stuck or “locked,” drawing very high amperage (amps) without turning.
- Lights in the house dim when the pump kicks on. This indicates a significant voltage drop, usually from a bad connection, undersized wire, or a failing motor.
- No power at the pressure switch. Check for a tripped breaker or a failed disconnect switch between the panel and the pump.
Diagnosing a Tripping Breaker Scenario
If the breaker trips, you need to find out why before you just reset it. Here’s a logical path.
First, turn the breaker off. At the pressure switch or disconnect, disconnect the wires that go to the pump. Now turn the breaker back on. If it immediately trips with the pump wires disconnected, you have a short in the house wiring. Call an electrician.
If the breaker holds with the pump wires disconnected, the problem is likely at the pump. A very common cause for a pump that hums but won’t start (causing a trip) is a failed start capacitor. The capacitor gives the motor the extra torque to begin spinning; when it fails, the motor just sits there and draws too many amps. You can sometimes hear a faint click from the pressure switch but only a loud hum from the well. Capacitor testing requires a multimeter and should be done with the power off. This is a common step in submersible pump troubleshooting. The next steps outline a complete flow to diagnose capacitor, wiring, and switch issues.
A pro will use a clamp meter to measure the pump’s amp draw while it runs and compare it to the motor’s rated load. A rising amp draw over time is a clear sign the pump motor is wearing out and headed for failure.
System Maintenance Roadmap
A little attention prevents big problems.
- Annual check: Listen for new grinding or screeching noises. Check your system’s water pressure with a gauge. Visually inspect the pressure switch contacts for excessive corrosion or pitting.
- Every 3-5 years: Have a well professional check the pump’s amp draw with a clamp meter. This is the best way to assess hidden motor wear.
- Capacitor lifespan: Start capacitors are a wear item. Expect to replace them every 5-10 years. Keeping a spare on hand is a smart move for any homeowner with a well.
Common Questions
What if my pump’s nameplate is missing or unreadable?
Your first stop should be the pump’s manual or the manufacturer’s website using the model number. If that’s not possible, do not guess the electrical specs. Contact a well systems professional or a licensed electrician who can safely identify the requirements, especially the voltage needs of the well pump.
Is it ever okay to use a wire gauge larger than the minimum required?
Absolutely. Using a thicker wire (a lower gauge number) is always safer and improves performance over long runs by preventing voltage drop. Just ensure your circuit breaker, disconnect, and connections are rated for the amperage your pump actually needs.
My pump is 240V, but my outlet is 120V. What now?
You cannot run a 240V pump on a 120V circuit; it will not start and can damage the motor. This means you need a new, dedicated 240V circuit installed from your main electrical panel by a licensed electrician.
Can repeatedly resetting a tripping breaker harm the pump?
Yes. Each trip signals an overload or fault. Forcing the pump to restart against this problem can overheat and burn out the motor windings. Find and fix the root cause-don’t just keep resetting the breaker.
How can I safely test if my well pump circuit is working correctly?
For a basic check, listen for the pump to cycle on when you run water. For voltage, only use a multimeter at the pressure switch if you are trained and have confirmed power is off before touching wires. If you suspect an issue, the safest action is to call a professional.
Getting Your Well Pump Wired Right
Always start by finding the data plate on your pump to see its exact amp draw and voltage. This single step prevents guesswork and keeps you safe. For the final connection, hire a licensed electrician to ensure the breaker, wire, and all components meet your local code. Knowing how to safely shut down the well pump electrical helps ensure you can service it safely when needed.
Bob McArthur
Bob is a an HVAC and plumbing industry veteran. He has professionally helped homeowners resolve issues around water softeners, heaters and all things related to water systems and plumbing around their homes. His trusted advice has helped countless of his clients save time, money and effort in home water systems maintenance and he now here to help you and give you first hand actionable advice. In his spare time, Bob also reviews home water systems such as tankless heaters, water softeners etc and helps home owners make the best choice for their dwelling. He lives around the Detroit area and occasionally consults on residential and commercial projects. Feel free to reach out to him via the contact us form.