What Happens If You Run a Water Heater Dry? A Straight Answer
You turned off the water to your heater and now you’re thinking about flipping it on. Don’t. Running it dry is a guaranteed way to break it.
We will cover how it destroys the heating elements, creates a serious safety risk, and the right steps to take if you already made this mistake.
I’ve been on hundreds of service calls for this exact problem. The takeaway is simple: a water heater without water is a ticking time bomb.
First, Let’s Picture What’s Happening in There
Think of your water heater tank like a metal pot on a hot stove. The pot is the tank. The stove burner is your heating system-either electric heating elements or a gas burner. Now imagine turning that burner on high but leaving the pot empty. You know what happens next.
Inside your heater, a thermostat calls for heat. The elements or burner kick on. Their job is to make things hot. The water’s job is to absorb that heat and carry it away to your faucet. Water is the critical coolant that keeps the whole system from destroying itself. Without it, the heat has nowhere to go but back into the tank and the heating elements themselves.
Running Dry: What Actually Breaks and Why
Running a water heater without water supply damages electric and gas models differently, but the outcome is always bad. Here’s the side-by-side breakdown.
Electric Water Heaters: These have two heating elements screwed into the tank wall. When the tank is full, they are submerged. When the tank is empty, they are surrounded by air. An electric heating element exposed to air will overheat and burn out in under a minute. The upper element usually fries first because it’s the first to be uncovered. You’ll hear a faint pop or buzz, then nothing. That’s the sound of a $25 part failing and potentially taking the thermostat with it.
Gas Water Heaters: The gas burner at the bottom heats the tank. Without water inside, the intense flame heats the bare steel of the tank bottom. The metal can glow red-hot, warp, and crack. This can ruin the tank permanently. The extreme heat also shoots up the flue pipe, which isn’t designed for such temperatures, and can damage the internal flue liner.
This brings us to the direct answer to a common search: can you leave a water heater on without water? No. You cannot safely leave a water heater on with the water supply turned off. It is not a “maybe” or a “sometimes.” It is a sure way to cause expensive, immediate damage. The question ‘can i leave water heater on with water off’ should always be answered with a hard stop. Turn the power or gas off first—especially for gas water heaters.
What About a Tankless Heater?
Tankless units have a built-in safety net. A flow sensor detects when water is moving. If no water flow is detected, the unit simply will not fire its burner or energize its heating elements. This fail-safe usually prevents dry firing.
The exception is mineral scale. In areas with hard water, limescale can jam the flow sensor mechanism. I’ve seen sensors stuck in the “on” position. This can trick the unit into heating without water flow, damaging the heat exchanger. Annual vinegar descaling of your tankless unit is cheap insurance against this.
The DIY vs. Pro Verdict for Diagnosis (Difficulty: 7/10)
Figuring out if you’ve damaged your heater is a mid-level DIY task. Safely checking an electric element with a multimeter or inspecting a gas burner for soot damage is within reach for a careful homeowner.
Here’s the line: replacing a fried electric element is a standard DIY repair. Replacing a warped, leaking tank means calling a pro for a whole new heater installation. If your gas heater ran dry, you must inspect the tank bottom for warping and the flue for damage. Any doubt, call a technician.
Remember, in most areas, any work that involves disconnecting gas lines-like replacing a gas valve or thermocouple-legally requires a licensed professional. Don’t risk it.
Your 5-Step Action Plan After an Oops
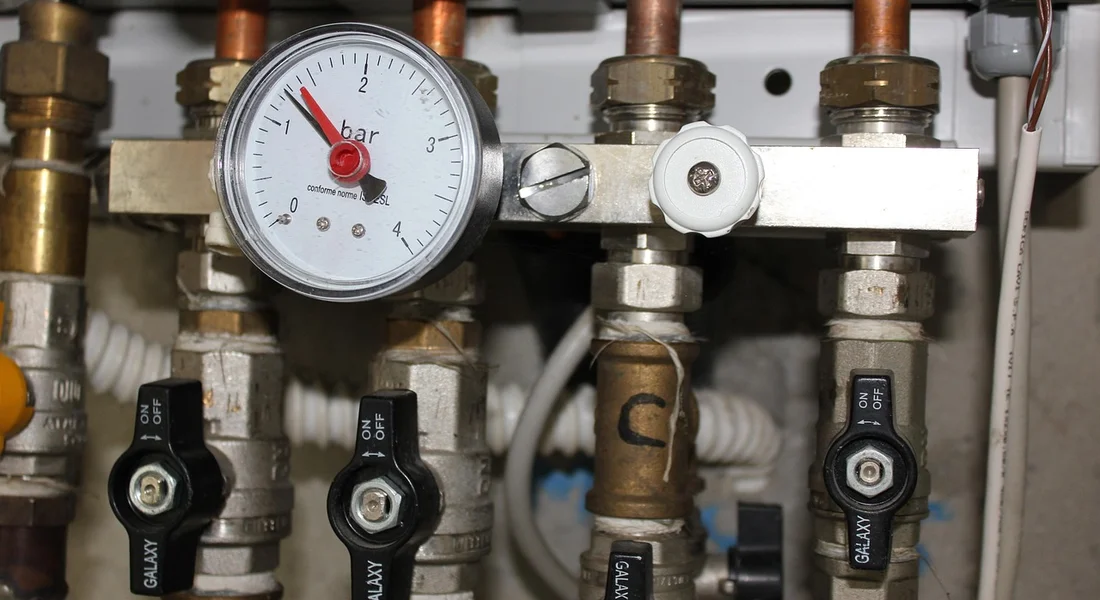
You turned the water off and forgot about the heater. It happens. Don’t panic. Follow these steps in order to minimize damage and get back to normal safely.
Step 1: Kill the Power (Electric) or Gas
Do this immediately. Your heater is trying to heat nothing but air and metal, which will destroy it.
- For Electric Heaters: Go to your main electrical panel. Find the breaker labeled for the water heater and flip it to the OFF position.
- For Gas Heaters: Locate the gas supply valve on the pipe leading to the unit. Turn the valve handle a quarter-turn so it is perpendicular to the pipe. This is OFF. If you have a pilot light, it will go out.
This is your first and most critical safety move. It stops the heating process dead.
Step 2: Do NOT Turn the Water Back On Yet
This feels counterintuitive, but it’s vital. The inside of that tank is scorching hot. Introducing cold water right now causes thermal shock. The metal contracts way too fast. This can warp the tank, split the glass lining, or pop welds. Wait.
Step 3: Let It Cool Completely
You need the entire tank, especially the heating elements or burner area, to cool to room temperature. For a standard 40 or 50-gallon tank, this means waiting at least 4 to 6 hours. Touch the tank’s access panels or the outlet pipe. If it’s warm at all, it’s not ready. Walk away and let it sit.
Step 4: Refill and Purge the Tank
Now you can reintroduce water. The goal is to fill the tank completely and push all the air out.
- Go to a faucet on the highest level of your house, like an upstairs bathroom. Turn the hot water side on fully.
- Find the cold water shut-off valve on the pipe going into your water heater. Slowly turn it back to the ON position.
- Listen at the open faucet. You’ll hear air hissing and sputtering out. Let the water run until it flows in a steady, non-sputtering stream. This means the tank is full and purged of air.
- Turn off the faucet.
Running that upstairs hot tap is non-negotiable. It provides an escape route for air, preventing an airlock that could leave parts of the tank dry.
Step 5: Restart and Test
With the tank full, you can restore power.
- Electric: Flip the breaker back to ON.
- Gas: Turn the gas valve to ON. Follow your unit’s instructions to re-light the pilot light if needed (usually involves holding down a red button for 60 seconds).
Give the heater time to heat a full tank-about an hour. Then check for two things. First, does the hot water at your faucet get truly hot? Second, inspect all around the base of the water heater and the pipe connections for any sign of moisture or dripping.
Diagnosing the Damage: The Red Flag Guide
Sometimes the heater survives. Sometimes it doesn’t. After you restart, watch and listen for these signs of failure.
- Loud Popping or Banging Noises: This is the sound of thermal stress. The overheated sediment at the tank’s bottom is cracking and shifting. While scary, it doesn’t always mean immediate failure, but it’s a sign of accelerated wear.
- No Hot Water or Very Short Supply: You get two minutes of hot water, then it’s cold. On an electric heater, this almost certainly means one or both upper heating elements burned out from dry-firing. They must be replaced.
- Water on the Floor: A puddle or persistent drip from the tank itself is a terminal sign. The steel tank likely warped or a seam failed. The unit needs replacement.
- Error Codes on a Tankless Unit: Tankless heaters have smart sensors. A dry fire will trigger codes for “overheating,” “no flow,” or “heat exchanger” failure. You’ll likely need a pro.
- Burnt Electrical Smell: A sharp, acrid odor near an electric heater’s access panels points to burnt wiring insulation or a melted element. Turn the breaker off again and inspect.
If you see water leaking from the tank body or smell burnt electronics, your next step is to turn the power and water back off and start shopping for a new unit.
Tools & Materials for a DIY Element Check

Before you touch anything, shut off the power at the breaker panel. Do not skip this step. Confirm the power is off with a non-contact voltage tester at the water heater’s access panels.
Gather your tools. Having everything ready before you start prevents frustration and keeps you safe.
- Non-contact Voltage Tester: This is your first line of defense. Use it to double-check that the wires are dead after you flip the breaker.
- Multimeter: You need this to test the heating elements for continuity (a complete electrical path). A basic model from a hardware store works fine.
- Element Wrench: A cheap, specialized socket made for water heater elements. A regular wrench often won’t fit in the tight space.
- Screwdrivers: For removing the access panel covers and thermostat assemblies.
- Garden Hose: You’ll need to drain several gallons of water from the tank to expose and remove the elements. Connect it to the drain valve at the bottom.
If your tests show a bad element, you must have the correct replacement on hand before you proceed. Always buy a new gasket with the element. The most critical detail is matching the voltage and wattage, which is printed on the side of your old element. A 4500-watt, 240-volt element is common, but never guess.
When to Repair vs. Replace the Whole Unit
The decision comes down to a simple question: is the tank itself still good? Everything else can be fixed.
If the tank is leaking water from the steel body, your only option is full replacement. A leaking tank cannot be repaired. You might see water pooling underneath that isn’t from a pipe or the pressure relief valve.
Repair makes financial sense in a specific scenario. If your diagnostic shows one or both heating elements have failed, but the tank is not leaking and the unit is less than 10 years old, swap the elements. The cost for parts is low and the job is straightforward. My own water heater is 8 years old, and I’ve replaced the lower element once already. A quick diagnostic test can confirm which element needs replacement, keeping the fix simple and direct.
Replacement becomes the more reliable choice when you’re facing multiple failures on an older unit. If the elements are bad, the thermostats are acting up, and the anode rod is completely gone, you’re throwing good money after bad. A new unit with a fresh warranty is a better long-term investment. The average lifespan of a tank is 8-12 years. If yours is in that range and needs more than a simple part, start shopping.
Special Note: RV Water Heaters and Winterizing
Many of you with RVs are asking, “Can I leave my RV water heater on?” Here’s the straight answer. You can leave the electric heating element on as long as the tank is 100% confirmed to be full of water. The gas (propane) side is a bit different. It’s generally safe to leave it on overnight if the tank is full, but for extended periods, I turn mine off to conserve propane and for peace of mind.
RV water heaters are built differently than your home unit. They are designed to be completely drained for winterizing. Most models have a built-in bypass valve kit. This valve lets you isolate the heater, so you can pump antifreeze through the rest of your RV’s plumbing without filling the heater tank with it. When winterizing tankless RV water heaters, the focus is on preventing freeze damage by properly draining lines and using bypasses as needed. A quick check to confirm all lines are drained can save you headaches come spring.
There is one non-negotiable rule. Never, ever turn the RV water heater ON-electric or gas-unless you are absolutely certain the tank is full of water. Running it dry will destroy the heating element or the gas burner tube in minutes. Always open a hot water faucet inside the RV and wait for a steady flow before flipping the heater switch.
To clarify “Can I leave the water heater on overnight” in an RV: yes, it’s generally safe if the tank is full. For electric mode, this is common practice at campgrounds. For gas mode, ensure your carbon monoxide and propane detectors are functioning. My rule is to use gas for quick heating, then switch to electric if I have a hookup, turning the gas off for the night.
A Maintenance Roadmap to Prevent This
The best way to avoid a dry-fire disaster is through simple, routine care. This schedule takes about an hour a year and saves you huge headaches.
Simple Annual Schedule
- Every 6 Months: Test the Temperature and Pressure Relief (TPR) Valve.
- Once a Year: Flush the sediment from your tank-style heater.
- Once a Year: For tankless units, descale according to your manual.
- Routinely: Give the unit a visual check whenever you’re nearby.
Test the Pressure Relief Valve Every 6 Months
This valve is your heater’s main safety device. If it seizes shut, pressure can build to dangerous levels. Testing is easy. Place a bucket under the discharge pipe connected to the valve. Lift the valve’s test lever for a few seconds until you hear a rush of air or see water discharge into the bucket. If no water or air comes out, or if the valve continues to drip after you release it, replace the valve immediately.
Flush the Tank Annually to Remove Sediment
Sediment (sand, minerals) settles at the bottom of the tank. In electric heaters, it can bury the lower heating element, causing it to overheat and fail. For gas heaters, it insulates the bottom of the tank from the flame, reducing efficiency and overheating the steel. Here’s how to flush:
- Turn off the power (breaker) or gas to the heater.
- Connect a garden hose to the tank’s drain valve and run it to a floor drain or outside.
- Turn off the cold water supply to the heater.
- Open a hot water faucet in your house to relieve pressure.
- Open the tank’s drain valve and let it flow until the water runs clear. This may take 5-10 gallons.
Annual flushing prevents element burnout and can significantly extend your heater’s life.
For Tankless: Descale According to Manufacturer Instructions
Tankless heaters need cleaning to remove scale (hard water mineral buildup) from the heat exchanger. This buildup restricts flow, causes overheating, and can damage the unit’s flow sensor. The process involves a submersible pump, vinegar or descaling solution, and hoses to circulate the cleaner. Follow your model’s manual exactly, as the steps and approved cleaners vary by brand. Cleaning and descaling a tankless heater is crucial to maintain efficiency and prevent flow-related shutdowns. Doing this yearly maintains efficiency and prevents flow-related shutdowns.
Visually Check for Leaks or Corrosion
Make this a habit. When you’re doing laundry or fetching something from the basement, take 30 seconds to look at your water heater. Check the top for leaks around the pipe connections. Look at the bottom for any signs of water or corrosion. A small drip today is a flooded floor tomorrow-catching it early is the cheapest repair you’ll ever make.
Code & Safety Compliance Check

Working on a water heater means dealing with water under pressure, electricity, and often gas or fuel oil. Doing things right is more than just getting hot water. It’s about not flooding your basement or causing a fire. The rules exist for a reason. That’s why following water heater safety guidelines is essential. They set the standards for safe installation, operation, and maintenance to prevent floods or fires.
All electrical connections at the heater must follow the National Electrical Code (NEC). This isn’t a suggestion. For a DIYer, this means using the correct wire gauge and a properly rated circuit breaker. If you’re replacing an element, the wiring must be tight and the gasket must seal perfectly. A bad electrical connection creates heat, and heat near a water tank is a problem waiting to happen.
If you are doing a full water heater replacement, a plumbing permit is usually required by your local building department. I know, it’s a hassle. But here’s why it matters: an inspector will verify your installation, including the critical temperature and pressure relief valve discharge pipe. I’ve seen too many of those pipes just dumped on the floor, which is a code violation and a scalding hazard. The permit process ensures it’s done safely.
Speaking of that valve, never reuse an old temperature and pressure (T&P) relief valve. You must install a new, ASME-certified T&P valve on any new or repaired water heater. This valve is your last line of defense against the tank exploding if the thermostat fails. A cheap, uncertified valve is a gamble with your home’s safety. It’s a $20 part that isn’t worth skipping.
When NOT to Try This: Call a Pro Immediately
Some problems are clear stop signs. Your goal is to fix the heater, not create a dangerous situation. If you see any of the following, close the door, walk away, and call a licensed plumber.
If you smell gas or the distinct rotten egg odor of mercaptan (the additive in natural gas and propane), get out and call your utility company from outside. Do not turn lights on or off. Do not try to find the leak yourself. This is an immediate emergency. I responded to a call once where a homeowner had been “sniffing around” a pilot light issue for an hour. The concentration in the mechanical room was dangerously high. It was pure luck nothing ignited.
Any significant water leak coming from the tank shell itself, not a pipe connection, means the tank has corroded through. You cannot fix this. The tank must be replaced. A slow drip from the drain valve or a fitting might be a simple fix, but a stream of water from the tank body is a death sentence for the unit.
If you are not 100% confident in identifying and shutting off the correct circuit breaker or gas supply valve, stop. Guessing wrong can lead to electrocution or a gas leak. The gas valve is usually a quarter-turn lever on the iron pipe entering the heater. If you don’t know which breaker it is, or the panel isn’t labeled, that’s your cue to call for help.
Finally, inspect the wiring at the top of the electric water heater. If you see any discolored, melted, or corroded wires or terminals, do not proceed. This indicates a past overheating problem that likely damaged the element or thermostat. You need a pro to assess the full extent of the damage and replace all faulty components safely. Just replacing the element on fried wiring will likely cause the same failure.
Common Questions
1. Is it really that bad to run it for just a minute?
Yes. For an electric heater, the exposed heating elements can burn out in under 60 seconds. For gas, the burner can instantly overheat the empty tank bottom. The moment you lose water supply, you must also cut the power or gas.
2. My tankless unit ran without water. Is it okay?
Probably, but verify. Tankless heaters have a flow sensor to prevent dry-firing. However, a stuck sensor due to limescale can bypass this. If it happened, check for error codes and schedule a descaling to prevent future issues.
3. I refilled it and it works. Am I in the clear?
Not necessarily. Listen for new loud popping noises and check for leaks at the base over the next few days. Hidden damage from thermal stress can cause a leak to develop later. Vigilance is key now.
4. What’s the one habit to prevent this?
Always shut off the heater’s power or gas supply *before* shutting off the water for any plumbing work. Make this a non-negotiable rule in your home. It’s the simplest fail-safe, especially when you’re turning off the water heater on vacation.
5. I’m not sure what I did. How do I proceed safely?
If you’re uncertain if the heater ran dry, assume it did and follow the cool-down and refill steps from the action plan. If you see water on the floor or smell anything burnt, stop, turn everything off, and call a professional.
Your Immediate Action Plan for a Dry Water Heater
Running your water heater without water, even briefly, can permanently destroy it. If you suspect this has happened, your first move is always to turn off the power at the breaker, especially if your electric water heater is tripping the breaker.
Before restoring power, you must confirm the main water supply valve is fully open and the tank has completely refilled.