Keep Your Tankless Water Heater Running Strong: A Homeowner’s Guide to Care
Your tankless water heater’s flow is slowing down, or you hear strange popping sounds. That’s the sound of scale building up, and it’s robbing you of hot water and efficiency.
This guide cuts through the confusion. We will cover the yearly cleaning and descaling routine, simple monthly maintenance checks, and the tools and safety steps you need to do it right.
I’ve serviced hundreds of these units and keep my own home’s system running with vinegar flushes. Skip this maintenance and you’re buying a new heater years early.
Knowing When Your Tankless Water Heater Needs Attention
A tankless water heater is not a set-it-and-forget-it appliance. It needs regular care to prevent a major failure, not just a reaction when it finally quits. Following your tankless water heater brand maintenance guidelines helps prevent problems before they start.
Think of it like the oil in your car’s engine. You don’t wait for the engine to seize before you change it. Skipping maintenance on your tankless unit has the same eventual result, a costly breakdown.
Watch for these signs that your unit needs service now.
- Inconsistent or Lukewarm Water: This is the classic symptom. If your shower goes cold or never gets truly hot, scale is likely insulating the heat exchanger.
- Strange Noises: Listen for popping, kettling, or rumbling sounds during operation. That’s water boiling and steam forming under mineral deposits.
- Error Codes on the Display: Modern units have self-diagnostics. An E04 or similar code often points to a flow or overheating issue caused by scale.
- Reduced Flow Rate: Noticeable drop in water pressure from your hot water taps. Mineral buildup is physically restricting the internal waterways.
- Increased Energy Bills: A scaled-up heat exchanger works much harder, burning more gas or electricity to heat the same amount of water.
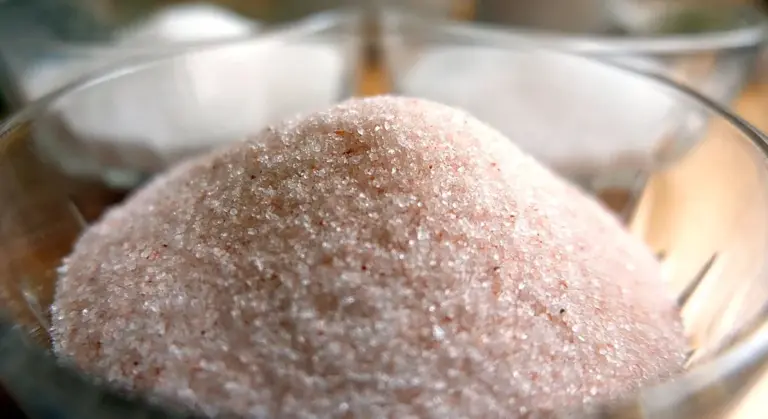
How often you need to clean it depends entirely on your water hardness. For soft water (less than 3 grains per gallon), an annual flush might be fine. With moderately hard water (3-7 gpg), plan for every 8-12 months. If you have very hard water (over 7 gpg), you should flush it every 6 months, no question.
If you can change a faucet and follow instructions, you can do this job. The overall DIY difficulty is a 6 out of 10. It’s more involved than cleaning a showerhead, but it’s straightforward with the right tools.
The Red Flag Troubleshooting Guide: Act Now
Some problems are not just maintenance issues. They are failures that need immediate attention.
- No Hot Water At All: If you have water flow but zero heat, and a simple reset doesn’t work, you likely have a failed component like a heating element, gas valve, or flow sensor.
- Major Leakage from the Unit: A small drip from a connection might be a loose fitting. Water spraying or pouring from inside the cabinet signals a ruptured internal part. Turn off water and power/gas immediately.
- Smell of Rotten Eggs or Natural Gas: For gas units, any sulfur or gas smell is an emergency. Shut off the gas supply at the valve, ventilate the area, and call your utility company or a pro from outside your home.
- Persistent Error Codes That Won’t Reset: If you clear an error and it instantly comes back, the unit has detected a fault it cannot overcome. It’s telling you it needs professional repair.
Stop DIY and call a licensed technician immediately if you smell gas, see major internal leaks, or are not 100% confident working with electrical or gas connections. Your safety and preventing catastrophic damage to your home are more important than finishing the job yourself.
Getting Ready: Tools and Solutions You’ll Need
You can’t flush the system with the garden hose. You need a closed-loop circulation setup. Here is your checklist.
- Submersible Utility Pump (must handle acidic/vinegar solution)
- Two 5-gallon Buckets
- Two short washing machine hoses (or 3/4″ hoses with female fittings)
- Descaling Solution (see comparison below)
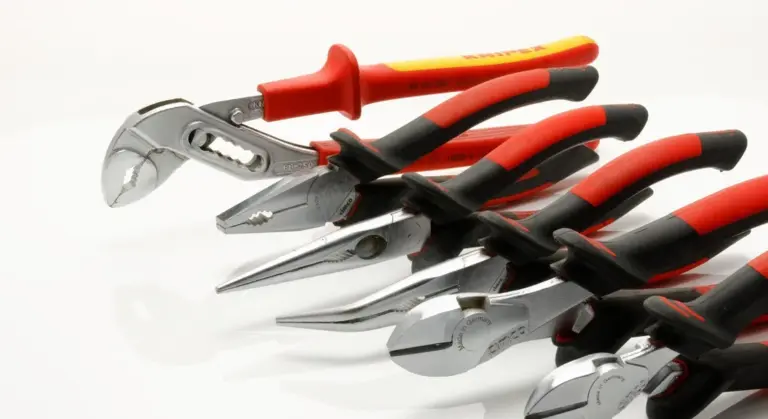
- Adjustable Wrenches or Channel-Lock Pliers
- Work Gloves and Safety Glasses
The submersible pump, hoses, and buckets are a one-time purchase. After the initial cost, each future flush only costs you the price of the cleaning solution, saving you hundreds in service calls.
Choosing your descaling solution is critical. Using the wrong one can void your warranty or damage seals.
White Vinegar (5% Acetic Acid)
- Pros: Cheap, readily available, and effective for mild to moderate scale. It’s safe for most unit materials when used correctly.
- Cons: Works slower than commercial descalers. The smell is potent. It may not fully dissolve severe, old buildup.
Manufacturer-Approved Proprietary Descaler
- Pros: Formulated for your specific unit. It’s strong and fast-acting on heavy scale. Using it often keeps your warranty valid.
- Cons: More expensive per flush. You usually have to order it online or from a supplier.
Can you use CLR? Most manufacturers say no, and I agree. CLR (Calcium, Lime, and Rust remover) is often too harsh. It can corrode the aluminum heating elements found in some electric units and damage rubber seals and gaskets over time. It’s a powerful cleaner for sinks and showerheads, but it’s a risk inside your expensive water heater. Stick with vinegar or a dedicated descaler.
The Step-by-Step Guide to Flushing and Descaling

What is the step-by-step process for cleaning a tankless water heater? You need to flush it with a descaling solution. This is not a suggestion. It is mandatory maintenance for any unit in hard water areas. Think of it like giving the heater a chemical shower from the inside out. The vinegar or commercial descaler dissolves the mineral crust clinging to the tiny heat exchanger channels so your unit can heat water efficiently again. To understand the broader operation, the tankless water heaters work guide offers a detailed walkthrough of how these units heat water on demand. It also covers common maintenance steps and troubleshooting to keep your system operating efficiently.
How do you flush a tankless water heater? You need a few tools: a submersible pump, two hoses, a bucket, and the descaling solution. Here is the process broken into phases.
Phase 1: Power Down and Isolate the Unit
Turn off the power. For an electric unit, switch off the dedicated circuit breaker. For a gas unit, turn the gas control valve to the “off” position. Next, shut off the water. Close the main cold water isolation valve and the hot water isolation valve on the unit. This stops all water flow through the heater. This is especially important when turning off the water heater for an extended period, such as when going on vacation.
Relieve the internal water pressure. Open the hot water pressure relief valve on the unit and a hot water faucet somewhere in your house. Let the water drain out until it stops. This prevents a surprise spray when you disconnect hoses.
Phase 2: Connect the Pump and Hoses
You will create a closed loop. Connect one hose from the cold water service port (usually marked with a blue ring) to the pump’s outlet. Place the pump in your empty bucket. Connect the second hose from the hot water service port (red ring) back to the bucket. Before you add solution, check your hoses. Using the wrong type of hose can contaminate your drinking water, so always use hoses labeled as safe for potable water.
Fill the bucket with your descaling solution. For most homeowners, a gallon of pure white vinegar works well. For severe scale, you may need a commercial descaler. Follow the product’s dilution instructions exactly.
Phase 3: Circulate the Descaling Solution
- Open the service port valves on the cold and hot water sides of the unit.
- Plug in and turn on your submersible pump. The solution will now pump from the bucket, through the heater’s cold side, out the hot side, and back into the bucket.
- Let it circulate. Run the pump for at least 45 minutes. For heavy buildup, let it run for up to 90 minutes. You will likely see debris and discoloration in the bucket.
Phase 4: The Final Rinse
Turn off and unplug the pump. Close both service port valves on the unit. Disconnect the hose from the hot water service port. Place this hose’s end in a floor drain or another empty bucket. Open the cold water service port valve. This will allow fresh, cold water from your home’s line to rush through the unit and flush out any remaining loosened scale and descaling solution. Let it flush for a solid 5 minutes.
Close the cold service port valve. Reconnect all plumbing to its original configuration, ensuring the isolation valves are open. Purge air from the lines by slowly opening a hot water faucet inside the house until you have a steady stream. Finally, restore power or gas to the unit.
Note that ‘descaling a hot water tank’ is a completely different process for traditional tank-style heaters. The main difference is scale settles at the bottom of a large tank, so you often drain it and manually scrub or use a different flushing method, rather than circulating solution through a compact heat exchanger.
Safety First: Non-Negotiable Precautions
What safety precautions are critical? Missing these can ruin your heater or cause serious injury. Treat this list as law, especially when it comes to water heater safety guidelines.
- Shut off all power and fuel sources first. For electric, the breaker is off. For gas, the valve is off. Verify with the unit’s display (if it has one) that it is dead. Working on a live electrical component is dangerous.
- Wear personal protective equipment (PPE). Chemical-resistant gloves and safety glasses are mandatory. Descaling solution or vinegar in the eyes is a trip to the emergency room.
- Work in a well-ventilated area. Open a window or door near the unit. Chemical fumes can build up quickly in a small utility room.
- Never use the same hoses for descaling that you use for drinking water or your garden. Keep a dedicated set. Cross-contamination is a real health risk.
If you are unsure about any step, especially involving gas lines or electrical connections, stop. Call a licensed professional.
Prevention and Ongoing Maintenance
How do you maintain a tankless water heater between professional services? How can you prevent scale buildup in the first place? The best fix is to treat the problem at its source: your water. Hard water minerals are the main culprits, so addressing them early helps prevent scale formation in appliances. Filtration or water softening can keep mineral levels down and protect your heater between services.
Installing a water softener or a scale inhibition pre-filter is the single most effective thing you can do to protect your tankless unit. It stops the minerals from ever entering the heater. I installed a softener in my own home years ago, and the difference in maintenance is night and day. The heat exchanger stays clean for much longer. However, when you install water lines for your heater and softener filters, it’s important to ensure they are done correctly to avoid any issues.
Between annual or bi-annual flushes, do these simple checks:
- Monthly: Give the unit a quick visual once-over. Look for any error codes on the display, check for signs of water leaks on the pipe connections, and listen for unusual noises like loud kettling or rumbling when it fires up.
- Quarterly: Check and clean the inlet water filter screen if your model has one. This little screen catches sediment before it hits the heater. A clogged screen will cause flow problems. Just unscrew the filter housing, rinse the screen under a tap, and put it back.
Listen to your heater. A sudden drop in hot water temperature or a noticeable reduction in flow rate often means scale is building up. Don’t ignore these signs. This routine care takes minutes but extends the unit’s efficient life by years, saving you from costly early replacement.
The DIY vs. Pro Verdict: Should You Hire Someone?

Should you hire a professional? It depends entirely on your comfort level with basic plumbing and following mechanical instructions. If you’ve successfully swapped out a faucet or installed a washing machine supply line, you can probably handle this. If the words “service valves” or “submersible pump” make you nervous, call a pro.
Here is the clear line. A confident DIYer with the right tools can flush a tankless heater. You need to be okay with connecting hoses, opening and closing valves, and running a pump. If you’re uneasy about the plumbing connections or the electrical components near the unit, hire a technician. A mistake here can lead to water damage or a voided warranty. Knowing how often to flush is part of a solid maintenance plan, and a tankless water heater flush frequency guide can help you set the schedule. With that plan in place, you’ll avoid missed maintenance and keep the unit running smoothly.
Time and Cost: DIY vs. Professional
How long does the process take? For a first-timer with all the tools ready, budget 90 minutes to two hours. Most of that time is just letting the pump circulate the cleaning solution. The actual hands-on work of connecting and disconnecting hoses is about 20 minutes.
Let’s compare costs directly.
- Typical Pro Cost: $150 to $300 for the service call and flush.
- DIY Cost (One-Time): About $80. This gets you a decent submersible utility pump, two washing machine hoses, and a gallon of approved descaling solution (like vinegar or a branded cleaner). The pump and hoses are a one-time purchase you’ll use for years.
You save money doing it yourself, but you invest your time and assume the responsibility.
Final Difficulty Rating
Difficulty Rating: 6 out of 10. This task requires careful attention to the order of operations and basic tool skills. It’s not complex plumbing, but you must follow the safety and flushing steps precisely to avoid trapping air or acid in the heat exchanger.
Common Pitfalls to Skip (Learn From My Mistakes)
What are the common mistakes to avoid? They’re almost always simple oversights that cause big headaches. I’ve made a few of these on early service calls, and you can skip them entirely.
- Not Running the Rinse Cycle Long Enough. After the acid cleaner does its job, you must flush it all out. Run clean water through the system for at least 10-15 minutes, not just until the water looks clear. Leftover acid will continue to corrode the internals. I always set a timer.
- Using the Wrong Cleaner. Never use harsh, pure acids or random household cleaners. Stick with white vinegar for mild scale or a manufacturer-approved descaling solution for heavy buildup. The wrong chemical can destroy the copper fins in the heat exchanger.
- Forgetting to Reopen All Valves. Before you restore power, walk the system. Double-check that every service valve and isolation valve you closed is fully open again. A closed cold water inlet is the top reason for a “no hot water” panic call after a flush.
- Rushing the Safety Steps. Always, always turn off the power to the heater at the breaker before you start. Never skip powering down the unit and letting it cool. Also, wear safety glasses and gloves when handling the descaling solution-it’s still an acid.
- Connecting the Hoses Backwards. Your pump has an inlet and an outlet. The pump must pull cleaning solution from the bucket and push it into the heater’s service port on the cold water side. Reverse the flow and you’ll just pump solution in a circle, not through the heater.
Avoiding these five errors guarantees a smoother, successful job. Go slow, follow the steps, and your tankless heater will run efficiently for years.
Common Questions
Is white vinegar safe to use for descaling?
Yes, for mild to moderate scale, pure white vinegar is a safe and effective cleaner for most units. For severe buildup or to strictly adhere to warranty guidelines, a manufacturer-approved descaler is stronger and faster. Never use harsh cleaners like CLR, as they can damage internal components.
What are the absolute must-do safety steps?
Always shut off electrical power at the breaker or the gas supply valve before starting. Wear chemical-resistant gloves and safety glasses to protect yourself from the acidic solution. Ensure your work area is well-ventilated to avoid fume buildup.
How long should the entire descaling process take?
For a first-timer, budget about 90 minutes to two hours from start to finish. The active circulation of the cleaning solution takes 45-90 minutes, with the rest being setup, rinsing, and reconnection. Once you’re familiar, the hands-on time is under 30 minutes.
What basic maintenance can I do between professional services?
Perform a monthly visual check for error codes or leaks and listen for unusual noises. Every few months, locate and clean the unit’s inlet water filter screen if it has one. Consider installing a whole-house water softener; it’s the best long-term prevention.
When should I definitely call a professional instead of DIY?
Call a licensed technician if you smell gas, see major internal leaks, or are uncomfortable working with plumbing, electrical, or gas connections. If you are not confident in your ability to follow the flush procedure precisely, hiring a pro protects your investment and your safety.
Keep It Flowing for Years to Come
The single most important habit is performing an annual flush with vinegar to remove scale buildup. Make it a regular calendar event, just like changing your air filter.
Beyond that, keep a sharp eye on your incoming water quality, as hard water is the primary enemy of a tankless system’s efficiency and lifespan. Installing a pre-filter or a whole-house softener is a smart first line of defense. This setup combines filtration and softening to treat water at the source and curb mineral buildup, protecting your tankless system.
Bob McArthur
Bob is a an HVAC and plumbing industry veteran. He has professionally helped homeowners resolve issues around water softeners, heaters and all things related to water systems and plumbing around their homes. His trusted advice has helped countless of his clients save time, money and effort in home water systems maintenance and he now here to help you and give you first hand actionable advice. In his spare time, Bob also reviews home water systems such as tankless heaters, water softeners etc and helps home owners make the best choice for their dwelling. He lives around the Detroit area and occasionally consults on residential and commercial projects. Feel free to reach out to him via the contact us form.