Get More Hot Water: Boost Your Heater’s Temperature and Capacity
Running out of hot water too fast? You can fix that by adjusting your water heater’s setup.
We will cover adjusting the thermostat safely, installing a mixing valve, tank insulation, and when to consider an upgrade.
I’ve fixed hundreds of these units. Check your thermostat first; it’s often set too low.
First Step: How to Check Your Water Heater’s Current Temperature
You need to know your starting point. Do not guess the temperature. The only reliable way to check is with a simple faucet test and a thermometer you already own.
Go to the faucet closest to your water heater, usually in a basement or utility room sink. Turn the handle all the way to hot. Let the water run for three full minutes. This clears the pipes of cooled water and gives you a true tank temperature reading.
Hold your kitchen thermometer in the stream. Write down the number. My own heater was putting out a lukewarm 110°F when I moved in, which explained the short showers.
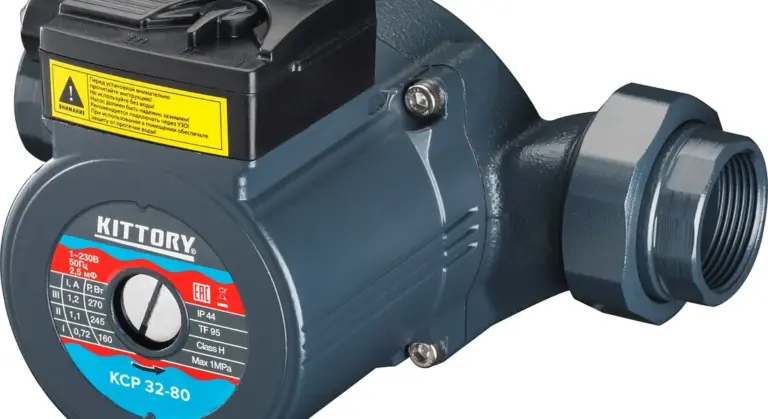
Thermostat access panels are different for electric and gas models. On an electric water heater, you will see one or two metal panels screwed onto the side of the tank. Behind these are the thermostats. On a gas model, the temperature control is a dial you will find near the bottom, often behind a small access door.
Most units are set to 120°F (49°C) from the factory. This setting is often lowered by homeowners or landlords to reduce the risk of scalding, especially in homes with young children or elderly residents. It can also be turned down to save a few dollars on energy bills.
Checking the temperature at the faucet is your safe baseline. Do not skip this. Making adjustments without knowing your current setting is like trying to fix a leak blindfolded. You have no reference for how much change you are actually making.
How to Raise the Temperature on Your Water Heater (Safely)
Increasing the heat is straightforward, but the steps are completely different for electric and gas models. Safety is not optional here. One mistake with electricity or gas can cause serious injury.
For an Electric Water Heater
Your first and most important job is to kill the power. Go to your home’s main electrical panel and turn off the circuit breaker that feeds the water heater. Do not rely on a nearby switch. Use a voltage tester on the wires inside the access panel to be absolutely sure the power is off. After you confirm power is off, the next step is to check if the water heater is fully de-energized and safe to inspect. In the steps that follow, we’ll show you how to check if the water heater is functioning and whether it needs service.
Electric heaters have two thermostats, one for the upper heating element and one for the lower. You need to adjust both. Remove the screw holding each access panel in place. You will see a thermostat with a dial marked with temperature settings.
Use a flathead screwdriver to turn the dial to your desired temperature. Adjust both the upper and lower thermostat to the same setting. Replace the panels, then go back to the breaker box to restore power.
For a Gas Water Heater
The process for gas is simpler but requires caution around the pilot light. Look near the bottom of the unit for a dial or knob. It is often labeled “Hotter” and “Colder” or has temperature markings.
You do not need to turn off the gas. Simply turn the dial to a higher number. The pilot light will remain on. If your pilot light is out, you must relight it according to the instructions on the tank’s label before adjusting the temperature.
Raising your water heater’s temperature above 120°F (49°C) significantly increases the risk of severe scalding burns. At 140°F (60°C), it takes just five seconds for a third degree burn. I keep my home system at 125°F max, which balances comfort and safety for scalding prevention.
If you need hotter water for a specific reason, like running a dishwasher without a heating element, install an anti scald mixing valve. This is a professional grade solution. The valve is installed at the water heater and mixes cold water with the super hot tank water to deliver a safe, consistent temperature to your fixtures. It lets you store water at 140°F for capacity while delivering it at a safe 120°F.
Practical Hacks to Stretch Your Existing Hot Water Capacity
You don’t always need a new heater or a bigger tank. Often, the problem is that you’re losing hot water faster than your heater can make it. These fixes target that.
Stagger High-Demand Activities
Your water heater has a recovery rate. That’s how many gallons of hot water it can make per hour. If you use hot water faster than it recovers, you run out.
Back-to-back showers and a hot laundry cycle will drain a standard 40-gallon tank fast. Space out these activities by 60-90 minutes to give the tank time to catch up. Run the dishwasher after the morning shower rush, not during it.
Install Low-Flow Showerheads and Aerators
This is the single most effective upgrade. Old showerheads can use 2.5 to 5 gallons per minute (GPM). A modern, comfortable low-flow model uses 1.8 GPM or less.
You cut your hot water use for that shower nearly in half. The math is simple. The same logic applies to faucet aerators, which mix air into the water stream.
Swapping these fixtures is a 10-minute job with a wrench and some plumber’s tape, and it saves energy and water every single day.
Insulate Your Hot Water Pipes
When you turn on the hot tap, you first purge the cooled water sitting in the pipes. Insulated pipes keep that water hotter longer.
Use foam pipe insulation from any hardware store. It’s slit down the side, so you just slide it on. Focus on the first 5-10 feet of pipe coming out of the heater and any pipes in unheated spaces like basements or crawlspaces.
Add a Water Heater Blanket (With Caution)
An insulating jacket for your tank can reduce standby heat loss. It works best on older tanks in cold spaces.
If you have a gas water heater, you must keep the blanket away from the bottom, the top vent, and the burner access panel. Blocking airflow or insulation touching the flue is a fire hazard. For electric heaters, it’s simpler, but avoid covering the thermostat. Many modern tanks are already well-insulated, so the benefit might be small.
Check for a Failed Dip Tube
This is the classic silent killer of hot water capacity. The dip tube is a plastic pipe inside the cold water inlet. It sends incoming cold water to the bottom of the tank to be heated.
When it degrades and breaks, cold water mixes at the top of the tank. You get lukewarm water almost immediately because it’s never sent to the bottom to get hot.
Here’s how to check:
- Turn off the cold water supply to the heater.
- Disconnect the cold water flex line from the nipple on top of the tank.
- Look inside the nipple with a flashlight. You should see the white plastic dip tube.
- If you see bits of plastic or the tube is missing, it has failed. You may also find plastic flakes in your faucet aerators or appliance screens.
Replacing it involves draining the tank, removing the nipple, and installing a new dip tube. While you’re at it, replace the corroded nipple with a new dielectric one to prevent future corrosion. If you see heavy corrosion, call a pro.
When to Consider a Direct Replacement or Upgrade
Before you start adjusting valves, you need to decide if your current system can even meet your needs. Sometimes, a bigger fix is the right one.
Adding a second tank can double your hot water capacity, but it also doubles your plumbing points of failure and needs more floor space. Installing one larger tank is usually simpler and more cost-effective if your space and existing connections can handle it. The math is straightforward: one 80-gallon tank costs less in materials and labor than installing two 40-gallon tanks in series. In my last house, the mechanical room was tiny, so going with a single tall, 75-gallon unit was the only practical choice.
Don’t just look at the tank size on the label. Find the yellow EnergyGuide sticker and look for the “First Hour Rating” (FHR). This number tells you how many gallons of hot water the heater can deliver in one hour, starting with a full tank. A 50-gallon tank with a high recovery rate can often outperform an older 65-gallon tank with a low FHR. If your family runs out of hot water during the morning rush, comparing FHRs between models is more useful than comparing tank sizes alone.
Traditional electric or gas tanks are simple but inefficient. A hybrid heat pump water heater pulls heat from the air, using far less electricity. This sets up heat pump water heater hybrid models as a practical next step. They combine efficient heat exchange with reliable storage. The big win with a hybrid is that you get the full tank capacity plus a high recovery rate, all while cutting your water heating costs by half or more. They do need installation in a space with enough warm air (like a basement) and can be louder, but the capacity and savings are real.
For maximum capacity, many people think of tankless heaters. They provide endless hot water on demand. They solve the capacity problem completely but require a significant upfront investment for the unit and often upgraded gas or electrical service. You trade the standby losses of a tank for a higher peak demand. They’re fantastic for long showers but can struggle if you try to run multiple hot water fixtures at the exact same time unless the unit is properly sized.
Tools & Material Checklist for a DIY Installation
If you decide to replace the unit yourself, you must have the right gear. Here is what you’ll need on hand.
Specific Tools:
- Two pipe wrenches (one to hold, one to turn)
- Tubing cutter for clean copper cuts
- Soldering torch & solder or PEX crimper/cinching tool (choose one system)
- Hacksaw for cutting old pipes or nipples
- Non-contact voltage tester
- Garden hose for draining
Common Materials:
- New water heater
- Dielectric unions or connectors to prevent corrosion between different metals
- Flexible water connectors (copper or stainless steel) for easier hookup
- Teflon tape and pipe dope (thread sealant) for all threaded connections
- New discharge pipe for the Temperature & Pressure (T&P) relief valve, run to within 6 inches of the floor
For your water connections, you have a choice. Copper is durable and professional but requires soldering skill. PEX with brass crimp fittings is more forgiving for DIY, as it allows for some flexibility and doesn’t require an open flame. In my own installations, I use PEX for the simple reason that if I need to adjust or replace something later, it’s much easier to cut and re-crimp.
The DIY vs. Pro Verdict for Water Heater Installation
This is not a beginner project. Be honest about your skills.
Difficulty Rating: 7/10 for a like-for-like electric swap. 8/10 for gas. The weight, the water, the connections, and the codes all add layers of complexity.
A confident DIYer with good mechanical sense can handle the core sequence for an electric heater: turning off power and water, draining the old tank, disconnecting it, moving it out, setting the new one, and doing the basic plumbing and electrical hookup. The key is ensuring the new unit is a direct replacement that doesn’t require changing the existing electrical circuit or plumbing layout.
You must call a licensed plumber for several critical situations. Any work on a gas line-disconnecting, running new pipe, testing for leaks-is legally and safely a job for a licensed pro. This is non-negotiable. Also hire a pro if the installation requires significant plumbing code changes (like moving the T&P valve location), upgrading your electrical service, or if you want the manufacturer’s warranty to remain valid (many require professional installation).
System Maintenance Roadmap: How to Make Your Hot Water Heater Last Longer
Getting more hot water isn’t just about turning up the dial. A poorly maintained heater works harder, fails sooner, and delivers less. This routine is what I do in my own home and recommend to every customer. Follow this schedule to protect your investment and performance.
Flush the Tank Every 6-12 Months to Remove Sediment
Sediment is your water heater’s worst enemy. Minerals and debris settle at the bottom of the tank, creating an insulating barrier. The burner or element must heat through this layer, wasting energy and eventually overheating the steel tank bottom, leading to leaks.
A simple annual flush removes this crud and is the single best thing you can do for a tank-style heater.
Here is how to do it:
- Turn off the power (circuit breaker) or gas (control knob to “Pilot”).
- Connect a standard garden hose to the drain valve at the base of the tank. Run the other end to a floor drain or outside.
- Open a hot water faucet in your house (like a laundry sink) to let air into the system.
- Slowly open the tank’s drain valve. Let the water run until it’s clear. If it’s still muddy after a few minutes, turn the cold water supply on briefly to stir up the tank, then continue draining.
The most common mistake is never opening the drain valve until it’s too late. If it hasn’t been used in years, it may be stuck or start leaking. Be prepared to replace the valve if it drips after closing.
Test the Temperature & Pressure (T&P) Relief Valve Annually
This valve is a critical safety device. If the thermostat fails and the tank overheats, pressure builds. The T&P valve opens to release steam and hot water, preventing a potential explosion. A valve that’s frozen shut from scale is dangerous.
Testing is quick:
- Locate the valve, usually on the top or side of the tank, with a discharge pipe running down.
- Place a bucket under the end of the discharge pipe.
- Lift the valve’s test lever all the way up for a few seconds. You should hear a rush of air or water into the bucket as it opens, then a definite “clunk” as it reseats when you release it.
If no water or air discharges, or if it continues to drip after you release the lever, replace the valve immediately. This is a non-negotiable safety repair.
Check the Anode Rod Every 3-5 Years (Especially With Soft Water)
The anode rod is a secret weapon. It’s a metal rod (usually magnesium or aluminum) screwed into the top of your tank that sacrifices itself to corrosion, protecting the steel tank lining. Once it’s fully corroded, the tank itself starts to rust.
Soft, corrosive water eats this rod incredibly fast. In my home with a softener, I check mine every three years. Use a 1-1/16″ socket and a long breaker bar to unscrew it from the top of the tank (turn off power and water first).
If the rod is less than 1/2 inch thick or the core wire is visible over much of its length, replace it. Installing a new anode rod is far cheaper than replacing a rusted-out water heater tank. If you’re performing maintenance, replacing the water heater anode rod is a key next step to protect the tank. This simple replacement can extend its life and prevent rust.
For Tankless Units: Annual Vinegar Descaling is Essential
Tankless heaters don’t store water, but mineral scale builds up on the tiny passages of the heat exchanger. This restricts flow, reduces efficiency, and can cause overheating errors. Hard water makes this happen faster.
You need a submersible pump, two short hoses, and five gallons of plain, undiluted white vinegar. The process involves isolating the unit, connecting the pump in a loop with the vinegar, and circulating it for about 45-60 minutes. Consult your manual for the specific service valve procedure.
Neglecting this annual flush is the main reason tankless units fail prematurely or stop producing enough hot water. After descaling, always flush the system with fresh water before restoring power to clear any loosened scale from the flow sensor.
The “Red Flag” Troubleshooting Guide
Before you try to get more hot water, you need to check for problems. Trying to boost a failing heater is a waste of time and money. Look for these five signs.
Water Not Getting Hot at All (Failed Element/Thermostat)
This is a complete system failure. For electric heaters, it usually means a heating element or thermostat has burned out. Gas models could have a failed thermocouple, gas valve, or pilot assembly.
Your first step is always to check the power source before you touch the unit.
- Electric: Check the circuit breaker. Reset it if it’s tripped. If it trips again immediately, you have an electrical fault.
- Gas: Make sure the gas supply valve is on. See if the pilot light is lit (look through the view window at the bottom).
If the power or gas is confirmed on but you have zero hot water, the repair is internal. For most homeowners, this is a job for a pro. Replacing an element or thermostat requires draining the tank and safe electrical work.
Rust-Colored Water or Water Around the Base of the Tank
Rusty water is a classic sign of internal tank corrosion. A small puddle or drip at the base is a major warning. The tank itself is likely rusting through.
Internal corrosion means the tank is failing, and a replacement is your only real option. You can temporarily check if the leak is from a pipe fitting above, but water originating from the tank seam or body is a death sentence. My last gas heater gave me 20 years before a tiny rust spot appeared at the base; I had a new one installed within the week. Waiting leads to a flooded basement.
Rumbling or Popping Sounds
That noise is sediment. Hard water minerals settle at the bottom of the tank. The burner or element then has to heat through a layer of sand-like gunk, which overheats, pops, and rumbles.
Severe sediment buildup drastically reduces efficiency and capacity by taking up space where hot water should be. It also cooks onto the bottom of the tank, causing hotspots that can warp and damage it. You should flush your tank yearly to prevent this. If it’s already loud, a flush might help, but the damage may already be done.
Hot Water Runs Out Extremely Fast
If your 40-gallon heater acts like a 10-gallon one, suspect the dip tube. This plastic tube guides incoming cold water to the bottom of the tank. When it cracks or disintegrates, cold water mixes at the top, sending lukewarm water to your faucets almost immediately.
Severe scale buildup from hard water can also reduce effective tank volume. A failed dip tube is a common and fixable problem, but it requires draining the tank and replacing the tube. I found a completely broken dip tube in my own heater last year; the hot water duration doubled after I swapped it.
Smell of Gas or Rotten Eggs
Treat these smells very differently. The smell of natural gas (like mercaptan, a rotten cabbage smell) means you potentially have a gas leak.
If you smell gas, do not touch light switches or create sparks. Get everyone out of the house immediately and call your gas company from outside.
The smell of rotten eggs (sulfur) in the hot water only is usually a chemical reaction. Bacteria in the water can react with a depleted magnesium anode rod, especially in soft water. The fix is often to replace the standard magnesium rod with an aluminum-zinc alloy anode rod, which stops the reaction. Proper sulfur odor removal from a water heater often involves flushing the tank or replacing the anode to stop the reaction. If these steps don’t help, a professional inspection may be needed.
Code & Compliance Check: What You Need to Know
Before you touch a wrench, you need to check the rules. Ignoring codes is a great way to fail an inspection, void your home insurance, or create a dangerous situation. Let’s get this part right.
You Likely Need a Permit
For a full water heater replacement or a new installation, your city or county almost certainly requires a permit. Pulling a permit isn’t just red tape; it means a licensed inspector will verify your work is safe, which is cheap insurance for your home and family. Even for some major modifications, a permit may be needed. Call your local building department. Tell them what you plan to do. They will give you the exact requirements and cost. I had to do this last year when I replaced my own 50-gallon unit, and the inspection took 10 minutes.
Key Code Points: The T&P Valve is Non-Negotiable
The temperature and pressure (T&P) relief valve is your water heater’s last line of defense against a catastrophic explosion. Its function is to vent excess pressure and temperature when thresholds are reached. This automatic release protects the tank from bursting. Code governs exactly how its discharge pipe must be installed.
- The pipe must be made of approved material like CPVC, copper, or PEX listed for hot water distribution. Do not use cheap vinyl tubing.
- It must drain to within 6 inches of the floor, or to a drain, with no traps or obstructions.
- The pipe must be the same size as the valve outlet (usually 3/4 inch) and must run downhill.
If this pipe is missing, capped, or piped wrong, your heater is a potential bomb. This is the one part of the code you cannot fudge.
Required Clearances for Safety
Your water heater needs space to breathe and to keep your house from burning down. Standard codes require:
- At least 18 inches of clearance from the front for servicing the anode rod or elements.
- Typically 1 inch of clearance from combustible materials (like wood paneling or stored boxes) on the sides and back.
- Zero clearance is allowed for flammable vapor sources (gasoline, paint thinners). Keep those far away.
Check your unit’s installation manual for its specific clearance requirements, as they can vary.
Adhere to Local Plumbing and Electrical Codes
Plumbing codes like the IPC (International Plumbing Code) or UPC (Uniform Plumbing Code) dictate everything from pipe sizing and material to venting for gas units. Electrical work for an electric heater must follow the NEC (National Electrical Code). Your local jurisdiction adopts one of these model codes and then often adds its own amendments, so what your cousin did in another state might not fly where you live. This is why that call to the building department is your first, most important step. They have the final say.
Water Science Snippet: How Scale Robs Your Heat and Capacity
If you have less hot water, don’t just crank the thermostat. First, look inside your tank. I’m talking about scale.
What is Hard Water, Really?
Your tap water isn’t just H2O. If you have “hard water,” it’s carrying dissolved minerals-mostly calcium and magnesium. We measure this hardness in Grains Per Gallon (GPG). One GPG equals about 17.1 parts per million. Water over 7 GPG is considered hard and a real problem for appliances.
Think of GPG as the mineral load your water heater has to process and, ultimately, store as solid rock.
The Kettle in Your Basement
You’ve seen it in a tea kettle. Heat hard water, and a white, chalky crust builds up inside. Your water heater is a giant, constantly heated kettle. Every time the burner or element fires up, those dissolved minerals solidify. They bake onto the heating elements and the inner walls of the tank just like limestone forms in a hot spring.
I’ve pulled elements from heaters so caked in scale they looked like white cigars. The tank walls feel like rough sandpaper.
Scale is an Insulating Blanket
This rock layer is your heater’s worst enemy. It acts as a thermal insulator.
- For gas heaters: Scale on the tank bottom insulates the water from the flame. The burner runs longer to transfer the same heat.
- For electric heaters: Scale completely coats the elements. Heat gets trapped in the element instead of passing into the water.
This inefficiency means higher gas or electric bills for the same amount of usable hot water. The heater works harder, wears out faster, and you still lose.
Your Tank is Shrinking
The physical space inside your tank is fixed. A 50-gallon tank holds 50 gallons, right? Not after years of scale. That crust builds inward, taking up volume. A half-inch of scale throughout a standard tank can steal 5 gallons or more of capacity.
You’re literally losing storage space to rock. Combine that with the insulating effect, and you get a double-whammy: less hot water that’s harder to heat.
The Softener Connection: Prevention, Not Cure
This is where a water softener changes the game. A softener removes the calcium and magnesium ions (the scale-makers) and replaces them with sodium or potassium ions through a process called ion exchange.
Soft water cannot form scale because the minerals that cause it are gone before the water ever enters your heater.
In my own home, after installing a softener, the difference was clear. My 12-year-old heater suddenly regained performance. The elements stayed clean until the tank finally rusted out years later. A softener won’t reverse existing scale, but it stops new scale from forming, preserving your heater’s efficiency and true capacity for its entire lifespan.
When NOT to Try This: Limitations and Safety First
Adjusting your water heater is a straightforward job. You must know when to stop and call a pro. Ignoring these red flags can lead to property damage, serious injury, or a completely dead appliance. In a water heater emergency, know who to call first—an emergency plumber or the manufacturer’s support line. Keeping that contact handy can speed up help and limit damage.
Do not attempt to adjust a malfunctioning thermostat. If the water is not getting hot at all, is lukewarm, or is scalding hot on a low setting, the thermostat is likely bad. Trying to adjust a broken one is pointless. Turn off the power, drain some water, and replace it.
Do not bypass the T&P relief valve or disable high-limit switches. This is non-negotiable. The Temperature and Pressure relief valve is the last line of defense against an explosion. If it’s leaking, replace the valve. Do not cap it. The high-limit switch stops the heater if it overheats. Never disable these safety features.
Do not install a larger tank without verifying your floor can support the weight. A full 80-gallon tank weighs over 900 pounds. An upstairs closet or a garage with a weak floor can fail. If you are upgrading tank size significantly, assume the floor needs reinforcement unless you know it was built for it.
Do not increase temperature on a very old unit (15+ years) with signs of rust. You are pushing an aging system. Higher temperatures and pressure can cause a weak tank to fail catastrophically. If you see rust streaks or moisture at the tank seams, plan for a replacement, not a temperature boost.
Recommended Products and Upgrades
These are the tools and parts that deliver real results. They fix the common problems that steal your hot water.
Tank insulation blankets are for electric tanks in cold spaces like garages or unheated basements. They reduce standby heat loss. Modern tanks are well-insulated, but an old one or one in a cold spot benefits. Do not cover the thermostat, top, bottom, or T&P valve. Do not use one on a gas heater-it can be a fire hazard.
Pipe insulation foam for the first 5-10 feet of hot water line keeps heat in the pipes right after the tank. Use self-sealing foam tubing. This simple step means you wait less for hot water at nearby faucets and waste less water down the drain.
Programmable thermostats for electric water heaters let you set higher temps for peak use and lower temps for off-hours. You can program a “boost” for morning showers and a “setback” for overnight. This is more efficient than keeping the tank at a constant high temperature.
A water softener as a pre-treatment improves efficiency and longevity if you have hard water. Hard water causes scale buildup on heating elements and at the tank bottom. This buildup harms heater efficiency by reducing heat transfer and requiring the unit to run longer. This sludge acts like an insulator, making the heater work harder and hold less hot water. Soft water prevents this.
A thermostatic mixing valve is critical for safe delivery of higher-temperature water. If you turn up the tank to 140°F for more capacity, the water at the tap can cause instant burns. A mixing valve, installed after the heater, blends hot water with cold to deliver a safe 120°F to your fixtures. It is a must for safety and code compliance.
What Helped Me: A Note from the Basement
This is the stuff they don’t always put in the manual. It comes from getting your hands dirty.
In my own house, insulating the hot water lines in the crawlspace was the single biggest win for faster hot water at the faucet and less wasted water down the drain. It cost $50 and took an afternoon. The faucet on the far side of the house got hot 30 seconds faster. That adds up.
I once cranked an old apartment water heater to ‘very hot’ trying to get more showers. I got about one more minute of hot water before it just started overheating and tripping the reset button. The problem was a failed lower heating element, not the setting. The upper element was doing all the work in the top third of the tank. Turning up the thermostat just made that one element work harder until it failed. The fix was a $20 heating element and 30 minutes of work, not a dial twist.
When to Stop and Seek Professional Help
Tinkering with your water heater can save you a service call. Some jobs are not for the weekend warrior. Knowing when to call a pro keeps your house safe and your wallet happy in the long run.
Any issue involving natural gas lines, smell of gas, or the pilot light.
If you smell gas, even faintly, that’s your cue to leave. Do not turn lights on or off. Do not try to relight the pilot. Get everyone out of the house and call your gas company or a licensed plumber from outside.
Gas valves and thermocouples can fail in ways that cause a small, unsafe leak or prevent the gas from shutting off properly. I’ve seen DIY attempts to clean a pilot assembly lead to a much bigger, more expensive problem. This is one area where specialized tools and certification matter more than a can-do attitude.
Any electrical work beyond a simple like-for-like swap where the wiring already exists.
Replacing a standard 240-volt heating element on an electric water heater is a common repair. You turn off the power, drain the tank, swap the old element for a new one, and refill. The wires are already there, color-coded, and you’re just connecting them to the same terminals.
If you need to run a new circuit from your breaker panel, install a new disconnect switch, or troubleshoot the high-limit switch, stop. Mistakes with 240-volt circuits are not just shocking, they can start fires. A licensed electrician ensures the wire gauge, breaker amperage, and connections are all correct and to code.
Major leaks from the tank itself (not a valve or connection).
Water pooling from the bottom of the tank or weeping from the middle of the steel shell means the tank is corroded through. This is a terminal diagnosis.
No amount of tape, sealant, or hope will fix a failed tank. A leaking tank must be replaced, and the only real choice is between doing it now or after a bigger flood. The pressure inside a 40 or 50-gallon tank guarantees a small leak will become a gusher, often at 3 AM. Call for a replacement quote.
If after basic troubleshooting, you still have no hot water or the problem is unclear.
You’ve checked the breaker and reset the high-limit button. You’ve confirmed the gas valve is on. Still nothing. Before you start throwing expensive parts at it, get a professional diagnosis.
A good technician can test components like the gas control valve, thermocouple, or lower heating element in minutes with a multimeter. Paying for one hour of labor to pinpoint the exact failed part is cheaper than buying three different parts and installing them all yourself, only to find the fourth part was the problem.
For unclear temperature or capacity issues, a pro can perform a simple dip tube test. If your hot water runs out quickly but seems scalding at first, a disintegrated dip tube is likely. They can check this by shutting off the cold inlet, opening a hot faucet, and seeing if air gets sucked back into the tank. It’s a quick check that confirms the issue and justifies the repair.
In my own home, I replaced a 20-year-old electric unit myself. When it was time for the new heat pump unit, I called a pro. The refrigeration circuit, electrical requirements, and condensate drainage were beyond my pay grade. Know your limits. A clear phone call to a local plumber is the smartest tool in your box sometimes.
Quick Answers
1. Does turning up the temperature actually give me more hot water?
Not in volume, but in effective supply. Hotter water gets diluted with more cold at the faucet to reach a safe temperature, so each gallon from the tank stretches further. However, never exceed 125°F without a mixing valve due to severe scalding risk.
2. What’s the safest way to get a real capacity boost without a new tank?
Install a thermostatic mixing valve. It lets you safely store water at 140°F for maximum stored energy, while the valve blends it down to a safe 120°F at your taps. This is a professional-grade solution that effectively increases your usable hot water supply.
3. I’ve adjusted the temperature and insulated the pipes. What’s the next best cheap fix?
Check for a failed dip tube. If this plastic tube inside the tank is broken, cold water mixes at the top and you get lukewarm water almost immediately. Finding plastic flakes in your faucet aerators is a telltale sign this is your problem.
4. Can I just turn both thermostats on my electric heater to the max setting?
Absolutely not. High-limit safety switches may trip, cutting all power. Excessively high temperatures also accelerate scale buildup and tank corrosion. For daily use, 120-125°F is the practical and safe maximum for most households.
5. My hot water runs out fast only when multiple showers run. Is my heater too small?
Not necessarily. First, check your heater’s First Hour Rating (FHR) on its EnergyGuide label. This number, more than tank size, tells you its real-world recovery capacity. Staggering high-demand uses by 60-90 minutes is often a free and immediate fix.
Smart Habits for Reliable Hot Water
First, use a simple thermometer to check your tap’s hot water temperature before touching the thermostat. Then, make flushing sediment from the tank once a year your non-negotiable maintenance task.
Bob McArthur
Bob is a an HVAC and plumbing industry veteran. He has professionally helped homeowners resolve issues around water softeners, heaters and all things related to water systems and plumbing around their homes. His trusted advice has helped countless of his clients save time, money and effort in home water systems maintenance and he now here to help you and give you first hand actionable advice. In his spare time, Bob also reviews home water systems such as tankless heaters, water softeners etc and helps home owners make the best choice for their dwelling. He lives around the Detroit area and occasionally consults on residential and commercial projects. Feel free to reach out to him via the contact us form.