What Size Water Supply Line Do You Really Need? A Straight Answer
Pick the wrong pipe size, and your shower becomes a trickle or you blow cash on extra copper. This guide fixes that.
We will cover how water pressure and flow rate connect, what your fixtures actually demand, the pros and cons of PEX versus copper, and the simple math to size it all correctly.
I’ve run supply lines in my own house and on a thousand service calls. Here’s the truth: a half-inch line often does the job, but your shower might need three-quarters.
The Heart of Your Home’s Water System: Sizing the Main Line
The main water line is the single pipe that brings all the water into your house. Everything else branches off from it. Think of it as the trunk of a tree. If the trunk is too small, the branches can’t get enough water, no matter how big they are. Your main line’s size sets the absolute maximum amount of water your home can use at any given moment.
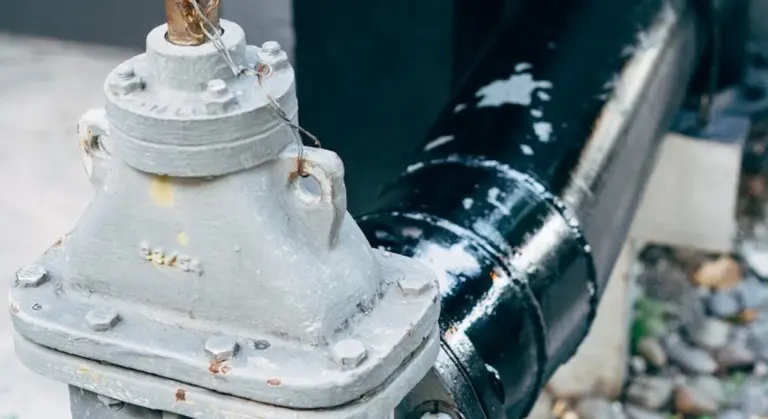
Most homeowners ask one question first: what size is the pipe coming into my house? For a typical home with one to three bathrooms, you will usually find a 3/4 inch line. For larger homes with more fixtures or a desire for high flow, a 1 inch line is common. You can check this yourself. Find where the pipe enters your home, often in the basement or crawlspace. Look for a stamp on copper pipe or measure the outside diameter of plastic pipe. A 3/4 inch copper pipe will measure about 7/8 of an inch across.
Your starting point changes depending on your water source. If you are on city water, your main line connects directly to the municipal supply at the street. Your home’s pressure is largely set by the city’s system. If you have a private well, your main line starts at the pressure tank. Here, the pump’s gallons-per-minute (GPM) capacity and the pressure tank’s size are just as critical as the pipe diameter. A weak pump feeding a large pipe will still give you poor flow; you must match the pump capacity to the pipe size and your home’s demand.
Water Science Snippet: Dynamic Pressure Loss
Water isn’t rigid. It fights against the pipe walls as it flows, which causes friction and slows it down. This is dynamic pressure loss. The longer the pipe and the smaller its diameter, the greater the friction. Imagine drinking a thick milkshake. A skinny straw makes you work hard for a little bit of milkshake. A wide straw lets you get a big gulp easily. Your home’s plumbing works the same way. A long, skinny pipe from the street means lower pressure at your showerhead, even if the pressure at the street is good.
The Tools You’ll Need for the Job (Or for Your Plumber)
Before you touch anything, turn off the main water shutoff valve. Have a bucket and towels ready for any residual water. These are the tools for inspecting, measuring, or replacing supply lines.
- Pressure Gauge: Screw onto a hose bib to check your home’s static water pressure. You need this baseline number.
- Pipe Cutter: A small, rotary cutter for copper or PEX gives a clean, square cut. A hacksaw will work in a pinch but leaves burrs.
- Tubing Bender: For soft copper lines, this prevents kinking when you need to make a gentle curve.
- Crimping or Cinch Tools: Specific to PEX piping. You must use the tool brand that matches your PEX fittings (e.g., Uponor expander for PEX-A, crimp rings for PEX-B).
- Teflon Tape: For sealing threaded pipe connections. Wrap it clockwise around the male threads.
- Pipe Wrenches: You need two-one to hold the fitting, one to turn the pipe. They prevent you from twisting and damaging other parts of the system.
You also need to know what material you’re working with. Here is a quick checklist of the most common types found in homes.
- Copper (Type L): Rigid, reddish-brown metal. The most common type for main lines and interior supply. It will be stamped with “Type L” or “Type M”.
- PEX-A or PEX-B: Flexible, colored plastic tubing (often red for hot, blue for cold). PEX-A is more flexible and uses expansion fittings. PEX-B uses crimp or clamp rings.
- CPVC: Rigid, cream-colored plastic pipe. Common in warmer climates, often used for interior hot and cold lines glued together with solvent cement.
Your first step is identification. The repair method and tools you need depend entirely on whether you have copper, PEX, or CPVC. You can choose to change materials later, but you must work with what you have for now.
How to Size Your Water Lines: A Step-by-Step Guide
Forget complicated charts for a minute. Sizing your water lines is about one thing: getting enough water, with enough pressure, to every faucet in your house at the same time. Here’s how you figure that out.
Step 1: Count Your Fixtures.
The first question is simple: how many bathrooms does the home have? But you need to count everything that uses water. Plumbers use a system called “fixture units” to make this easy. Think of it like counting people in a room instead of listing every piece of clothing they’re wearing. Each fixture gets a number.
Here’s a quick guide for common home fixtures:
- Toilet: 3 fixture units
- Bathtub/Shower: 2 fixture units
- Lavatory (bathroom sink): 1 fixture unit
- Kitchen sink: 2 fixture units
- Washing machine: 2 fixture units
- Dishwasher: 1 fixture unit
Walk through your house and make a list. Add up all the units. This total number is the foundation for all your other calculations. A 1-bathroom home might have 10 total fixture units. A 3-bathroom home could easily hit 25 or more.
Step 2: Measure Your Pressure & Distance.
Your water has to travel. Two critical things determine if it arrives strong or weak: the starting pressure and how far it goes.
First, find your static water pressure. This is the pressure from your main supply when no water is running. You need a pressure gauge, which screws onto any hose bib or your washing machine’s cold water inlet. Turn off all water inside, attach the gauge, and open the bib. A reading between 40 and 80 PSI is typical. Below 40, you’re starting at a disadvantage.
Next, measure the distance. How many feet of pipe does the water travel from where it enters your house to the farthest fixture, like a shower on the second floor? Water pressure drops due to friction inside the pipe. A 100-foot run loses more pressure than a 20-foot run. If your main line is too small for the distance, you’ll get a trickle at that far faucet.
Step 3: Calculate Peak Demand.
What is the peak water demand? It’s not when one toilet flushes. It’s the worst-case, real-world moment. Picture a weekday morning: someone is in the shower, the washing machine just started its fill cycle, and another person flushes a toilet. That simultaneous demand is your peak flow.
Your fixture unit total from Step 1, combined with your pressure and distance from Step 2, tells you the required flow rate in gallons per minute (GPM). A standard 3/4-inch main line might supply 8-10 GPM, but that same morning rush in a larger home could demand 12 GPM or more. If your pipe can’t deliver that peak flow, someone gets a cold, weak shower. Online sizing calculators or plumbing code tables use your fixture units to give you the exact GPM number you need to support.
Step 4: Plan for Add-Ons.
Are there any plans for future additions? This is where homeowners get stuck. You size for today, then next year you add a system and wonder why your pressure dropped.
Any equipment you add to the main line creates a pressure drop. A water softener can use 5-8 PSI. A whole-house sediment filter might use 3-5 PSI. An irrigation system demands a big burst of water all at once. If you think you might add these later, you must plan the pipe size for it now. My rule is to upsize the main supply line by one size if you know a softener or filter is in your future. Water softeners can alter flow rate depending on their settings and media. Upsizing helps maintain steady flow even as the softener works. It’s much cheaper to run a 1-inch pipe during new construction than to tear out walls later to replace a too-small 3/4-inch line. I did this in my own basement project, and it made installing my softener a breeze with zero impact on upstairs shower pressure.
Standard Water Supply Line Sizes for Every Fixture
Getting the right size isn’t complicated. Here is the standard size for every fixture you’re likely to handle.
Remember, the supply line is the flexible tube connecting the shut-off valve to the fixture. The pipe in your wall is usually one size larger. This table tells you what to buy at the hardware store.
Toilets
The standard is a 3/8″ compression fitting on a 7/16″ or 1/2″ flex line. It screws onto the bottom of the fill valve, which usually has a 7/8″ thread. This size provides enough water to refill the tank quickly without being excessive. When you replace a fill valve, the new one will almost always use this same 3/8″ connection.
Bathroom Sinks
This is a two-part answer. The copper or PEX pipe coming out of your wall is 1/2″ in diameter. The shut-off valve (called an angle stop) reduces that down, and the standard flexible supply line that plugs into it has a 3/8″ compression fitting. The other end of that line connects to the faucet tailpiece with a 1/2″ compression fitting. So you buy a “3/8″ x 1/2″ supply line.”
Kitchen Sinks
Kitchen sink supply lines are identical to bathroom sinks in most homes. You use a 3/8″ x 1/2″ flexible line. The exception is if you have a high-flow faucet or a pull-down sprayer with a separate line for instant hot water. Those may require a 1/2″ supply line from the valve to the faucet to maintain pressure.
Washing Machines
Your washing machine box has two valves that look like outdoor faucets. These are 1/2″ hose bibbs. The hoses you connect have 3/4″ female hose thread (FHT) ends on both sides. Always use braided stainless steel hoses here, not the cheap rubber ones. A burst washing machine hose is one of the most common and destructive plumbing failures in a home.
Water Heaters
The inlet (cold water in) and outlet (hot water out) on a standard tank water heater are 3/4″ NPT (National Pipe Thread). The main trunk line feeding it should also be 3/4″. This larger size is crucial for providing enough volume of hot water to multiple fixtures at once. Never reduce this down to 1/2″ pipe right at the heater. This rule also matters for heat pump water heaters, where properly sized supply lines help the unit operate efficiently and deliver steady hot water.
Dishwashers
A dishwasher is typically fed by a dedicated 1/2″ copper line that runs from under your kitchen sink. Under the sink, this line has a small 3/8″ compression shut-off valve. A 3/8″ supply line then runs from that valve to the dishwasher’s inlet solenoid valve. This setup gives it adequate flow without robbing pressure from the kitchen faucet. If you’re configuring a hot-water feed, you’ll connect the dishwasher hot water line to the hot supply under the sink. This ensures the dishwasher receives hot water for optimal cleaning.
Hose Bibbs (Exterior Faucets)
The standard pipe size for a hose bibb is 1/2″. This provides enough flow for watering lawns or washing cars. If you have a dedicated line for something like a pressure washer or filling a pool, you might upgrade to a 3/4″ hose bibb fed by a 3/4″ pipe for faster flow.
Water Softeners & Whole-House Filters
These systems connect to your main water line. The standard connection size is 3/4″. Using a 1″ connection is even better for modern, high-flow systems as it reduces pressure loss. The flexible hoses or copper pipes that connect the unit to your home’s plumbing will match this inlet/outlet size, either 3/4″ or 1″. Always check your unit’s manual.
Exceptions and Upgrades
Standard sizes work for 95% of homes. You need to think bigger for high-demand fixtures. A large, free-standing tub filler or a multi-head shower system with several body sprays often requires a 3/4″ supply line to deliver the promised gallon-per-minute flow. If you’re installing a luxury shower or a soaker tub, check the manufacturer’s specs before you run the pipes. They will explicitly state the required pipe size. Running 1/2″ lines to a fixture that needs 3/4″ will leave you with a disappointing trickle.
PEX vs. Copper vs. CPVC: Choosing the Right Pipe
You have three main contenders for your home’s water lines. Each has pros and cons. Your choice impacts your wallet, your weekend, and your home’s long-term plumbing health. You might also weigh whether water and sewer line insurance is worth it as part of your broader protection plan. Understanding what it covers can help you decide if it’s right for you and your budget.
Material Comparison: A Side-by-Side Look
| Material | Cost (Materials) | Ease of DIY Installation | Durability & Longevity | Code Acceptance |
|---|---|---|---|---|
| PEX (Cross-linked Polyethylene) | Low to Moderate | Easiest. Needs special crimp or clamp tools, but no soldering. Flexible, fewer fittings. | Excellent. Resists scale and corrosion. Can expand if frozen, reducing burst risk. Good for 30+ years. | Widely accepted by IPC/UPC. Check local codes for specific installation methods (e.g., manifolds). |
| Copper | Highest | Most difficult. Requires soldering (sweating) with a torch, flux, and skill. Rigid pipes need precise measurements. | Proven. Lasts 50+ years. Resists bacteria but can corrode in acidic water or from stray electrical currents. | The traditional standard. Universally accepted by all codes. |
| CPVC (Chlorinated Polyvinyl Chloride) | Lowest | Moderate. Requires CPVC solvent cement (glue) for joints. Curing time is needed before pressure. Rigid like copper. | Good. Resists corrosion but can become brittle with age, especially if exposed to sunlight. Fittings can fail if glued improperly. | Accepted by IPC/UPC for indoor hot and cold water. Note: Standard PVC is NOT approved for indoor potable water supply, only for drain lines. |
For a full DIY replumb, PEX is often the smartest balance of cost, ease, and performance. Copper is the premium, professional choice if budget and skill allow. CPVC is a budget-friendly option, but its installation and long-term brittleness give me pause for a whole-house system.
A Real-World Choice: My Home Manifold System
In my own basement renovation, I used PEX for a home-run manifold system. I chose it for one main reason: control. Each fixture (sink, toilet, shower) gets its own dedicated line running from a central manifold. This means I can shut off water to just the guest bathroom without affecting the kitchen.
The flexibility of PEX made snaking lines through joists a one-person job. I used copper stub-outs at the fixtures for a solid connection point for shutoff valves. This hybrid approach uses each material’s strength. The manifold cost a bit more upfront in tubing and fittings, but the diagnostic and repair simplicity it provides is worth every penny. It’s all about choosing the right pipes and installation practices.
Code & Compliance: The Rules Matter
Your local building code has the final say. The International Plumbing Code (IPC) and Uniform Plumbing Code (UPC) are the model standards most areas adopt or modify.
- Always call your local building department before you buy pipe. What’s fine in one town might be prohibited in the next.
- A common restriction involves PVC. Remember, white PVC pipe is for drains and irrigation only. Using it for your home’s drinking water is a code violation and a health risk.
- Some areas may have rules about where PEX can be run (e.g., not in exposed exterior walls) or require specific types of fittings.
Failing an inspection because you used the wrong pipe means tearing out your work and starting over. A five-minute call to the building department prevents this costly mistake.
The Red Flag Guide: Signs Your Pipes Are Too Small
Think of your home’s water pipes like highways. A two-lane road handles regular traffic fine, but the moment you add a semi-truck or a crash, everything slows to a crawl. Your plumbing works the same way. If the “highways” (your main supply lines) are too narrow, you’ll get traffic jams of water. Here’s how to spot them.
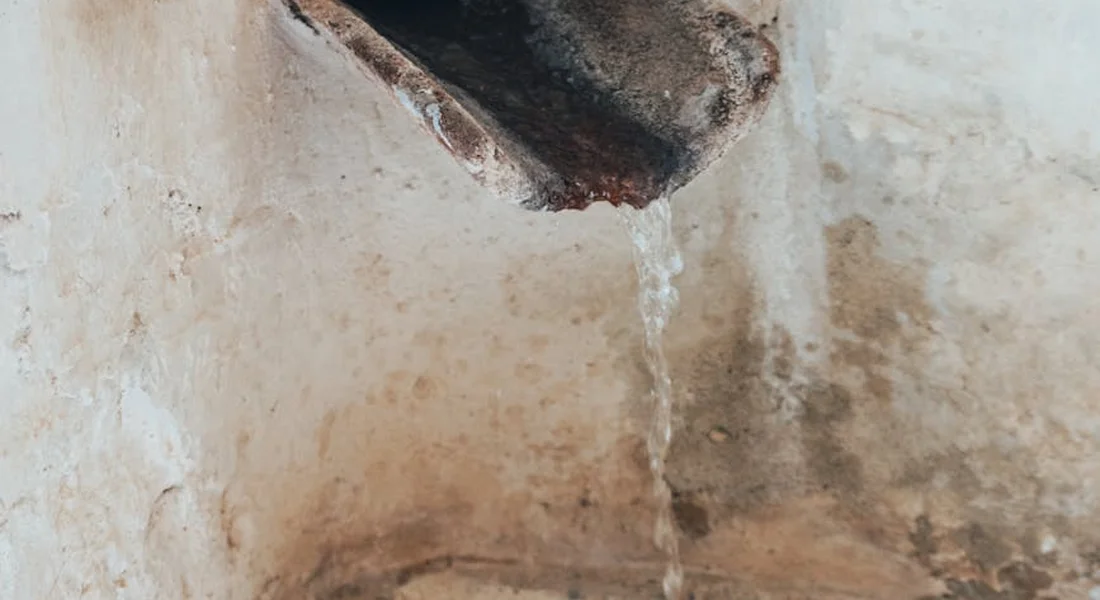
Symptom 1: The Dramatic Pressure Drop
This is the most common and telling sign. You’re in the shower and someone flushes a toilet. Instead of a slight dip, the shower turns into a sad, lukewarm trickle. If running two fixtures at once causes a drastic pressure loss in one or both, your supply lines cannot deliver enough volume to meet the simultaneous demand. A simple test: run the washing machine on a cold fill and immediately try to use an outdoor hose. If the hose sputters, you’ve found proof.
Symptom 2: Slow-Filling Toilets and Tubs
This isn’t about a lazy toilet fill valve. If it takes forever for your toilet tank to refill after a flush, or an age to fill a bathtub, the problem is likely at the source. The pipe feeding that fixture is too small to deliver water quickly enough. Check the shut-off valve behind the toilet first (make sure it’s fully open), but if that’s not it, the line is the culprit.
Symptom 3: Noisy Pipes (Water Hammer)
You turn off a faucet quickly and hear a loud bang or shudder in the walls. That’s water hammer. While it can be caused by missing air chambers, it’s often worse in systems with undersized pipes. The high velocity needed to push enough water through a small pipe creates greater momentum, which slams into closed valves with more force. I had this issue in my own home’s guest bath until I upsized the line during a renovation.
Symptom 4: Inadequate Flow for New Appliances
You install a fancy new shower system with multiple sprayers or a high-flow laundry station, but it performs terribly. Modern appliances and luxury fixtures are thirsty. They’re designed with the assumption that your home’s arteries are sized to modern standards (typically 3/4″ main lines). Connecting them to old, undersized 1/2″ supply pipes is like trying to drink a thick milkshake through a coffee stirrer.
System Maintenance Roadmap
Undersized pipes don’t just annoy you, they stress your entire water system. The pipes themselves don’t need oil changes, but everything attached to them will.
Low pressure and high velocity caused by small pipes force your water softener and whole-house filter to work in a compromised state. The constant strain can lead to premature media breakdown in a softener and much faster clogging of filter cartridges. You might find yourself changing sediment filters every month instead of every six.
Furthermore, equipment like tankless water heaters requires a minimum flow rate to activate. If your pipes can’t deliver that flow, the unit may cycle on and off erratically or fail to fire at all for smaller fixtures. Always check your home’s flow capacity before investing in such appliances.
The DIY vs. Pro Verdict on Replacing Supply Lines
Figuring out what you can handle yourself and what needs a pro saves you money and prevents disaster. Let’s draw that line clearly.
Difficulty Ratings for Common Jobs
Not all pipe work is created equal. Here’s a straightforward rating from my own tool bag to your project.
| Task | Difficulty (1-10) | Why This Rating? |
|---|---|---|
| Replacing a faucet or toilet supply line (braided hose) | 2/10 | It’s mostly about turning two nuts. The main risk is an old valve that won’t shut off completely. |
| Installing an appliance line (washer, ice maker) | 3/10 | Requires finding the right saddle valve or existing outlet and making a clean connection. Leaks here cause major damage. |
| Running a new PEX line to a single fixture | 5/10 | You need to know how to properly cut, crimp, and route PEX. One bad crimp ring equals a future flood. |
| Re-piping the main 3/4″ or 1″ supply line from the street/meter | 8/10 | This is high-stakes. It involves main shut-offs, potential street permits, and managing high-pressure water for the entire house. |
| A whole-house re-pipe (all new lines) | 9/10 | A massive project requiring code knowledge, manifold planning, and extensive work inside walls and ceilings. Almost always a pro job. |
Where to Draw the Line: Your Scope vs. Theirs
Your zone as a capable homeowner is the “fixture supply.” This is the final 2 to 6 feet of pipe or hose that connects the water shut-off valve to your sink, toilet, or washing machine.
- You can absolutely replace a braided stainless steel sink hose.
- You can swap out plastic supply lines for your toilet.
- You can install a new copper or PEX stub-out for a faucet if you’re comfortable soldering or using push-to-connect fittings.
The job becomes a professional’s domain the moment you move upstream from those individual fixture shut-off valves.
Replacing the main 3/4″ line coming into your house, branching 1/2″ lines through your walls, or doing a full re-pipe requires a licensed plumber. They handle the building codes, the proper soldering of copper, the correct sizing of manifolds, and ensuring the entire system’s pressure integrity. I’ve fixed too many DIY “whole-house” jobs that had chronic low pressure or hidden leaks.
When NOT to Try This Yourself
Knowing when to stop is more important than knowing how to start. Call a pro immediately if any of these are true.
- You have old galvanized steel pipes. These pipes often corrode shut internally. Turning a nut on a 50-year-old galvanized fitting can cause it to snap or start a chain reaction of leaks down the line. In my own old house, I touched one to replace a valve and ended up re-piping the entire bathroom because the vibration broke a joint in the wall.
- Your project requires a permit. Most municipalities require a permit for any work on the main supply line or any plumbing inside walls. A pro pulls the permit, gets the inspection, and you get the paperwork that protects your home’s value and insurance.
- You are unsure about local codes. Codes dictate the right type of pipe (e.g., some areas ban certain plastics), required support intervals, and proper venting. Getting this wrong can fail inspection or, worse, create a health hazard.
- The leak or break is on the street side of your water meter. That pipe is almost always the responsibility of your municipal water authority. You dig that up, you’re liable for the repair bill.
If you see significant corrosion, hear water running inside walls, or lack a clear plan, put the wrench down and make the call. Paying for two hours of a plumber’s time is cheaper than paying for two weeks of hotel stay after a DIY flood.
Putting It All Together: A Recommended Approach
This can feel like a lot. You have fixture demands, pipe sizes, and material types swirling in your head. Take a breath. For most homeowners, the goal is simple: good pressure at every tap, now and when you add something later.
Start by checking what you already have before you decide to change anything. Look at the main line coming into your house. Find where it splits off to different areas. Knowing your existing framework is the first step to improving it.
If you’re solving a pressure issue, work backward from the problem fixture. Is it just one shower, or is every faucet on the second floor weak? A single fixture problem is often a clogged aerator or a faulty valve. A whole branch issue points to undersized piping or a blockage in that line.
Recommended Products
Your material choice depends entirely on the job’s scale. For small fixes and connections, you want convenience and reliability. For whole-house projects, you need durability and future flexibility.
For DIY fixture lines, use braided stainless steel hoses with built-in shutoffs. I have these on every toilet and sink in my house. They are flexible, resist bursting, and the integrated valve lets you turn off the water right at the appliance without hunting for a wall shutoff. It’s a clean, professional-looking upgrade.
For a repipe or a major branch line replacement, you generally have two excellent paths. Use Uponor PEX-A (for expandability) or copper Type L (for longevity and universal code acceptance).
- PEX-A (Uponor): This is what I used when I repiped my own basement. The expansion fittings are massive and incredibly reliable. The pipe is flexible, so you use fewer fittings, which means fewer potential leak points. It handles freeze expansion better than any other material.
- Copper Type L: This is the gold standard for a reason. Every plumber knows how to work with it, and every inspector will pass it. It has a proven 50+ year lifespan when the water chemistry isn’t corrosive. It’s rigid and requires more skill to solder, but you’ll never wonder if it’s up to code.
When to Seek Professional Help
There is a clear line where a pro with the right tools and knowledge saves you time, money, and a huge headache.
Call a licensed plumber if your problem is at the main water line, involves the water meter, or stems from your well pressure tank. Tampering with the meter or the main shutoff can involve your utility company and lead to very costly leaks. Well system pressure is a delicate balance of tank, switch, and pump; misdiagnosing it can burn out expensive components.
You need a professional for a full system redesign or if you’re adding multiple high-demand fixtures like a large shower system and a laundry room on the same branch. A pro will perform a proper hydraulic calculation. This is a math-based assessment of your home’s peak demand, pipe lengths, and friction loss that determines the exact pipe size needed. It’s not guesswork.
If you open a wall and find a maze of old galvanized pipes or confusing connections, stop and make a call. What looks like a simple swap can turn into a multi-day excavation project fast. A good plumber can see the whole system and give you options you didn’t know you had.
Common Questions
How do I check if my home’s starting water pressure is strong enough?
Screw a pressure gauge onto an outdoor hose bib. With all water off inside, open the bib to get a reading. Consistent pressure below 40 PSI means you’re starting at a disadvantage and should investigate further before sizing any new lines.
I’m planning to add a water softener or irrigation system later. Should I upsize my main line now?
Yes, absolutely. Both systems create a significant pressure drop and demand high flow. Upsizing your main supply line by one size (e.g., from 3/4″ to 1″) during initial work is far cheaper than replacing pipes inside finished walls later.
Does having a well versus city water change how I size my pipes?
It changes your starting point. With city water, your pressure is largely set. With a well, your pump’s gallons-per-minute (GPM) output is your limiting factor. You must size your pipes to match your pump’s capacity, or you’ll have low flow no matter how big the pipe is. For residential wells, typical well pump GPM rates vary by depth and pump design. Knowing the [typical well pump GPM rates](https://watersystemwiki.com/typical-well-pump-gpm-rates-residential) for residential use helps you estimate demand and plan storage or pressure control.
What’s the biggest mistake homeowners make when installing luxury showers or tubs?
They run standard 1/2″ supply lines. High-flow fixtures often require a dedicated 3/4″ line to deliver their promised performance. Always check the manufacturer’s required GPM and pipe size in the specs before the pipes go in the wall.
The farthest bathroom has poor pressure, but the main line is big enough. What’s wrong?
Distance and friction are likely the culprits. The longer the water travels, the more pressure it loses. If the branch lines running to that far fixture are undersized (like old 1/2″ galvanized pipe), they can’t deliver the volume the main line provides, causing a weak flow.
Putting It All Together
Your fixture demand decides your main line size, not the other way around. Start by adding up your home’s total fixture units to get the right number, then choose a durable pipe material you trust. Never size a line based on what’s cheapest or already in your wall; a pipe that’s too small creates constant pressure problems no adjustment can fix.
Bob McArthur
Bob is a an HVAC and plumbing industry veteran. He has professionally helped homeowners resolve issues around water softeners, heaters and all things related to water systems and plumbing around their homes. His trusted advice has helped countless of his clients save time, money and effort in home water systems maintenance and he now here to help you and give you first hand actionable advice. In his spare time, Bob also reviews home water systems such as tankless heaters, water softeners etc and helps home owners make the best choice for their dwelling. He lives around the Detroit area and occasionally consults on residential and commercial projects. Feel free to reach out to him via the contact us form.