Stuck Well Pump? Here’s How to Fix It Yourself
Your water just stopped. You checked the breaker and it’s fine, but the pump won’t kick on. That silent well cap means your pump is stuck.
We will cover the three most common reasons pumps jam, how to safely check each one, and the step-by-step fixes you can do right now.
I’ve been pulling and fixing pumps for 20 years. Most of the time, this is a simple problem you can handle without a $1,000 service call.
What Makes a Well Pump Get Stuck in the First Place?
When your well pump is stuck, it’s not taking a break. It’s mechanically bound or jammed in place. Think of it like a bolt that’s rusted frozen in a threaded hole. You can’t just unscrew it. You have to break it free. If it can’t be freed, replacing the well pump might be the practical next step.
These pumps sit in the same spot for years, sometimes decades. During that time, minerals in your water slowly deposit on the metal surfaces. This scale acts like concrete, cementing the pump and its pipes to the well casing. Time is the main ingredient here.
It’s like a garden hose left connected to an outdoor spigot for ten years. The threads fuse together, and you need serious force (and maybe penetrating oil) to get it apart. Your well pump lives in a much harsher, wetter environment, especially when you need to disassemble it for maintenance.
The problem is almost always one of seven common issues with water lines. Knowing which one you’re facing is the first step to getting your water flowing again.
The 7 Most Likely Culprits for a Stuck Pump
Here are the reasons your pump won’t budge, from most to least common for a typical homeowner.
Mineral Buildup and Scale: The Concrete in Your Well
If you have hard water, this is your culprit. Dissolved calcium and magnesium carbonate precipitate out, forming rock-like scale. Iron in the water creates a rust-colored sludge that hardens like pottery. This glue bonds the pump’s exterior and the drop pipe to the well casing.
This is the most common reason for a pump that was working but now won’t come up for service or replacement. It builds up slowly, so the pump gets tighter every year.
- Likelihood: Very High in areas with hard or iron-rich water.
- Difficulty to Fix: Medium. It often requires chemical treatment (like muriatic acid) and careful mechanical persuasion.
Corrosion and Rust: When Metal Just Gives Up
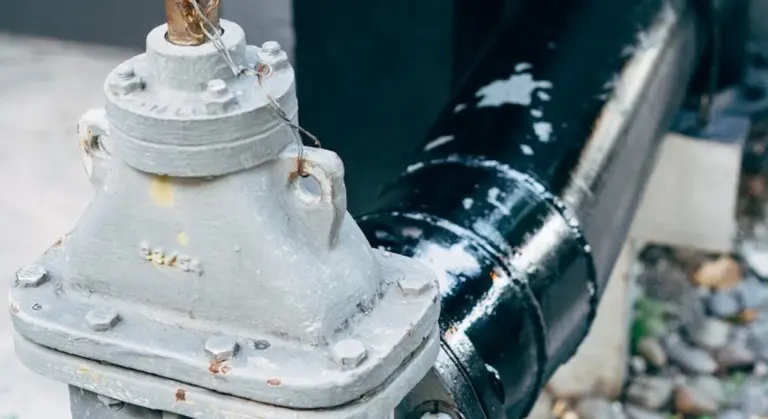
Steel rusts. Galvanized steel drop pipe, steel pump fittings, or the pump housing itself can corrode over time. As the metal rusts, it swells. This increased diameter can create a perfect, tight lock against the inside of the well casing.
This is a bigger risk with older systems that used galvanized steel pipe instead of modern schedule 80 or 120 PVC. I’ve pulled up pipes where the rust was so bad the metal flaked apart in my hands.
- Likelihood: High in older wells (30+ years).
- Difficulty to Fix: High. Rusty metal is weak. Applying force often breaks the pipe, leaving the pump down the hole.
Debris and Sediment: The Well’s Natural Grip
Wells aren’t clean holes. Sand, silt, and small gravel are always present. If the well screen becomes compromised or there’s a major disturbance (like a nearby earthquake or construction), this material can slump around the pump. A severe drought that lowers the water table can also cause sediment to settle and pack in. This buildup can reduce flow and lead to no water flow from the pump. Early recognition helps address no water flow well pump issues before damage worsens.
It’s like your pump sank into quicksand that then dried and hardened around it.
- Likelihood: Medium, especially in shallow or sandy wells.
- Difficulty to Fix: Variable. Sometimes vigorous pumping or surging can loosen it. Other times, it’s a major digging job.
A Collapsed or Damaged Well Casing
The well casing is the liner that keeps the hole open. It can rust through, get crushed by shifting soil, or bend from earth movement. When the casing fails, it physically collapses inward, trapping the pump and pipes inside.
This is a major red flag and often requires a professional with a camera inspection to confirm. Recognize the warning signs of sump pump failure and how it’s diagnosed. Being proactive with diagnosis can prevent larger damage. Do not force the pump if you suspect this. You could cause a complete well failure.
- Likelihood: Low, but catastrophic when it happens.
- Difficulty to Fix: Very High. This is almost always a job for a well drilling company. You might need a new well.
The Pump Fell or Settled (It Happens)
The pump is heavy. It’s held up by a combination of the drop pipe’s strength and stainless steel pipe clamps. If a clamp fails, a fitting cracks, or the pipe itself shears, the pump can drop. It rarely falls to the bottom. Instead, it lodges at an angle, jamming itself against the side of the casing.
You’ll often hear a story of a loud bang or unusual noise from the well just before the water stopped.
- Likelihood: Low to Medium.
- Difficulty to Fix: High. You’re now dealing with a misaligned, heavy object in a deep, narrow hole.
Electrical Cable Snags
The pump’s power cable runs down the well alongside the drop pipe. If it wasn’t neatly strapped during installation, it can work its way loose over years of pump vibration. A loose cable can get pinched between the pipe and casing, or even wrap around the pipe, acting as a knot that prevents lifting.
This is a classic installation error that shows up years later when you try to pull the pump.
- Likelihood: Medium.
- Difficulty to Fix: Medium. It requires careful, alternating tension and slack on the pipe and cable to work the snag free.
Just Plain Old Age and Wear
Everything has a lifespan. The pump’s bearings can seize. Internal components can fail and lock the rotor. After 15-25 years of constant use, things just wear out and stop moving. This isn’t the pump getting stuck to the well, it’s the pump seizing up internally. Just like with any equipment, even well-maintained pumps will eventually depreciate and fail.
Consider this the pump’s final retirement party. It decided to stop working and is now refusing to leave its post.
- Likelihood: High for pumps older than 20 years.
- Difficulty to Fix: High. A seized pump is dead weight. You’re not fixing it, you’re extracting it for replacement.
Safety First: The Non-Negotiable Rules Before You Touch Anything
You can’t fix a pump if you get hurt. This process has real risks. I’ve been on service calls where someone skipped these steps and got a shocking surprise. Follow them exactly every single time.
Electricity and a deep, wet, metal well casing are a deadly combination that you must respect before any troubleshooting begins. Confined spaces add another layer of danger. Your goal here is to create a safe, zero-energy work zone.
1. Kill the Power at the Breaker Panel
Do not just flip the switch on the pressure control box. Go directly to your home’s main electrical panel. Find the breaker that controls the well pump and switch it to the OFF position. If it’s not clearly labeled, which is common, listen for the pump to cycle off when you flip breakers. Once you find it, put a piece of tape over it so no one accidentally turns it back on—especially if you’re dealing with a well pump pressure switch that has been tripping the breaker.
2. Verify It’s Dead with a Voltage Tester
This is the step people think they can skip. You cannot. Assuming the power is off is how accidents happen. Go to the pressure switch near your pressure tank. Carefully remove the cover. Use a non-contact voltage tester on the wires inside. Test on the line side terminals coming from the breaker. The tester should not beep or light up. Physically verifying with a tester is the only way to be sure the circuit is safe to work on.
3. Relieve All Water Pressure in the System
Your plumbing system holds pressure, even with the pump off. Before loosening any fittings, you must bleed that pressure out. Open the drain valve on your pressure tank and let the water flow out until it stops. Also, open a faucet on the highest floor of your house and the one closest to the pressure tank. You should hear air hissing and then water will stop flowing.
Gear Up: Your Basic Safety Kit
Put on safety glasses and heavy-duty work gloves before you proceed. Well caps are dirty, bolts can be rusty, and you’re dealing with confined spaces. Gloves protect your hands from sharp edges and give you a better grip. Safety glasses keep sediment and debris from falling into your eyes when you’re looking down the casing. It’s simple gear that makes a big difference.
Gathering Your Arsenal: Tools to Free (or Fish Out) a Stuck Pump
You cannot free a stuck well pump with just your hands. The right tools are not a suggestion; they are a requirement for safety and success. This list answers the exact question, “What tools do I need?” Having these tools ready before you touch the well casing prevents wasted time and avoids turning a simple stuck pump into a broken one. That prep also pays off when you’re replacing a well sump pump, a task known for its extra difficulty without proper tools. With the basics covered, you’ll be ready for the heavier steps ahead. We will start with the basics every homeowner should have and move to the gear for heavier work.
The Absolute Essentials
These are the tools you likely own or can easily rent. Do not skip any of them.
- Adjustable Wrenches: You need at least two. One holds the pipe steady while the other turns the fitting. This prevents twisting and damaging the drop pipe.
- Pipe Wrenches (2 is ideal): An 18-inch and a 24-inch wrench give you the leverage for stubborn connections. The second wrench acts as a backup holder, just like with the adjustables.
- Safety Gear: This means heavy leather gloves, safety glasses, and sturdy boots. Well casings have sharp edges, and pipes can slip.
- Work Lights: A good LED headlamp and a standalone shop light. You cannot see what you are doing down a dark well hole.
- Penetrating Oil (like PB Blaster): This is your first line of attack on a stuck union or fitting. Soak the connection points thoroughly and wait 15 minutes before you try to force anything.
For the “Fishing” and Pulling Operations
If the pump is not just stuck at the connection but seized in the casing, you move from loosening to extraction. This is where you learn how to fish a pump out of a well, and the primary tool to pull a pump out of a well is a mechanical hoist. The goal is to apply steady, controlled force.
- A Sturdy Well Cap Wrench: Many well caps are secured with specialty bolts. A proper wrench saves you from stripping them with pliers.
- A Come-Along (Hand Winch) or Pump Hoist: This is the core pulling tool. A come-along hooks to a solid overhead point, like a beam in your well house. A dedicated pump hoist is better but more expensive. My own garage hoist has pulled two pumps for me.
- Heavy-Duty Nylon Lifting Straps: Never use chain or rope that can kink. Nylon straps wrap securely around the pipe and connect to the hoist hook.
- Maybe a Helper: A second set of hands guides the pipe and watches for snags. Doing this alone is risky.
If You Need to Go Deeper: Specialized Gear
When a pump is really jammed or very deep, you face what the pros handle daily. This is the specialized well pulling equipment you are up against, and it is often the point where calling a professional becomes the smartest tool you use. They use truck-mounted rigs with powered hoists, pipe stands to manage hundreds of feet of drop pipe, and chain vises that can grip without crushing. For a DIYer, renting this gear is complex and costly. Knowing this limit saves you from a dangerous situation or causing a well collapse.
Step-by-Step: How to Free Your Stuck Submersible Pump

You can’t just yank it out. Work through these steps in order, starting with the gentlest method. Going straight to force is how you break a pipe 200 feet down.
Step 1: The Initial Inspection and “Talk Test”
Before you touch a tool, talk to your well. Ask it some questions by looking for obvious problems.
- Is the well seal cracked or loose? A bad seal can let debris fall in and jam things up.
- Check the pitless adapter fitting where the pipe exits the casing. Is it loose? Is there severe corrosion?
- Look at the wires and safety rope. Are they pinched or frayed at the top?
- Can you see the drop pipe? Does it look bent or kinked right at the entrance?
If the pipe is visibly crooked, you have a major alignment issue and should stop here and call a pro. This inspection takes five minutes and can save you a world of trouble.
Step 2: The Persuasion Phase (Gentle Methods)
If everything looks straight, it’s time for some gentle persuasion. The goal is to break the mineral bond holding the pump, not the pump itself.
Soak it with Penetrating Oil
Scale and rust act like glue. Penetrating oil can dissolve that bond. Don’t use motor oil or WD-40. Get a real penetrant like PB Blaster or Liquid Wrench.
- Remove the well seal or cap to expose the annular space (the gap between your drop pipe and the well casing).
- Slowly pour the oil down that gap. Aim to coat the entire circumference. You might use a small funnel.
- Let it soak. For hours. Overnight is better. The oil needs time to creep down and work.
- After soaking, gently try to lift the pipe again with your come-along or hoist.
This method solved a pump seizure on my neighbor’s well last fall, buying them another season before a full replacement. Patience is your most important tool here.
Try the Hydraulic Bounce Method
This is the first real application of force. You’re not jerking. You’re using steady, rhythmic pressure to “bounce” the pump loose from its scale prison.
- Secure your come-along or pulling hoist to a solid overhead point. The well casing itself is NOT a solid point.
- Attach the cable to your drop pipe securely, below any couplings.
- Apply steady, firm upward pressure until you feel resistance.
- Hold that tension, then slightly release and re-apply in a smooth, rhythmic pattern. Think of rocking a car out of snow, not snapping a tow strap.
This rhythmic pressure can often crack the scale seal where a single brutal pull would snap a pipe. If you feel a sudden give, stop pulling and slowly, manually lift the pipe to see if it’s free.
Step 3: The Problem-Solving Phase (If Gentle Fails)
No movement means a more complicated problem. You’re moving from persuasion to problem-solving.
Dealing with a Tangled or Snagged Cable
The safety rope or electrical cable can wrap around the pipe, especially if the pump wasn’t strapped properly during installation.
You will feel a tight, binding resistance. The solution is careful rotation, not more pulling.
- With tension on the pipe, try rotating it clockwise (tightening) very slowly.
- If it turns a bit and then binds, try rotating counter-clockwise.
- The goal is to unwind the snag. You may need to rotate slightly, pull a little, rotate again.
If rotation doesn’t help after a few tries, stop. Forcing it can twist and kink the pipe, creating a much bigger problem.
Using Torque and Tap: The Last DIY Resort
This is the line. Cross it knowing you might pay for a new well pump, new pipe, and a professional extraction.
The theory is simple: use vibration to break the bond. While one person applies cautious rotational force to the pipe with a large pipe wrench, another person taps the side of the well casing near the top with a heavy rubber mallet or a block of wood.
The vibrations from tapping can shake scale loose, while the torque helps break its grip.
Here is the strong warning. This technique risks:
- Twisting the pipe in two underground.
- Shearing the threads off the pump itself.
- Damaging the well casing liner.
- Making the situation so much worse a pro will charge you double.
If you try this, use tiny amounts of force. A slight turn. Gentle taps. If it doesn’t budge after a few attempts, your job is done. You’ve officially reached the limit of safe DIY. The next step involves a well service company with a pulling rig and a camera. Calling them now is cheaper than calling them after you’ve dropped half your pump system down the hole.
The Red Flags: When to Stop DIY and Call a Pro

Knowing when to step back is the most important DIY skill you can have. Pulling a stuck submersible pump is serious work. If you see any of these signs, put your tools down and call a well professional.
You suspect a collapsed casing.
The well casing is the permanent pipe lining your well. If it’s bent, crushed, or damaged, your pump is mechanically stuck. No amount of pulling will free it. Forcing a pump past a collapsed casing can permanently ruin your entire well, turning a pump repair into a $10,000+ well replacement. Signs include severe difficulty pulling *and* lowering the pipe, or a history of land subsidence near the wellhead, which can complicate repairing or rebuilding submersible well pumps.
The pump cable is severed or badly damaged.
You see cracked, frayed, or completely broken wires. This is an immediate electrical hazard. Working with a damaged power cable submerged in water risks severe shock or electrocution. Even if the pump isn’t stuck, this repair requires proper waterproof splices and should be handled by a technician.
The drop pipe twists, deforms, or you hear cracking.
As you apply tension, the pipe above ground shouldn’t twist or look like it’s stretching. Creaking or sharp cracking sounds are bad news. This means the pulling force is exceeding the pipe’s strength, and it’s about to snap. If the pipe breaks and falls down the well, you’ve just created a much more complex and expensive fishing job.
The pump is over 150 feet deep.
This is a hard rule. The weight and water pressure at that depth are immense. You need a well rig, a winch, and pipe handling tools to safely manage the extreme forces involved. I once helped a neighbor attempt a 180-foot pull with a truck. The stress on the pipe was terrifying. We stopped immediately and called a pro with the right equipment.
The gentle methods failed completely.
You’ve tried rocking the pipe and using a surge of water. The pump hasn’t budged an inch. At this point, continued DIY effort is usually a waste of your weekend and increases the risk of causing secondary damage. A professional has specialized tools, like a well rig with sustained, controlled force and jetting equipment, to solve problems you simply can’t.
Your Well Pump Maintenance Roadmap: Stop Sticking for Good
The best way to fix a stuck pump is to never let it get stuck. It comes down to a simple, consistent schedule. Think of it like changing the oil in your truck. Skip it, and you’re asking for a costly breakdown. Follow it, and your pump will run for years.
Sticking happens slowly, so your prevention needs to be consistent. This three-part plan covers what you can do each year, what to leave to a pro every few years, and the smart choices to make if you’re ever putting in a new pump.
Annual Check-Up (Every Spring)
Pick a nice day each spring and give your wellhead 15 minutes of attention. You’re looking for early warning signs.
- Visually inspect the wellhead, cap, and wiring for integrity. Look for cracks in the well cap, rodent damage to wires, or a sunken well casing. A damaged seal can let debris and insects in, leading to clogs and corrosion around your pump.
- Listen for any unusual pump sounds (scraping, grinding). When the pump kicks on, put your ear near the well cap. You should hear a steady hum. Any new rattling, grinding, or screeching means something is starting to wear or bind down below. Write down what you hear; it helps a pro diagnose later.
- Test your water for iron and hardness to gauge scale potential. Use a simple test strip from any hardware store. High iron and hardness minerals are the number one cause of scale cementing a pump in place. If your numbers are climbing, you know scale is building up faster.
I keep a logbook in my garage for this. One column for the date, one for what I saw and heard, and one for the test results. It’s the easiest way to spot a trend before it becomes an emergency.
Every 3-5 Years: The Pro Visit
Even with perfect yearly checks, you need a deeper look. This is not a DIY moment. A licensed well contractor has the tools and experience to see what you can’t.
- Schedule a professional inspection and water test. They can check the pump’s amperage draw, which tells them if the motor is working too hard. They’ll run a full water analysis that finds problems test strips miss, like specific minerals that cause rapid scaling. A pro can spot minor issues like a slightly bowed pipe or early corrosion before they become pump-trapping disasters.
- Consider a preventative acid treatment if scale buildup is known to be rapid in your area. This is a pro job only. They circulate a mild acid solution down the well to dissolve existing mineral scale from the pump and casing. It’s like a root canal for your well – not fun, but it prevents a much bigger problem. If your annual tests show high minerals or your pump cycles more often, talk to your contractor about this.
At Installation: Set Yourself Up for Success
Most pumps get stuck because of movement and corrosion. If you’re installing a new pump or replacing an old one, you have one chance to get it right. Spend a little more now to save thousands later.
- Advise using a torque arrestor to prevent pipe movement and a stainless steel cable guard. The torque arrestor acts like a shock absorber. It keeps the pump and pipes from spinning or banging against the well casing when the pump starts. That movement causes wear and can jam the pump. The stainless cable guard keeps the electrical cable safely tucked away from the drop pipe to prevent chafing.
- For new installs or replacements, consider using more corrosion-resistant materials. Skip the standard galvanized steel drop pipe. Choose rigid schedule 80 PVC or, better yet, stainless steel. It costs more upfront but laughs at corrosive water. Using corrosion-resistant pipe like stainless steel or rigid PVC is the single best way to prevent the pipe itself from rusting and fusing to the pump. On my own well replacement, I used stainless. It’s the last drop pipe I’ll ever buy.
Quick Answers
What’s the first thing I should try to free a stuck pump?
After ensuring the power is completely off, your first safe move is to apply a specialized penetrating oil down the well casing. Allow it to soak for several hours to dissolve mineral scale. Then, attempt a gentle, rhythmic pull with a proper hoist-never a jerking motion.
What are the absolute essential tools I need to attempt this?
You must have a way to apply controlled force, like a sturdy come-along or pump hoist, and heavy-duty nylon lifting straps. You also need two large pipe wrenches for fittings, a voltage tester for safety, and penetrating oil. Without these, you risk injury or damage.
What’s the biggest risk if I keep forcing a pump that won’t budge?
The primary risk is snapping the drop pipe. This turns a simple extraction into a complex “fishing” job where the pump is lost in the well, drastically increasing repair costs. Forcing it can also damage the well casing itself, compromising your entire water source.
Is there a clear rule for when to call a professional?
Yes. Call a pro immediately if the pump is over 150 feet deep, if you see a bent pipe or suspect a collapsed casing, or if your careful initial efforts fail completely. Their specialized rigs and experience manage risks you can’t safely handle alone.
If I do regular maintenance, can I completely prevent a stuck pump?
While you can’t prevent all causes, you can greatly reduce the risk. Annual visual checks and professional inspections every 3-5 years are key. The most effective prevention happens at installation: using a torque arrestor and corrosion-resistant pipe like stainless steel.
Final Tips for a Free-Flowing Well
The single most important thing is to work through the basics methodically: check your power, listen for the pump, and inspect the pressure tank before you assume the worst. A surprising number of “stuck” pumps are just tripped breakers, blown fuses, or waterlogged tanks that you can handle yourself. For everything else, from deep sediment to a failed motor, calling a licensed well professional is the safe, smart move that protects your system and your wallet.
Bob McArthur
Bob is a an HVAC and plumbing industry veteran. He has professionally helped homeowners resolve issues around water softeners, heaters and all things related to water systems and plumbing around their homes. His trusted advice has helped countless of his clients save time, money and effort in home water systems maintenance and he now here to help you and give you first hand actionable advice. In his spare time, Bob also reviews home water systems such as tankless heaters, water softeners etc and helps home owners make the best choice for their dwelling. He lives around the Detroit area and occasionally consults on residential and commercial projects. Feel free to reach out to him via the contact us form.