Sump Pump Venting and Weep Holes: What You Need to Know
You’re installing a sump pump and worried you’ll miss a detail that floods your basement. Get the venting and weep hole right, and you stop that worry cold.
We will cover the exact venting rules for safe operation, what a weep hole really does for your pump, and the straightforward steps to install it all correctly.
I’ve wired and plumbed these in a hundred basements, including my own. Skip the weep hole, and you’re buying a new pump when the float switch jams in a year.
First, Let’s Talk About What a Sump Pump System Really Is
Think of it as a team of four parts working together to keep your basement dry.
- The Pit (or Basin): This is the hole in your floor, usually lined with a plastic or concrete sleeve. It’s a collection point. Water from the ground or your foundation drains flows into it.
- The Pump: This is the mechanical unit that sits inside the pit. When water in the pit reaches a certain height, a float switch turns the pump on.
- The Discharge Pipe: This is the pipe that carries the pumped water away from your house. It connects to the pump and runs up and out, usually to your yard or a storm drain.
- The Check Valve: This is a one-way valve installed on the discharge pipe inside the basement. It stops the water in the pipe from flowing back into the pit after the pump shuts off.
Here’s the simple science. Water in the soil creates pressure (hydrostatic pressure) against your foundation. It will always move toward the path of least resistance, which is often through cracks or porous concrete into the dedicated low point you made for it, the sump pit. That’s why ideal dry sump pit conditions matter: proper sizing, sealing, and ventilation keep the pit dry and allow water to drain away efficiently. When these conditions are met, moisture is less likely to affect the foundation and interior spaces.
You need to know the difference between the pit and the pump because they fail in different ways. A cracked pit liner means water leaks back into the soil. A failed pump means the water just sits there and rises.
Do I Need to Vent My Sump Pump Discharge Line? The Simple Truth
No. A sump pump discharge line does not need a traditional plumbing vent like your sink drain does. That vent is for sewer gases. Your sump line is only moving clean(ish) groundwater, so it doesn’t need to be vented.
When people ask about “venting” a sump pump, they’re almost always talking about preventing an air lock.
Here’s how an air lock happens. After the pump shuts off, the check valve closes. This traps water in the vertical section of the discharge pipe. When the pump starts again, it has to push against that entire column of water to get it moving. If the pump isn’t powerful enough, or if the column is very tall, the pump can just churn uselessly. It’s like trying to drink from a straw with your finger blocking the top.
The solution isn’t a vent, it’s a simple weep hole (sometimes called an air relief hole).
You drill a small hole (about 1/8″ to 1/4″) in the discharge pipe, just below the check valve and above the pit cover. This hole lets air into the pipe between the pump and the check valve, breaking the suction lock and allowing the pump to start easily.
When NOT to Try This
Never, ever connect your sump pump discharge pipe to a chimney flue or a furnace exhaust vent. I’ve seen this asked online (“can sump pump vent go to chimney”). This is a major code violation and incredibly dangerous. Sump pump discharge hoses should always be routed properly to the outside, away from your foundation. Those vents are for combustion gases like carbon monoxide. Tying into them can force those lethal gases back into your home. Always discharge to the outside air, away from your foundation.
The Weep Hole: Your Pump’s Secret Lifesaver

A weep hole is a small, drilled opening in your sump pump’s discharge pipe. You make it yourself after installation. Its job is simple but critical. It’s one of the sump pump components you handle during installation.
You drill this hole in the vertical section of pipe, between the pump itself and the check valve. The size is small, between 1/8 inch and 1/4 inch in diameter.
The sole purpose of a weep hole is to prevent an air lock, which will burn out your pump motor in seconds.
Here is how an air lock happens. After the pump shuts off, water in the vertical discharge pipe above the check valve flows back down. The check valve slams shut to stop it. This can create a vacuum, trapping air in the pump’s discharge chamber. On the next cycle, the pump impeller spins against this trapped air pocket instead of water. It cannot build pressure. The motor overheats and fails. It is called “air locking” or “hydraulic locking.”
Think of it like trying to drink a thick milkshake with a straw that has a tiny clog near the top. You suck hard but get nothing but air. Your pump “sucks hard” too, but with no water to cool it, the motor burns up.
So, do all sump pumps need a weep hole? Do you need a weep hole for a sump pump? The answer is specific. You must install a weep hole for a standard submersible sump pump that uses a check valve on the discharge line. The check valve creates the potential for an air lock, and the weep hole is the cure. Pedestal pumps or systems without a check valve generally do not need one. Always check your pump’s manual, but for a typical basement submersible setup, drilling that hole is non-negotiable. Understanding when a sump pump is necessary and how to install it properly are essential steps in any installation plan. This naturally leads into the broader topic of sump pump necessity and installation.
Installing It Right: Tools, Steps, and the Code Check
This is a manageable project. We will rate it a 4 out of 10 for difficulty. You are working with PVC pipe and a drill, but you are doing it in a damp pit, so care is needed.
Gather Your Tools and Materials
Get everything ready before you open the sump lid.
- Cordless drill and drill bits (1/8″ and 1/4″)
- PVC discharge pipe (schedule 40, correct diameter for your pump)
- PVC slip-fit check valve
- PVC primer and solvent cement
- Hacksaw or PVC pipe cutter
- Tape measure and marker
- Adjustable wrench or channel-lock pliers
- Rags
Step 1: Dry-Fit the Discharge Line and Check Valve
Do not use glue yet. Assemble the pipe from the pump’s discharge port up to where it will exit the basin. Include the check valve in this run. The check valve arrow must point UP, indicating the direction of water flow away from the pump. Ensure you have a vertical section of pipe between the pump and the bottom of the check valve. This is where the weep hole will go. Mark all connection points for reference when you glue.
Step 2: Glue the System Together
Disassemble the dry-fit pipes. Working quickly, apply purple PVC primer to the fitting sockets and pipe ends. Follow with clear solvent cement. Assemble each joint with a firm quarter-turn twist. Hold each connection for 15 seconds to set. Work from the pump upward. Ensure the check valve orientation remains correct.
Drilling the Critical Weep Hole
Once the glue has set for a few minutes, locate the vertical pipe section between the pump discharge and the check valve. The hole must be below the check valve. Measure about 6 to 8 inches above the pump discharge port. Drill your pilot hole using the 1/8 inch bit. You can carefully enlarge it to 1/4 inch if desired. Do not make the hole larger than 1/4 inch, as it could reduce pumping efficiency. Clear any PVC shavings from the hole and the pit.
Step 3: Run the Discharge Pipe Outside
Connect your pipe from the check valve outlet to the exterior discharge point. Use appropriate wall penetrations and sealants. Support the pipe with hangers. The exterior end should terminate with a discharge fitting that directs water away from your foundation.
Code and Compliance Check
Your installation must follow local plumbing codes, which are often based on the International Plumbing Code (IPC) or Uniform Plumbing Code (UPC).
- A check valve is typically required by code on a sump pump discharge line.
- Discharge must not flow onto a public walkway or a neighboring property.
- Water must be directed away from your foundation, often to a storm drain, dry well, or drainage ditch.
- Some localities prohibit connecting sump discharge to the home’s sewer or septic system.
Always check with your local building department for specific requirements. A proper, code-compliant install prevents property damage and neighbor disputes.
Special Cases: Zoeller Pumps and Pedestal Pumps
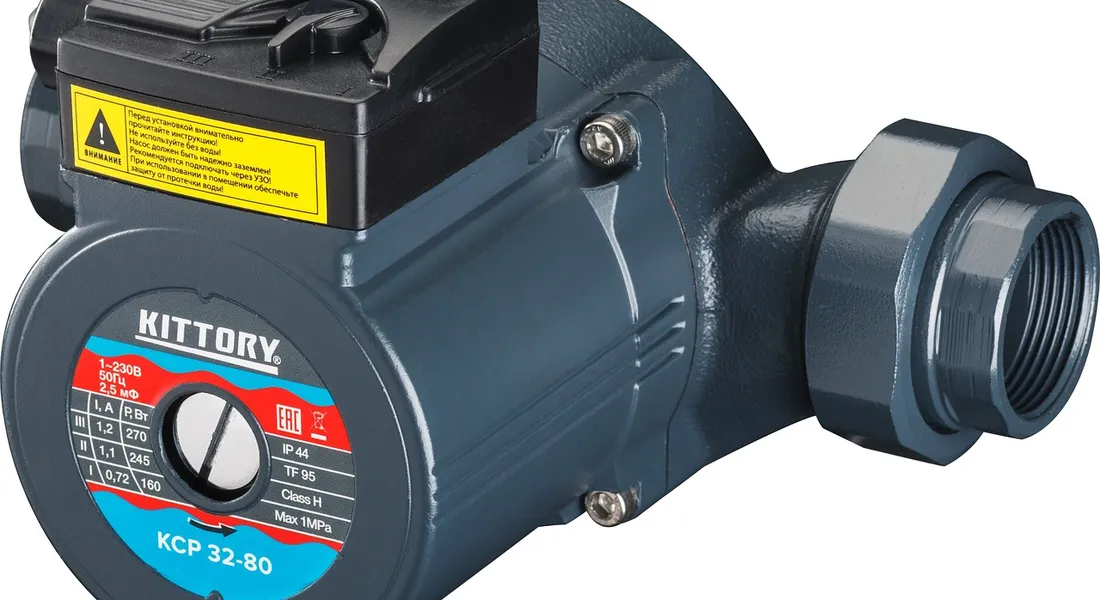
You might search for “do Zoeller sump pumps have a vent on them” because you’ve heard they’re top-tier. The answer is no, they don’t have a built-in vent. Even the best submersible pump, like a Zoeller, needs a weep hole drilled in the discharge pipe after the check valve. The quality of the pump doesn’t change the physics. Trapped air can lock any pump, no matter the brand name. The weep hole is a separate, necessary part of your piping system. Knowing this is especially important when you’re installing or replacing a Zoeller sump pump.
Pedestal pumps are a different story. These have a motor mounted on a column high above the sump pit. Pedestal pumps often don’t require a weep hole because the check valve is usually installed right at the pump outlet, above the water line in the pit. This placement means water can’t drain all the way back to the pump, so a full air lock typically can’t form. The small amount of air in the vertical pipe below the check valve isn’t enough to cause problems.
Keeping It Working: Your Sump Pump Maintenance Roadmap
System Maintenance Roadmap
Treat your sump pump like smoke detectors. Test it regularly so it doesn’t fail when you need it most. Follow this simple seasonal checklist.
- Every Spring and Before Big Storms: Pour a 5-gallon bucket of water into the pit. The pump should turn on, move the water, and turn off automatically.
- Every 3-6 Months: Visually check the weep hole on the discharge pipe. Use a small nail or wire to clear any mineral buildup or debris blocking it.
- Every Fall: Go outside and clear leaves, dirt, and sticks from the discharge pipe exit. Make sure water can flow away from your foundation freely.
- Once a Year: Unplug the pump, remove the cover, and clean the sump pit. Shovel out gravel, sand, and sludge that can jam the pump or float switch.
The “Red Flag” Troubleshooting Guide
Your pump will tell you when something is wrong. Listen and look for these signs.
- Pump cycles constantly but moves little or no water. This is the classic air lock sign. Your first check is the weep hole. If it’s clear, the check valve might be stuck or installed backwards.
- You hear a loud “thwump” or hammering sound when the pump shuts off. This is water hammer. It means your check valve is slamming closed, often because there’s no weep hole to relieve pressure, and it will damage your pipes.
- The motor hums but doesn’t start. The impeller is likely jammed by debris. You must unplug the pump and clear it.
- Visible rust, cracks, or leaks on the discharge pipe. This is a physical failure that needs immediate repair before the pipe bursts under pressure.
- Water in the pit isn’t reaching the pump’s turn-on level. The float switch or sensor is either stuck, tangled, or has failed.
Personal Story “What Helped Me”
I’ve installed dozens of check valves. It’s easy to get turned around in a cramped pit and put it in backwards, which is a major headache to fix later. My trick is to take a bright zip tie and cinch it tightly around the discharge pipe, letting the tail point straight up in the direction of flow. During installation, I just line up the “UP” or flow arrow on the valve with the zip tie. It’s a foolproof guide that takes two seconds and saves a lot of cussing.
When to Call a Pro: The DIY vs. Professional Verdict
Knowing your limits saves money and prevents floods. Some jobs are straightforward swaps. Others need a licensed plumber or excavator.
Professional Help Section
Call a professional in these situations. The cost is worth the guarantee and avoided headache.
- Your existing discharge line is buried under a concrete slab. Excavating and repairing concrete is a major job. A pro has the tools and knowledge to patch the floor correctly and ensure the new pipe has proper slope.
- You need to dig a new discharge trench to meet code distance requirements. If water is dumping too close to your foundation, you need a trench to carry it away. This involves heavy machinery, knowing frost line depth, and proper backfilling.
- The installation requires new electrical work. This includes running a new dedicated circuit from your panel, installing a GFCI outlet in the pit, or wiring a battery backup system. If you’re not confident with your home’s wiring, hire an electrician.
- You must drill a new hole through your foundation wall or rim joist. Drilling through structural concrete or masonry requires a hammer drill and a core bit. Getting the size, angle, and location wrong can weaken the structure or cause a messy leak.
- The sump pit itself is failing or needs to be replaced. Digging out an old, broken pit and installing a new one is messy, heavy work that often involves working close to the foundation footings.
Reinforce the DIY Limits
Be realistic about what you can handle. Overconfidence leads to wet basements.
You can absolutely replace a failed pump with a new one and connect it to the existing discharge pipe. This is a common weekend project. You disconnect the old pump, remove the old check valve, and hook up the new components with new fittings. Just make sure the new pump matches the old one’s horsepower and outlet size.
You can also replace sections of above-ground discharge pipe that are cracked or leaking. Cutting out a bad section of PVC and gluing in a new piece with couplings is a basic plumbing skill.
You should not re-route a discharge line through a foundation wall without understanding structural implications. Hitting rebar or creating a crack can compromise your home’s integrity. You also need to properly seal the exterior penetration against water intrusion, which is a separate skillset.
You should not attempt to modify the sump pit’s location or depth unless you know where the underground footer drains tie in. You could sever the very pipes that are channeling water to the pit. If you’re digging or preparing the sump pit, plan the trench and drainage layout carefully before you start.
Recommended Products
If you are doing a DIY replacement or install, use reliable components. Don’t cheap out on the parts keeping your basement dry.
- Submersible pumps with vertical float switches. The float is protected inside the pump column, reducing the chance of getting stuck on pit walls or debris compared to tethered floats.
- Rugged thermoplastic or brass check valves. A good check valve prevents water from flowing back into the pit after the pump shuts off. Look for a clear model or one with a flow sight so you can see if it’s working.
- 1.5-inch schedule 40 PVC pipe for discharge lines. It’s the standard, durable, and easy to work with. Use PVC primer and cement for permanent joints.
- A sealed, gasketed lid for your sump pit. This prevents evaporation from adding humidity to your basement and stops debris from falling in. The one on my own system has a rubber gasket and locks down with thumbscrews.
- A quality battery backup system. Look for one with an alarm, automatic switchover, and a deep-cycle AGM battery. It’s not an area for bargain shopping.
Common Questions
What drill bit size should I use for the weep hole?
Use a 1/8-inch drill bit to start; you can carefully enlarge it to 1/4-inch if needed. Never go larger than 1/4-inch, as a bigger hole can significantly reduce your pump’s lifting power and efficiency. This small size is the perfect balance between preventing an air lock and maintaining strong water flow.
My weep hole sprays a little water. Is that normal?
Yes, a small trickle or spray when the pump runs is completely normal and indicates it’s working. The hole relieves air pressure, and a little water escape is part of that process. If you get a large, forceful stream, your hole may be too big or the check valve might be failing.
Do high-end pump brands, like Zoeller, include a built-in vent?
No, they do not. Even the best submersible pumps follow the same physics. The need for a weep hole is created by your check valve and piping, not the pump model. Always drill the hole in the discharge pipe per the instructions, regardless of the brand you bought.
Can I install the weep hole above the check valve?
Absolutely not. The hole must always be drilled below the check valve, on the vertical pipe section between the pump and the valve. A hole above the valve defeats its purpose and will cause water to constantly drain back into your pit, making the pump cycle endlessly.
I’ve heard about “venting” the pipe to the roof. Is that a good idea?
No, that is a misunderstanding and a potential problem. Sump discharge requires a weep hole, not a plumbing vent. Running a pipe to your roof is unnecessary, can freeze shut, and may violate code. Stick to the simple, proven method: a small drilled hole below the check valve.
Final Tips for Sump Pump Venting and Weep Holes
Always vent the discharge pipe to prevent airlock, a common reason sump pumps fail during heavy rain. Drill a small weep hole in the pipe above the pump so water can drain back, stopping corrosion and freeze damage before they start.
Written by Bob McArthur. Bob is a an HVAC and plumbing industry veteran. He has professionally helped homeowners resolve issues around water softeners, heaters and all things related to water systems and plumbing around their homes. His trusted advice has helped countless of his clients save time, money and effort in home water systems maintenance and he now here to help you and give you first hand actionable advice. In his spare time, Bob also reviews home water systems such as tankless heaters, water softeners etc and helps home owners make the best choice for their dwelling. He lives around the Detroit area and occasionally consults on residential and commercial projects. Feel free to reach out to him via the contact us form.