Air and Sediment in Water Pipes: The Top Causes Every Homeowner Should Know
Hearing sputtering from your faucets or spotting grit in your water glass? Those are classic signs of air and sediment in your lines.
This article breaks it down straight. We will cover municipal water main work, drastic temperature swings, internal pipe corrosion, and sediment dumping from your water heater.
I’ve been pulling apart and fixing residential water systems for over a decade. The main takeaway is this: identifying which cause you’re dealing with is 90% of the battle.
Your Water Lines Are Trying to Tell You Something
You turn on the tap. Instead of a smooth stream, it coughs and spits at you. You hear a sudden bang from the walls when the washing machine shuts off. Your glass of water looks milky for a few seconds. These are not ghosts in the machine. They are clear signals.
Air and sediment are the two main enemies of a quiet, reliable plumbing system. They work separately, but the chaos they create feels the same.
Think of your home’s plumbing like its bloodstream; air bubbles and mineral sediment are like cholesterol, slowing everything down and causing noisy, damaging blockages.
Let’s diagnose where these troublemakers come from, confirm the signs you’re seeing, and walk through the straightforward fixes you can often handle yourself.
What’s Making All That Air in Your Pipes?
If you’re asking “what causes air buildup in home water lines,” you usually have one of four specific system failures or events to blame. You might notice water line problems symptoms like banging pipes or fluctuating water pressure. The fix depends entirely on which one it is.
A Failing Well Pressure Tank
For homes on a well, this is suspect number one. Your pressure tank has a rubber bladder inside that separates water from air. When that bladder fails or becomes “waterlogged,” the air charge disappears and air gets pumped directly into your house lines.
You can check this by tapping the top and bottom of the tank; a hollow “ping” at the top and a solid “thud” at the bottom is good, but a solid thud everywhere means the tank is full of water and needs service or replacement. This is the direct answer to “can a bad pressure tank cause air in my lines.” Yes, it’s the most common reason.
Municipal Water Supply Interruptions
If you’re on city water, you didn’t escape the air. When the water department shuts off a main for repairs, the pipes can fill with air. When service is restored, that air gets pushed right to your faucets.
This air usually clears on its own after you run all your taps for a few minutes. If it doesn’t, the problem is likely inside your house.
Trapped Air from the Water Heater
This one tricks a lot of people. Your water heater doesn’t usually *introduce* air, but it is a major collection point. Air trapped inside during a refill or released from water during heating will gather at the top of the tank. Then, every time you open a hot tap, you get a burst of sputtering.
The simple check is to see if the sputtering happens only at your hot water taps. If it does, your water heater is the staging area for the problem.
Recent Plumbing Work
Any repair, from replacing a washing machine hose to installing a new filter system, introduces air into the lines. This is normal. You must “bleed” the air out by slowly opening the highest and farthest faucets in your house and letting them run until the stream is smooth.
If you’ve had work done and now have air, the system just needs to be purged; it’s not a defect, it’s a necessary step the plumber might have missed.
How Air Sneaks Into Your Hot Water Heating System
Let’s focus on that hot water sputter. The physics are simple: cold water holds dissolved air. When you heat that water in your tank, the air comes out of solution, like bubbles forming in a pot on the stove. These bubbles rise and collect at the highest points-the top of your heater and the peaks of your hot water pipes.
While some of this is normal, a corroded anode rod or a failing tank can accelerate corrosion and hydrogen gas production, which feels just like air at your tap. If your hot water has a rotten egg smell with the sputtering, the anode rod is the first thing to check. You should also check for rust signs on your hot water heater.
Is the sputtering isolated to your hot water taps? If yes, start your diagnosis at the water heater with a maintenance check. Drain a few gallons from the tank’s spigot to clear sediment that can trap air, and inspect the anode rod if you’re comfortable.
The Gritty Truth About Sediment Buildup
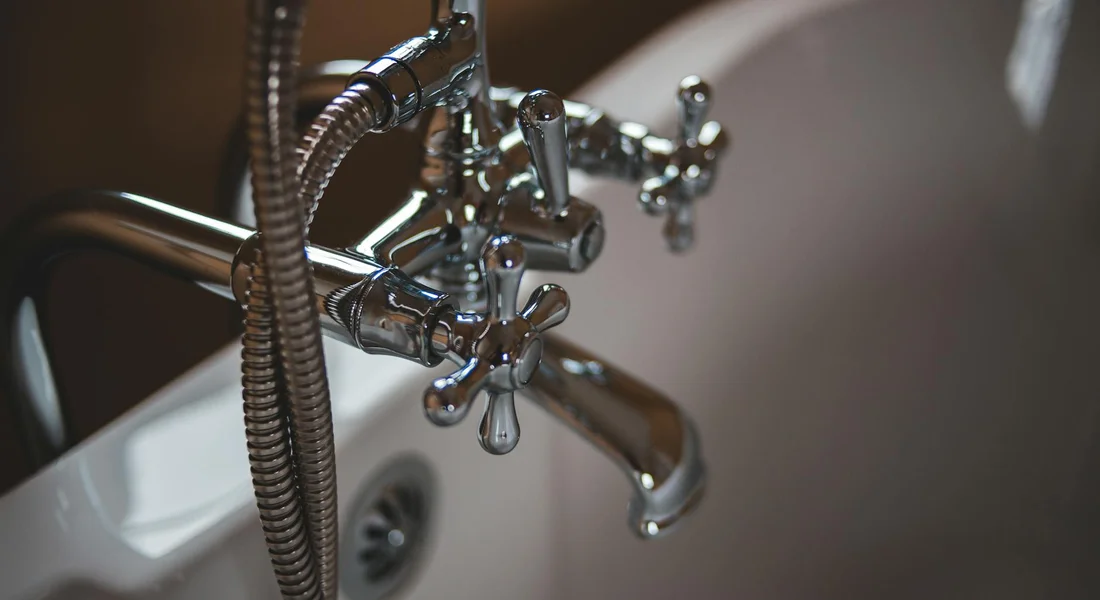
Sediment builds up in your water lines from one of two places. It either comes in with the water from your main supply or well, or it flakes off from the inside of your own pipes. Sediment can be difficult to remove.
Think of your plumbing like a slow moving river. It carries tiny particles. Over years, those particles settle in the low spots and corners of your pipes. The most common types are:
- Sand and Silt: Common with well water. You’ll feel gritty sand at the bottom of a glass or in your faucet aerator.
- Iron and Manganese: This is “rusty water.” It leaves orange, red, or brown stains on fixtures and laundry. Sometimes it appears as black specks.
- Calcium Carbonate (Limescale): This is the hard, white chalky stuff from hard water. It crusts on showerheads and forms white flakes.
- Pipe Corrosion Flakes: Old metal pipes rust from the inside out. These flakes are often rusty brown and can clog valves completely.
Water Science Snippet: Hardness and TDS
Hardness minerals (calcium and magnesium) are dissolved in water. Heat or pressure changes can force them to solidify into scale. Total Dissolved Solids (TDS) is a measure of all dissolved stuff in your water, including hardness minerals and salts. A high TDS number often means you have more material in the water that can potentially turn into sediment.
Your Water Heater: A Sediment Factory
Your water heater is ground zero for sediment problems. Heat causes dissolved minerals, especially calcium carbonate, to solidify much faster. They fall out of the water and collect at the bottom of the tank as a thick layer of scale. Identify and remove water heater sediment to maintain efficiency.
This isn’t just dirt. That layer acts like insulation between the burner or heating element and the water. Your heater works harder and longer to heat the same amount of water. You’ll hear rumbling or popping noises as steam bubbles try to push through the sediment layer.
Ignoring this will kill your water heater. The sediment causes overheating at the bottom of the tank, leading to premature failure.
This is why flushing your water heater tank annually is not just maintenance, it’s mandatory.
Do Your Pipes Themselves Cause Buildup?
Absolutely. The material your pipes are made from is a huge factor.
- Galvanized Steel: This is the worst offender. The zinc coating wears off over decades. The steel underneath rusts, creating rust sediment that flakes off and clogs everything. If you have persistent brown water and low pressure, old galvanized pipes are likely the main culprit.
- Copper: More resistant to corrosion but not perfect. In areas with acidic water, copper can develop pinhole leaks. It doesn’t create scale like steel, but it won’t stop sediment from coming in.
- PEX (Cross-linked Polyethylene): This plastic pipe is inert. It doesn’t corrode or add any sediment of its own. However, it does nothing to filter sediment already in the water. Any sand or rust coming from the main will travel right through it.
How to Spot Trouble: The Red Flag Checklist
You don’t need to guess. Your house gives you clear signals when air or sediment is in the lines.
Signs of Air in the Pipes
- Sputtering or spitting faucets when you first turn them on.
- Loud banging or vibrating in the pipes (water hammer) when a valve shuts off quickly.
- Irregular water flow, surging and slowing at the tap.
- A glass of water looks cloudy white but clears from the bottom up in a minute.
Signs of Sediment in the Pipes
- Reduced water pressure at multiple fixtures.
- Discolored water (brown, yellow, red) especially after first use in the morning.
- Grit collected in faucet aerators or at the bottom of toilet tanks.
- An earthy, metallic, or just “off” taste to your water.
If you experience a sudden major loss of pressure or widespread, persistent discoloration in all your taps, stop. This often indicates a major pipe break or heavy mainline sediment intrusion. Call a professional plumber now to assess the situation.
Fixing and Preventing Buildup: A Homeowner’s Action Plan
Dealing with air and sediment is a two part job. First, you clear out what’s already there. Then, you put systems in place to stop it from coming back. Here’s your mix of quick fixes and long term strategy.
DIY Air Removal and Sediment Flushing
You can handle these common tasks with basic tools. Just follow the steps and respect the safety warnings.
Bleeding Air from Your Pipes
If your faucets are spitting and sputtering, you likely have trapped air. This is often the easiest fix in plumbing.
- Start at the lowest faucet in your house, like a basement laundry sink.
- Turn the cold water on all the way. Let it run for two full minutes.
- Move to the next highest faucet and repeat. Work your way up to the highest faucet or shower on the top floor.
- Finally, flush every toilet in the house two or three times.
This process forces the air pockets up and out through the open faucets, restoring steady water flow.
Difficulty Rating: 2/10. It just takes time and patience.
Flushing Your Water Heater
Sediment settles at the bottom of the tank like sand in a glass. Flushing it out improves efficiency and extends the heater’s life. For Rheem tankless heaters, flushing sediment is a routine maintenance step to keep water flow smooth. Regular flushing helps prevent mineral buildup that can lessen performance over time. Safety is non negotiable here: the water is extremely hot and the system is under pressure.
- Turn off the power to an electric heater at the breaker, or set a gas heater’s thermostat to “Pilot.”
- Shut off the cold water supply valve at the top of the heater.
- Connect a garden hose to the drain valve at the bottom. Run the other end to a floor drain, utility sink, or outside.
- Open a hot water faucet somewhere in the house (like a bathroom sink) to prevent a vacuum.
- Carefully open the heater’s drain valve. Let the water flow until it runs completely clear. This can take 10 20 minutes.
- Close the drain valve, remove the hose, turn the cold water supply back on, and let the hot faucet run until all air is purged.
- Restore power or relight the pilot per the manufacturer’s instructions.
Difficulty Rating: 5/10. The steps are simple, but handling hot water and valves requires careful attention.
Tools & Material Checklist
- Garden Hose (standard, for heater flush)
- Bucket (for small spills or testing water)
- Channel lock Pliers (for stubborn valve handles)
- Flat head or Phillips Screwdriver (for removing faucet aerators)
Stopping Buildup at the Source: Your Defense System
How can buildup be prevented or reduced? You install barriers. Think of these products as your home’s water defense team.
- Sediment Filters (Spin down or Cartridge): A spin down filter has a screen you manually flush clean, while a cartridge filter traps dirt in a replaceable element. They catch sand, silt, and rust before it enters your home’s plumbing.
- Whole House Water Softeners: These swap scale forming minerals like calcium and magnesium for sodium, preventing the rock like limescale that acts like glue for other sediment.
- Air Elimination Valves: For homes with boilers or hydronic heating systems, this automatic valve vents trapped air to keep the closed loop system running quietly and efficiently.
Code & Compliance Check: Only use filters that are NSF/ANSI certified for drinking water, and always check your local plumbing codes before making permanent modifications to your water line.
Your Maintenance Roadmap
Consistency beats heroics every time. Stick to this simple schedule.
| Frequency | Task |
|---|---|
| Monthly | Check the pressure gauge on your well tank (if you have one). Walk your basement and look for any new leaks. |
| Annually | Flush the water heater. Replace sediment filter cartridges. Unscrew and clean faucet aerators and showerheads in vinegar. |
| Every 3 5 Years | Have a professional inspect the bladder in your well pressure tank. For tank style water heaters, a pro can check the anode rod and thermostat. |
The DIY vs. Pro Verdict: When to Make the Call
Knowing the line saves you money and prevents disasters.
DIY Territory: Bleeding air lines, flushing your water heater, replacing spin down filter screens or cartridge filters.
CALL A PRO: Diagnosing a water logged or failed well pressure tank, replacing main supply lines or whole house pipes, addressing major corrosion, any job involving gas lines or complex electrical connections (like a heater’s thermostat).
When NOT to Try This
- If you are unsure where the air or sediment is coming from (your house or the municipal main).
- If your home has extensive old galvanized steel piping, which is fragile and can snap.
- If the problem (like dirty water or low pressure) is affecting every house on your street. That’s a utility company issue.
What Helped Me: A Pro Tip from the Toolbox
In my old house, the upstairs bathroom faucet would sputter every single morning. I bled the lines monthly. It drove me nuts. Finally, I stopped treating the symptom and looked for the cause. I installed a simple automatic air vent on the highest horizontal pipe run in the basement, just before the line went up to the bathroom. It was a $30 part and 20 minutes of work. The sputtering stopped for good. Sometimes the fix is simpler than you think. The goal isn’t just to clear the air once, but to give it a permanent escape route.
Quick Answers
How can I tell if it’s air or sediment causing my issues?
Air makes faucets sputter and water look milky, but it clears quickly. Sediment reduces pressure, causes discoloration, and leaves grit in aerators. Isolate the problem by checking if it happens on only hot or all taps.
Can sudden pressure changes really introduce air?
Yes, rapidly. A pressure drop from a municipal main break or even a large fire hydrant use can suck air into pipes through loose fittings or a faulty pressure regulator. If sputtering starts after such an event, bleed your lines and monitor.
My water is clear but my aerators keep clogging. What gives?
That’s classic fine sediment. Tiny particles like silt or rust flakes travel unseen until they pile up at the screen. Regularly clean your aerators and consider a whole-house sediment filter to catch it at your main shutoff.
How does pipe material affect what kind of buildup I get?
Galvanized steel corrodes from the inside, adding rust flakes to your water. Copper is cleaner but can’t stop incoming minerals. Plastic pipes like PEX won’t add their own sediment, but they also won’t filter any out. For outdoor water lines, PEX can be a practical choice when installed with proper outdoor practices. Make sure to follow freeze-protection and burial guidelines. Inspect what you have.
What’s the single most important maintenance task to prevent sediment?
Flush your water heater annually. It’s the number one sediment collector in your home. Regularly draining your water heater prevents scale buildup that traps air, reduces efficiency, and leads to premature tank failure. Mark your calendar for this non-negotiable task.
Your Action Plan for Clear Water
Start by checking all valves and fittings for leaks every season to keep air out of your pipes. Install a sediment filter at your main shutoff and flush your water heater annually to stop debris from settling in.
Written by Bob McArthur. Bob is a an HVAC and plumbing industry veteran. He has professionally helped homeowners resolve issues around water softeners, heaters and all things related to water systems and plumbing around their homes. His trusted advice has helped countless of his clients save time, money and effort in home water systems maintenance and he now here to help you and give you first hand actionable advice. In his spare time, Bob also reviews home water systems such as tankless heaters, water softeners etc and helps home owners make the best choice for their dwelling. He lives around the Detroit area and occasionally consults on residential and commercial projects. Feel free to reach out to him via the contact us form.