DIY Sump Pump Cover: Build and Install It Right in a Day
Your sump pit is open. That means noise, dirt, and a real safety risk for kids or pets. A homemade cover solves all that.
We will cover picking the best materials, cutting and assembling the frame, fitting and fastening the cover, and keeping it serviceable.
I’ve installed and repaired hundreds of these systems. Here’s the straight talk: skip flimsy plywood and use outdoor-grade lumber from the start.
Why You Should Cover That Sump Pump Hole
An open sump pit is a hole in your basement floor asking for trouble. Covering it is one of the easiest and smartest upgrades you can make, but make sure to follow best practices for sump pump pit installation.
The Practical Benefits
Here is exactly what a good cover does for you.
- Keeps debris out. Dirt, small toys, and random basement junk will eventually find that hole. A cover stops them from falling in and clogging your pump’s intake.
- Reduces basement humidity and mold risk. An open pit lets damp air evaporate directly into your basement. Sealing the lid cuts down on this moisture source, making your dehumidifier’s job much easier.
- Contains musty odors. That damp, earthy smell from the pit stays in the pit when it’s properly covered and vented.
- Improves safety. It prevents trips and falls and keeps curious kids and pets from dropping things (or themselves) into the hole.
DIY vs. Buying a Pre-Made Cover
You can buy a plastic or metal cover. But building your own is often the better move.
A DIY cover costs less, usually under $50 in materials versus $100 or more for a pre-made unit. You also get to customize the size and shape for your odd-shaped pit. The biggest win is satisfaction. You built a solution that fits your home perfectly.
Are Transparent Sump Pump Covers Good?
Clear acrylic or polycarbonate lids let you check the water level and pump condition at a glance. That’s their one big advantage.
Wood is almost always the better choice for a DIY project. It’s easier to work with, cheaper, and provides a thermal break that reduces condensation on the lid. An acrylic sheet is tricky to cut without cracking and doesn’t insulate at all. If you need to see inside, install a small vent grill or cut a viewing port in a wooden lid and seal it with clear plastic.
What You Need: Tools and Materials for a Sump Pump Cover
You do not need fancy tools. A basic home workshop will handle this.
Your Material Shopping List
- Exterior-Grade Plywood (3/4″ thick): This is your main lid. The “exterior” grade uses waterproof glue.
- Weatherstripping Foam Tape: To seal the gap between the lid and the floor.
- Vent Grill (4″ x 4″ or similar): Crucial for allowing air pressure to equalize so the pump can drain properly.
- Heavy-Duty Hinges (2): For easy access.
- Handle or Pull: To lift the lid.
- Deck Screws (2.5″): For assembly.
- Wood Glue: For stronger joints.
- Paint or Polyurethane: To seal the wood from moisture.
Choosing Your Materials
Can you cover a sump pump with plywood? Absolutely. A 3/4-inch exterior-grade plywood sheet is the best material for the job. It’s strong, stable, and resists moisture. Seal all edges and faces properly with paint or polyurethane.
Avoid pressure-treated lumber for the lid. The chemicals can corrode metal components and the constant moisture exposure isn’t necessary for a sealed, painted lid. Save treated wood for outdoor projects.
Can you cover a sump pump with carpet? Never. Carpet is a sponge. It will soak up moisture, smell terrible, and become a mold factory right on your floor. Use solid, sealed materials only, especially for sump pump areas that are prone to odors.
Your Tool List
- Tape Measure
- Pencil
- Circular Saw or Jigsaw
- Drill/Driver
- Countersink Drill Bit
- Hole Saw (for the vent)
- Sanding Block
- Paintbrush
Getting Started: How to Measure Your Sump Pit Accurately
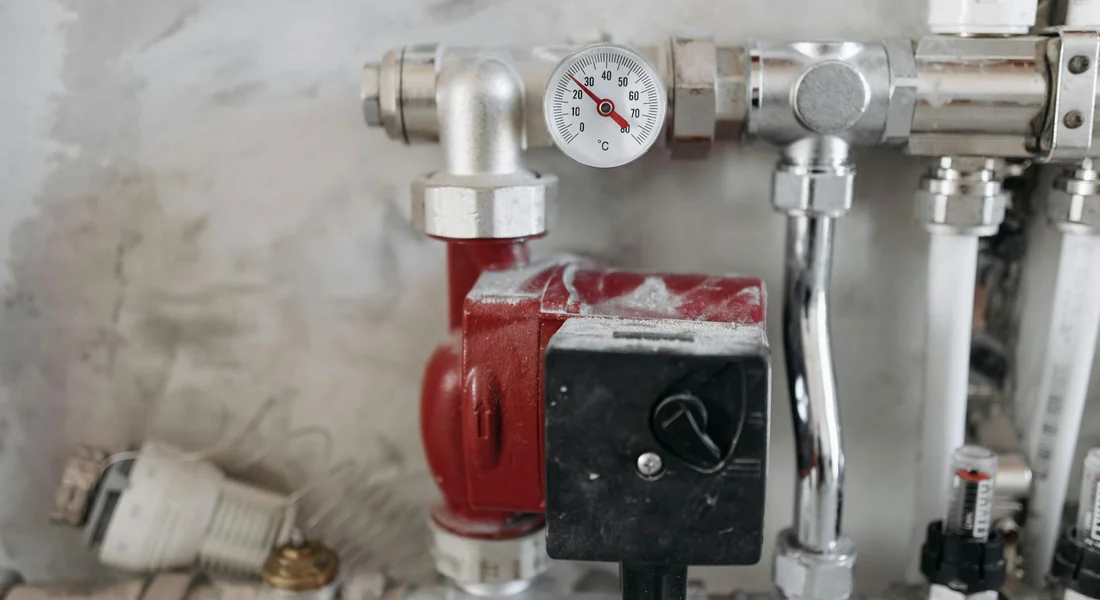
How do you measure your sump pit for a custom cover? You measure the rim it sits on, not the hole in the ground. This is the most common mistake. Measure the wrong part and your cover falls in or doesn’t sit flat.
Get a tape measure and follow these steps.
- Clear the area around the pit’s opening. Move any debris off the concrete lip.
- Measure the outside length of the rim. Place your tape measure on the outer edge of the concrete or plastic lip. Do not let it sag into the pit.
- Measure the outside width of the rim. Do this in a couple of places.
- Check for square. Use a carpenter’s square. If you don’t have one, measure diagonally from corner to corner. Both diagonal measurements should be equal. If they’re off by more than 1/4 inch, note it. Your cover may need a slight trim for a perfect fit.
- Note every obstruction. Look for discharge pipes, vent pipes, electrical conduits, and the pump power cord coming up through or near the pit. Write down their locations relative to the pit’s edge.
The finished cover must rest on the flat rim of the pit, not down inside it. This clearance is non-negotiable. A cover inside the pit can trap moisture, warp, and even interfere with the pump float.
The Build: Cutting, Assembling, and Adding Access
Now you have your numbers. Let’s build a cover that seals tight but gives you quick access.
Step 1: Cutting the Main Lid Panel
Use 3/4-inch exterior grade plywood for strength. Transfer your length and width measurements directly onto the plywood. Use a straightedge to draw your cut lines.
Cut just outside the line with a circular saw or jigsaw. You can always sand wood down, but you can’t add it back. A slightly oversized piece lets you fine tune the fit. Once cut, test the fit on the pit rim. It should sit flat with a little wiggle room. Sand the edges until it fits snugly on the rim without forcing it.
Step 2: Creating a Functional Access Panel
How do you create an access panel? You build a small door within the big lid. You don’t want to lift the entire heavy cover every time you check the pump.
Plan your panel. A good size is about 12×12 inches or large enough to get your hand and a shop vac hose through. Mark this rectangle on your main lid panel, positioning it so it clears the pump and any pipes.
Cutting and Hinging the Door
Use your jigsaw to cut out the access panel. You now have two pieces: the big lid with a hole, and the small door.
Attach the small door with two sturdy hinges. Place them on the back edge. Use hinges that allow the door to open a full 180 degrees so it lies flat out of the way.
Choosing a Latch
For the front edge, install a simple latch or a cabinet door catch. In my basement, I use a magnetic child safety latch. It holds firmly but releases with one hand. A small drawer pull screwed into the door makes lifting it easy.
Step 3: Sealing and Ventilating the Cover
This step answers two big questions: How do you seal against moisture and odors, and how do you ensure proper ventilation?
Sealing the Wood
Apply a water resistant sealant to every surface of the plywood. I use two coats of oil based polyurethane, sanding lightly between coats. This seals the wood from the humid pit air below and any minor spills above.
Sealing the Lid to the Pit
Run a strip of adhesive backed foam weatherstripping along the underside of the lid, near the outer edge. When you place the lid on the pit rim, this foam compresses to form an air and odor seal. It stops that musty basement smell from drifting up.
Adding a Vent
You must add a vent. A sealed lid can create a vacuum (pressure lock) that strains the pump motor and slows water flow.
Cut a 3 or 4 inch hole near one edge of the main lid, away from the access panel. Install a simple plastic soffit vent or louvered vent cover over the hole. This allows air to equalize pressure but keeps large debris out. Screw it down from the top.
Installation and Final Fit Check
You built the cover, now it’s time to install it for good. This is not just a drop-and-forget step. A proper fit keeps the system safe and functional.
Placing the Finished Cover
First, clear the sump pit rim of any dirt or old sealant. You need a clean, flat surface for a good seal. Have a helper if the cover is large or awkward. Carefully lower the cover straight down onto the pit. Make sure any pipe holes or notches you cut are aligned correctly, especially if you’re performing a replacement of the sump pump cover.
The cover should sit level and stable on the pit rim without you holding it. If it rocks, the rim isn’t level or your cover isn’t square. Shim the low side of the rim with a piece of plastic or composite shim, not wood which can rot.
Checking Access Panel Clearance
This is a common trip-up. Open the access panel or door all the way. Does it hit a discharge pipe, a wall, or the floor joist above? You need full, unobstructed access to the pump and check valve.
I learned this on a service call where a homeowner’s beautiful wooden hatch couldn’t open past 45 degrees. We had to cut the discharge pipe and add a 45-degree elbow to reroute it. Check this before you seal anything down.
Ensuring a Snug Seal
Press down gently on the cover edges. The weatherstripping or gasket material should compress slightly. You want a uniform, light pressure all the way around.
Look for any gaps or, just as bad, spots where the lid is visibly warping upward from excessive pressure. A gap lets in moist air and radon. A warped lid won’t seal evenly and will stress the material. If it’s warping, your cover is likely too small and is bridging the pit opening. You may need to add a supportive frame or lip.
Testing the Pump Cycle
Do not skip this. Pour about 5 gallons of water into the pit (use the access hole or the vent). Listen and watch. The pump should kick on, run, and shut off normally. The sound might be slightly muffled, which is fine.
Listen for new vibrations or rattles against the cover. Feel for excessive suction pulling the lid down, which means your vent might be blocked. The pump should operate exactly as it did without the cover, just quieter and safer.
Maintaining Your Pump with a Cover Installed
A cover should make pump care simpler, not a chore. It keeps out dust, bugs, and debris, so the pit stays cleaner. Your maintenance routine just gets a few small additions.
How do I maintain the sump pump with the cover installed?
You follow the same basic pump checks, but you now also inspect the cover itself. The goal is to ensure the seal is intact and the system stays dry and odor-free underneath.
Think of the cover as part of the pump system now, not just a cap. A failed seal or a clogged vent turns your sealed system into a potential problem.
Simple Seasonal Checklist
Do this quick check in the spring and fall, and before any forecast of heavy, sustained rains.
- Visual Inspection: Open the access panel. Look at the pump, float, and check valve. There should be no new standing water or slime. The pit should be noticeably cleaner than before you had a cover.
- Test Operation: Pour water to trigger the pump. Verify it starts, pumps out forcefully, and auto-shuts off.
- Clean the Vent Grill: Wipe or vacuum any dust or cobwebs from the vent screen or louver. This is crucial for air flow and preventing negative pressure.
- Check for Odors or Moisture: When you open the lid, take a sniff. A musty smell indicates moisture is getting trapped. Look for condensation on the underside of the cover or on the pipes. This points to a missing vapor barrier or a blocked vent.
The Cover Makes Maintenance Easier
Before my vinyl-covered pit, I’d pull off the old plywood lid every fall to find spider webs, silt, and toy army men my kids dropped in. Now, it’s just a clean, dry pit. I undo four latches and I’m looking at the pump in the sump pit.
A proper DIY cover eliminates the big cleanup, letting you focus on the actual pump mechanics. If your cover makes it harder to service the pump, you built it wrong. The access should be quick and total. The environment inside should be so clean that your biannual check takes five minutes, not twenty. And remember, drying out your pump cover is especially important during wet weather.
DIY Sump Pump Cover Safety and Code Red Flags
A cover is a simple piece of wood or plastic, but installing it wrong can cause big problems. This section answers the critical safety and code questions before you start cutting.
The “Red Flag” Troubleshooting Guide
Once your cover is on, you lose a direct view of the pump. You need to listen and feel for these warning signs instead. If you notice any of these, lift the cover and investigate immediately.
- Strange new noises or vibrations: A new grinding, screeching, or loud humming from under the cover usually means a failing pump motor or a stuck impeller. Your pump is telling you it’s about to quit.
- Frequent cycling with no rain: If the pump turns on and off every few minutes during dry weather, you likely have a high water table or a faulty float switch. This will burn out the pump motor fast.
- Water pooling on top of the cover: This is a major red flag. It means water is being discharged from the pump but then leaking back down around the discharge pipe seal or through the cover itself. Your pit is effectively recycling water, and the pump will run non-stop until it fails.
- A strong rotten egg smell: This is sewer gas (hydrogen sulfide). If your sump pit is also tied to a floor drain or sewer line, an airtight cover can trap dangerous gases in your basement. That vent hole is a safety feature, not an option.
- The pump fails to turn on during a test: The most critical test. Pour a bucket of water into the pit (through the vent hole) to trigger the float. No action means a tripped breaker, a dead pump, a stuck float, or a severed power cord.
Critical Safety and Code Considerations
Ignoring these rules can lead to pump failure, mold, or even dangerous gas buildup. Treat them as mandatory for any cover you build.
What are the safety considerations for a sump pump cover?
Your two main safety jobs are ventilation and electrical access.
Never create an airtight seal. The vent is non-negotiable. A sealed pit creates a vacuum that can lock the float switch in the “on” position, trapping sewer gases, and promoting explosive mold growth. Always drill at least one 2-inch vent hole and consider a screened vent cover to keep pests out.
Electrical safety is paramount. All wiring, the outlet, the plug, and the pump’s control box must stay accessible and completely dry. Never route the pump’s power cord under the edge of the cover where it can get pinched and frayed. Your cover design should let you unplug the pump without removing the whole lid.
Are there any building codes or regulations I need to follow?
Codes vary by city and county. Some municipalities, especially in areas with high radon, actually require a sealed and vented sump cover as part of radon mitigation systems. Others may have rules about the materials used or who can perform electrical work, particularly when it comes to sump pump installation.
Always check with your local building department before you build. A five-minute phone call can prevent you from failing a future home inspection. If your project involves splicing wires or adding a new circuit, hire a licensed electrician.
The DIY vs. Pro Verdict: Should You Build This Cover?
This is a classic homeowner project. Here’s where to draw the line between DIY and calling a professional.
Difficulty Rating: 3/10 for a basic plywood cover. If you can measure a square, operate a drill, and screw four boards together, you have the skills.
The DIY Scope: Any homeowner comfortable with a circular saw and drill can safely build and install a simple, vented plywood or plastic lid. The work is all above the floor. It involves no plumbing or electrical modification. In my own basement, I built a two-piece hinged cover from exterior plywood for easy pump access, and it’s worked perfectly for years.
The Pro Scope: Hire a plumber or electrician if you uncover issues. This includes needing to re-plumb the discharge pipe to get a better seal, moving the pump location, or fixing faulty wiring or a bad outlet. Most importantly, if your sump pit is connected to a active radon mitigation system, consult a radon specialist. Sealing it incorrectly can compromise the entire system and affect your home’s air quality.
Quick Answers
What’s the most common mistake when building a DIY cover?
The biggest error is using interior-grade materials like standard plywood or particle board. These will warp and rot from the constant humidity. Always use 3/4″ exterior-grade plywood and seal every surface with a quality paint or polyurethane for longevity.
How critical is the vent, and can I just drill a small hole?
The vent is a safety and operational necessity, not an option. A simple 4″ hole covered with a louvered grill prevents dangerous vacuum lock, allows proper pump drainage, and helps disperse any minor sewer gases. A small hole often clogs and is insufficient.
What’s the one tool I shouldn’t skip for a safe build?
A countersink drill bit. Driving screws flush without one leaves raised heads that create trip hazards and prevent a tight seal. Taking the extra second to countersink every screw makes the surface safe and professional.
Will this cover make it harder to service my pump?
It should make it easier. If your design doesn’t include a dedicated, generously-sized access panel with easy-open latches, you built it wrong. A good cover keeps the pit clean so you spend less time cleaning and more time on actual pump maintenance.
How do I check my local building codes for this project?
Call your local municipal building department. Be specific: ask if there are codes for sump pit covers, especially regarding radon mitigation sealing or required venting. This is a crucial 5-minute call that can prevent issues during a future home inspection.
Keep Your Sump Pump Cover Simple and Secure
Build your cover to fit the pit opening exactly, stopping moisture and pests from getting in. Always make sure you can remove it easily to reach the pump for any service it needs.
Written by Bob McArthur. Bob is a an HVAC and plumbing industry veteran. He has professionally helped homeowners resolve issues around water softeners, heaters and all things related to water systems and plumbing around their homes. His trusted advice has helped countless of his clients save time, money and effort in home water systems maintenance and he now here to help you and give you first hand actionable advice. In his spare time, Bob also reviews home water systems such as tankless heaters, water softeners etc and helps home owners make the best choice for their dwelling. He lives around the Detroit area and occasionally consults on residential and commercial projects. Feel free to reach out to him via the contact us form.