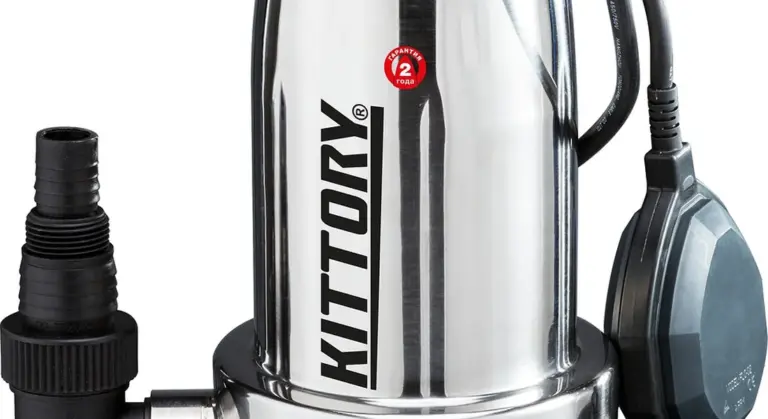
How to Drain Your Sump Pump and Protect Your Foundation
You see water pooling against your house after every rain, and you’re right to worry. That water is your foundation’s worst enemy.
We will cover the safe way to shut down and drain your sump pump, how to check the discharge line for clogs, and your best options for redirecting that water far from your home.
I’ve fixed enough flooded basements to know this isn’t complicated. Get this right, and you stop problems before they start.
Your Foundation’s Lifeline: How a Sump Pump System Works
A sump pump has one job. It moves groundwater away from your basement or crawlspace before it can seep in. Think of it as a mechanical bailer for your house’s foundation. If you’re looking to understand the basics, functions, and classifications of sump pumps, you’ll see how different models fit your needs.
The system is simple when you break it down. Water from the soil drains into a pit in your basement floor. A pump sits in that pit. When the water level rises, a float switch turns the pump on. The pump pushes the water up and out through a discharge pipe. A check valve on that pipe stops the water from flowing back down into the pit once the pump shuts off.
Discharging water is the critical final step; it’s not about the pump running, but where the water is sent. A pump that runs but dumps water right next to your house is failing its only job. That water will just seep back into the soil and into your pit, creating a useless, energy-wasting loop.
You must separate this from your gutter downspouts. Gutters handle surface water from your roof. Your sump pump handles groundwater from the earth. They are two different problems needing two different solutions. Never connect a gutter downspout directly into your sump pump discharge line. You will overwhelm the pump.
Also, never drain grey water from a laundry sink or utility tub into the sump pit. Soap scum and lint will coat the pump and switch, causing early failure. The debris clogs everything up. I’ve pulled pumps out that looked like they were made of fuzzy concrete from laundry water. This is one of the common causes of sump pump failure.
Gear Up: The Sump Pump Tool Kit and Safety First
Get your tools and materials together before you start. It saves multiple trips to the hardware store. Here is what you will need.
For clearing and inspecting the system:
- Wet/Dry Shop Vacuum
- Bucket
- Garden Hose (to flush the pit outside)
- Screwdrivers (flathead and Phillips)
- Utility Knife (for cutting old, stiff hoses)
For modifying or extending the discharge line:
- Hose Clamps
- Pipe Wrench or Channel-Lock Pliers
- Rigid PVC Pipe (Schedule 40, 1.5″ or 2″ is common)
- Flexible Discharge Hose (the corrugated kind)
- PVC Fittings (elbows, couplings, adapters)
- Splash Blocks (to direct water flow on the surface)
- Bury-rated Tubing or PVC for underground extensions
Before you touch anything, shut off the power to the sump pump at your home’s main circuit breaker panel, then unplug the pump from its outlet. Do not trust just the outlet switch. Work on a wet pump while it’s energized, and you risk a fatal shock. This is the non-negotiable first step. This also sets you up for proper maintenance and a safe disconnect sump pump. With the power off and the pump unplugged, you can inspect for wear, clean debris, and prepare for any service.
Wear gloves and safety glasses. The pit water is dirty, and you’ll be dealing with plastic burrs and rust.
Check your local building codes before you dig or run a new pipe. Many areas require discharge water to be directed a minimum distance from your foundation (often 10 to 20 feet) and may have rules about where you can send it, like a storm drain or dry well.
Step-by-Step: Draining, Cleaning, and Inspecting Your Pump
Your sump pump is usually in the basement’s lowest corner. If your basement is finished, look for a round plastic or metal lid in the floor. In my last house, it was tucked behind the water heater. Listen for it during a rainstorm to find it. You can then test and troubleshoot the pump as needed.
1. Cut the Power
This is non-negotiable. Water and electricity are a deadly mix. Safely shut down the well pump’s electrical connection. If it’s hardwired, find the correct circuit in your main electrical panel and flip that breaker off. Test that the power is off by trying to turn the pump on at its float switch before you touch anything.
2. Remove the Pump from the Pit
You’ll likely see a flexible hose or rigid pipe connected to the pump’s discharge port. There’s also a check valve on that pipe to stop water from flowing back into the pit. Loosen the hose clamp or disconnect the pipe fitting at the pump. You may need a screwdriver or pliers. Lift the pump straight up and out. Some water will spill, so have a bucket ready.
3. Clean the Pump and Scrub the Pit
Take the pump outside or to a utility sink. Use a garden hose to blast water through the intake screen and into the impeller housing at the bottom. This flushes out silt and small stones that grind down the impeller. Let it drain. For the pit, scoop out any debris like gravel or leaves. Scrub the sides with a stiff brush and rinse it clean. A dirty pit is the main reason pumps fail early. A clean sump pump pit helps prevent debris from re-entering the pump. Keeping the pit clean also reduces wear and simplifies future maintenance.
4. Inspect the Discharge Pipe
This is where most problems hide. Look at the entire pipe length from the pit to where it exits your house. Check for cracks, especially at joints. In winter, look for splits from ice. Shine a flashlight into the pipe to check for internal clogs from mud or roots, which can cause the pump to overwork and burn out. If you have a flexible hose, feel for soft spots or bulges.
5. Reattach Everything Securely
Lower the clean pump back into the dry pit. Connect the discharge pipe. If your old hose clamps are rusted or the PVC fitting is cracked, replace them. Do not reuse bad hardware. For PVC, use new pipe cement on the joint for a watertight seal. Plug the pump back in or restore power. Pour a 5-gallon bucket of water into the pit. The pump should turn on, move the water, and shut off automatically.
The Right Way to Redirect Water Away From Your House
The goal is simple. Move water far away so it can’t seep back to your foundation. Your discharge point should be at least 10 feet from your house’s wall. That gives the water room to soak into the ground safely.
Choosing Your Discharge Pipe Material
You have two main choices.
- Rigid PVC Pipe: This is the permanent, professional solution. It’s durable against sun and freezing. You bury it in a shallow trench. It costs more and takes more work to install, but you do it once.
- Flexible Discharge Hose: This is a temporary, seasonal fix. You attach it in the spring and take it off before winter. It’s easier to roll out and store, but it kinks, degrades in sunlight, and animals can chew it.
I use PVC for the main run from my house. I keep a short section of flexible hose for emergency rerouting during big storms.
How to Extend the Discharge Line
First, measure how far you need to go to hit that 10-foot mark. When you lay the pipe, it must slope downward away from your house. Aim for at least a 1/4-inch drop for every foot of pipe. This uses gravity to help the pump and prevents water from pooling inside the line. Secure every connection with stainless steel hose clamps (for hose) or proper solvent cement (for PVC). A leak at a joint undermines the whole system.
Where Should the Water Go?
You have a few good options:
- Splash Block: Direct the pipe onto a concrete or plastic splash block in your yard. This disperses the water flow so it doesn’t erode the soil.
- Dry Well: This is a buried pit filled with gravel. It’s excellent for heavy clay soil that doesn’t drain well. The water collects in the well and slowly soaks into the surrounding earth.
- Storm Drain or Ditch: Only if your local building codes explicitly allow it. Never connect to a sanitary sewer line.
Common Mistakes to Avoid
I’ve seen these cause flooding and arguments.
- Draining onto a neighbor’s property: This is a fast way to create legal trouble. The water is your responsibility to manage on your lot.
- Creating an ice hazard in winter: If you leave a hose attached, water trapped in it will freeze, blocking the pipe. The pump will run but can’t discharge, leading to a flooded basement. Always disconnect and drain hoses before freezing weather.
- Letting water pool near the foundation: If your extension pipe is level or slopes back toward the house, you’re just recycling the problem.
Fire It Up: Testing and Troubleshooting Your Work
Your pump is back in the pit. Do not walk away yet. A quick, methodical check now prevents a frantic, wet mess later.
Post-Installation Checklist
Before you add water, run through these three visual checks.
- Pump is Level: The pump must sit flat on the pit floor. A tilted pump can cause the float switch to bind and fail to activate.
- Float Moves Freely: Manually lift the float arm through its full arc. It must not catch on the pit wall, discharge pipe, or power cord. In my own pit, I always leave a two-inch gap all around.
- Check Valve is Oriented Correctly: The arrow on the valve body must point away from the pump, toward the exterior discharge. A backwards valve lets all the water flow right back into the pit.
The Five-Gallon Test
Now for the moment of truth. This simulates real pit filling.
- Restore Power: Plug the pump back in or flip the circuit breaker.
- Add Water: Slowly pour about 5 gallons of water directly into the sump pit. Use a bucket. A garden hose works too, but go slow to avoid overflowing.
- Observe the Cycle: Watch the water level. The float should rise, trigger the pump, and the pump should start moving water. Listen closely.
A proper cycle sounds like this: the pump kicks on with a solid hum, water discharges forcefully outside, the water level drops quickly, and the pump shuts off with a distinct click when the float drops.
Red Flag Troubleshooting Guide
If your test doesn’t sound right, here are the likely culprits.
- Pump Runs But Doesn’t Move Water: This is almost always a clog. The impeller (the spinning fan inside) is blocked by a rock, debris, or a stuck check valve flap. Unplug the pump and check the discharge line opening on the pump and the check valve.
- Pump Runs Continuously: The float switch is likely stuck in the “on” position, or the switch itself has failed. Manually jiggle the float arm. If it’s free, the internal switch may need replacement.
- Pump Makes Grinding or Screeching Noises: This signals mechanical failure. The impeller shaft bearing is shot or the impeller is damaged. The pump needs to be replaced. I’ve heard this sound on service calls-it’s a death rattle for pumps.
Sump Pump and Drainage System Maintenance Schedule

Your sump pump is an insurance policy. Like any policy, you pay small, regular premiums to avoid a massive claim. This schedule is your premium. Your homeowners insurance can help cover water damage from a sump pump failure. Understanding how your policy handles sump pump incidents can prevent surprises.
Quarterly (Every 3 Months)
Perform the Five-Gallon Test. Do this at the start of each season. It takes two minutes and confirms the system is alive and ready. Mark your calendar.
Bi-Annually (Spring and Fall)
Focus on the water’s path from your house to the yard.
- Inspect the Discharge Line: From where it exits your basement wall to where it ends in the yard, look for cracks, sags, or obstructions.
- Ensure the Exit Point is Clear: The water should pour out at least 10 feet from your foundation. Remove leaves, mulch, or soil that has washed over the outlet. Redirect the flow if it’s pooling near the house.
Annually (Early Fall is Ideal)
This is the deep clean. Unplug the pump first.
- Remove the pump from the pit.
- Scrub the pit walls and floor to remove silt and gravel.
- Clean the pump intake screen and housing.
- Inspect the check valve for proper seal and smooth operation.
- If you have a battery backup, test it according to the manufacturer’s instructions and check the battery water level if applicable.
Fifteen minutes of annual maintenance is far cheaper than a basement full of water and a ruined furnace. Consistency is everything. I clean my pit every September, like clockwork. It’s saved me twice during freak autumn storms.
DIY vs. Pro: When to Call a Plumber
This is a 4 out of 10 job for basic maintenance. Most homeowners can handle the core tasks to keep their system running.
What You Can Do Yourself
Your regular upkeep is straightforward. Unplug the pump first. Always.
- Clean the pump screen or intake.
- Check the pit for debris and silt.
- Pour a bucket of water in to test the pump’s automatic start.
- Attach a flexible discharge hose extension to move water further from the house.
This basic inspection and cleaning should be done every few months, especially before rainy seasons.
When to Pick Up the Phone
Some jobs need a licensed pro with the right tools and insurance. Don’t risk your home or safety.
- Installing a new discharge pipe below the local frost line. This requires deep, straight trenching.
- Complex glued PVC plumbing runs with multiple elbows and underground connections.
- Any electrical issue beyond plugging in a cord. This includes wiring a new outlet or hardwiring a pump.
- Major yard regrading to create slope away from your foundation. This is excavator territory.
Working on buried plumbing or household electricity is where DIY can get very expensive, very fast.
Check your local rules. Many towns require a permit for installing a permanent underground discharge line.
Recommended Products for a Reliable Discharge System
Using the right parts prevents callbacks and protects your basement. Here is what to look for.
Pump Types
You have two main choices. Submersible pumps sit down in the water inside the sump pit. They are quieter and are common in living areas. Pedestal pumps have the motor mounted above the pit, with a hose going down. They are easier to service because you can see all the parts. Different work types—submersible vs pedestal—affect how the pump operates in your space. Understanding these work types can help you pick the right sump pump.
For a finished basement, choose a submersible pump. For easy access and simpler maintenance, a pedestal model works.
Discharge Hose
The flimsy hose that comes with the pump is a starter part. Upgrade it. You want a reinforced, crush-resistant hose. Look for terms like “all-weather” or “freeze-resistant” on the label. A good hose won’t kink and will handle summer sun and winter cold without cracking.
Pipe & Fittings
For a permanent buried line, use Schedule 40 PVC pipe. It’s the standard for underground drain applications. Don’t use thin-walled pipe. Use the correct clear primer and heavy-duty cement for PVC. They make a solvent weld that won’t fail under pressure.
Schedule 40 PVC is strong enough to handle backfilled soil and the pump’s pressure without failing.
Essential Accessories
- A high-quality check valve stops water from flowing back into the pit after the pump shuts off. This prevents rapid cycling and wear. A silent check valve is worth the extra few dollars to avoid the loud “thump.”
- A durable, large splash block. Place this at the end of your discharge hose. It disperses the water flow so it doesn’t erode the soil right next to your foundation. Get a heavy one that won’t wash away.
Common Questions
1. Why is going to the circuit breaker safer than just unplugging the pump?
Outlets can be miswired, leaving the pump’s components energized even when unplugged. Shutting off the dedicated circuit at your main panel is the only way to guarantee a safe, dead system. Always test that the power is off before your hands go near the pit, especially when working with sump pump electrical circuits.
2. What’s the best material for a permanent discharge extension?
For a set-it-and-forget-it solution, use Schedule 40 PVC pipe. It resists crushing, sunlight, and freezing temperatures when buried properly. Flexible hose is only for temporary, seasonal use as it kinks and degrades.
3. How do I ensure my extended line has the proper slope?
Use a level to confirm a consistent downward slope of at least 1/4-inch per foot away from your house. This uses gravity to assist the pump and prevents water from pooling and freezing inside the pipe.
4. What should I listen for during the post-maintenance test?
A healthy cycle sounds like this: a solid pump hum, forceful water exiting the pipe outside, and a distinct click as it shuts off. Grinding noises or continuous running are red flags that need immediate attention.
5. How do I find out about local drainage regulations?
Always contact your municipal building department or check their website first. Local codes dictate critical rules, like minimum discharge distances (often 10-20 feet) and where you can legally direct the water.
Keep Your Sump Pump Flowing and Foundation Safe
Test your sump pump every few months and keep the discharge pipe clear of debris. Always direct water 10 feet from your house to prevent foundation cracks and a wet basement. Getting the discharge distance right matters for protecting your home’s foundation. We’ll include a detailed guide on sump pump discharge distance from the house in the next step.
Bob McArthur
Bob is a an HVAC and plumbing industry veteran. He has professionally helped homeowners resolve issues around water softeners, heaters and all things related to water systems and plumbing around their homes. His trusted advice has helped countless of his clients save time, money and effort in home water systems maintenance and he now here to help you and give you first hand actionable advice. In his spare time, Bob also reviews home water systems such as tankless heaters, water softeners etc and helps home owners make the best choice for their dwelling. He lives around the Detroit area and occasionally consults on residential and commercial projects. Feel free to reach out to him via the contact us form.