DIY Water Heater Repair Guide: 5 Issues Homeowners Can Handle
Your water heater just quit, or it’s making noises that can’t be good. You’re looking at a cold shower and a potentially huge repair bill.
This guide walks you through the most common fixes. We will cover the pilot light, sediment buildup, the thermostat, the pressure relief valve, and basic leak troubleshooting.
I’ve fixed hundreds of these on service calls and tackled more than a few in my own basement. The main thing to know is when a job is safe for you and when it’s time to call a pro.
First, Diagnose the Problem: What’s Your Water Heater Telling You?
Your water heater talks. It gives you clear signs something is wrong. Spotting these signs early can turn a big repair into a simple fix. Here’s how to understand what it’s telling you.
Think of this as a diagnostic flow chart: start with your main symptom and follow it to the likely cause.
- No Hot Water: Check power (tripped breaker, switched off) or gas supply (pilot light out). For electric, a failed heating element or thermostat is likely. For gas, it could be the thermocouple or gas valve.
- Not Enough Hot Water: You’re running out faster than usual. The tank size hasn’t changed, so something is wrong. For electric, one heating element may have failed. For all types, a massive sediment buildup is stealing tank space. A faulty thermostat set too low can also cause this.
- Leaking Water: Find the source immediately. Is it from a pipe fitting, the pressure relief valve, or the tank itself? A leak from the tank body usually means it’s time for a replacement.
- Strange Noises (Rumbling, Popping, Knocking): This is almost always sediment. Minerals harden on the tank bottom, and the burner or element heats it unevenly, causing it to crackle and pop.
- Discolored Water (Rusty, Brown): The inside of your steel tank is rusting. Your sacrificial anode rod is likely completely depleted, so the tank itself is corroding.
- Water Too Hot or Too Cold: The thermostat is malfunctioning or set incorrectly. This is a simple adjustment or a part replacement.
- Pilot Light Out (Gas Heaters): A draft, a dirty orifice, or a failed thermocouple can cause this. Relighting it is step one.
- Tripped Circuit Breaker (Electric Heaters): A shorted heating element is the usual suspect. The breaker trips to prevent a fire.
Water Science Snippet: The Enemy is TDS
TDS stands for Total Dissolved Solids. It’s everything dissolved in your water-mainly calcium and magnesium (hardness minerals). High TDS, or hard water, is the number one cause of sediment buildup and rapid anode rod consumption. Those minerals fall out of solution when heated, coating your tank and elements. They also accelerate corrosion, forcing your anode rod to work overtime. This leads directly to noise, inefficiency, and a shorter tank life.
My Water Heater Has No Hot Water or Runs Out Too Fast
Let’s fix this. Follow these checks in order. It’s a process of elimination.
Step 1: Check the Obvious Power Sources.
- Electric: Go to your main electrical panel. Is the breaker for the water heater tripped? Reset it. Also, check for a nearby disconnect switch (sometimes on a wall near the unit) and make sure it’s on.
- Gas: Look at the bottom of the unit. Is the pilot light on? If not, you need to relight it. (See the DIY section below).
DIY vs. Pro Verdict: Resetting a breaker or switch is Difficulty 1. Relighting a pilot is Difficulty 3.
Step 2: Test the Thermostats.
- For both gas and electric, the thermostat controls the temperature. On electric models, there are usually two-one for the upper and one for the lower element. Use a multimeter to check for continuity. If a thermostat has no continuity, it’s dead.
DIY vs. Pro Verdict: Replacing a thermostat is Difficulty 5. You must turn power and water off.
Step 3: Check the Heating Elements (Electric Only).
- If you have power and the thermostat is good, a heating element has likely failed. Again, use a multimeter to check for continuity. No continuity means a bad element.
DIY vs. Pro Verdict: Replacing a heating element is Difficulty 7. This is serious DIY territory involving draining, electrical work, and potential flooding if the gasket isn’t sealed right.
If your water runs out fast but isn’t completely cold, focus on sediment or a single failed lower element. A tank half-full of rock-hard mineral scale holds half the hot water. Flush it.
There’s Water on the Floor: Is It a Leak I Can Fix?
First, don’t panic. Second, find the source. Your immediate action is to turn off the water supply to the heater (the valve on the cold water line coming in) and turn off its power (breaker for electric, gas valve for gas).
- Leak from a Pipe Fitting: Check the connections at the top of the tank (hot and cold lines) and the drain valve at the bottom. A drip from a threaded connection might just need tightening with a wrench. A leak from the drain valve might need a new washer or the valve replaced.
- Leak from the T&P Relief Valve: This valve on the side or top has a small pipe pointing down. If it’s dripping, it’s doing its job relieving excess pressure. But constant dripping means the valve is faulty or your home’s water pressure is too high (over 80 PSI).
- Leak from the Tank Itself: If water is seeping from the middle of the tank’s steel body, stop. The tank is corroded through. You cannot fix a leaking tank. It must be replaced.
Can a hot water heater leak be repaired? Yes, but only if it’s from a repairable part like a valve or fitting. A tank leak is a death sentence for the heater.
Code & Compliance Check: Your T&P relief valve must be ANSI Z21.22 certified. If you replace it, get one that is. This is a critical safety device. Never, ever cap it off to stop a leak. A capped valve can turn your water heater into a bomb.
It Sounds Like a Coffee Percolator: Dealing with Noise and Sediment
That rumbling sound is sediment. Over years, minerals from hard water settle and bake onto the bottom of the tank. When the burner or element kicks on, it superheats the sediment layer, causing trapped water to boil and make that percolating noise.
The fix is to flush the sediment out of the tank. It’s a routine maintenance task that can restore efficiency and quiet the unit. If you ignore it, the sediment insulates the water from the heat source, making the heater work harder. It can also eventually cause overheating and damage to the tank bottom.
Flushing is a straightforward job you can do yourself. You’ll need a garden hose, a flathead screwdriver, and maybe a pair of channel-lock pliers if the drain valve is stubborn.
The Water Looks Rusty or Smells Funny
Rusty water points directly to corrosion inside the tank. Your anode rod-a magnesium or aluminum rod screwed into the tank-sacrifices itself to corrosion to protect the steel tank. When it’s fully consumed, the tank starts to rust.
Brown or rusty hot water is a classic sign you need to check and likely replace the anode rod.
A rotten egg smell (sulfur) is from bacteria in the water. These bacteria react with the magnesium in a standard anode rod, producing hydrogen sulfide gas. The fix here is replacing a magnesium rod with an aluminum-zinc alloy rod, which doesn’t feed the bacteria the same way.
Both issues lead you to the same access point: the hex head plug on top of your water heater where the anode rod lives.
Roll Up Your Sleeves: Common DIY Fixes You Can Handle
These are jobs for a confident homeowner with basic tools. I’ve rated them on a 1-10 scale, where 1 is changing a lightbulb and 10 is a full tank replacement.
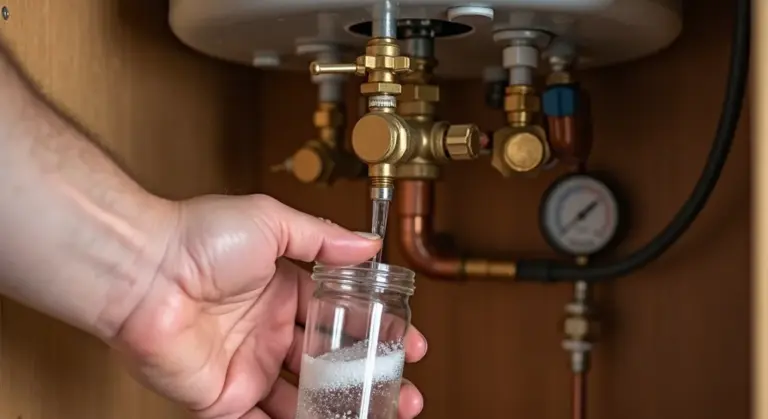
Flushing Your Heater to Clear Sediment
Difficulty Rating: 4. The main challenge is dealing with hot water and a possibly stuck valve.
Tools Needed: Garden hose long enough to reach a drain or outside, flathead screwdriver, bucket, work gloves.
- Turn Off Power & Water: For electric, turn off the breaker. For gas, set the dial to “Pilot.” Turn off the cold water supply valve on top of the heater.
- Connect the Hose: Attach your garden hose to the drain valve at the bottom of the tank. Run the other end to a floor drain, utility sink, or outside.
- Open a Hot Water Tap: Go to a sink and open the hot water faucet. This breaks the vacuum and lets the tank drain smoothly.
- Open the Drain Valve: Use your screwdriver to slowly open the plastic drain valve. Warning: The water will be extremely hot at first. Let the tank drain completely.
- Flush: Briefly turn the cold water supply back on to stir up the sediment in the bottom. Let it flow out the hose until the water runs clear.
- Close Up: Close the drain valve, remove the hose, turn the cold water supply fully back on. Let the tank fill completely (water will flow steadily from the hot faucet you opened). Then close the faucet. Restore power (turn breaker on or set gas dial to “On”).
Replacing the Anode Rod (Your Tank’s Secret Shield)
Difficulty Rating: 6. This can be very easy or a major battle, depending on corrosion.
Think of the anode rod as a sacrificial lamb. It’s a metal rod (usually magnesium) that corrodes instead of your steel tank lining.
Tools Needed: 1/2-inch drive ratchet or breaker bar, deep socket (often 1 1/16″, but check your model), pipe nipple (for leverage), Teflon tape.
- Turn Off & Drain: Shut off power and water. Drain about 5-10 gallons from the tank to lower the water level below the anode rod’s location (usually on top).
- Locate and Loosen: Find the hex-head plug on top of the tank. It may have a plastic cap. Fit your socket and try to loosen it. This thing can be unbelievably tight. You may need a 3-foot pipe nipple over your ratchet for leverage. Sometimes, heating the tank fitting with a hair dryer can help.
- Remove and Replace: Once loose, unscrew it completely. Be ready for some residual water. Pull the old rod out. Wrap the threads of the new rod with Teflon tape and screw it in hand-tight, then give it a firm snug with the wrench. Don’t overtighten.
- Restore: Turn the water back on, let the tank fill, restore power.
Relighting a Pilot Light and Replacing a Thermocouple
Difficulty Rating: Relighting = 5. Thermocouple Replacement = 6.
If your pilot is out, first check that your gas supply is on. Then follow the lighting instructions on the sticker on your heater. Generally:
- Set the gas control knob to “Pilot.”
- Push and hold the knob down. This starts gas flow to the pilot.
- While holding the knob, press the igniter button repeatedly until the pilot lights. Keep holding the knob down for 60 seconds to heat the thermocouple.
- Release the knob. The pilot should stay lit. Turn the knob to “On.”
If the pilot won’t stay lit after you release the knob, the thermocouple is almost certainly bad. This is a small copper sensor that tells the gas valve the pilot is lit. Replacing it involves shutting off the gas, unscrewing the old one from the bracket and valve, and installing the new one exactly in the pilot flame’s path.
Swapping Out a Heating Element (Electric Heaters Only)
Difficulty Rating: 7. This is often the limit for DIY due to the combination of electrical and plumbing work.
SAFETY FIRST: POWER MUST BE OFF AT THE BREAKER. VERIFY IT IS OFF WITH A NON-CONTACT VOLT METER AT THE HEATER’S TERMINALS.
Tools Needed: Element wrench (or large socket), screwdriver, volt meter, new element, new gasket.
- Cut Power & Drain: Turn off the breaker and verify no power. Shut off water and drain the tank to a level BELOW the element you’re replacing.
- Disconnect Wires: Remove the access panel(s). Take a picture of the wiring. Disconnect the wires from the old element’s screws.
- Remove the Old Element: Use your element wrench to unscrew it from the tank. It will be tight.
- Install the New: Clean the opening. Place the new rubber gasket on the new element. Hand-thread the new element in, then tighten firmly with the wrench. Do not cross-thread.
- Reconnect & Refill: Reconnect the wires exactly as they were. Replace the insulation and access panel. Turn water on to fill the tank. Purge air from hot water lines at a faucet. Once water flows steadily, restore power at the breaker.
When You Must Put the Wrench Down and Call a Professional
You can handle a lot of water heater repairs yourself. Some issues are not DIY projects. Knowing the difference and when to repair or replace a water heater keeps your home safe and saves you from a costly, dangerous mistake.
This directly answers questions like “can a busted water heater be repaired” or “can a flooded water heater be repaired.” Sometimes the answer is yes, you can fix the part that failed. Other times, “busted” means the tank is gone and the only repair is a full replacement.
You Have a Leaking Tank: The Unfixable Problem
A leak coming from the tank body itself is a death sentence. Do not try to repair it. I’ve seen questions online like, “can a cyclone water heater be repaired by welding bottom?”
The answer is absolutely not. Welding a pressurized water tank is not safe and will never meet plumbing code.
The leak means the inner steel liner has corroded through. That corrosion is throughout the metal. Plugging one hole just moves the problem. The pressure will find the next weak spot. Your only move here is to schedule a replacement before the leak turns into a major flood in your basement or utility closet.
You Smell Gas or See Soot (Gas Heater Dangers)
This is non-negotiable. If you smell natural gas or rotten eggs (the odorant they add), follow these steps right now.
- Do not touch the heater or any light switches.
- Get everyone out of the house.
- Call your gas company from outside or a neighbor’s house.
If you see black soot around the burner access panel or the flue, that’s a major red flag. Soot means incomplete combustion, which can produce deadly carbon monoxide gas that you cannot smell. This points to a bad burner, a clog, or a serious venting issue. This is a job for a licensed technician who can test combustion and ensure your home is safe.
Working on Gas Lines, Water Connections, or Complex Electrical
Some jobs require a permit and a pro by law. Think of it as a Code & Compliance Check.
- Gas Line Work: Running a new gas line or modifying the existing one to move a heater? This almost always requires a licensed plumber or gas fitter to meet Uniform Plumbing Code (UPC) standards. The risk of a leak is too high.
- Major Plumbing Connections: If the repair requires soldering new copper pipes very close to the unit or you’re not confident sweating joints, call a plumber. A small leak here can cause big water damage.
- Complex Electrical: Replacing a simple thermostat is one thing. Diagnosing a faulty control board or a wiring fault in the unit is another. If you’re not experienced with a multimeter and reading wiring diagrams, hand this to an electrician or plumber.
My personal difficulty rating for these tasks? A solid 10. The potential cost of getting it wrong far outweighs the service call fee.
Is It Worth Fixing? The Repair vs. Replacement Decision
Fixing a part is one thing. Throwing good money after bad is another. Let’s break down when to repair and when to start shopping.
The Age and Cost Rule of Thumb
A standard tank water heater has a typical lifespan of 8 to 12 years. You can find the manufacture date on the serial number sticker. The older the unit, the wiser it is to lean toward replacement. For a clearer benchmark, see our average water heater lifespan guide. It helps you decide when replacement makes the most sense.
Ask yourself this simple question: Does the repair cost more than half the price of a brand new unit?
If your 10-year-old heater needs a new lower element, upper element, and thermostat, you’re looking at a decent parts bill and a few hours of work. That total can easily cross the 50% line. At that point, putting that money toward a new, efficient, warrantied heater is the smarter long-term play.
Signs You’re Better Off with a New Water Heater
Sometimes the heater tells you it’s done. Listen to it. You’re better off with a new unit if you see these patterns.
- Multiple repairs in two years. It’s becoming a money pit.
- Chronic sediment issues. Even after a full flush, it fills with sand or scale again in months, killing elements and efficiency.
- Widespread rust on the tank exterior or valve connections. This often indicates internal corrosion is advancing.
- It consistently fails to meet your hot water demand. This could be a failing burner (gas) or massive scale buildup, but in an old unit, it’s usually a sign of overall decline.
This answers the real question: “Can my old hot water tank be repaired, or should I stop throwing money at it?” If multiple items on this list are true, your best repair is a replacement.
Keep It Running: Simple Maintenance to Avoid Future Repairs
Most repairs start as ignored maintenance. A little regular attention stops small issues from becoming big, expensive headaches.
Think of this like checking the oil in your car; it’s a simple habit that protects your investment and keeps everything running smoothly.
The Annual Flush and Visual Check
Once a year, set aside 30 minutes for your water heater. I do mine every fall, right before the cold weather hits.
First, perform the sediment flush we talked about earlier. Connect a hose, drain a few gallons until the water runs clear. This removes the grit that wears out the tank from the inside.
Next, check the Temperature and Pressure (T&P) Relief Valve. This is your heater’s emergency safety device. If it fails, the heater could become dangerously pressurized.
Here is how to check it.
- Place a bucket under the discharge pipe connected to the valve.
- Lift the valve’s lever straight up until you feel resistance.
- Let it snap back down. You should hear a brief gush of water and air into the bucket.
If no water comes out, or if it continues to drip after you release the lever, the valve is bad and needs immediate replacement. This is a non-negotiable safety fix.
Setting the Right Temperature and Insulating Pipes
Your thermostat setting affects safety, your energy bill, and how fast minerals build up inside the tank.
120°F (49°C) is the sweet spot. It’s hot enough for household tasks, minimizes scalding risk for kids and elderly, and slows down hard water scale formation. Check yours with a thermometer at a faucet.
To adjust it, you usually just turn a dial under an access panel. Remember to shut off power to an electric heater or turn the gas control to “pilot” first.
For a quick efficiency win, insulate the first 3-6 feet of the hot water pipe coming out of the heater. Use foam pipe insulation from any hardware store.
This simple wrap keeps heat in the pipe so you get hot water faster at your faucet, and you waste less water and energy waiting for it. In my own basement, this cut the wait time for my kitchen sink hot water almost in half.
Maintenance is not complicated. An annual check, a proper temperature, and a little insulation give you reliable hot water and keep repairmen away. Following a regular water heater maintenance schedule ensures your system runs efficiently.
Quick Answers
What should I do if I find water on the floor around my water heater?
Immediately turn off the water supply (cold water valve) and the power (breaker for electric, gas valve for gas). Your first job is to find the leak’s source-common spots are pipe fittings, the drain valve, or the temperature and pressure (T&P) relief valve. A leak from the tank’s steel body means the unit must be replaced; do not attempt to repair it.
What causes a water heater pilot light to go out, and how do I safely relight it?
A pilot can be extinguished by a draft, a clogged orifice, or a failing thermocouple. Always follow the lighting instructions printed on your unit’s label, which typically involves holding a button while igniting. If the pilot won’t stay lit after several attempts or you smell gas, stop and call a professional.
How do I troubleshoot low water pressure from my hot water taps?
First, check if the problem is only with hot water by comparing flow to a cold tap. If it’s isolated to hot, the issue is often a partially closed supply valve on the cold water inlet to the heater or significant sediment clogging the tank’s inlet tube. Fully open the valve and if that doesn’t work, a system flush may be needed.
What should I do if my water heater’s temperature is too high or too low?
First, check the thermostat setting on the unit; it should typically be set to 120°F (49°C) for safety and efficiency. Use a thermometer at a faucet to verify the actual temperature. If the water temperature doesn’t match the setting, the thermostat may be faulty and need replacement-a job for a confident DIYer or a pro.
How can I fix a water heater that is tripping the circuit breaker?
A tripping breaker is a serious sign of an electrical fault, often a shorted heating element. Do not repeatedly reset the breaker, as this is a fire hazard. For your safety, you must shut off power and test the elements with a multimeter for a short to ground. This job involves electrical and plumbing work, so if you’re unsure, call an electrician.
Keeping Your Water Heater Reliable
When your water heater acts up, always check the simple things first: your home’s power, the unit’s circuit breaker, and the water supply valves. A voltage tester is your best friend for confirming power at the heating elements before you decide any part needs replacing. If the issue persists, our water heater not heating troubleshooting guide can walk you through the next steps. It offers clear, practical steps and safety reminders.
Bob is a an HVAC and plumbing industry veteran. He has professionally helped homeowners resolve issues around water softeners, heaters and all things related to water systems and plumbing around their homes. His trusted advice has helped countless of his clients save time, money and effort in home water systems maintenance and he now here to help you and give you first hand actionable advice. In his spare time, Bob also reviews home water systems such as tankless heaters, water softeners etc and helps home owners make the best choice for their dwelling. He lives around the Detroit area and occasionally consults on residential and commercial projects. Feel free to reach out to him via the contact us form.