DIY Appliance Water Line Installation: No Leaks, No Stress
Ever worry about a burst hose behind your fridge ruining your floor? This guide shows you how to connect water lines safely and securely.
We will cover picking the best supply lines, gathering essential tools, and installing lines for dishwashers, washing machines, and refrigerators.
I have swapped more supply lines on service calls than I can count. Always use brass compression fittings, they never crack like plastic.
What You Need to Know Before You Grab Your Tools
Think of your appliance supply lines as dedicated garden hoses that live inside your house. They deliver water from your home’s main pipes directly to your machine. You have two basic choices for the final connection: flexible hoses or rigid pipes.
Flexible appliance connectors are the go-to for most DIY hookups because you can buy them pre-made in standard lengths. You’ll see braided stainless steel lines and reinforced polymer (plastic) lines. They connect directly to a shut-off valve on your wall or floor, unlike PVC or copper water lines used in household plumbing. For a washing machine swap or a new fridge, this is what you’ll use 99% of the time.
Rigid pipe runs are for when you are adding a new water line from scratch, like figuring out how to add a hot water line for a dishwasher in a new location. This means cutting into your home’s plumbing (usually PEX or copper) and running a new branch to the appliance spot. It’s more involved but creates a clean, permanent installation.
Not every appliance drinks from the same tap. A dishwasher only needs a hot water supply to get your dishes clean. Your refrigerator’s ice maker and water dispenser only need a cold line. A washing machine is the only one here that typically uses both a hot and a cold supply line. Dishwashers vary in how they heat water—some rely on the home’s hot line, others use internal heating. Brand features like booster heaters and energy-saving modes influence performance.
Connecting a new line usually means tying into an existing water line. The most common spots are under a kitchen sink for a dishwasher or fridge, or near your laundry valves for a washer. You’ll install a new shut-off valve on that existing line, which gives you control right at the source.
Your Plumbing Toolbox and Material Checklist
Getting your gear together first saves multiple trips to the hardware store. Here is what you’ll need on hand.
Essential Tools
- Two adjustable wrenches or channel-lock pliers (using two prevents twisting the pipe while you tighten).
- A tubing cutter (for clean cuts on PEX or copper pipe).
- A deburring tool or sandpaper (to clean up sharp edges after cutting metal pipe).
- PEX crimp or cinch tool and rings (only if you are running new PEX lines).
- High-quality Teflon tape (for sealing threaded fittings).
- A small bucket and old towels (there will always be a little water left in the lines).
- A good flashlight or work light.
Supply Line Materials Compared
| Material | Best For | Key Points |
|---|---|---|
| Braided Stainless Steel | Dishwashers, Washing Machines, Sinks | Most common and DIY-friendly. The braiding contains a rubber tube. Very durable but can kink if bent too sharply. |
| Reinforced PVC / Polymer | Refrigerators | Often comes as a skinny, gray hose. Flexible and sufficient for the low volume a fridge uses. Cheaper than stainless. |
| Copper Pipe | Permanent rigid runs (professional installs) | Extremely durable and rigid. Requires soldering skills to install. Not used as a flexible connector. |
| PEX Tubing | Running new water lines inside walls | The modern standard for home plumbing. Flexible, easy to cut, and uses simple crimp fittings. You run PEX from your main line to a new shut-off valve. |
Parts Checklist
Walk down the plumbing aisle with this list. Match the parts to the appliance and your existing plumbing.
- Shut-Off Valves: Get one for each new line (e.g., a single ¼-turn angle stop for a dishwasher). Ensure the inlet side matches your pipe type (compression, PEX, or copper sweat).
- Supply Lines: Buy the correct length. Standard connection is 3/8″ compression on both ends for appliances. Verify your appliance inlet (some fridge lines are 1/4″).
- Fittings: You may need couplings, elbows, or tee fittings to branch off your existing pipe. If using PEX, get the correct crimp rings.
- Pipe Straps: For securing any new PEX or copper runs to studs or joists.
Pro tip: Always install a dedicated shut-off valve for every appliance. The few extra dollars save you from turning off water to the whole house if a line ever bursts. Also consider water heater shut-off valve codes—these may dictate valve type, placement, and accessibility. Ensuring compliance helps keep your installation safe and up to code.
How to Hook Up a Dishwasher Water Line
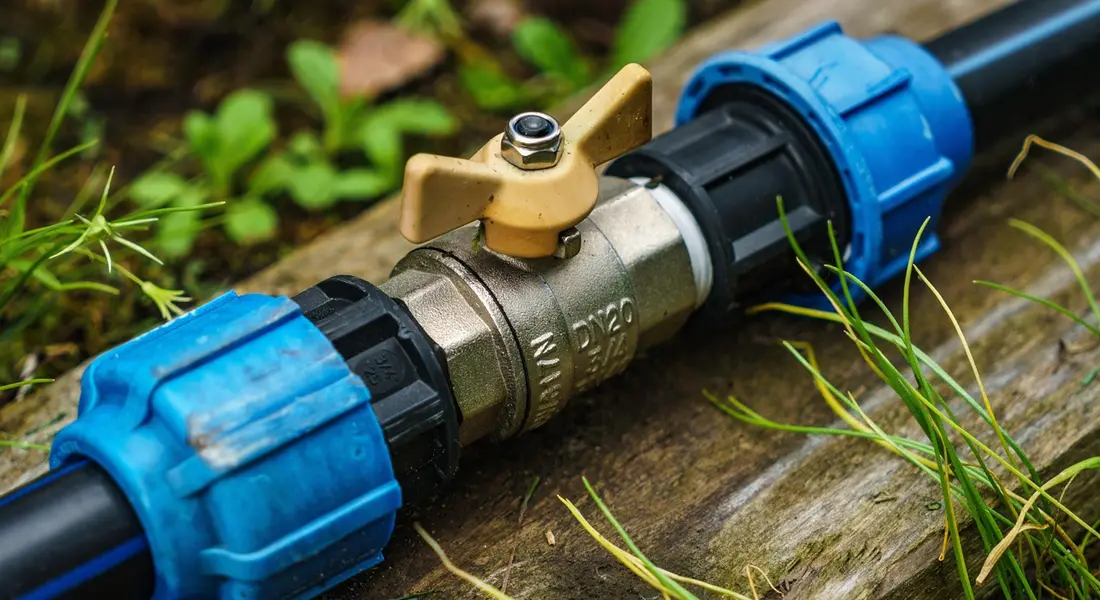
How do I install water supply lines for a dishwasher? You only need a hot water line. I’ve hooked up dozens, and the process is the same whether it’s a new install or a replacement in my own kitchen. In the next steps, I’ll show you how to connect the dishwasher hot water line.
Locate and Turn Off the Hot Water Under the Sink
Find the hot water shutoff valve under your kitchen sink. Turn the handle clockwise until it stops. Test the water is off by turning on the hot faucet at the sink until the flow stops completely.
Connect the Line to the Dishwasher’s Inlet Valve
You need to reach the connection point on the dishwasher. This usually means removing the lower kick panel at the front. Always use a new braided stainless steel supply line, not the old rubber hose that might be there. I found a swollen, brittle rubber hose under my last house’s dishwasher. It was a leak waiting to happen.
Route the Line Through the Cabinet
Feed the new supply line from the dishwasher area into the sink cabinet. Avoid sharp bends or pinching it against cabinet edges. A smooth path prevents kinks.
Connect to the Water Supply Valve
Link the free end of the braided line to the hot water valve you turned off. The fitting threads on easily by hand. Make sure the line isn’t twisted.
The Power Move: Hand-Tightening, Then a Quarter-Turn with a Wrench
Screw all connections on by hand until they are snug. Then, take an adjustable wrench and give each nut just a quarter-turn more. This extra quarter-turn with a tool creates the seal without cracking the fittings or stripping the threads, a common DIY mistake.
Dishwashers use a single hot water line. Accessing it almost always means removing that front kick panel. If you see an old, gray rubber hose, replace it. Braided stainless steel lines have a mesh jacket that contains a burst, preventing a major flood. Before you begin, locate the shut-off valve for the dishwasher to control water flow if a leak occurs. Knowing where the shut-off lines are can save you a lot of trouble during maintenance.
How to Connect Water Lines for a Washing Machine
How do I install water supply lines for a washing machine? You’re dealing with two lines, hot and cold. It’s a simple swap, but getting it wrong means a wet laundry room.
Shut Off the Two Laundry Valves (Hot & Cold)
Behind the washer, you’ll see two valves, typically one red (hot) and one blue (cold). Turn both handles clockwise to shut off the water. To be sure, have a helper briefly start a wash cycle to confirm no water enters the machine.
Remove Old Hoses (Have a Bucket Ready)
Keep a small bucket or towels handy. Unscrew the old hoses from the back of the washer first, then from the wall valves. Some water will drip out. Catch it.
Install New Washers in the Hose Ends
Check the rubber washers inside the new hose fittings. If they’re missing or damaged, install new ones. A proper rubber washer is what makes the connection watertight, not just how tight you crank the nut.
Connect to the Machine, Then to the Wall Valves
Screw the hoses onto the washing machine inlet ports first. The hot port is usually on the left. Then, connect the other ends to the correct wall valves. Hand-tighten everything.
Keep Hoses Straight, No Kinks
Push the washer back carefully, leaving about 4 inches of space from the wall. Straighten the hoses so they have a gentle curve with no sharp bends or kinks that restrict water flow.
The standard connection is a 3/4″ hose thread, which almost every modern supply hose uses. In older homes, you might find 1/2″ threads, so check your valves before buying. If the machine fills slowly after your perfect install, the problem isn’t you. Sediment clogs the tiny inlet screens inside the machine’s water valves. Unplug the washer, disconnect a hose, and clean that screen with a toothbrush.
Running a Water Line to Your Refrigerator

A common question I get is, How do I install water supply lines for a refrigerator? The good news is that fridge lines are typically the easiest to run, using small 1/4″ tubing. You just need a plan, a few parts, and an afternoon.
Find a Cold Water Source
Your first job is to locate a nearby cold water pipe. The most common source is the cold water line under your kitchen sink. If your fridge is far from the kitchen, look for an accessible line in the basement or crawl space directly below it. Always shut off the main water supply to the house before cutting into any pipe. It’s especially important to be cautious when removing any fixtures, such as fridge doors with water lines attached.
Install a Saddle or Self-Piercing Valve
You need a way to tap into that cold water line. You have two main choices, and I’ve used both in my own home projects.
- Saddle Valve: This valve clamps around the pipe. You tighten a screw to drive a piercing point into the pipe. It’s cheap and requires no pipe cutting. The downside? They are notorious for leaking over time. I consider them a temporary fix.
- Self-Piercing Shut-Off Valve: This is a more professional tee valve that also clamps on and self-pierces. The big advantage is it includes a reliable quarter-turn shut-off handle just for your fridge line. For a permanent, leak-resistant connection, spend a few extra dollars on a self-piercing shut-off valve.
Run the 1/4″ Plastic or Copper Tubing
Now, route the small water line from the new valve to the fridge location. You generally use plastic polymer tubing (like PEX or poly) or soft copper tubing. Make sure to use the correct size for refrigerator ice maker water lines.
- Under the Floor: This is often the cleanest look if you have basement or crawl space access below. Drill a small hole up through the floor behind the fridge space.
- Through Cabinets: If the fridge is next to cabinets, you can run the line through the cabinet kickplate or along the back wall inside a cabinet. Use clips to secure it.
- Behind Walls: I only recommend this during a major remodel. Running lines inside finished walls without proper access panels creates future repair nightmares.
Keep the run as straight as possible. Avoid sharp bends that can kink plastic tubing and restrict flow.
Connect to the Fridge’s Rear Connection
Push the tubing through the floor or wall hole behind the fridge. Leave a gentle service loop of about 2 feet. Most modern refrigerators have a simple push-to-connect fitting: you just push the 1/4″ tube straight in until it seats. You might hear a click. Give the tube a firm pull to ensure it’s locked. If your fridge has a compression fitting, follow the manufacturer’s instructions to tighten the nut. After securing the connection, you can flush the fridge water dispenser lines to ensure clean, debris-free water. A quick flush now makes future maintenance smoother.
Fixing Common Water Line Problems
Even a good install can have issues later. Here’s how to tackle the most frequent problems.
Address Leaks at Connections
A drip at a connection is your first clue. Shut off the water to that line.
- For a compression fitting (with a nut), the seal is often a small rubber washer or ferrule. Check if the washer is cracked or missing. Replace it, reconnect, and tighten firmly by hand, then give it a quarter-turn with a wrench.
- For pipe thread connections (like at a valve), the seal is usually Teflon tape or pipe dope. Unscrew the connection, clean off all the old sealant, and re-wrap the male threads with fresh Teflon tape. Wrap it clockwise, 4-6 times.
Solve Low Water Pressure at an Appliance
If your ice maker is slow or the dishwasher isn’t filling right, do these checks in order.
- Inspect the supply line. Is it kinked? Straighten it out.
- Find the appliance’s inlet valve or screen. Many dishwashers and washing machines have a small filter screen where the water line connects. Unscrew the supply line (water off!), clean the screen, and reconnect.
- Check the shut-off valve. It might only be partially open. Turn it all the way on.
Deal with a Valve That Won’t Turn or is Leaking at the Stem
A valve that leaks around the handle stem or is frozen shut needs replacement. For a standard screw-on valve under a sink, here’s the process.
- Shut off the main water supply to the house and open a lower faucet to drain the lines.
- Unscrew the supply line from the old valve.
- Use two wrenches: one to hold the valve body, one to unscrew the valve’s large locking nut from the pipe.
- Clean the pipe threads and install the new valve with Teflon tape.
- Reconnect the supply line and turn the water back on slowly, checking for leaks.
If the valve is soldered to the pipe, or you’re not comfortable cutting into a pressurized line, this is your “call a pro” moment. A plumber can swap it in minutes.
Hot Water Recirculation Lines
If you’re running a dedicated line for a dishwasher, know that some homes have a hot water recirculation loop. This is a dedicated return line that keeps hot water moving near your fixtures so you get hot water instantly. If you’re tapping into a hot water line and hear a pump running, you might be connecting to this loop. It’s a more advanced system, but good to know exists for future plumbing projects.
Your Appliance Water Line Maintenance Roadmap
Your new supply lines are in. The job is not done. Think of them like the tires on your car. You do not install them and forget them for a decade. A simple, consistent checkup prevents big problems.
Create Your Inspection Schedule
Set two calendar reminders. One for every six months and one for each year. This takes five minutes.
- Every 6 Months: Get a flashlight and look behind your washing machine, dishwasher, and fridge. You are looking for two things: beads of moisture on the hose or valves, and any bulging or blistering on the hose body. A small leak today is a burst line tomorrow.
- Every Year: With the water turned off at the valve, feel the supply lines. Run your fingers along them. Are they stiff or brittle? Do they have tiny cracks? Rubber and plastic degrade from the inside out. Feeling for brittleness catches what a visual miss might miss.
This routine inspection is your cheapest and most effective flood insurance.
Follow the Replacement Rules
Do not wait for a failure. Proactive replacement is non negotiable. The lifespan depends entirely on what the line is made of.
- Standard Rubber or Plastic Lines: Swap these out every 5 years, no exceptions. They are the weakest link. I replace mine like clockwork.
- Braided Stainless Steel Lines: These are tougher, but not immortal. Replace them every 7 to 10 years. The real rule is to replace them at the first sign of any wear, like a frayed braid or a swollen fitting.
When you buy new lines, write the installation date right on the hose with a permanent marker. You will never guess its age again.
Use the Vacation Shut Off
Your washing machine valves live under constant pressure. When you leave town for more than a few days, turn both the hot and cold valves to the off position. This simple act relieves the pressure stress on the hoses and valves. I do this every single trip. It costs nothing and adds a huge layer of protection while you are not there to catch a leak.
Understand the Cost of Waiting
A new, high quality braided supply line costs about twenty dollars. Compare that to the cost of replacing flooring, drywall, and cabinetry from a slow leak that goes unnoticed for days. The math is not complicated. Twenty dollars now is always better than thousands in water damage later. I have been to too many service calls where a homeowner said they meant to replace that old hose. Do not let that be you.
When This Job Needs a Professional Plumber
Installing a supply line from an existing valve is solid DIY territory. Some situations, however, require a licensed professional. Knowing the difference saves you time, money, and prevents major headaches.
Clear Signs You Need to Call a Pro
Stop and call a plumber if your project meets any of these conditions.
- No Shut Off Valve Exists: You want to add a dishwasher, but there is no valve under the kitchen sink. A plumber needs to tee into the existing cold line and install a proper shut off valve.
- The Work Requires Soldering: If your home has copper pipes and the new connection needs a solder joint in a tight space behind walls or cabinets, the fire risk and skill required make this a pro job.
- You Need to Tap the Main Line: Running a new line for a fridge in a garage often means tapping your home’s main cold water line. This is not a compression fitting project.
Weighing Cost Versus Risk
Think about the hourly rate for a plumber. Now think about the cost of repairing water damage from a failed fitting you were not confident installing. Paying for one hour of a plumber’s time to make a perfect, watertight connection is a smart investment if you have any doubt. They have the tools and experience to get it right the first time. A leak happens at 3 AM, not at 3 PM while you are watching it.
Permits and Inspections
Any plumbing work that adds a new water line inside a wall or floor typically requires a permit from your local building department. A licensed plumber pulls this permit, does the work to code, and schedules the inspection. This is not just red tape. It ensures the work is safe and won’t cause problems for future homeowners or your insurance company. If your project involves drilling into studs or running new pipe, this is the pro’s domain.
Common Questions
Can I use the same type of supply line for all my appliances?
Not exactly. While 3/8″ braided stainless is standard for dishwashers and washing machines, refrigerators often use specific 1/4″ plastic or copper tubing for their low-volume needs. Always match the supply line to the appliance’s inlet size and your local plumbing code.
What’s the most common mistake homeowners make when connecting these lines?
Overtightening the fittings. Cranking too hard can crack the ferrule or crush the sealing washer, creating a leak instead of preventing one. Hand-tighten until snug, then use a wrench for just an extra quarter-turn.
How do I know if my existing shut-off valves need replacing before I connect a new line?
Test them. Turn the valve off and on. If it’s extremely stiff, leaks around the stem, or doesn’t fully stop water flow, replace it before connecting your new appliance. A reliable shut-off is your first line of defense.
Is it safe to run a refrigerator line through the back of a cabinet?
Yes, this is a common and safe route. Use clips to secure the tubing and ensure it has a gentle curve with no kinks. Just avoid running it directly against the back of the fridge where the coils get hot.
What should I do immediately after installing a new supply line to check for leaks?
Turn the water on slowly and inspect every connection with a dry paper towel-it reveals tiny drips. Then, run the appliance through a full cycle while monitoring for moisture. Catching a leak early prevents major damage.
The Two Rules for a Worry-Free Installation
Always start by shutting off the main water supply. Then, before you consider the job done, run the appliance and check every connection for drips.
Bob is a an HVAC and plumbing industry veteran. He has professionally helped homeowners resolve issues around water softeners, heaters and all things related to water systems and plumbing around their homes. His trusted advice has helped countless of his clients save time, money and effort in home water systems maintenance and he now here to help you and give you first hand actionable advice. In his spare time, Bob also reviews home water systems such as tankless heaters, water softeners etc and helps home owners make the best choice for their dwelling. He lives around the Detroit area and occasionally consults on residential and commercial projects. Feel free to reach out to him via the contact us form.