Sump Pump Check Valves: What They Do and How to Test, Install, and Fix Them
Hear water rushing back into your sump pit after the pump shuts off? That backflow is flooding your basement and your check valve has failed.
This guide gives you the straight facts. We will cover the valve’s function, why it’s non-negotiable, and how to test, install, and repair it yourself.
I’ve pulled my share of soggy check valves from flooded crocks. Here’s the deal: a working valve is the cheapest insurance you own.
The Sump Pump Check Valve, Explained in Plain English
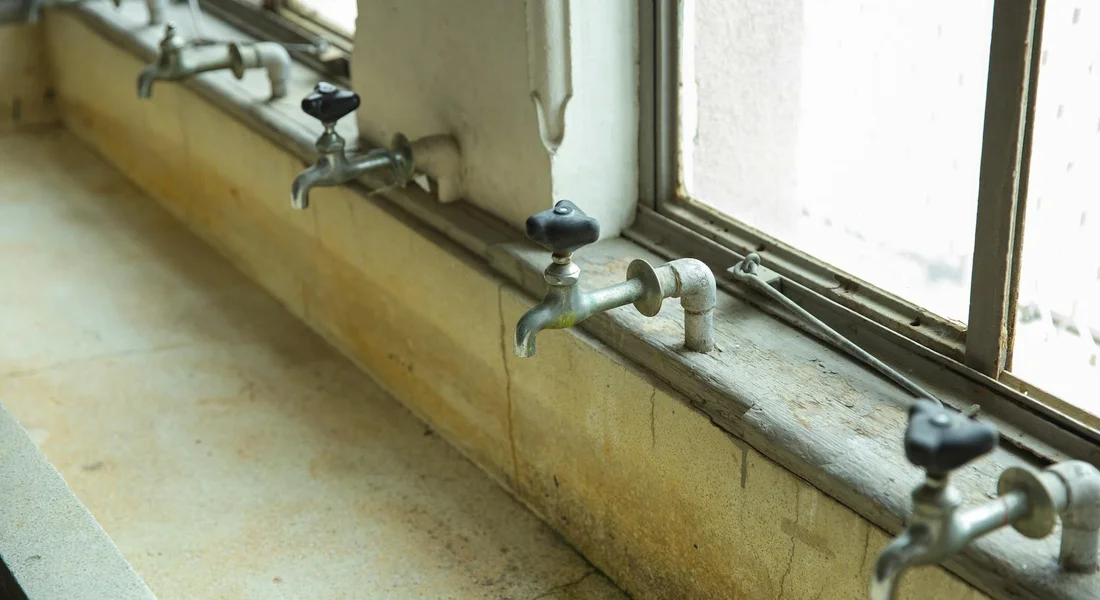
Think of a check valve like a one way street for water. Water can go out, but it can’t come back in. It’s a simple mechanical door in your discharge pipe that only swings or lifts open in one direction.
Every check valve has three basic parts:
- The Body: This is the main housing, usually made of PVC, ABS, or sometimes brass. It’s what you glue or thread into your pipe.
- The Internal Mechanism: This is the “door.” For sump pumps, it’s typically a flapper or a spring loaded poppet that gets pushed open by pumping pressure and slams shut when the pump stops.
- The Connection Points: These are the ends, sized to match your discharge pipe (like 1 1/2″ or 2″). They can be slip fittings for solvent cement or threaded for a seal-tape connection.
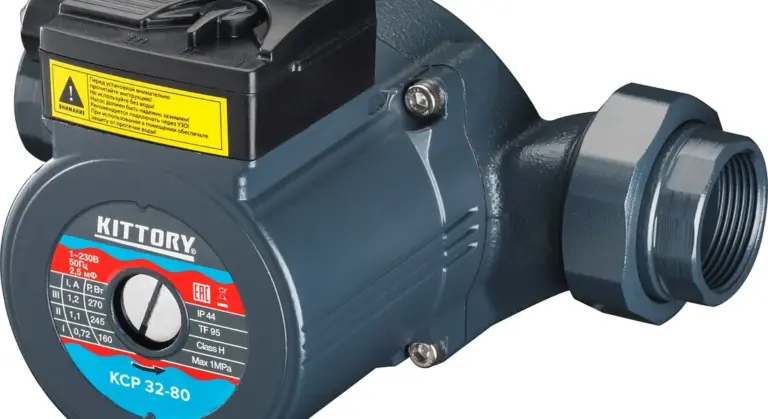
You’ll see a few types: swing check valves, spring check valves, and diaphragm check valves. For a standard submersible sump pump, a simple PVC swing or spring check valve is the most common and effective choice you’ll find at any hardware store.
Do all sump pumps have a check valve? No, they often do not. Many pumps are sold as a bare unit. The check valve is a separate, critical add on that you or your installer must provide. Understanding which components you need is part of the sump pump components installation steps. The next section takes you through the installation steps so you can assemble and install everything correctly. Skipping it is the single biggest mistake I see in DIY installations.
How Much Does a Sump Pump Check Valve Cost?
A basic, reliable PVC check valve for a residential sump pump costs between $15 and $40. The price shifts with material. ABS plastic is on the lower end, heavy duty PVC is standard, and corrosion resistant brass is on the higher end.
That cost is trivial compared to replacing a burned out pump motor or repairing water damage from a failing system. It’s the cheapest insurance policy in your basement.
Why You Absolutely Need a Check Valve on Your Sump Pump
The necessity is simple: it stops water hammer and backflow. When your pump shuts off, all the water in the vertical discharge pipe wants to flow back down into the pit by gravity. Without a check valve, it does.
This backflow creates a loud bang (the hammer) and forces the pump’s impeller to spin backwards. The sump pit refills instantly, triggering the pump to turn right back on. This cycle repeats every few seconds. Regular maintenance is essential for sump pumps to function properly.
The consequences are severe:
- Pump Short Cycling: The pump starts and stops constantly, never running a full cycle.
- Wasted Energy & Motor Burnout: That rapid cycling overheats the motor. I’ve replaced pumps killed in one rainy season from missing check valves.
- A Constantly Noisy System: You’ll hear loud bangs and near constant pump activity instead of the occasional, quiet hum.
Can you run a sump pump without a check valve? Technically, yes, it will move water. But you are guaranteeing premature pump failure and creating an annoying, inefficient system. Running a sump pump without a check valve is a deliberate choice to destroy your pump faster. Install the valve.
Tools and Materials You’ll Need for the Job
Gather your gear first. Doing this prevents mid-job trips to the hardware store. I keep a dedicated bucket in my basement with most of these tools for quick sump pump checks.
For Testing Your Check Valve
You can verify if your valve is working with just a few items. This is a simple diagnostic step every homeowner should know.
- Screwdriver(s): To open the sump pit cover and access the discharge pipe.
- Flashlight: To see clearly into the pit and along the pipe.
- Gloves and Eye Protection: The pit can be dirty, and you don’t want debris in your eyes.
- A helper (optional but useful): One person can watch the water flow in the pipe while the other triggers the pump.
The only tool you really need for testing is your eyes and ears, but safety gear is non-negotiable.
For Installing or Replacing a Check Valve
This is where you need the right hardware. Using the correct tools makes for a clean, leak-free install.
Tool Checklist
- PVC Cutter or Hacksaw: A PVC cutter gives the cleanest, squarest cut on plastic pipe. A hacksaw works if that’s what you have.
- Adjustable Wrenches (Two): You’ll need two for tightening hose clamps or loosening threaded unions.
- Screwdrivers: For tightening hose clamps with screw heads.
- Measuring Tape and Marker: For measuring the pipe and valve to mark your cut lines accurately.
- Deburring Tool or Utility Knife: To clean off any plastic burrs from your cuts for a smooth fit.
- Torpedo Level (Magnetic is best): To ensure your new valve is oriented correctly. The arrow on the valve must point up, away from the pump.
Materials Checklist
- The Correct Check Valve: Match the diameter of your existing discharge pipe (usually 1.25″ or 1.5″). Get a valve rated for sewage/effluent if your pump handles solids.
- PVC or ABS Primer & Cement: This is for solvent-welding plastic pipe. You must use the correct type (PVC cement for PVC pipe, ABS cement for ABS). They are not interchangeable.
- Stainless Steel Hose Clamps (Four): Needed if you’re using a flexible coupling or a rubber union connection.
- Pipe Couplings or Unions: You’ll need these to connect the new valve to the cut pipe. Flexible rubber couplings are the most DIY-friendly.
- Pipe Hanger or Strap: To support the discharge pipe after the valve. This prevents stress on the pump and the new connections.
Buying a valve kit with rubber couplers included saves time and guarantees you have all the connecting parts.
Safety Gear is Not Optional
- Safety Glasses: Plastic shavings, primer, and cement can splash. Protect your eyes.
- Work Gloves: Protects your hands from sharp pipe edges and dirty surfaces.
- Knee Pads (if needed): You’ll be kneeling by the sump pit. Your knees will thank you.
Before you touch anything, unplug the sump pump. You are working with water and electricity. Always disconnect the power at the outlet.
How to Test if Your Check Valve is Working (Or Has Failed)
You don’t need fancy tools to diagnose a check valve. The best method uses your eyes and ears. A working check valve makes a distinct sound when it closes.
The “Listen for the Thump” Test
Go to your sump pit during a cycle or pour a bucket of water in to trigger the pump. Watch the discharge pipe where it exits your basement wall. As soon as the pump shuts off, listen closely right at the valve’s location. You should hear a solid, low “thump” or “clunk” as the flapper or spring inside slams shut. It sounds like a car door closing firmly. Doing this check is part of a sump pump install test troubleshoot guide. If the sounds or timing don’t match, refer to the guide for troubleshooting steps and safety tips.
A clear, single thud confirms the valve is closing quickly and sealing, preventing water from flowing back. If you hear nothing, or just a faint trickling/gurgling sound, the valve is likely stuck open or its seal is worn out.
The Visual Sign of a Failed Valve
If you don’t hear the thump, watch the water in your sump pit right after the pump stops. This is the definitive test. With a failed valve, water that was just pumped out will immediately flow backward through the discharge pipe.
You will see the water level in the pit rise again by an inch or more within seconds. This causes the pump to short-cycle, turning back on much sooner to re-pump that same water. Seeing the water level surge back up after the pump stops is a sure sign the check valve isn’t holding. It’s wasting your pump’s life and energy.
When the Valve Sticks Shut
Failure isn’t just about staying open. A valve can also stick closed, which is trickier to diagnose. The symptoms mirror a failed pump: your pit fills with water, but the pump never kicks on. Before you blame the pump, you must check for a blockage.
Disconnect the power to the pump. Then, detach the discharge pipe from the pump outlet. Shine a flashlight into the pipe and the valve inlet. Look for debris like rocks, silt, or roots jamming the mechanism. A valve frozen shut by debris will stop all water flow, making you think the pump motor is dead.
Practical Steps to Test Your Check Valve
Here’s a simple sequence that integrates the common question, “How do you test a sump pump check valve?” into a safe, effective procedure.
- Safety First: Ensure the pump is plugged in and the circuit is on. Have a helper or bucket ready if you need to manually trigger the pump with water.
- Trigger a Cycle: Pour water into the sump pit until the float activates the pump. Let it run until it automatically shuts off.
- Listen Immediately: The instant the pump stops, put your ear near the check valve (usually 12-24 inches above the pump). Listen for the definitive closing “thump.”
- Watch the Water: Keep your eyes on the water level in the pit for 10-15 seconds after the pump stops. It should remain steady. If it rises, the valve has failed open.
- Inspect for Blockages: If the pump isn’t running at all, cut power, disconnect the discharge pipe from the pump, and check for a clog in the valve or pipe.
Performing these checks once or twice a year, especially before the wet season, takes five minutes. It’s the simplest way to catch a small problem before it leads to a flooded basement.
Red Flag Troubleshooting Guide
Your sump pump’s check valve rarely gives a polite warning. It fails loud and clear. Ignoring these signs can burn out your pump or flood your basement. Here’s how to read the signals and spot other warning signs of failure.
Loud Hammering or Banging Noises
This isn’t just an annoying sound. It’s called water hammer. It happens when the check valve slams shut violently because the internal mechanism (flapper or spring) is broken or missing. The column of water moving through your discharge pipe crashes to a sudden stop, shaking your entire plumbing line.
That pounding isn’t just loud, it can crack pipe fittings and joints over time, causing a major leak. If you hear this, you need to inspect the valve immediately. The repair is almost always a full valve replacement.
Pump Cycles Every Few Minutes
A healthy system runs, empties the pit, and rests. If your pump kicks on every 2-3 minutes like clockwork, the check valve is likely stuck open or its seal has failed. Water it just pumped out is flowing right back down the discharge pipe into the pit. The pump sees the rising water and starts again in a useless, energy-wasting loop.
This rapid cycling will burn out your pump motor in weeks, not years. To confirm, watch the discharge pipe outside after the pump stops. If you see or hear water trickling back down for more than a second, the valve has failed.
Visible Water Backflow Into the Pit
This is the most direct sign of total failure. After the pump shuts off, look into the sump pit. If you see a strong stream or even a trickle of water pouring back in from the discharge pipe, the check valve is doing nothing. The flapper is either jammed open, broken off, or the valve body itself is cracked.
Stop using the pump and disconnect it from power. With a failed valve, your pump cannot lower the water level effectively during a storm. This is a replace-on-sight scenario. Do not attempt to run the pump until a new valve is installed, especially in a situation like a basement flood caused by pump failure during a storm.
Pump Runs But Discharges Little Water
You hear the motor humming, but only a trickle comes out of the discharge pipe outside. While this can be a clogged pump intake or impeller, a severely obstructed check valve can also be the culprit. Debris like silt, small rocks, or roots can jam inside the valve, blocking the flow path almost completely.
First, check for a simple clog. Turn off the pump’s power, disconnect the discharge pipe at the check valve, and look inside. If the valve is clear but the pump still has low flow, the problem is likely the pump itself. If the valve passage is blocked, cleaning it might work, but replacement is more reliable.
Continuous Gurgling Sounds From the Discharge Pipe
A faint gurgle right as the pump stops is normal air release. A persistent gurgling or sucking sound that lasts for minutes indicates an air leak. This often happens at a poorly sealed union on the check valve or a cracked valve body. Air is being drawn into the pipe, which can prevent the pump from building proper pressure to move water efficiently.
Check all connections before and after the valve. Tighten them. If the sound continues, the leak is likely through the valve body itself, which means it’s no longer airtight and must be replaced.
When to Stop and Call a Pro
Some issues are beyond a quick DIY fix. Call a professional plumber or water systems technician if:
- You confirm backflow into the pit and are not comfortable cutting and reassembling PVC pipe.
- The valve is located in a cramped, hard-to-reach space inside the discharge line.
- After replacing the valve, the hammering noise or rapid cycling continues (this points to a larger system issue).
- You discover the discharge pipe itself is damaged, corroded (if metal), or improperly sloped.
Working with a malfunctioning sump pump system during heavy rain is a major flood risk. If you’re unsure, calling a pro is cheaper than replacing a finished basement.
Step-by-Step: How to Install a Sump Pump Check Valve
How do you install a sump pump check valve? You do it right the first time. A sloppy install here defeats the whole purpose and can flood your basement. Getting the valve location right is essential for proper function. In the next steps, we’ll show you exactly where to place it. Follow these steps.
- Turn Off and Unplug the Sump Pump. This is non-negotiable. You are working with electrical components and water. Disconnect the pump from power completely.
- Measure and Cut the Discharge Pipe. You need to remove a section of the vertical pipe to fit the valve. The valve must be installed in a vertical section of pipe, as close to the pump as possible, but above the pit cover. Measure the valve’s length, mark your pipe, and cut it cleanly with a hacksaw or pipe cutter.
- Dry-Fit All Components. Before any glue touches pipe, assemble the valve, any needed couplings, and the pipe sections. Check the arrow on the valve body-it must point up and away from the pump, toward the outside discharge point. Ensure everything fits and the orientation is correct.
- Apply Cement for PVC. If you have PVC pipe, clean the ends with primer, then apply a uniform layer of PVC cement to the pipe end and the inside of the valve or coupling. Push together with a quarter-turn twist and hold for 30 seconds. Work quickly.
- Secure with Stainless Steel Clamps. If your system uses flexible hose or rubber couplings, this is your connection method. Slide the clamps over the hose, attach the valve, and tighten the clamps securely with a screwdriver. Do not overtighten and crack the fitting.
The perfect location is in the vertical pipe run, about 12 to 18 inches above the sump pit cover. This keeps it accessible for service and above the water line in the pit. Picture your setup: pit, pump, a short vertical pipe, the check valve, then the pipe heading up and out. The valve is the one-way gatekeeper right after the pump.
Can You Temporarily Fix a Sump Pump Check Valve?
Yes, but you won’t like it. This is for an emergency only, like when a storm is actively flooding your basement and a new valve is a day away.
The most common failure is a flapper that won’t seal, allowing backflow. A desperate, short-term hack is to manually prop the internal flapper in the closed position. You can try wedging a small, smooth stone or a piece of plastic between the flapper and its seat inside the valve body. This forces it to stay shut and prevent backflow.
This is not a repair; it is a dangerous stopgap that can cause pump burnout. The pump now must build enough pressure to blast that prop loose every single cycle. It strains the motor immensely. Use this method only to prevent catastrophic flooding for a few hours until you can perform the proper installation steps above with a new valve. Do not walk away and think it’s fixed.
How to Repair or Replace a Faulty Check Valve
Let’s be honest. When your check valve fails, you don’t usually repair it. You replace it. The plastic PVC or ABS valves common in most home sump pits are designed as sealed units. For a part that typically costs between $15 and $40, spending time and money trying to fix it rarely makes sense. Replacement is almost always the answer.
When Repair is Actually Possible (Brass Valves)
There is one exception. Some older systems or heavy-duty installations use a brass, screw-together check valve. These can sometimes be serviced. You’ll know it if you have one; it will have a distinct hexagonal midsection you can unscrew.
Here is the process if you have a repairable brass valve:
- Shut off and unplug the sump pump. This is non-negotiable.
- Unscrew the valve from the discharge pipe on both sides and remove it.
- Clamp the valve body in a vise or hold it securely. Unscrew the central housing section.
- Inside, you’ll find a flapper or a spring-loaded poppet. Inspect it for cracks, warping, or mineral buildup.
- Clean all parts with vinegar to dissolve scale. Replace the internal flapper or spring mechanism with an exact match from a hardware store or plumbing supplier.
- Reassemble the valve with pipe thread sealant on the threads, then reinstall it in the line.
This is a niche fix for a specific type of valve; for 95% of homeowners, the job is a straightforward swap.
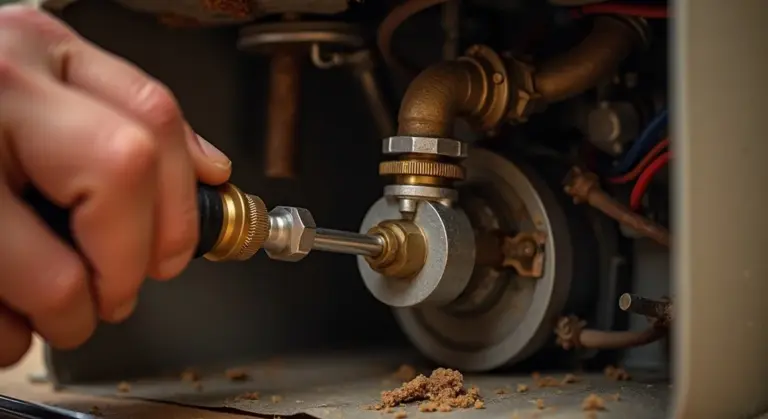
The Core Procedure: Replacing the Valve
Repair usually means replacement. The steps are the same as installing a new valve. You need two pipe wrenches or large channel-lock pliers, a hacksaw, and PVC primer & cement if you’re working with plastic pipe.
- Unplug the sump pump. Wait for any water in the pit to settle.
- Locate the check valve on the vertical discharge pipe, usually within a few feet of the pump.
- Use two wrenches: one to hold the pipe steady below the valve, the other to unscrew the union nut connecting the valve. For glued PVC, you will need to cut the pipe on both sides of the old valve.
- Remove the old valve. Clean the pipe ends of any old glue or debris.
- Install the new valve. Ensure the arrow on the valve body points UP, away from the pump. This direction is critical for proper operation.
- For threaded unions, hand-tighten the nuts, then give them a final quarter-turn with a wrench. For glued PVC, apply primer and cement to both the pipe and fitting, then push together firmly with a slight twist. Hold for 30 seconds.
Double-check the valve’s orientation before you finalize the connections-installing it backwards is a common mistake that causes immediate failure.
Answering “How Do You Repair a Sump Pump Check Valve?”
This common question has a simple answer. You don’t, in the traditional sense. You replace it. The internal mechanism on a standard valve is not serviceable. Consider a faulty check valve like a failed light switch; you don’t take it apart to fix the tiny spring inside, you just install a new one. The replacement procedure outlined above is your repair manual. It’s a one-hour project that saves you a $200+ service call and protects your basement from water damage. Keep a spare valve on your basement shelf. You’ll thank yourself later.
The DIY vs. Pro Verdict: Difficulty Rating (4/10)
For a homeowner who’s comfortable with basic tools, replacing a sump pump check valve is a 4 out of 10 on the difficulty scale. It’s simpler than replacing the pump itself and mostly involves cutting and gluing PVC pipe. You won’t need to solder copper or thread iron pipe.
Your DIY Scope: Testing, Cleaning, Straightforward Replacement
This project is absolutely within your reach if your system uses standard PVC or ABS plastic pipe. Your DIY tasks are clear.
- Testing: Listen for loud water hammer or check for backflow after the pump shuts off. You can physically lift the flapper in a clear valve to see if it moves freely.
- Cleaning: If the valve is accessible and serviceable, you can unscrew the union to clean debris from the flapper and seat.
- Replacement: If the valve is shot, you can cut out the old one and install a new valve with slip-fit PVC couplings and primer/cement. The key is having enough straight pipe on either side of the old valve to make clean cuts and fit the new assembly.
On my own basement system, I keep a spare 1.5-inch PVC valve and two couplings on a shelf. The entire swap takes about 30 minutes, and the glue sets in 15.
When to Call a Licensed Plumber
Know your limits. Hire a pro if you see any of these red flags.
- Complex Plumbing: The discharge pipe makes multiple tight turns right at the valve, leaving no room to work.
- Cast-Iron or Metal Pipes: This requires a pipe threader or specialized knowledge to connect to your new PVC valve.
- No Clearance to Cut: The pipe is tight against a joist or wall, making a clean, square cut with a hacksaw or PVC cutter impossible.
- Basic Discomfort: If the thought of measuring, cutting, and gluing pipe makes you nervous, the service call fee is worth the peace of mind.
The Saturday Morning Project Reality
For most homes built in the last 30 years, the sump pump line is simple PVC running straight up from the pit. Getting the right PVC pipe size for a sump pump ensures proper drainage and long-term reliability. This is a classic one-trip-to-the-hardware-store project you can finish before lunch. Buy the correct valve size, two slip couplings, a can of PVC primer and cement, and a little pipe if you need it. Dry-fit everything twice before you glue. Once the glue sets, you’re protected for another decade.
Recommended Products: What to Look For
Choosing the right check valve isn’t complicated, but getting it wrong creates leaks and headaches. You want a part that will last for years in a wet, demanding environment.
Skip the cheap, thin plastic valves you find in bargain bins; they crack under pressure and are the most common source of new-valve failures I see. Look for a valve made of sturdy schedule 40 PVC or ABS plastic. These materials handle the constant water flow and pressure without becoming brittle. A clear inspection window built into the valve body is a fantastic feature. It lets you see the flapper move to confirm operation and spot any debris buildup without taking anything apart.
Prioritize a Union-Style Valve
This is the single biggest upgrade you can make for future you or the next technician. A standard check valve is solid, meaning the entire unit must be cut out of the pipe for replacement.
A union-style valve has threaded disconnect nuts on each end, allowing you to unscrew it from the discharge line in minutes. When your sump pump eventually needs service or replacement, you can simply unscrew the check valve instead of sawing through glued pipe. The small extra cost is worth every penny. I installed union valves on my own basement system, and it made replacing a pump last year a straightforward afternoon job instead of a plumbing project.
Match Your Discharge Pipe Diameter Exactly
This seems obvious, but it’s a frequent mistake. Your sump pump’s discharge outlet and the existing pipe running outside are a specific size, and you should ensure they connect properly.
You must buy a check valve that matches this diameter perfectly; the standard sizes are 1.5 inches or 2 inches. Do not try to adapt a 1.5-inch valve to a 2-inch pipe using reducers, as this restricts flow and makes the pump work harder. Before you buy, use a measuring tape or a small ruler to measure the inside diameter (ID) of your discharge pipe. Take the old valve with you to the store if you’re unsure.
Keep It Quiet: Sump Pump Check Valve Maintenance Tips
A quiet check valve is a happy check valve. If yours starts making a loud “thwack” or “bang” when the pump shuts off, that’s its cry for help. A bit of regular attention prevents that noise and a wet basement. I schedule this check with my annual water heater flush, it’s a good way to remember.
Your Simple Annual Checkup
You don’t need fancy tools for this. Set aside 15 minutes once a year, preferably in early spring before the heavy rains. Here’s what to do.
- Listen for Proper Operation: Have someone pour a bucket of water into the sump pit to trigger the pump. When the pump stops, you should hear the check valve close. A solid “click” or “thud” is normal. A loud, jarring bang means the valve is slamming shut, which strains the system.
- Check for Leaks at Connections: With the pump running, look at both ends of the check valve. Feel for any spraying or dripping water. A leak here means water is flowing back into your pit, making the pump work double-time. Tighten the hose clamps or union nuts, but don’t over-tighten PVC fittings.
- Clear the Pit of Debris: Small stones, silt, and other junk can get sucked up and prevent the valve’s flapper from sealing. Unplug the pump, bail out any standing water, and remove any debris by hand. I keep a small shop vac nearby just for this job.
Test It With the Pump
Never test your sump pump by itself. The check valve is part of the team. Your test routine should include it.
Before the wet season, manually lift the pump float to start a cycle. Watch the discharge pipe outside. When the pump turns off, the water flow should stop immediately. If water continues to trickle or flow backwards out of the pipe for more than a second, your check valve is failing.
A valve that allows backflow is worse than no valve at all, as it creates a continuous loop that will burn out your pump motor.
Sand and Silt Are the Enemy
If your groundwater is sandy or full of fine silt, your maintenance schedule changes. That abrasive grit acts like sandpaper on the valve’s seal and hinge.
In these conditions, check the valve every six months. Listen more closely for a “chattering” sound as it closes, which indicates grit on the seal. You may need to replace a standard valve with a more durable, sealed mechanical model sooner than the typical 5-7 year lifespan.
Common Questions
What does a check valve actually do for my sump pump?
It acts as a one-way gate. It opens to let pumped water flow out to the yard or storm drain, then slams shut the instant the pump turns off. This prevents that entire column of water from rushing backwards, which floods your pit and strains the pump.
What happens if my sump pump doesn’t have a check valve?
The pump will short-cycle itself to death. Water will flow back down the pipe after every cycle, causing the pump to restart every few minutes. This rapid, pointless cycling wastes energy and will burn out the motor in a single season.
How can I quickly test if my check valve has failed?
Listen and look right after the pump shuts off. You should hear a solid “thump” at the valve. If you don’t, immediately watch the water level in the sump pit; if it rises, water is flowing back in and the valve has failed. Unplug the pump until it’s fixed. These checks help you identify whether the issue is the valve or the pump. If the pump still isn’t pumping after this, consult the sump pump not pumping guide for a step-by-step troubleshooting path.
What’s the most common mistake when installing a check valve?
Installing it backwards. The arrow on the valve body must point up and away from the pump, toward the discharge point. Also, support the pipe above the valve with a strap to prevent stress on the connections.
Can I repair a check valve, or do I need to replace it?
For the standard PVC valves in most basements, replacement is the only reliable fix. They’re sealed units. For the cost ($15-$40), it’s smarter to swap in a new one than to try and repair worn internal parts. Always keep a spare on hand.
Keeping Your Sump Pump Check Valve in Top Shape
Make a habit of testing your check valve every six months to spot issues before water backs up into your basement. If it fails, swap it out quickly to stop flooding and avoid costly damage.
Bob McArthur
Bob is a an HVAC and plumbing industry veteran. He has professionally helped homeowners resolve issues around water softeners, heaters and all things related to water systems and plumbing around their homes. His trusted advice has helped countless of his clients save time, money and effort in home water systems maintenance and he now here to help you and give you first hand actionable advice. In his spare time, Bob also reviews home water systems such as tankless heaters, water softeners etc and helps home owners make the best choice for their dwelling. He lives around the Detroit area and occasionally consults on residential and commercial projects. Feel free to reach out to him via the contact us form.