Water System Filter Maintenance: The Straight Talk on When to Change Them
Is your water pressure dropping or does it taste funny? Your filter is likely begging for a change.
We are going to lay out the exact schedule and tasks to follow. We will cover the major filter types, how often to replace each one, and the simple upkeep that prevents big repairs.
I have over a decade on service calls and run the same systems in my own house. Here is the takeaway: a consistent schedule is cheaper than an emergency fix.
Why Your Water Type Dictates Your Schedule
Your maintenance calendar starts with your water source. City water and well water are different beasts. Treating them the same is a fast track to clogs, bad tastes, and failed equipment. Make sure to test your water properly to address the unique needs of each source.
Municipal water is processed. Treatment uses chemicals at key steps—coagulants, disinfectants, and pH adjusters. These chemicals shape every stage of purification. It contains chlorine or chloramines to disinfect it. It often carries sediment from miles of aging pipe. Your filters are fighting a consistent, known battle against these additives and particulates.
Well water is raw. It comes straight from the ground. Common enemies include iron, manganese, sand, and hydrogen sulfide (that rotten egg smell). The load can be heavy and varies with the season. A spring thaw can dump a ton of sediment into your well.
Water Science Snippet: Total Dissolved Solids (TDS)
TDS is a measure of all inorganic salts, metals, and minerals dissolved in your water. Think of it as the “stuff” in your water. Higher TDS means your filters, especially reverse osmosis membranes, work harder and load up faster. A simple TDS meter can show you if your water is lightly or heavily loaded.
| Factor | Well Water System | City Water System |
| Primary Contaminants | Iron, Manganese, Sand, Sulfur, Bacteria | Chlorine, Sediment, Pipe Scale |
| Sediment Pre-Filter Change | Every 1-3 months (often sooner) | Every 3-6 months |
| Carbon Filter Focus | Taste/odor from sulfur | Removing chlorine taste |
| System Longevity Note | Heavy sediment shortens pump and valve life. How often do i need to replace my well pump? A good pump lasts 10-15 years, but poor filtration can kill it in half that time. | Chlorine degrades rubber seals and plastic parts faster over time. |
How Often to Change Each Type of Filter (The Real Numbers)
Generic timelines are useless. Here are the real-world intervals I use for my house and recommend to clients, based on average water conditions.
Sediment Pre-Filters
These are your system’s workhorses. They catch sand, silt, and rust. A clogged sediment filter strains everything downstream.
- Standard Spin-Down or Cartridge Filter: Check every month. Change every 3-6 months for city water, 1-3 months for well water.
- Big Blue/Slim Line 10″ or 20″ Cartridges: Typically last 6 months (city) to 3 months (well).
The rule is simple: if you see visible dirt or your water pressure drops, it’s time.
Carbon Filters
Carbon removes chemicals, chlorine, and bad tastes. It has a set capacity and then it’s done.
- Standard Carbon Block Cartridge: Replace every 6 months. This is the most common answer to how frequent to change charcoal water purification filters.
- Granular Activated Carbon (GAC) Tanks: Last 1-2 years, but often get changed annually as part of routine service.
If your water starts tasting like a swimming pool again, the carbon is exhausted.
Water Softener Resin
The resin beads that grab hardness minerals don’t get “replaced” on a schedule like a filter. They get regenerated with salt. But they do wear out.
How often change water softener filter? The resin tank itself lasts 10-20 years. The resin beads inside slowly degrade and need replacement every 10-15 years on average. You’ll know it’s time when your softener runs out of capacity quickly, or you see tiny tan beads in your faucet screens.
Reverse Osmosis (RO) Membranes
The heart of an RO system. Its life depends entirely on your water pressure and TDS.
- With standard pre-filtration: Replace every 2-4 years.
- High TDS or low pressure: Expect 2 years or less.
Use a TDS meter. If the TDS of your “pure” water creeps above 10-15% of your tap water TDS, the membrane is failing.
UV Bulbs for Disinfection
UV bulbs lose intensity long before they burn out. You cannot see this drop.
- Replace the UV bulb annually, without fail.
- Clean the quartz sleeve that protects the bulb every 3-6 months when you change other filters.
A UV system with an old bulb gives you a false sense of security. The schedule is non-negotiable.
Your System Maintenance Roadmap
| Component | Check | Replace (City Water) | Replace (Well Water) |
| Sediment Pre-Filter | Monthly (pressure) | Every 3-6 months | Every 1-3 months |
| Carbon Filter | Taste/Odor | Every 6 months | Every 6 months |
| Water Softener Resin | Beads in faucet, low capacity | Every 10-15 years | Every 8-12 years* |
| RO Membrane | TDS Meter Reading | Every 3-4 years | Every 2-3 years |
| UV Bulb | – | Annually | Annually |
*Well water resin often fails faster due to iron fouling, even with proper upkeep.
The Red Flag Troubleshooting Guide
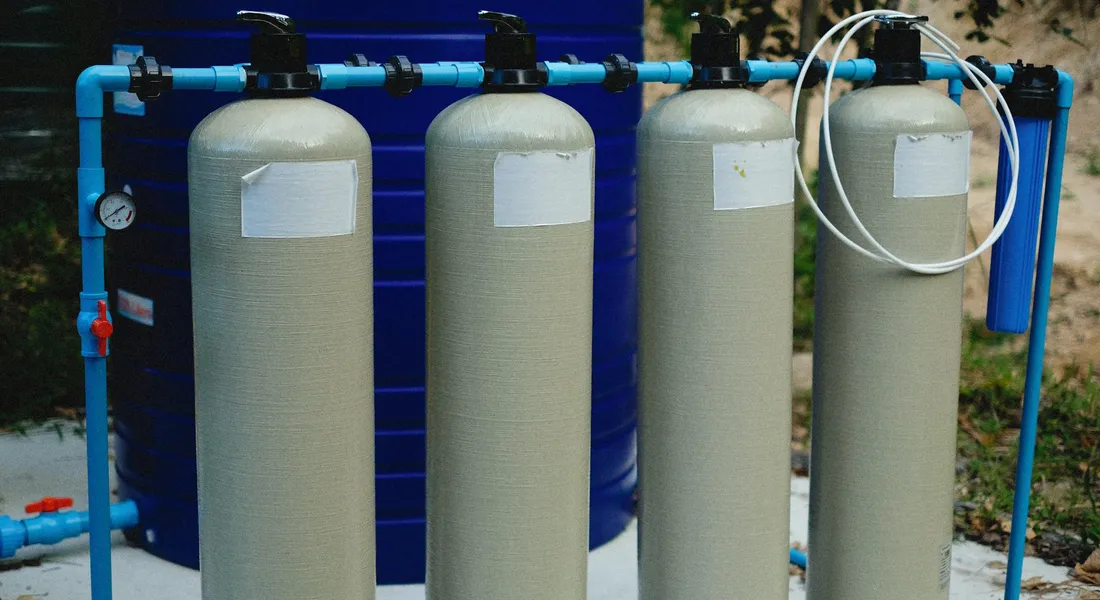
Do not wait for a calendar alert. Your water will tell you when a filter is done. Ignoring these signs means you are drinking dirty water or damaging your appliances.
1. Your Water Tastes or Smells “Off”
This is your first clue. Filters lose their ability to trap contaminants.
If your water smells like rotten eggs, your carbon filter is dead. It can no longer absorb hydrogen sulfide gas. A metallic or salty taste often means your softener resin is fouled or the filter before it has failed.
Your nose and tongue are the best test kits you own.
2. Noticeable Drop in Water Pressure
A slow sink faucet or weak showerhead is a classic symptom. The filter media is so clogged with sediment, scale, or iron that water can barely squeeze through.
Check if the low pressure is at one faucet or everywhere. If it’s everywhere, your main sediment filter is screaming for help. That’s a common signal in water filtration troubleshooting. The next steps will guide you through a quick diagnostic.
A clogged filter makes your pump work harder and wastes energy.
3. New Spots on Dishes or Surfaces
Your water softener is just a specialized filter. When it stops working, hardness minerals get through.
You will see white, chalky spots on glassware, shower doors, and faucets. Soap will stop lathering well. This means the softener resin is exhausted or the pre-filter is clogged, overloading the softener.
Spotty glassware is a billboard announcing your softener has failed.
4. Unusual Noises from the System
Listen to your equipment. Gurgling, hissing, or banging from filters or the softener tank is bad news.
Gurgling often means air is being sucked in through a crack or bad seal. Hissing or banging in pipes can be from trapped air or water hammer caused by a restricted filter. The system is straining.
Your water system should be quiet. New sounds are a call for service.
5. Visible Sediment or Discoloration
This is the most obvious red flag. If you see sand, grit, or rust particles in your water, the sediment filter has been bypassed for weeks.
Brown or yellow water points to a failed filter that’s no longer removing iron or manganese. Carbon fines (black specks) mean a carbon block filter is breaking down internally.
If you can see it in your glass, your filtration system has completely failed.
Your Complete Filter Change Toolkit
Being prepared turns a messy chore into a 15-minute job. Gather these items before you start.
Tools & Material Checklist
- A large bucket (5-gallon is ideal)
- Old towels or shop rags
- Adjustable wrenches (or a dedicated filter wrench)
- Channel-lock pliers
- Teflon tape (for pipe threads)
- Liquid thread sealant (for plastic filter housing threads)
- A flashlight or headlamp
Lay towels down under the housing. You will spill water, guaranteed.
Recommended Products to Keep on Hand
You do not want to discover you need a filter on a Sunday night. Keep these common spares in a cool, dry place.
- 5-Micron String-Wound Sediment Filter: The workhorse. It catches sand, silt, and rust to protect everything downstream.
- Catalytic Carbon Block Filter: Better than standard carbon for killing rotten egg smell and removing chlorine.
- Standard Replacement Cartridges: Know your system. Keep one of each specific filter your house uses.
Buy filters in multi-packs. It is cheaper and ensures you always have a spare.
Pro-Tip: Shut Off and Depressurize Safely
This is the critical first step everyone rushes. Doing it wrong makes a huge mess.
- Find the shutoff valve before the filter system. Turn it to the “off” position.
- Open a downstream faucet, like the kitchen cold water, to relieve pressure in the pipes.
- Press the pressure relief button on your filter housing (if it has one).
- Place your bucket under the housing. Use your filter wrench to loosen the sump. Let any remaining water drain into the bucket.
Never skip depressurizing. A pressurized housing can blast off and cause injury or flooding.
The DIY vs. Pro Verdict on System Maintenance
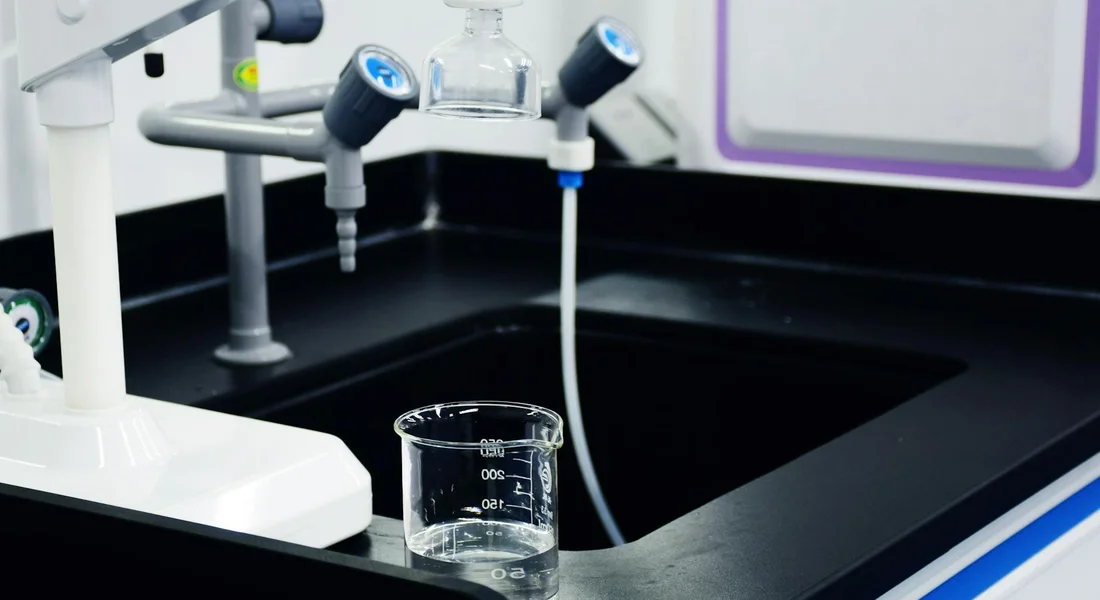
Not every maintenance task requires a service call. Knowing what you can tackle safely saves money and time.
Difficulty Ratings for Common Filter & Media Swaps
I rate tasks from 1 (changing a lightbulb) to 10 (full system replumb). Your skill may vary.
- Spin-On Sediment or Carbon Filters (2/10): This is the entry point. You need a filter wrench, a bucket for drips, and five minutes. The hardest part is remembering to turn off the water first and releasing pressure.
- Whole-House Filter Housing O-Ring or Gasket (4/10): More involved than a spin-on. You must disassemble the sump, clean the housing, and properly seat the new ring. A small tear during install will cause a major leak.
- Water Softener Resin Replacement (6/10): It’s messy and physically demanding. You’re dumping 1-2 cubic feet of tiny beads from a tall tank. Getting the riser tube screen back in place correctly is critical. Doing this in my basement was a half-day project.
- Under-Sink RO Membrane & Filters (3/10): Simple if you follow the order of operations. Use the provided push-connect tubing tools to avoid leaks. The mistake I see is installing the sediment filter after the carbon block, which ruins the membrane fast.
When to Seek Professional Help
Call a pro before you create a bigger, more expensive problem. Three scenarios always warrant it.
Complex Plumbing or Electrical Work. Installing a UV system means wiring it to a dedicated circuit and ensuring proper flow. Splicing into main line copper or rerouting pipes often requires a permit, especially when selecting pipes and installation practices.
Suspected Biological Contamination. If you have confirmed coliform bacteria or other pathogens, do not guess. A pro will properly diagnose the source, shock chlorinate the system correctly, and verify the fix with testing.
You Cannot Identify the Problem. Strange noises, consistent pressure loss, or error codes you can’t clear mean it’s time for an expert diagnosis. Paying for one hour of labor for a correct answer is cheaper than buying the wrong parts.
When NOT to Try This
Be honest with yourself. Some jobs have zero room for error.
- Major Control Valve or Bypass Valve Repairs: These valves direct all your home’s water. A mistake during reassembly can lead to flooding or no water at all.
- Disassembling a UV System Quartz Sleeve: The sleeve is fragile, expensive, and surrounds a powerful UV lamp. One slip and you’re buying a new sleeve and possibly dealing with broken glass near electrical components.
- If You Are Not Comfortable Shutting Off the Main Water Valve: This is the non-negotiable first step for 90% of water system work. If you don’t know where it is or how to turn it, stop. Learn that first before attempting any filter change.
Code & Compliance Check
Always verify that replacement filters or cartridges carry a valid NSF certification relevant to your contaminant concern. A filter labeled “NSF 42” improves taste and odor. One labeled “NSF 53” reduces specific health contaminants. Using an uncertified filter for safety-critical applications gives a false sense of security. Understanding these certifications helps you compare products across brands. In the next steps, we’ll explain how to verify NSF certifications for water filters and point you to reputable resources.
Building Your Personal Maintenance Calendar
The manufacturer’s schedule is a guess. Your water use, quality, and equipment create the real timeline. Here is how to build a schedule you’ll actually follow.
Start by logging three simple things: your water pressure, any changes in taste/odor/flow, and the date of every filter change or system check. A note on your phone or a magnet notepad on the softener works. After a few months, patterns emerge. You’ll see if your sediment filter clogs in 2 months or 4.
Your Seasonal Maintenance Guide
Tying tasks to seasons makes them easier to remember. This is a sample framework based on a home with a well, softener, and whole-house sediment filter.
What Maintenance Schedule Should You Follow?
The only correct schedule is the one you create and stick to. It answers this FAQ by making maintenance personal. Combine your equipment manuals, your logged observations, and the seasonal checklist above. Set quarterly phone reminders. The goal isn’t perfection, it’s preventing small issues from becoming wet, expensive disasters. A simple calendar beats a perfect plan you forget every time.
What Helped Me: A Tech’s Long-Term Strategy
I learned this lesson the hard way. I forgot to change the sediment filter on my own whole-house system. A clogged filter caused a pressure drop that stressed my water heater’s elements. It was an expensive and completely preventable mistake.
That’s when I started setting quarterly reminders on my phone for the first weekend of every new season. Spring, summer, fall, winter-the dates are easy to remember. When the alert pops up, I head to the basement. It takes 20 minutes.
I keep a simple maintenance log on a clipboard hanging next to my equipment. It’s just a sheet of paper with four columns:
- Date
- System (e.g., “Whole-House Filter,” “Softener”)
- Action Taken (e.g., “Replaced 5-micron sediment cartridge,” “Checked salt level, added 2 bags”)
- Notes (e.g., “Pressure gauge reading 55 PSI,” “Brine tank clean”)
This isn’t for a science fair. It’s so I can look back and see exactly when I last did something. No guessing. My wife can also check it if I’m away.
How Long Should a Water Softener Actually Last?
A good quality water softener, with basic care, should last 15 to 25 years. The resin inside that actually removes the hardness is the main wear item. Think of it like the brakes on your car-they wear down with use.
The control valve and electronics are what usually fail first, often because of neglect you can avoid. Here’s what kills them early:
- Using the wrong salt. Always use high-purity salt pellets, not crystals or rock salt. The impurities in cheap salt create sludge in the brine tank that clogs the valve.
- Letting the salt level drop to zero. The system tries to regenerate with weak brine. This forces it to work longer and harder, wearing out components.
- Ignoring the brine tank.
- Bypassing the softener for outside hose use. It seems smart to save softened water, but constantly turning the bypass valve on and off strains the seals inside the valve body. Set it and leave it, or install a separate hard water line for your outdoor spigots.
Every year or two, you need to shut it off, siphon out the water, and manually remove the hard salt bridge or sludge layer that forms at the bottom. A mushy salt bridge prevents the tank from making proper brine.
The Real Cost is Inconsistency
Think of filter changes and salt checks as tiny, cheap insurance payments. Missing them is like skipping payments until your policy gets canceled right before the flood.
Consistent, small care prevents big, wet, expensive headaches. A $20 filter change prevents a $400 service call for a fried pump. Five minutes checking salt prevents a weekend without soft water. Your system isn’t magic-it’s machinery. Simple, scheduled attention keeps it running quietly for decades.
Common Questions
How do I remember to change my filters on time?
Set quarterly reminders on your phone tied to the seasons-it’s the method I use. Keep a simple paper log or note on your phone with the date and filter type changed. Consistency is the only trick; a schedule you forget is useless.
What’s the real risk if I just wait until something seems wrong?
You risk damaging expensive equipment like your pump or water heater from the strain of a clog. More importantly, you’re likely consuming contaminants once a filter is exhausted. Proactive changes are always cheaper and safer than reactive repairs.
Why does well water usually need more frequent filter changes?
Well water is untreated and carries a heavier, more variable load of sediment and minerals like iron. A spring thaw or heavy rain can dump a surge of dirt into your system overnight, rapidly clogging filters that seemed fine last week. This is especially problematic in well water systems known for iron and sulfur content.
Can I just clean my sediment or carbon filter instead of replacing it?
Do not clean disposable filters. Washing a sediment filter can force contaminants deeper into the media, and it will not restore flow. Cleaning a carbon block destroys its internal structure and chemical-trapping ability. Always replace with a new, certified cartridge.
Which maintenance tasks are truly safe for a homeowner to do themselves?
Replacing standard spin-on filters and under-sink RO cartridges is very safe if you follow the steps to shut off water and depressurize first. Adding salt to your softener is also fine. Anything involving electrical components, main plumbing lines, or system disassembly is a call to a pro.
Making Filter Maintenance a Habit
Stick to a regular schedule based on your water usage and the manufacturer’s advice. Watch for signs that your filtration needs attention—reduced flow, unusual taste, or cloudy water—and use these cues to adjust maintenance. Keeping an eye on these signs also helps you anticipate costs and keep your filtration schedule on track. This routine check is your best defense against poor water quality and expensive system failures.
Written by Bob McArthur. Bob is a an HVAC and plumbing industry veteran. He has professionally helped homeowners resolve issues around water softeners, heaters and all things related to water systems and plumbing around their homes. His trusted advice has helped countless of his clients save time, money and effort in home water systems maintenance and he now here to help you and give you first hand actionable advice. In his spare time, Bob also reviews home water systems such as tankless heaters, water softeners etc and helps home owners make the best choice for their dwelling. He lives around the Detroit area and occasionally consults on residential and commercial projects. Feel free to reach out to him via the contact us form.