Installing PEX Water Lines: A Practical Guide to Methods, Fittings, and Tools
Worried about plumbing leaks or complicated connections? PEX makes home water line projects manageable for any determined DIYer.
We will cover the three main connection methods, how to pick the right fittings for the job, and the specific tools that guarantee a solid, leak-free install.
I’ve swapped out miles of copper for PEX in my house and on service calls. The short takeaway: dry-fit everything twice before you make a permanent connection.
Your PEX Plumbing Toolkit: Methods and Must-Have Parts
You install PEX using one of three main connection methods. Each has its own tools and best uses.
The Three Connection Methods
Crimp connections use a copper ring and a special crimping tool. You slide the ring over the PEX, insert the fitting, and squeeze the ring with the tool. This is the standard for most professional plumbers and new construction. It creates a very strong, permanent seal.
Clamp connections, often called cinch, work almost the same way. The difference is the ring. You use a stainless steel clamp and a cinching tool. The tool pulls the clamp tight. Many technicians, including myself, prefer clamp rings for repairs because the tool is often lighter and the stainless steel won’t corrode.
Push-to-connect fittings, like SharkBite, are the easiest. You cut the pipe, push it straight into the fitting, and it locks. No tools are needed for the connection itself. I keep a few in my truck for emergency fixes. They are perfect for quick, accessible repairs but cost more per fitting.
Method Comparison: Choose Your Fighter
Here is a direct comparison to help you pick.
| Method | Cost of Fittings | Tool Price | Ease for DIY | Reliability |
|---|---|---|---|---|
| Crimp | Low | Moderate ($50-$150) | Moderate | Excellent |
| Clamp (Cinch) | Low | Moderate ($40-$120) | Moderate | Excellent |
| Push-To-Connect | High | None | Very Easy | Very Good (for accessible locations) |
For a whole house re-pipe, crimp or clamp is the way to go. For a single valve replacement, push-to-connect saves the day.
Essential Parts: More Than Just Pipe
You need the right parts. This answers the common question, ‘What types of fittings are used with PEX?’
- PEX Tubing: You have two main types. PEX-A is more flexible. It can bend around corners without a fitting. PEX-B is stiffer and usually costs less. For my home projects, I use PEX-B for long straight runs and PEX-A for tricky spots.
- Fittings: These are usually brass or plastic. You need elbows (90-degree and 45-degree), tees (to split a line), and couplings (to connect two pipes end-to-end). Get all the same brand as your rings or clamps.
- Shutoff Valves: Always install quarter-turn ball valves. They are reliable. Put them under every sink and before appliances.
- Mounting Plates: These are metal or plastic brackets. You nail them to studs or joists to hold the pipe securely. Loose pipes can bang and wear out.
Why PEX is Better for Your Water
PEX is made from cross-linked polyethylene. It is a plastic polymer that is inert. This means it does not react with water, so it will not corrode or leach metals like lead or copper into your supply, unlike some older pipes that may require a lead in water test for peace of mind. Old galvanized or copper pipes can slowly dissolve, raising your water’s TDS (Total Dissolved Solids) and sometimes giving it a metallic taste. PEX keeps your water’s chemistry and taste as it should be.
Gathering Your Gear: The PEX Installer’s Tool Belt
Having the right tools makes the job smooth. Here is your definitive checklist.
Tools for Each Connection Method
This list answers ‘What tools are needed for PEX installation?’ directly.
For Crimp or Clamp Methods:
- Crimper Tool (for copper rings) OR Cinch Tool (for stainless clamps).
- Go/No-Go Gauge: This little tool checks if your crimp or clamp is the correct tightness. Do not skip this.
- PEX Tubing Cutter: A sharp, ratcheting cutter gives a clean, square cut. Do not use a hacksaw.
- Deburring Tool or Utility Knife: After cutting, remove any plastic burrs from the inside and outside of the pipe. A smooth end seals properly.
- Pipe Reamer: This cleans out the inside of fittings. Important if you are reusing old valves.
For Push-To-Connect Methods:
- PEX Tubing Cutter (same as above).
- Deburring Tool (same as above). A clean cut is critical for the O-ring seal inside a SharkBite.
- Disconnect Tool (optional): A small plastic collar that helps you remove the pipe from the fitting if you make a mistake.
The General Tool Kit
You will also need these basics for any installation.
- Measuring Tape: For planning your runs.
- Permanent Marker: To mark cut lines on the pipe.
- Sturdy Ladder: For working in ceilings or high walls.
- Adjustable Wrenches: For connecting to existing iron pipe or water heater nipples.
- Drill/Driver and Screws: For securing mounting plates.
For a one-time project like installing a water softener loop, renting the specialty tool is a smart move. Most big-box hardware stores rent PEX crimpers or cinch tools for a daily fee. It beats buying a tool you will use once.
The Core Connection: How to Properly Join PEX Pipe and Fittings

How do you connect PEX fittings? For a permanent, code-approved connection, you’ll use a crimp or clamp ring. Both work the same way. A copper crimp ring or stainless steel clamp is tightened over the pipe and fitting to create a seal. The process is straightforward if you follow the steps exactly. A sloppy connection will leak, especially when connecting to heater-to-PEX fittings like SharkBite.
Gather your tools first. You need a PEX tubing cutter, a deburring tool, your crimp rings, the fittings, and the correct crimp tool or clamp tool. I keep a go/no-go gauge on my keychain when I’m on a job. It’s that important.
- Cut the pipe perfectly straight. Use a sharp PEX cutter, not a hacksaw. A crooked cut is your first step to a bad seal.
- Deburr the inside and outside of the cut end. Remove all plastic shreds. A clean pipe end slides onto the fitting smoothly and seats fully.
- Slide the crimp ring onto the pipe. Make sure it’s at least 1/8-inch from the end. Don’t forget this step. Forgetting the ring is the most common rookie mistake.
- Push the pipe onto the fitting’s barbed end until it hits the shoulder. You should feel it bottom out. Wiggle it slightly to ensure it’s fully seated.
- Position your crimp tool over the ring, centered on the fitting’s barb. Squeeze the tool handles firmly until they click or stop. The ring should now be compressed uniformly.
Every single connection you make must be tested with a go/no-go gauge. Slide the gauge over the crimped ring. If the “go” side fits and the “no-go” side doesn’t, you’re good. If the no-go side fits, the crimp is too loose and must be redone. Do not skip this.
Code & Compliance Check
Your local plumbing code is the final word. Most adopt rules requiring PEX to be supported every 32 inches horizontally and within 8 inches of a fitting. Use plastic hangers or straps, never metal that could cut into the pipe. For your health, ensure all PEX pipe and fittings are marked NSF/ANSI 61, meaning they’re certified for potable water. The stuff at the big box store should have this, but always check. When choosing pipes installation practices, plan supports and routes to meet those spacing rules and protect joints from stress. Choose components and methods that align with code, water quality standards, and long-term reliability.
Running Lines and Adding On: From Whole House to Ice Makers
What are the steps for running PEX through a house? It’s a logical process. First, map your route from the main shutoff to the farthest fixture. Plan to minimize fittings and keep lines accessible. For a whole-house job, I often run 3/4-inch main trunks and use 1/2-inch branches to individual fixtures, which is generally recommended for residential applications. This maintains good pressure.
- Shut off the main water supply and drain the system. Open the lowest faucet in the house.
- Run your main trunk lines first. Follow joists and studs where possible. Keep pipes away from hot ducts, sharp edges, and areas where they could be punctured.
- Secure the main run. How do you support and secure PEX piping? Use J-hooks or pipe straps. Remember the code: support every 32 inches and within 8 inches of every fitting. Don’t let the pipe sag.
- Branch off to fixtures. Use tee fittings to split lines. Leave a generous service loop of extra pipe at each fixture location-it makes final hookup easier.
How to Add a Valve to a PEX Water Line
You need a local shutoff for a sink or toilet. Adding one is simple. Turn off the water to that section and drain it. Use your cutter to remove a short section of the horizontal PEX line. Install a PEX shutoff tee. Connect the existing pipe to two sides of the tee. Run a new short piece of pipe from the third outlet of the tee up to your new quarter-turn valve. Now you can isolate that fixture without shutting off water to the whole house.
How to Hook Up an Ice Maker Water Line
This is a common weekend project. You have two options. The fast way is to use a self-piercing saddle valve clamped onto a cold water line (like under the sink). The better, more reliable way is to install a dedicated 1/4-inch tee with a shutoff on your main PEX line. From that tee, run a 1/4-inch plastic or copper ice maker line. Route it through the floor or cabinets to the space behind the refrigerator. Leave a 6-foot coil of line behind the fridge so it can be pulled out for service. Then connect the fridge water line to this supply and check for leaks before final installation. Having the line readily accessible makes the fridge hookup quick and easy.
How to Test an Ice Maker Line
Before you connect the line to the refrigerator, you must test it. Turn the new shutoff valve on slowly. Check every connection—at the tee, any couplings, and the end of the line—for drips or spray. Wipe connections dry and look again in a few minutes. Also, let the water flow from the open end of the line into a bucket for a moment. This clears any debris and confirms you have good, clean flow. Only then should you connect it to your fridge’s inlet. Make sure you followed the proper steps to turn off the water supply before installing the new line.
The DIY vs. Pro Verdict
A whole-house PEX replumb is a 6/10 in difficulty. It demands planning, patience, and a solid understanding of your home’s layout. Running a single ice maker line is a much more manageable 3/10 task. Any plumbing work that requires a permit, involves the main water entry point, or touches your gas line is a clear signal to call a licensed professional. They handle the pressure tests and inspections so you don’t have to. Also, for fridge ice makers, the water line size matters—most use 1/4 inch OD tubing (some setups use 3/8 inch adapters). Matching the size ensures proper fittings and easier routing.
Steer Clear of Leaks: Common PEX Installation Pitfalls
Getting the pipe in the wall is one thing. Getting it to stay dry for twenty years is another. I’ve fixed enough leaks from DIY jobs and even some pro shortcuts to know the usual suspects. Outdoor runs add concerns like frost protection and burial depth. UV exposure and temperature swings can affect PEX in exposed areas. Most PEX failures come from a handful of simple, avoidable Outdoor PEX installation errors. Let’s walk through them so you can get it right the first time.
What are the common mistakes to avoid when installing PEX?
This question gets to the heart of a reliable install. The top mistakes aren’t about skill, they’re about attention to detail and using tools correctly.
- Using the Wrong Ring or Cinch Size: This is the big one. A 1/2-inch PEX fitting needs a 1/2-inch ring. A 3/4-inch fitting needs a 3/4-inch ring. They are not interchangeable. I keep my rings and my crimp tools labeled. Using the wrong size will not create a proper seal and will leak immediately or, worse, down the road.
- Not Inserting the Pipe Fully: You must feel the pipe bottom out inside the fitting. Look for the depth mark on the PEX tubing and ensure it’s past the edge of the fitting. If it’s not all the way in, the ring crimps over empty space instead of the solid fitting barb. This creates a weak point that will eventually blow off.
- Overtightening Threaded Adapters: When you connect a PEX adapter to a threaded pipe or valve, hand-tighten it, then give it just one more full turn with a wrench. That’s it. Overtightening cracks the plastic fitting or distorts the metal threads. Think of it like tightening a lug nut, you want it snug, not crushing the wheel.
- Kinking the Tubing: A sharp bend can fold the tube like a soda straw. This restricts flow dramatically and weakens the wall. Always bend PEX with a smooth, wide curve. If you need a sharp 90-degree turn, use a 90-degree elbow fitting. It’s cheaper than fixing a leak inside a wall later.
The Non-Negotiable Final Step: The Pressure Test
Never, ever close up a wall without testing. It’s the single best way to catch a mistake before it becomes a disaster.
After your entire new section is connected, cap the ends. Connect an air compressor or a water hose test kit to a drain valve. Pump the system up to at least 80 PSI for air, or your house’s normal water pressure (usually 40-60 PSI) for water. Let it sit under pressure for a minimum of one hour, but ideally overnight, and check the gauge for any drop. Listen for hissing and check every single connection for mist or drips. This one step has saved me thousands in drywall repair.
The “Red Flag” Troubleshooting Guide
Sometimes a problem slips through. Here’s how to spot a bad connection after the fact.
- A Fine Mist or Drip at a Fitting: This is the most obvious sign. Water is finding a way out. Tightening a crimp ring never works. You must cut out the bad section and re-make the connection.
- Low Water Pressure Downstream of a Connection: If one faucet has weak flow, trace the line back. A kinked tube or a fitting where the pipe wasn’t fully inserted (causing an interior lip) can act like a clog.
- A Bulging or Cracked PEX Ring: A proper crimp is uniform. If the ring is deformed, cracked, or looks stretched, it was installed incorrectly or with the wrong tool. It will fail.
Keeping It Flowing: PEX System Care and Longevity
PEX tubing is famously low-maintenance. It doesn’t corrode, it resists scale, and it’s flexible. The maintenance focus for a PEX system isn’t the pipe, it’s the components attached to it and the environment it’s in. Your valves, fittings, and exposure points need a little attention.
System Maintenance Roadmap
You don’t need a complex schedule. Just add these few checks to your home routine.
- Visual Check of Exposed Fittings: Every few months, take a quick look at any connections you can see under sinks, in the basement, or at your water heater. You’re looking for condensation, minor drips, or corrosion on metal adapter fittings. Catching a small leak early is everything.
- Insulate Lines in Unconditioned Spaces: PEX can freeze and rupture. In your attic, crawlspace, or garage, wrap the pipes with foam pipe insulation. It’s cheap, it slides on, and it prevents one of the most common causes of pipe failure.
- Flush the System for Slow Flow: If your water pressure seems lower overall, sediment might be stuck in your aerators or valve seats. Turn off your water main, open all your faucets to drain the lines, then turn the water back on full blast for a minute at each faucet. This often clears out debris without any disassembly.
Fittings and Valves: The Real Wear Points
The PEX in your walls will likely outlast you. The brass and plastic parts it connects to, however, are the moving parts. Over decades, the O-rings inside shutoff valves can wear out, and valve stems can seize from mineral buildup. This is normal system aging, not a flaw.
Recommended Products to Keep on Hand
A little preparedness prevents a big emergency. Here’s what I keep in my own toolbox.
- Spare Fittings: Keep a few extra 1/2-inch and 3/4-inch couplings and 90-degree elbows. If you ever need to repair a section, you have the part immediately.
- Silicone Grease: A tiny tube is perfect for lubricating the rubber O-rings inside lever-style shutoff valves if they get stiff, or for coating new valve stems during installation to prevent future seizing.
- Quality Shutoff Valves: When you install valves, skip the old multi-turn gate valves. They corrode shut. Use quarter-turn ball valves made of brass or durable polymer. They last longer, operate smoothly, and provide a more reliable shutoff.
Common Questions
How do I connect PEX to my existing copper or CPVC pipes?
Use a approved transition fitting, like a threaded adapter or a push-to-connect coupling. Shut off the water, cut the old pipe cleanly, and deburr the end thoroughly. Follow the fitting manufacturer’s instructions exactly and always pressure-test the new joint before closing up walls.
What’s the real difference between PEX-A and PEX-B for my home project?
PEX-A is more flexible and can bend around corners without a fitting, which is great for complex runs. PEX-B is stiffer and typically costs less, making it a solid choice for long, straight trunk lines. Your choice mainly depends on your project’s layout and your budget.
How do I properly plan the layout before running PEX through my house?
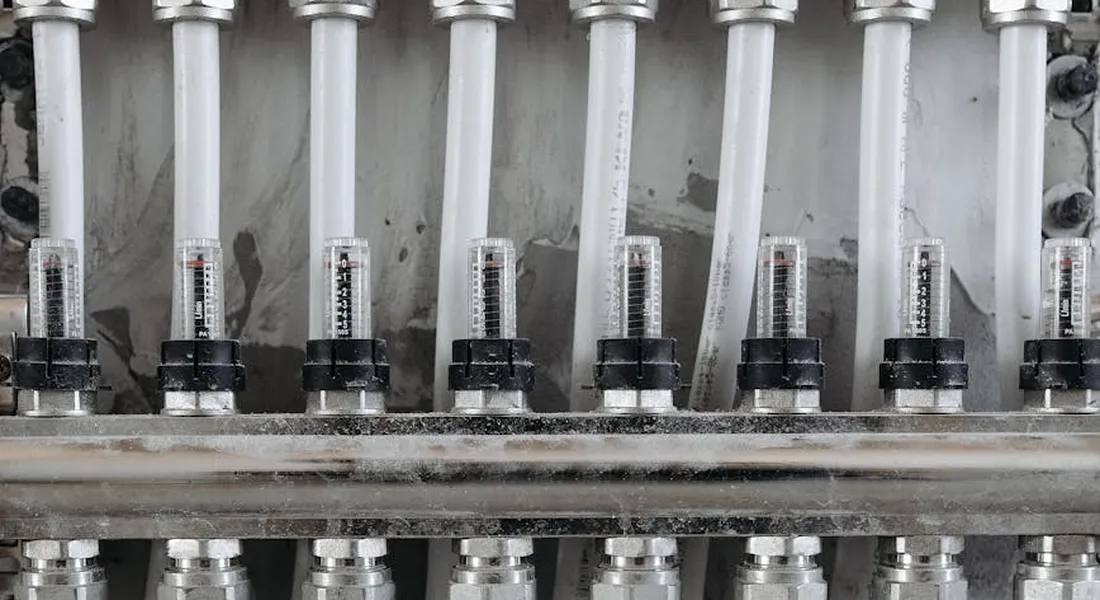
Start at the main shutoff and map your route to the farthest fixture, aiming to minimize fittings. Keep pipes accessible and route them away from heat sources and sharp edges. A well-planned “home run” or “manifold” system simplifies future maintenance and troubleshooting.
What’s the correct way to support PEX to prevent future issues?
Use plastic J-hooks or straps-never metal that can cut into the pipe. Secure the pipe every 32 inches on horizontal runs and within 8 inches of every fitting. Proper support prevents sagging, reduces stress on connections, and stops the annoying “water hammer” bang.
Can I use push-to-connect fittings inside a wall or ceiling?
No. Most plumbing codes prohibit installing push fittings (like SharkBites) inside enclosed, inaccessible spaces. They are only approved for accessible locations, such as under an open sink. For any permanent run inside a wall, use the crimp or clamp method.
Finish with Confidence: Your PEX Checklist
Pick one connection method and master it with your tools before you touch the main line. A few minutes of practice on spare pipe prevents leaks and wasted time on the final run. If you’re connecting PVC to copper water lines, plan for the right adapters as you practice. That foresight pays off when you reach the main line.
Written by Bob McArthur. Bob is a an HVAC and plumbing industry veteran. He has professionally helped homeowners resolve issues around water softeners, heaters and all things related to water systems and plumbing around their homes. His trusted advice has helped countless of his clients save time, money and effort in home water systems maintenance and he now here to help you and give you first hand actionable advice. In his spare time, Bob also reviews home water systems such as tankless heaters, water softeners etc and helps home owners make the best choice for their dwelling. He lives around the Detroit area and occasionally consults on residential and commercial projects. Feel free to reach out to him via the contact us form.