Sump Pumps 101: What They Are, How They Work, and the Types for Your Home
Water in your basement is a problem you can’t ignore. A sump pump moves that water out before it causes damage.
This article gives you the straight facts. We will cover what a sump pump is, how it works, and the different types for home systems.
I’ve pulled my share of failed pumps from wet pits. Get this right the first time and you avoid a messy, expensive cleanup later.
What Is a Sump Pump? A Simple Definition
A sump pump is a specialized water pump designed for one job: removing accumulated water from a low point in your home, typically a basement or crawl space sump pit.
First, let’s get the spelling right. You’ll see it written as two words: “sump pump.” In Spanish, it’s often called a “bomba de sumidero.”
Its core job is to act as your basement’s first line of defense against flooding and the expensive water damage that follows. Think of it like a sentry that automatically kicks in when groundwater rises or a storm drain backs up, moving that water away from your foundation before it can seep into your living space.
How a Sump Pump System Works in Your Basement
You might wonder how sump pumps work in basements. It’s a simple, automatic cycle. Picture this system in your head, including the frequency of the cycle, and it will make sense.
- Water from the soil or a perimeter drain system flows into a specially dug hole in your basement floor called a sump pit (or crock).
- Inside the pit, a float switch-a device that works just like the float in your toilet tank-rises with the water level.
- When the water (and the float) reach a preset “on” height, the switch triggers the pump motor to turn on.
- The pump’s spinning impeller creates suction, pulling water up through a pipe called a discharge line that leads outside your home, away from the foundation.
- Once the water level drops, the float falls back down and shuts the pump off until the next time it’s needed.
That’s the complete loop: water enters the pit, the float rises, the pump turns on, and water is ejected outside. A check valve on the discharge pipe stops ejected water from flowing back down into the pit once the pump cycles off.
The Main Parts: Your Sump Pump’s Anatomy
Knowing the parts helps you understand maintenance and talk to a pro. Here’s what’s inside that pit.
- Pump Motor: This is the engine that provides the power to move water.
- Impeller: A spinning fan inside the pump that creates centrifugal force to push water out.
- Pit Liner: A durable plastic or fiberglass barrel that holds the pump and keeps the hole from collapsing.
- Float Switch: The “brain” that tells the pump when to turn on and off based on water level.
- Check Valve: A one-way gate on the discharge pipe that prevents water from flowing back into the pit.
- Discharge Pipe: The PVC or flexible hose that carries the pumped water from your basement to the yard.
Test the float switch every few months by pouring a bucket of water into the pit to make sure it activates the pump. If it doesn’t, the switch is likely stuck or failed, which is a common reason for pump failure during a storm.
Types of Sump Pumps for Home Systems: Pedestal vs. Submersible and More

For most homeowners, the choice comes down to two main designs. You’ll see pedestal pumps and submersible pumps. Beyond that, you have critical backup systems and a few specialty units for specific jobs.
Your primary decision will be between a submersible pump and a pedestal pump, and the right choice depends on your basement’s layout and your tolerance for noise.
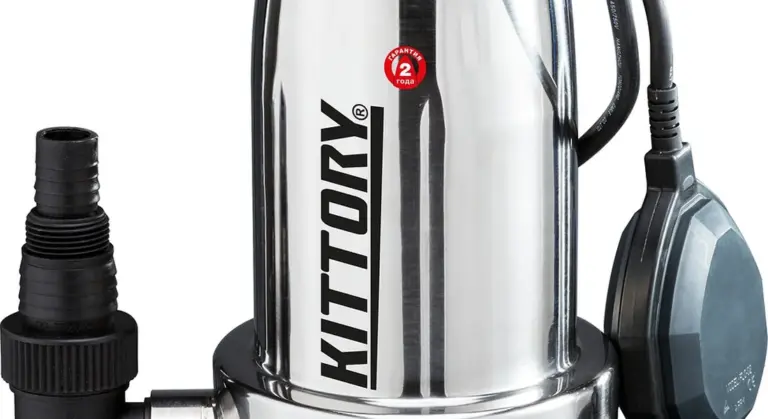
Submersible Sump Pumps
A submersible pump is designed to operate fully underwater, seated right at the bottom of your sump pit. The entire unit, motor and pump, is sealed inside a waterproof housing.
Think of it like a pool pump that lives in the water it’s moving.
- Pros: These pumps are much quieter since the water muffles the sound. They are typically more powerful and can handle higher volumes of water, making them good for wet regions. Being out of sight in the pit keeps your basement looking neat.
- Cons: The sealed design makes them more expensive upfront. Servicing can be trickier because you have to lift the heavy, wet unit out of the pit to check or repair it. The constant immersion can also lead to shorter motor life compared to a dry motor.
Pedestal Sump Pumps
A pedestal pump has a column, or pedestal, that holds the motor up and out of the water. Only the pump impeller at the bottom of the rod sits in the pit.
The motor stays high and dry above the sump pit lid.
- Pros: The motor lasts longer because it never gets wet. You can see and hear it running, which makes basic troubleshooting easier. They are simpler machines, which makes them cheaper to buy and usually cheaper to fix.
- Cons: They are noticeably louder. The motor and pedestal take up permanent floor space next to the pit, which can be awkward in a finished basement or utility room.
Battery Backup Sump Pumps: Your Power Outage Insurance
This isn’t a primary pump type. A battery backup is a separate, secondary pump installed alongside your main pump. They are just one of backup and secondary systems available for pumps.
Its only job is to kick on when the power goes out, which often happens during the very storms that cause flooding.
It runs on a large, deep-cycle battery (like a marine or RV battery) that stays charged by your home’s power. If you lose electricity, a float switch activates the backup pump to keep your basement dry. Every home with a serious flooding risk needs one.
Specialty Pumps: Effluent Pumps and Combination Systems
You might hear about effluent pumps. These are for an ejector pit, not a standard sump pit. They pump out gray water from sinks, laundry, or a basement bathroom. They are not designed for sandy groundwater.
Combination systems are a popular upgrade. They bundle a primary submersible pump and a battery backup pump into a single, compact unit that fits in one sump pit. This saves space and simplifies installation, giving you built-in protection.
Sump Pump Horsepower and Capacity: How Much Pump Do You Need?
You see horsepower ratings on sump pumps like 1/3, 1/2, or 3/4. It’s easy to think bigger is always better. It’s not. Beyond horsepower, several key factors matter for a basement setup. Knowing these factors helps you choose the right sump pump. Buying too much pump is a common and expensive mistake that can cause short cycling and burn out the motor faster.
How Many Horsepower Is a Sump Pump?
Think of horsepower like the engine in a car. A bigger engine can move more water, faster. Most standard home sump pumps are 1/3 or 1/2 horsepower. A 1/3 HP pump can move about 2,000 to 3,000 gallons per hour. A 1/2 HP pump can move 3,000 to 5,000 gallons per hour. When choosing sump pump horsepower for a basement, consider basement size and potential water intrusion. Picking the right horsepower balances fast drainage with energy efficiency.
For a visual, a 1/3 HP pump can empty a standard 30-gallon garbage can of water in about 30 seconds. That’s a lot of water. You are matching the pump’s power to the job, not buying the most powerful tool on the shelf.
Why Most Homes Only Need 1/3 or 1/2 HP
Unless you live in a swamp or have a chronically flooded commercial basement, you don’t need a 3/4 or 1 HP pump. An oversized pump will turn on, empty the pit in five seconds, and shut off. Then, a little more water trickles in and it kicks on again. This is short cycling.
Short cycling destroys a pump motor. It’s like starting your car, driving one block, turning it off, and repeating all day. My own basement uses a reliable 1/3 HP submersible pump. It has handled every heavy Midwestern rainstorm for eight years without a hiccup.
Key Factors for Choosing the Right Pump
Forget horsepower for a second. Focus on these three things first.
Basement Size and Water Entry
Is your basement damp with just seepage, or does water pour in during a storm? A small, unfinished basement with minor seepage is a job for a 1/3 HP pump. A large, finished basement with a history of water intrusion needs a 1/2 HP pump.
Local Water Table
Your local water table is the natural level of water underground. If you live in a low-lying area near a lake or river, the ground is saturated more often. Your pump will run more frequently. In a high water table area, a robust 1/2 HP pump is smart insurance.
Pump Capacity (Gallons Per Hour)
This is the most important number. Capacity tells you how much water the pump can move. You find it on the pump’s spec sheet. Match the pump’s GPH rating to your worst-case scenario. Here’s a simple guide.
Finally, check the float switch. A vertical float switch works best with a narrower pit. A tethered float switch needs more room to swing. Make sure your pit is big enough for the pump and switch you choose.
The DIY vs. Pro Verdict: Installing a Sump Pump
Installing a sump pump from scratch is a serious job. I rate it a solid 7 out of 10 on the difficulty scale for a competent DIYer. Even after installation, you’ll need to test and troubleshoot it properly to ensure it works when you need it.
A skilled homeowner can absolutely handle replacing a failed pump in an existing, properly installed pit liner. It’s a swap job: disconnect the old pump and pipe, drop in the new one, and reconnect. I did this in my own basement last spring when my 10-year-old pedestal pump gave out. The pit was already there, the discharge line was set, and it took me an afternoon.
You need to call a professional for three major tasks. The first is digging the sump pit itself, especially if it requires breaking through your basement floor slab. The second is coring a new hole through your home’s foundation wall for the discharge pipe. The third is any complex discharge routing, like running pipe under a deck or patio to get water far enough away from your house. Getting these steps wrong can lead to foundation damage or a system that doesn’t work when you need it most.
Tools & Materials Checklist
If you’re replacing a pump or tackling a new install with a pre-dug pit, you’ll need the right gear. Here’s my go-to list from my service truck and home workshop.
Tools You’ll Need:
- PVC pipe cutters or a hacksaw (for clean pipe cuts)
- PVC primer and cement (the blue glue)
- Adjustable wrenches or channel locks
- Wire strippers and electrical tape
- A power drill with assorted bits
- A level and a tape measure
- A shovel (for spreading gravel)
Materials You Must Have:
- The sump pump (submersible or pedestal)
- Rigid PVC pipe and fittings (1.5″ or 2″, check your pump’s outlet)
- A check valve (to stop water from draining back into the pit)
- A sump pit liner (if doing a new installation)
- Clean gravel or drainage rock (for the pit base)
- A GFCI electrical outlet (or you must plug the pump into one)
- A sealed, vented pit lid (this is now code in most places)
Code & Compliance Check
Ignoring local building codes can get you fined and leave you with a useless pump. Always check with your local building department first. Their rules are the final word.
The discharge water must be directed away from your home’s foundation to a point where it can properly drain. This often means running pipe at least 10 to 20 feet from the house. You cannot just dump it next to your basement wall.
Most modern codes require a sealed, gasketed lid on the sump pit. This stops moisture from evaporating into your basement and helps prevent radon gas entry. Your pump must be plugged into a Ground Fault Circuit Interrupter (GFCI) outlet for shock protection. These are the non-negotiables I see inspectors look for every time. There are also sump pump electrical circuit safety requirements, such as a dedicated circuit with proper overcurrent protection and weatherproof wiring. Following these helps ensure a safe, code-compliant installation.
Maintenance and Troubleshooting: Keeping Your Pump Ready
Think of sump pump maintenance like changing your furnace filter. You can’t see the problem until it’s too late, and the cost of neglect is a flooded basement. This isn’t optional work.
Your pump sits idle for months, then needs to perform perfectly during a storm. The only way to guarantee that is with regular checks.
Your Annual Sump Pump Maintenance Roadmap
Follow this simple schedule. It takes minutes and saves thousands in water damage.
- Test Monthly. Unplug the pump, then slowly pour a 5-gallon bucket of water into the pit. Plug it back in. The float should rise, trigger the pump, and the pit should empty. If it doesn’t, you have a problem.
- Clean the Pit Every 3-6 Months. Debris like gravel, silt, and sticks can jam the float or clog the intake screen. Scoop it out. I use a cheap plastic garden trowel I keep by my pit.
- Inspect the Discharge Outlet in Spring and Fall. Go outside and find where the pipe exits your house. Make sure it’s clear of leaves, mud, or insect nests. In freezing climates, disconnect the hose in winter to prevent ice blockages.
Battery backup systems need love, too. Test the alarm monthly-there’s usually a button. Check the water level in the battery cells every 3 months, topping up with distilled water if needed. A dead backup battery gives you zero protection during a power outage.
The Red Flag Troubleshooting Guide
Your pump will tell you when it’s failing. Listen to it. Here are the common cries for help.
- Pump Runs Constantly. This usually means a stuck float switch. The float arm is hung up on the pit wall or debris, telling the pump the water is always high. Free the float arm.
- Strange Noises (Grinding, Rattling). A grinding sound often means a worn impeller or a failing bearing. Rattling can be a loose discharge pipe or a damaged check valve. Unplug the pump and inspect.
- Visible Rust or Heavy Corrosion. This is advanced wear, usually on older pumps. Corrosion weakens the housing and internal parts. Plan for a full replacement soon.
- Pump Cycles On and Off Too Frequently. This points to a problem with the check valve. If it’s faulty, water flows back into the pit after each cycle, triggering the pump again. Replace the check valve.
- No Action During a Pour Test. You add water, but nothing happens. First, check that the pump is plugged in and the outlet has power. If power is good, the float switch or the pump motor itself has likely failed.
Recommended Products and Final Advice
Choosing the right parts isn’t about finding a magic brand. It’s about picking the right type built with the right features. Here’s what to look for in the three most critical components.
Your Main Pump: A Reliable Submersible
For most homes, a submersible pump is the workhorse. You want one that stays quiet and lasts for years.
- Look for a cast iron or stainless-steel housing, not plastic. It handles heat from running longer and resists corrosion.
- Check the horsepower. A standard 1/3 HP model is fine for most pits. A 1/2 HP pump is better for deeper pits or heavier water volume.
- A removable filter screen is a must. It lets you clean out debris without taking the whole pump apart.
A solid submersible pump is your first line of defense, so don’t cheap out on the one that will do 95% of the work.
Your Backup: A Quality Battery Backup System
When the power goes out during a storm, this is what keeps your basement dry. It’s a separate pump and control unit.
- Prioritize systems with a sealed, maintenance-free battery. You shouldn’t be checking water levels.
- Look for a control panel with an alarm. It should beep loudly if the pump runs, if power fails, or if the battery is low.
- Choose a backup pump with a different switch type than your main pump. If a stuck float disables your primary, the backup uses a different mechanism to turn on.
A Critical Part: A Sturdy PVC Check Valve
This valve stops water from flowing back into the pit after the pump shuts off. A bad valve makes your pump work twice as hard.
- Get a valve with a clear union. This lets you easily remove the pump for service without cutting the discharge pipe.
- A silent or quiet model is worth it. The loud “thump” from a cheap flapper valve wears out the valve and annoys everyone.
- Make sure it’s the right size for your discharge pipe, usually 1 1/2 inches.
When NOT to Try This Yourself (Limitations)
Installing or fixing a sump pump has clear boundaries. Knowing when to stop saves you money and prevents disaster. Understanding the differences between sump pump repair and installation can guide your next step. It helps you know when a quick fix is enough or when a full install is needed.
- Major foundation or concrete work. If your pit is crumbling, needs to be enlarged, or requires jackhammering a new location, call a pro. Messing with your foundation is a different game.
- Extensive electrical work. Running a new dedicated circuit from your main panel is for a licensed electrician. Tapping into an existing circuit with a proper GFCI outlet is often the DIY limit.
- Diagnosing complex switch or control problems. If you’ve checked for clogs and power but the pump still acts erratically, the issue could be in the switch mechanism or control board. Water damage from a failed pump costs thousands. A professional service call costs a couple hundred.
When to Seek Professional Help Immediately
Some situations are red flags. If you see any of these, put the wrench down and pick up the phone.
- You open the pit and see wiring that looks old, frayed, or you simply don’t understand how it’s connected.
- Your pit constantly runs dry in seconds or the pump never stops. This often means the pit needs to be dug deeper or relocated to where water actually collects.
- You have a working pump, but you still get water seepage or flooding during heavy rains. This indicates a bigger drainage issue around your foundation that a pump alone can’t fix.
A good plumber or basement waterproofing pro can solve these problems correctly the first time. Paying for that expertise buys you real peace of mind, which is the whole point of having a sump pump.
Common Questions
1. Submersible or Pedestal: Which type is better for my home?
It depends on your basement’s layout and your priorities. Choose a submersible pump for a quiet, out-of-sight installation in a living area. Choose a pedestal pump for easier, lower-cost maintenance in a utility space where motor noise is acceptable.
2. What’s the single most important part to check regularly?
The float switch is the brain. Test it every few months by pouring water into the pit to ensure it triggers the pump. A stuck switch is the most common reason for pump failure during a storm.
3. Is a battery backup pump really necessary?
Yes, if you want reliable protection. Your main pump is useless during a power outage, which often happens in severe weather. A backup pump is your essential insurance policy to keep your basement dry when the lights go out.
4. What are the clear signs my sump pump is about to fail?
Listen for unusual grinding or rattling noises and watch for constant running or rapid on/off cycling. Visible rust on the pump body is another major red flag. Address these warnings immediately to avoid a failure.
5. When should I absolutely call a professional instead of DIY?
Call a pro for any work involving breaking concrete, coring a new discharge hole through your foundation, or complex electrical wiring. Getting these steps wrong can cause foundation damage or create a dangerous electrical hazard.
Keep Your Basement Dry and Your Mind at Ease
Trust your sump pump to do its job, but verify its work with simple, regular checks. Start by pouring a bucket of water into the pit to make sure the pump activates and drains properly every few months. Keep the pit clean to prevent debris from causing clogs. A clean sump pump pit makes future checks and maintenance easier.
Bob McArthur
Bob is a an HVAC and plumbing industry veteran. He has professionally helped homeowners resolve issues around water softeners, heaters and all things related to water systems and plumbing around their homes. His trusted advice has helped countless of his clients save time, money and effort in home water systems maintenance and he now here to help you and give you first hand actionable advice. In his spare time, Bob also reviews home water systems such as tankless heaters, water softeners etc and helps home owners make the best choice for their dwelling. He lives around the Detroit area and occasionally consults on residential and commercial projects. Feel free to reach out to him via the contact us form.