How to Pick the Right Water Heater and Not Regret It
Your old heater just quit, or maybe you’re tired of running out of hot water. Buying a new one is a big purchase, and the wrong choice costs you money for years.
We will cover how to figure out what you’ve got now, the real differences between tank, tankless, and heat pump models, and how to buy the right unit without getting sold junk.
I’ve installed and serviced hundreds of these. You can save a lot of headache by looking at the label on your old unit before you even start shopping.
Start Here: Diagnose Your Current Water Heater’s Problem
Before you shop for a new model, figure out why your old one failed. This tells you if you just need a repair or a full replacement. It also helps you avoid buying the wrong type of heater for your home.
Common Failure Signs
Water heaters give clear signals before they die. Listen to them.
- Rusty Water: If only your hot water is brown, the tank liner is corroding. This is a death sentence for the tank.
- Leaks: A small drip from a pipe connection might be a simple fix. A steady leak from the tank itself means the steel has corroded through and the unit must be replaced immediately.
- Strange Noises: Popping or rumbling sounds are sediment buildup at the bottom of the tank. The sediment acts like an insulator, making the heater work harder and fail sooner.
- Lukewarm Water: If you’re never getting truly hot water, it could be a failing heating element (electric), a bad gas valve (gas), or a thermostat that’s given out.
Check the Age and Model
Find the manufacturer’s label on the side of your heater. Look for the serial number. For most brands, the first four digits are a date code. Often, it’s a letter for the month (A=January, B=February, etc.) and two numbers for the year.
For example, a serial number starting with “D12” means April 2012. The average tank water heater lasts 8-12 years. If yours is in that range and showing problems, replacement is smarter than repair.
Red Flag Troubleshooting Guide
Some problems are emergencies. Do not try to fix these yourself.
- Major Leak at the Tank: Water pooling around the base? Shut off the water supply to the heater and the power (circuit breaker for electric, gas valve for gas) right away. Then call a pro.
- Gas Smell: If you smell rotten eggs or sulfur near a gas water heater, you could have a gas leak. Get everyone out of the house and call your gas company from outside.
- Water Heater is Hot to the Touch: If the tank or pipes are scalding hot, the thermostat is stuck “on.” This is a safety risk. Turn off the power and call for service.
Quick Basic Diagnostics
If the problem seems minor, you can check two things. First, ensure the thermostat is set high enough (try 120°F). For electric units, check the circuit breaker. For gas, make sure the pilot light is on.
Checking the anode rod is the best predictor of tank life. This “sacrificial” rod protects your tank from corrosion. If it’s completely eaten away, your tank is next. Draining a few gallons from the tank to flush sediment can also buy you some time if noise is the only issue.
How Do I Calculate My Real Hot Water Needs?
Forget just looking at tank size. You need to know how much hot water you use in your busiest hour. This is called the First-Hour Rating.
What is First-Hour Rating (FHR)?
First-Hour Rating is simple. It’s the number of gallons of hot water the heater can deliver in one hour, starting with a full tank. It combines the hot water in the tank plus how fast the heater can make more.
A 50-gallon tank with a low recovery rate might have a lousy FHR. A 40-gallon tank with a high recovery rate could have a great one. Always choose your heater based on the FHR listed on the EnergyGuide label, not the tank capacity.
Your Simple Hot Water Worksheet
Think about your weekday morning. Add up the gallons for every hot water task that happens in a one-hour peak period.
- Shower: 10 gallons (standard showerhead) to 20 gallons (rainfall head)
- Dishwasher: 6 gallons per load
- Kitchen Sink (washing hands, prep): 4 gallons
- Washing Machine: 15-20 gallons per load (hot wash/warm rinse)
Example: Family of 4
Two showers (20 gal) + one dishwasher load (6 gal) + kitchen sink (4 gal) = 30-gallon peak demand. You’d want a heater with an FHR slightly above 30 gallons.
Example: 1-2 Person Household
One shower (10 gal) + kitchen sink (2 gal) = 12-gallon peak demand. A smaller unit with a matching FHR is perfect and saves money.
Why Tank Size is Misleading
A “40-gallon tank” doesn’t mean you get 40 gallons of usable hot water. As you use it, cold water enters the tank, mixing and lowering the overall temperature. The real metric is performance under load, which is the FHR. For tankless heaters, you look at flow rate (gallons per minute, or GPM) and the temperature rise it can achieve.
Water Science Snippet: Incoming Water Temperature
Your heater’s job is to raise the incoming water to your set temperature. If your groundwater is 50°F, it has to work harder than if it’s 70°F. This affects both tank and tankless performance. In colder climates, you need a heater with a higher recovery rate or a larger tankless unit to achieve the same GPM flow of hot water. This is why a unit that worked in Texas might fail in Minnesota.
Choosing Your Heater’s Type and Power Source
This choice decides your hot water life for the next decade. Get it right.
Tank vs. Tankless: The Big Showdown
A traditional tank heater is like a giant thermos. It stores and constantly reheats 40 to 80 gallons of water. A tankless (on-demand) heater is like a powerful, instant coffee maker for water. It heats water only when you open a hot tap. The table below breaks down the real differences you’ll feel at home, including the energy efficiency of each option.
If you have a large family and everyone showers at different times, a reliable 50-gallon tank is a workhorse. If you live alone or as a couple and want to save on gas or electric bills, a tankless is a smart long-term investment. I put a gas tankless in my own garage to free up floor space for storage. Understanding residential water tank types and their purposes helps you choose the right setup for your home. From bulk storage to space-saving tankless options, each type serves a different need.
Fuel Source: What Powers Your Heat?
Your available utilities often make this decision for you, but there are key details within each option.
Natural Gas & Propane
These are the most common and cost-effective for heating water quickly. Gas models recover hot water faster than electric ones. You must have proper venting to the outside. If you’re buying a new gas water heater, you must know your local code requirements, as they vary wildly by state. In California, all new gas water heaters must be ultra-low NOx emitting. In Kentucky, standard atmospheric vent models are still widely available and code-compliant. Always check with your local building department.
Electric
Electric heaters are simpler to install where a gas line isn’t present. They have lower upfront costs but typically higher operating costs than gas. They are 100% efficient at the unit, but generating the electricity at the power plant is not. For an electric install, verify your home’s electrical panel can handle the new heater’s dedicated circuit and amp requirement.
Heat Pump Hybrid (Electric)
This is a highly efficient electric tank that works like a refrigerator in reverse. It pulls heat from the surrounding air and uses it to heat the water. It can be two to three times more efficient than a standard electric model. The catch is it needs to be installed in a space that stays between 40-90°F year-round with at least 1,000 cubic feet of air around it, like a large basement. It will also cool and dehumidify that space, which is a bonus in a basement but a problem in a conditioned closet.
Less Common Heater Types
These systems solve specific problems and are worth knowing about.
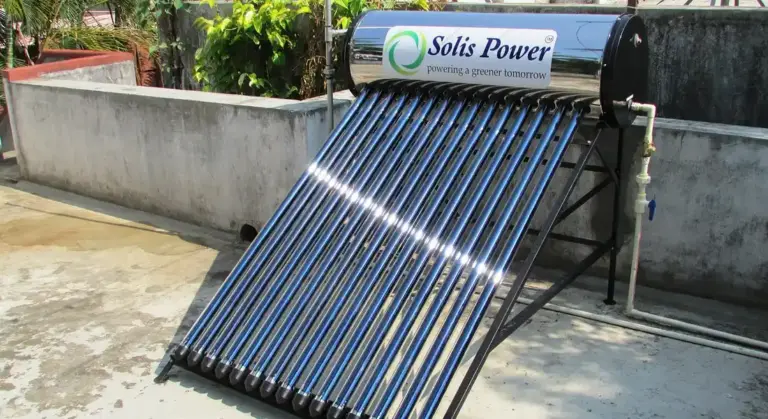
- Solar Pre-Heat Systems: These use roof-mounted solar collectors to heat a fluid that warms your water in a special tank. They drastically reduce traditional fuel use but require a backup conventional heater for cloudy days and have very high installation costs.
- Point-of-Use Heaters: These are small electric tank or tankless units installed under a sink far from your main heater. I installed one under my own kitchen sink to get instant hot water without waiting for it to travel from the garage. It saves water and energy.
Recommended Product Categories
Instead of specific brands, here are proven categories that work well for most homes. Look for units with good warranties and readily available replacement parts.
- 50-Gallon Gas Atmospheric Vent: The classic choice for a 3-4 person household with standard gas utility and a traditional chimney or vent stack.
- High-Efficiency Gas Condensing Tankless: For homes with natural gas and a desire for endless hot water and lower gas bills. Requires a specific PVC venting system.
- Heat Pump Hybrid Electric: Best for homes without gas service, with a large, unconditioned basement or utility room where it can draw ample warm air.
- 80-Gallon Electric Tank: A straightforward solution for large homes all on electric service that need a big reserve of hot water.
Your choice here balances budget, available space, and your family’s hot water routine. Measure your space, check your utility connections, and choose the water heater capacity to match your actual daily use.
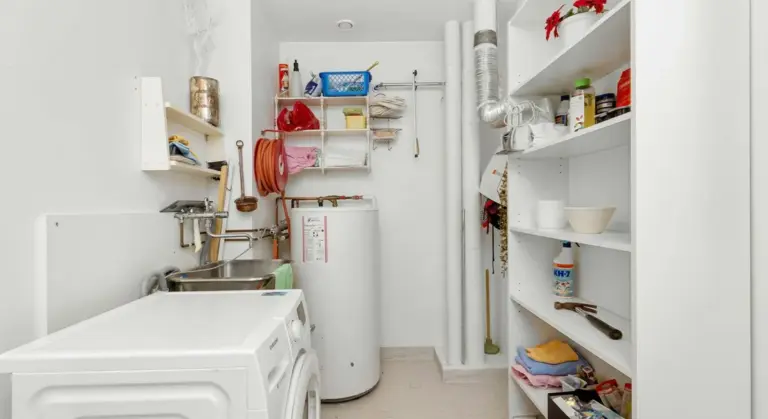
Installation, Codes, and the DIY Reality Check
Installation Requirements: What Your New Heater Needs
Your new water heater needs more than just a spot in the basement. The requirements are different for gas and electric models.
For a gas water heater, proper venting is the single most important factor for safety. It exhausts deadly carbon monoxide. You need a correctly sized type B-vent pipe that goes straight up and out of your roof or through a sidewall with an approved termination cap. The draft hood on the heater must connect perfectly to this vent.
Electric models skip the vent but demand adequate electrical service. A standard 40 or 50-gallon tank needs a dedicated 30-amp, 240-volt circuit. You must confirm your electrical panel has the capacity and space for a new double-pole breaker.
Both types need a drain pan underneath if installed in an area where a leak could cause damage (like inside a living space). In earthquake zones, local codes require seismic straps to anchor the top and bottom of the tank to wall studs.
Tools & Material Checklist
Gather everything before you start. Here is your core list:
- Two pipe wrenches (one to hold, one to turn).
- PTFE thread seal tape (Teflon tape) for all threaded connections.
- A tubing cutter or hacksaw for copper pipe.
- Your connection method: a soldering torch, solder, and flux for copper, or PEX crimp/cinch tools and rings for PEX.
- A non-contact voltage tester to confirm power is OFF.
- A garden hose to drain the old tank.
- New flexible water connector hoses (often 3/4 inch).
- A new temperature and pressure relief (TPR) valve, which is good practice.
Code & Compliance Check
Ignoring codes risks your safety, your home, and your insurance. The Uniform Plumbing Code (UPC) and International Plumbing Code (IPC) set the rules.
The pressure relief valve discharge pipe is a common failure point I see on service calls. The code is specific: it must be a rigid pipe (like copper), drain to within 6 inches of the floor, and have no valves or caps. Its purpose is to safely divert scalding water if the tank over-pressurizes.
Venting for gas heaters has strict rules for slope, support, and clearance to combustibles. Most municipalities require a permit for water heater replacement to ensure safety measures are met. A professional’s installation will include this permit and a final inspection, which validates the work for future home sales.
DIY vs. Pro Verdict
Let’s be honest about what you’re getting into. I rate the difficulty of a like-for-like replacement as a 6/10 for electric and a 9/10 for gas.
A handy homeowner can typically handle the physical replacement of an electric unit: shutting off power and water, draining, disconnecting, and moving the old tank. Connecting the new water lines and wiring the new unit is within reach if you are meticulous.
Gas line work, venting, and major electrical changes are strictly pro territory. This includes running a new gas line, modifying vent pipes, or installing a new 240-volt circuit. A licensed plumber or gas fitter ensures explosive gas is handled safely. They also get the permit and assume liability.
Should I hire a professional for installation?
For a gas water heater, the answer is almost always yes. The risks of carbon monoxide poisoning or gas explosion are real and not worth the savings. Hire a licensed professional.
For an electric heater in the same location with matching electrical service, a confident DIYer can succeed. If you have any doubt about your electrical skills, hire an electrician or plumber. Water and electricity are a dangerous mix, and an incorrect wiring job can shock someone or start a fire.
Navigating Costs, Budget, and Where to Buy

Let’s talk money. The price tag on the box is just the start. You need to budget for the whole job to avoid a nasty surprise.
Breaking Down the Total Cost
Think of it like a car repair bill. The part is one cost, the labor and extras are another. For a water heater, your total includes four things. One of these is the parts themselves.
- Unit Price: This is the cost of the heater itself.
- Installation Labor: A pro might charge $500 to $1,500 for a standard swap. Complex jobs (moving the unit, changing fuel types) cost more.
- New Parts & Materials: Your old valves and pipes might not fit. Budget for new water lines, a relief valve, unions, and possibly a new gas line or vent pipe. For my last replacement, I needed all new flexible connectors and dielectric unions.
- Permit Fees: Many areas require a permit for a new installation. This ensures the work is inspected and safe. The fee is usually small, but skipping it can cause problems when you sell your house.
Add the unit price, labor, parts, and permit fees together to get your true budget number.
What If You Can’t Afford a Water Heater?
A broken heater is an emergency. If money is tight right now, you have a few paths.
First, check with your local utility company. Many offer rebate programs for efficient models or even assistance programs for income-qualified homeowners. Your state’s housing department might have similar help.
Second, ask installers about financing. Many plumbing companies offer monthly payment plans. Just read the terms carefully.
Avoid companies pushing “free” water heater offers. These are almost always scams that lock you into a never-ending rental contract with high monthly fees. You end up paying for the heater three times over. There is no free lunch, and there is no free water heater.
Understanding Warranties
The warranty tells you what the manufacturer trusts to last. Read it closely.
- Tank Coverage: This is the core warranty, often 6, 9, or 12 years. If the tank leaks, they’ll provide a new unit.
- Parts Coverage: Elements, thermostats, and valves are usually covered for a shorter period, sometimes just one year.
- Labor Coverage: This is rare. Most warranties only cover the replacement heater, not the cost to install it.
A longer tank warranty usually means a better tank with more corrosion protection, like a thicker glass lining or better anode rods. It’s a signal of quality.
Where to Buy: Store, Supplier, or Pro?
Your choice depends on who’s doing the install.
Big-Box Stores (Home Depot, Lowe’s): Good for DIYers. Selection is decent, prices are competitive, and you can load it yourself. They also sell common repair parts. For a simple heating element or thermostat, even a store like Walmart might have what you need.
Plumbing Supply Houses: These sell to tradespeople. Prices are often lower than retail, but you usually need an account or a contractor to buy for you. The selection is more professional-grade.
Professional Installers: They will supply the unit. You pay one price for everything. The upside is single-source responsibility. If anything goes wrong, you call them, not the store and a separate plumber. This is the easiest, but often the most expensive, route.
Energy Ratings and Finding Rebates
Look for the yellow EnergyGuide label. It shows the Estimated Yearly Operating Cost and the Uniform Energy Factor (UEF). UEF replaced the old Energy Factor (EF). The higher the number, the more efficient the heater.
A high UEF model costs more upfront but saves on gas or electric bills every month. To find rebates, search online for “[Your State] water heater rebate” or “[Your Utility Company Name] appliance incentive.” The Database of State Incentives for Renewables & Efficiency (DSIRE) website is a great national tool. Always check for rebates before you buy, you might save hundreds.
Long-Term Care: The Water Heater Maintenance Roadmap

Buying the right heater is half the battle. Keeping it running for its full lifespan is the other. This is your simple, non-negotiable maintenance plan.
The Annual Maintenance Checklist
Set a reminder for the same time every year. I do mine the weekend after daylight saving time ends. Here is your three-part task list.
Every 12 Months: Drain and Flush the Tank
This removes sediment (sand, minerals, scale) that settles at the bottom. That layer acts like an insulator, forcing the heater to work harder and longer to heat your water. You will lose efficiency and money.
- Turn off the power (breaker for electric, gas valve for gas) or the fuel source.
- Connect a standard garden hose to the drain valve at the bottom of the tank.
- Run the hose to a floor drain, utility sink, or outside.
- Open a hot water faucet somewhere in the house (like a bathroom sink) to break the vacuum.
- Open the tank’s drain valve and let it flow until the water runs clear. This takes 2-5 minutes for most tanks.
Every 3-5 Years: Inspect (or Replace) the Anode Rod
This is the most important part of tank longevity. The anode rod is a sacrificial metal rod that attracts corrosive elements, “rusting” itself to protect the steel tank. When it’s gone, your tank starts to rust.
You need a 1-1/16″ socket and a breaker bar. Shut off the water and power, drain a few gallons from the tank to lower the water level below the rod’s location (usually on top), then unscrew it.
If the rod is less than 1/2 inch thick or heavily corroded with chunks missing, replace it immediately. A new rod costs about $50 and can double your tank’s life.
Twice a Year: Test the Temperature & Pressure (T&P) Relief Valve
This is a critical safety device. It opens to release water if the temperature or pressure inside the tank gets dangerously high, preventing a potential explosion.
Lift the valve’s test lever for a few seconds. You should hear a rush of air or water into the drain pipe. If nothing happens, or if it drips afterward and won’t stop, the valve is bad and must be replaced immediately.
What Happens When You Skip Maintenance
Ignoring this roadmap has direct, expensive consequences.
- Sediment Buildup: The heater uses more energy (higher bills) and takes longer to recover hot water. Eventually, the sediment can harden, damaging the tank bottom and creating rumbling noises.
- Premature Tank Failure: A consumed anode rod leaves the tank interior unprotected. Corrosion creates pinhole leaks. You will be replacing the entire unit years early.
- Safety Hazards: A failed T&P valve cannot protect against excessive pressure. A faulty vent on a gas heater can lead to carbon monoxide entering your home.
Neglect turns a 12-year appliance into an 8-year problem waiting to flood your utility room.
Essential Safety Features on Any New Unit
When you are finally buying a replacement, physically verify these three features. Do not assume they are all good.
- A Working, Properly Sized T&P Valve: It must be installed directly into the tank, not in a pipe tee. The drain line must be rigid pipe (like CPVC) that runs down to within 6 inches of the floor.
- Up-to-Code Scald Guards: Modern units have an antiscald feature, often a setting that limits the max output temperature to 120°F. This is crucial for homes with children or elderly residents.
- Proper Combustion Venting (for gas models): The vent pipe must be the correct type (usually B-vent) and size, securely connected, and have a clear path outdoors. A flawed vent is a silent killer.
What Helped Me: A Basement Saved by a Drain Hose
I was dutifully flushing my own 7-year-old gas heater. The water was coming out brown, which I expected. But as it started to clear, I saw small, gritty, metallic flakes in the stream. They looked like tiny pieces of rust.
That was my warning sign. I shut everything down and pulled the anode rod. What I pulled out wasn’t a rod. It was a skinny, corroded remnant, about the thickness of a pencil. The core wire was almost fully exposed.
The tank had been starting to eat itself, and those flakes were the first bits of the tank’s steel lining. Without that annual flush, I never would have seen the evidence. I replaced the anode rod that day. That heater lasted another 5 trouble-free years. The $30 I spent on a new rod and an hour of my time likely saved me from a catastrophic leak and a $1500 emergency replacement. The maintenance schedule is not a suggestion. It’s your early warning system.
Final Steps: Making the Purchase and What Comes Next
You’ve done the research. Now, before you click ‘buy’ or head to the store, run through this final checklist. This is where theory meets the physical reality of your home.
Your Final Pre-Purchase Checklist
Grab a notepad and confirm these five items. Missing one can turn a weekend project into a costly headache.
- Confirmed Size (First Hour Rating): This is your gallon number. Don’t buy a 40-gallon tank just because that’s what you had. Your calculated First Hour Rating (FHR) from earlier is your target. If your math says you need a 50-gallon unit with a 72-gallon FHR, stick to it.
- Fuel Type Locked In: Gas (natural or propane) or electric? This decision is made for you by your existing hookups. Switching types is a major, expensive electrical or gas plumbing job.
- Physical Dimensions for Your Space: Measure the height, width, and depth of your available space. Now add 6 inches for connections and maintenance clearances. Measure your doorways and stairwells to ensure the new unit can actually get to its spot. I’ve seen more than one heater get stuck in a basement hallway.
- Venting Path Verified: For gas models, how does the old vent pipe run? Is it single-wall B-vent or PVC for a high-efficiency unit? Your new heater must vent the same way, out the same path. You cannot arbitrarily change venting materials or routes without major construction.
- Local Code Quirks: Some areas require expansion tanks on all closed water systems. Others have strict earthquake strapping rules or require pans with drains for units in living spaces. A quick call to your local building department can save a failed inspection later.
When to Seek Professional Help
Know your limits. There’s no shame in calling a pro, only in causing a dangerous or code-violating mess.
Hire a licensed plumber for any gas line work, from hookup to leak checking. A small gas leak is a very big problem.
Get an electrician if your new electric heater requires a new, larger circuit or breaker that your panel can’t handle. This isn’t just plugging in an appliance.
If your city requires a permit and you’ve never pulled one for plumbing work, consider professional installation. They handle the paperwork and ensure it passes inspection, which protects your home’s value and your insurance.
Finally, if any step in this process makes you feel uncomfortable or unsure, stop. The cost of a pro is fixed. The cost of a mistake is not.
When NOT to Try This Yourself: The Hard Stops
Some scenarios are clear red lines for DIY.
Do not attempt to replace a gas water heater in a confined closet or small room without the tools and knowledge to test for proper combustion air and draft. Carbon monoxide is silent and deadly. For water heater closet storage safety, keep the space clear of clutter and flammable materials and ensure there is adequate ventilation. Keep the closet organized and free of combustibles to reduce fire and CO risks.
Never install an electric water heater without verifying your home’s electrical service and the specific breaker panel has the capacity for the new unit’s amperage draw. Overloading a panel can cause fire.
If your old unit shows signs of extensive corrosion, leaking valves you cannot shut off, or mysterious plumbing that doesn’t match standard layouts, stop. What you find behind the old heater can reveal larger issues.
Next-Step Actions: Prepping the Old Unit
You’ve bought the right heater. Now, prepare the site. Safely shutting down and draining the old unit is your first physical task.
- Turn Off the Energy Source. For electric, flip the dedicated circuit breaker at the main panel. For gas, turn the gas valve on the supply line to the “off” position (usually perpendicular to the pipe).
- Turn Off the Cold Water Supply. Close the valve on the cold water pipe leading into the heater.
- Relieve Pressure and Heat. Open a few hot water faucets in the house (like a sink upstairs) to prevent a vacuum lock and allow the tank to cool for several hours.
- Connect a Drain Hose. Attach a standard garden hose to the drain valve at the base of the heater. Run the other end to a floor drain, sump pit, or outside.
- Open the Drain Valve and Let it Flow. Open the pressure relief valve on the side of the tank to help air enter and water drain. Draining can take 20 minutes or more for a full tank. Sediment will likely clog the valve. Be prepared to gently poke the valve opening with a small screwdriver to clear it.
With the old unit drained and disconnected, your worksite is ready. The path for your new, efficient water heater is clear.
Common Questions
What warranty should I expect with a new water heater?
Look for the tank warranty, typically 6 to 12 years. This covers a leak from the tank itself. Remember, the warranty usually provides a replacement unit only, not the labor cost to install it.
Are there any rebates or incentives for energy-efficient water heaters?
Yes, often from utility companies and state programs. Always check the DSIRE database and your utility’s website before purchasing. A high-efficiency model might cost more upfront, but a rebate can significantly offset that.
What is the average lifespan of a water heater?
A tank-style unit lasts 8-12 years on average. Lifespan depends heavily on water quality and maintenance, like annual flushing and anode rod inspection. Tankless heaters often last 15-20 years due to the lack of a standing water tank. For a detailed lifespan comparison, check out our average water heater lifespan guide.
How do I choose between a standard and a high-efficiency model?
Compare the Uniform Energy Factor (UEF) on the yellow EnergyGuide label-higher is better. High-efficiency models cost more upfront but save on monthly operating costs. Choose high-efficiency if you plan to stay in your home long enough for the savings to recoup the initial investment.
Should I hire a professional for installation?
For gas units, always hire a licensed professional to ensure safe venting and gas connections. For a simple electric replacement, a confident DIYer can manage it with proper electrical safety. If you have any doubt about your skills, code compliance, or necessary permits, hiring a pro is the safest investment.
Your Water Heater Final Checklist
Start by sizing your new water heater based on your home’s peak demand, not just the tank capacity. Pick a model with strong energy ratings to cut down on operating costs, making your investment pay off over time.
Bob is a an HVAC and plumbing industry veteran. He has professionally helped homeowners resolve issues around water softeners, heaters and all things related to water systems and plumbing around their homes. His trusted advice has helped countless of his clients save time, money and effort in home water systems maintenance and he now here to help you and give you first hand actionable advice. In his spare time, Bob also reviews home water systems such as tankless heaters, water softeners etc and helps home owners make the best choice for their dwelling. He lives around the Detroit area and occasionally consults on residential and commercial projects. Feel free to reach out to him via the contact us form.