Electric Water Heaters Explained: How They Work and Keep Your Water Hot
Why did your shower go cold halfway through? Or why is your electric bill higher than it should be? Let’s get straight to how your heater actually runs.
We will cover the main parts inside the tank, how electricity heats the water, and the simple ways to control your water temperature.
I’ve swapped out more heating elements and thermostats than I can count, in my job and on my own house. Set the temperature at 120 degrees Fahrenheit to save money and prevent scalding.
The Simple Magic Inside Your Electric Water Heater
Your electric water heater is not complicated. Think of it as a giant, well-insulated electric kettle that constantly refills itself. Cold water goes in, gets heated, and hot water waits for you to use it. That’s the whole job – it warms the water to the right temperature.
Here’s the basic cycle. Cold water from your main supply line enters a tube at the bottom of the tank. The water gets heated right there. Hot water rises naturally to the top of the tank. When you turn on a hot water tap, that ready hot water at the top is pushed out by the incoming cold water. It’s a simple, effective system.
This is called a storage tank system, and it’s the reason you can run out of hot water. Your heater can only heat the water it has stored, at the speed its elements can work, which is limited by its heat loss and capacity. Once you use more than what’s in the tank, you’re waiting for new water to heat up.
I was explaining this to my neighbor last week while we fixed a leaky garden hose bib. He always wondered why his showers got cold. I told him it’s not magic, it’s just physics and a tank of water.
Meet the Parts: Your Water Heater’s Anatomy
Let’s look at what makes this kettle tick. Knowing the parts helps you understand maintenance and spot problems.
The Storage Tank
This is the steel core of the unit. It holds all the water. The inside is lined with a glass coating. This lining is vital. It acts like a shield to keep the water from rusting the steel tank from the inside out. If that lining gets scratched or fails, the tank will start to corrode and eventually leak.
Heating Elements
These are the electric coils, like the burner on your stove. Most tanks have two: an upper element and a lower element. They don’t run at the same time. The top one heats first to give you a quick recovery at the tap. Once the top water is hot, the thermostat switches power to the lower element to heat the rest of the tank. This cycling saves energy and keeps a full tank ready. It’s one of the characteristics that differ among water heater types.
Thermostats
These are the brains. You have one thermostat for each heating element. They tell the elements when to turn on and off based on the water temperature you set. Your home’s 240-volt circuit is split into two 120-volt legs to power this system. If your heater stops making hot water, a tripped thermostat is a common culprit.
Dip Tube and Hot Water Outlet
The dip tube is how cold water gets to the bottom. It’s a simple pipe that sends incoming water down to where the lower heating element is. The hot water outlet is a shorter pipe at the very top of the tank, ensuring you always draw from the hottest available water first. If a dip tube breaks, cold water mixes at the top and you get lukewarm water fast. Knowing where the dip tube sits inside the tank helps diagnose temperature issues related to its placement. In some models the dip tube location varies, so checking the installation diagram for your unit can guide you to the correct spot.
Anode Rod
This is the sacrificial lamb. It’s a metal rod (usually magnesium or aluminum) screwed into the top of the tank. Water attacks this rod instead of the tank’s steel walls. It corrodes away so your tank doesn’t. You should check it every few years. A depleted anode rod looks thin, crusty, or might be almost completely gone. The one in my own heater last year was down to a skinny wire.
Temperature and Pressure Relief (TPR) Valve
This is your critical safety device. If the thermostat fails and the water overheats, or pressure builds too high, this valve opens to release water and prevent an explosion. It’s not optional. Plumbing code (IPC and UPC) requires every water heater to have one. Test the valve by lifting its lever once a year. You should hear a gush of water into the drain pipe. If it doesn’t work, replace it immediately.
Drain Valve
This is the spigot for maintenance. It’s at the very bottom of the tank. You use it to drain sediment during annual flushing or to empty the tank for replacement. It’s usually a standard garden hose thread. A good tip is to open it briefly every six months to make sure it hasn’t seized up from corrosion.
Controlling the Heat: Temperature, Safety, and “Can It Boil?”
Your electric water heater’s thermostat controls everything. Factory settings usually land between 120°F and 140°F, a range that balances safety from scalding with enough heat for cleaning. I keep mine at 120°F to save energy and because my kids use that bathroom. Some dishwashers need 140°F to sanitize, so check your appliance manual.
How to Check and Adjust Your Thermostat: A Safe, Step-by-Step Guide
This is a basic task. The rule is always kill the power first. Here is exactly how I do it on service calls and at home.
- Shut off the power at the main electrical panel. Find the double-pole breaker labeled for the water heater and flip it to OFF. Use a non-contact voltage tester on the wires at the tank to confirm they’re dead.
- Remove the two access panels on the side of the tank. They’re usually held by screws.
- Carefully peel back the insulation foam. You’ll see the thermostats-one for the upper element, one for the lower.
- Check the temperature setting. It’s a dial or a slot for a flat-head screwdriver. Note the original setting, then adjust to your desired temperature. A small turn makes a big difference.
- Press the insulation back into place and reinstall the panels. Restore power at the breaker.
Give the tank three to four hours to heat up fully. Test the water at a faucet farthest from the heater with a cooking thermometer.
Can you heat water above 100 degrees? Yes, easily, and your tank does it every single day. The real question is about boiling. Water boils at 212°F at sea level. In a sealed, pressurized tank, you can heat it past 212°F without it turning to steam. That creates dangerous pressure.
Heating and boiling are not the same here. Your heater’s high-limit switch, often called the ECO (Energy Cut Off), is a crucial backup that cuts all power if the thermostat fails and the temperature gets dangerously high. The Temperature and Pressure Relief (TPR) valve on the side is the final safety. It opens to blast out steam and water if pressure gets too high, preventing an explosion.
DIY or Professional Help? The Straight Answer
Adjusting a thermostat is a 3 out of 10 for difficulty-a simple, safe DIY job if you follow the steps. Replacing a faulty TPR valve or messing with the internal wiring is a 10 out of 10. That work involves high-pressure plumbing and live electricity. One wrong move and you could flood your basement or get a serious shock. Call a pro for those.
What’s Wrong? Troubleshooting Common Electric Heater Problems
Don’t panic when the hot water stops. Work through this list like a pro. Start with the simplest fix first.
No Hot Water
- First, check the circuit breaker. It might have tripped. Reset it. If it trips again immediately, you have a serious electrical fault.
- Power is on? The upper thermostat likely failed. You need a multimeter to test it for continuity.
- If the thermostat is good, the upper heating element is probably burned out. Elements wear out every 5-10 years.
Not Enough Hot Water
- This often means the lower heating element is dead. The top element heats the first half of the tank for quick use. The bottom element maintains the temperature for the rest. If it fails, you only get that first half.
- Look for crossed wires. If someone previously worked on it and hooked the wires to the wrong terminals, the elements won’t heat in the right sequence.
- Your tank might be too small for your house. A family of four with two showers running back-to-back can drain a standard 40-gallon tank faster than it can reheat.
Water is Too Hot
A faulty thermostat stuck in the “on” position is the direct cause. It’s not signaling the element to shut off. Replace the thermostat right away. Before you do, check if the high-limit switch has tripped. You’ll usually see a red reset button.
Leaking Water
Find where it’s coming from. Dry the area and look closely.
- TPR Valve: A drip from the discharge pipe is sometimes normal during heating cycles. A steady stream means the valve is bad or there’s an over-pressure emergency.
- Drain Valve: The brass spigot at the tank bottom can leak. Try tightening it. If it still leaks, the washer inside is shot.
- Pipe Connections: Check the cold water inlet and hot water outlet fittings. A loose connection can often be fixed with a wrench.
- The Tank Itself: If water is weeping from the steel tank body, it’s finished. Corrosion has created a pinhole leak, and the entire tank must be replaced. No patch kit will work.
Rotten Egg Smell
That sulfur stink is a chemistry problem. Sulfate-reducing bacteria in your water supply feed on sulfate and, when they interact with a standard magnesium anode rod, produce hydrogen sulfide gas. The fix is to replace the anode rod with an aluminum-zinc type (sold as “corrosion-smart” or “peroxide” rods) or to shock the tank with a bleach solution to kill the bacteria. I usually recommend replacing the rod. It’s a longer-term fix.
Popping or Rumbling Noises
That sound is sediment-hard water minerals like calcium that have settled on the tank bottom. The lower heating element superheats the water trapped under this sediment layer, causing it to bubble and explode with a pop or rumble. You need to flush the tank. Attach a hose to the drain valve, run it to a floor drain, and let it flow until the water runs clear. Do this once a year.
The Red Flag List: Stop and Call a Pro
- Water pooling under the tank. This is a tank leak. It will only get worse. Turn off the water and power immediately.
- TPR valve leaking constantly, not just dripping. This valve is acting as a relief for a dangerous over-pressure condition. The root cause needs professional diagnosis.
- Hot water is scalding even with the thermostat set to 120°F. This confirms a failed thermostat or high-limit switch. It’s an urgent safety hazard.
- The breaker trips repeatedly as soon as you reset it. This indicates a short circuit or a grounded heating element. It’s an electrical fire risk.
If you encounter any item on this list, your DIY time is over. Shut off the power and water supply to the heater and call a licensed plumber or electrician.
Keeping It Running: Your Maintenance Roadmap
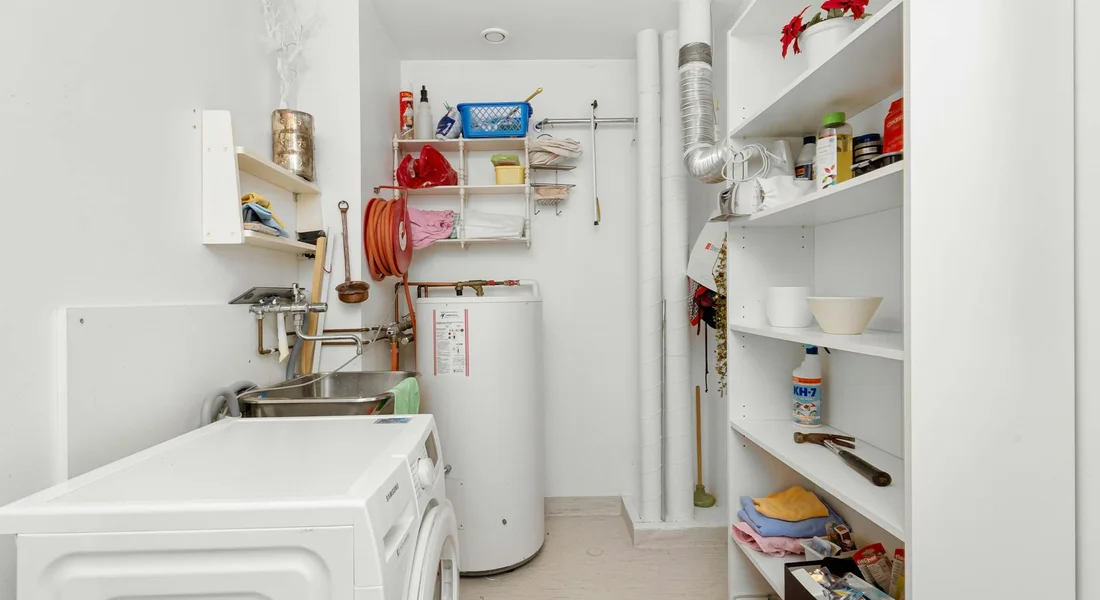
Think of maintenance like changing the oil in your car. Skip it, and you’ll pay a big price later. Do these simple tasks, and your heater will last for years.
A disciplined schedule prevents 90% of common water heater failures.
Every 6 Months: Test the TPR Valve
The Temperature and Pressure Relief (TPR) valve is your tank’s emergency brake. It keeps it from turning into a bomb if the thermostat fails.
- Locate the valve on the side or top of the tank. It has a small discharge pipe.
- Place a bucket under the pipe’s end.
- Lift the test lever straight up for a few seconds, then let it snap back.
You should hear a rush of air or see a burst of hot water into the bucket. If nothing comes out, or if it continues to drip afterward, the valve is bad. Replace it immediately.
Every Year: Flush the Sediment
Minerals in your water settle at the bottom of the tank. This sludge makes your heater work harder and can clog your pipes.
Flushing the tank once a year is the single best way to maintain efficiency.
Here’s how:
- Turn off the power to the electric heater at the breaker panel.
- Connect a standard garden hose to the drain valve at the bottom of the tank. Run the other end to a floor drain or outside.
- Open a hot water faucet in a nearby sink or tub. This breaks the vacuum so the tank can drain.
- Open the tank’s drain valve with a flat-head screwdriver. Let it flow until the water runs clear (this can take 5-10 minutes).
- Close the drain valve, remove the hose, turn the power back on, and let the tank refill and reheat.
Every 3-5 Years: Replace the Anode Rod
This is the secret. The anode rod is a sacrificial metal stick that attracts corrosive elements in the water. It rusts away so your steel tank liner doesn’t. When the rod is gone, your tank starts to corrode from the inside out.
Difficulty: 6/10. You’ll need a 1 1/16″ deep socket (sometimes 1 1/8″), a long breaker bar, and maybe a hacksaw.
- Shut off power and water to the tank.
- Drain a few gallons of water (just enough to get the water level below the top of the tank).
- Locate the anode rod’s hex head on the top of the tank. It often looks like a big bolt.
- Loosen it with your breaker bar. It will be very tight. You might need to cut the old rod in half with a hacksaw to remove it if your basement has low clearance, which is common.
- Thread the new rod in, turn the power and water back on, and check for leaks.
The anode rod in my 12-year-old heater was completely gone when I checked it last year. The tank is still fine because I caught it in time. This made me curious about the purpose of a water heater anode rod and how it protects the tank from corrosion. Understanding its role helps explain why regular inspections matter.
As Needed: Check Pipe Insulation
Feel the first 3-5 feet of the hot water pipe coming from your heater. If it’s warm, you’re losing heat (and money) to the air. Wrap it with foam pipe insulation from any hardware store. Do the same for the cold inlet pipe to prevent summer condensation and dripping.
How Hard Water Changes Everything
If your water has high TDS (total dissolved solids) or GPG (grains per gallon), maintenance is more critical. The minerals that cause scale create much more sediment. They also dramatically speed up the corrosion process, eating your anode rod in 2-3 years instead of 5. A whole-house sediment filter installed before the water heater is a smart investment in hard water areas.
Expected Lifespan
With this maintenance, expect 10 to 15 years of service from a standard tank. Ignore these tasks, and you might see failures in 6 to 8 years. The tank will rust through, and you’ll have no warning before a leak floods your utility room.
Recommended Products to Have on Hand
- A standard 5/8″ garden hose (dedicate one to this job).
- A 1 1/16″ deep socket and breaker bar.
- Self-sealing foam pipe insulation.
- A replacement TPR valve that matches your tank’s pressure and temperature rating (have it ready).
- A whole-house sediment filter (like a simple spun poly filter) if you have visible sediment or hard water.
Electric, Gas, or Tankless? Picking the Right System
Choosing a water heater is about trade-offs. There’s no perfect choice for every home. Ask yourself one question first: what matters most to you? Upfront cost, your monthly bill, or never running out of hot water? Consider the water heater’s consumption and efficiency when making your decision.
| System Type | Best For | Key Pros | Key Cons |
|---|---|---|---|
| Electric Tank (Standard) | Budget-conscious buyers, smaller homes, spaces without gas lines. | Lowest purchase and installation cost. Simple, safe install (no combustion). Fits anywhere. | Highest energy cost to operate. Slowest recovery rate (runs out of hot water faster). |
| Gas Tank (Natural Gas or Propane) | Families that use a lot of hot water, areas with low gas prices. | Faster hot water recovery. Lower operating cost than standard electric. | Higher purchase cost. Needs proper venting (chimney or sidewall). Combustion requires safety checks. |
| Tankless (Gas or Electric) | Homes where space is premium and endless hot water is a priority. | Endless hot water on demand. Compact, wall-mounted design. Very energy efficient when used appropriately. | Very high upfront cost (unit + install). May need electrical service upgrade (electric) or larger gas line. Can struggle with multiple simultaneous uses (e.g., shower + dishwasher). |
For large families in moderate to warm climates, a hybrid electric heat pump water heater is a fourth option. It works like a refrigerator in reverse, pulling heat from the air to warm the water. It’s the most efficient on the market, cutting costs by half or more. It needs about 7 feet of vertical clearance and works best in a space that stays between 40-90°F, like a basement or garage. The high initial cost is offset by big energy savings over time.
Common Questions
What’s the one thing I should check if my hot water runs out too fast?
First, check that both thermostats are set to the same temperature, typically 120°F. If the lower thermostat is set cooler than the upper one, the bottom half of your tank never heats fully. This is a common wiring or adjustment mistake that cuts your tank’s capacity in half.
Is it normal for the TPR valve to drip a little?
A very occasional drip after a heating cycle can be normal, but a steady drip or any leakage is not. A constant drip usually means the valve is failing and needs replacement. If it’s releasing a steady stream of water, shut off power and water to the heater immediately and call a professional-it’s relieving dangerous pressure.
My water heater is making a rumbling noise. What’s wrong?
That rumbling or popping sound is sediment hardening on the tank bottom. The lower heating element is essentially boiling the water trapped under that sludge. You need to flush the tank to remove the sediment; this restores efficiency and prevents damage. Letting it go can lead to premature failure.
Can I replace my anode rod myself?
Yes, if you’re moderately handy and have the right tools (a big deep socket and breaker bar). The hardest part is breaking it loose, as they’re installed very tight. If your basement ceiling is low, you may need to cut the old rod to remove it, which increases the difficulty. If you’re unsure, hiring a pro is a smart investment to protect your tank.
What temperature should I really set my thermostat to?
For most households, 120°F is the sweet spot. It’s hot enough for showers and washing, minimizes scalding risk, and saves on energy costs. The only exception is if your dishwasher requires a higher temperature (check its manual); in that case, set the heater to the dishwasher’s requirement, typically 140°F.
Keeping Your Electric Water Heater Efficient
Flush the tank once a year to prevent sediment from shortening its life and raising your bills. Check the thermostat setting first; 120 degrees Fahrenheit is safe and efficient for most homes.
Bob is a an HVAC and plumbing industry veteran. He has professionally helped homeowners resolve issues around water softeners, heaters and all things related to water systems and plumbing around their homes. His trusted advice has helped countless of his clients save time, money and effort in home water systems maintenance and he now here to help you and give you first hand actionable advice. In his spare time, Bob also reviews home water systems such as tankless heaters, water softeners etc and helps home owners make the best choice for their dwelling. He lives around the Detroit area and occasionally consults on residential and commercial projects. Feel free to reach out to him via the contact us form.