How to Pick a Tankless Water Heater That Won’t Let You Down
You want endless hot water, not a cold surprise in the shower. Getting the size wrong is the fastest way to waste your money.
We will cover figuring your home’s flow rate, understanding temperature rise, choosing between gas and electric, and why your fixture count matters more than square footage.
I’ve swapped out more bad installs than I can count. Skip the guesswork and match the heater to your actual demand.
1. Forget Square Feet – Here’s What Really Drives Your Hot Water Demand
Your home’s square footage is useless for sizing a tankless water heater. What matters is what’s using the water and when. A 3,000 sq ft house with one person has tiny hot water needs. A 1,500 sq ft house with a busy family needs a powerhouse. You size the heater for your peak demand, not just the area of your home.
Think about simultaneous use. This is the key concept. It’s when multiple fixtures call for hot water at the exact same time. Picture a weekday at 6 PM. Someone is in the shower upstairs. Another person starts a shower downstairs. In the kitchen, the dishwasher kicks on its hot water cycle. That’s three demands hitting your system at once. Your tankless unit must be powerful enough to supply all three at the temperature you want.
Answer these questions first:
- How many people live in your home?
- How many bathrooms have showers or tubs?
- What are your simultaneous hot water needs?
Grab a notepad. Do a quick audit of your home’s hot water fixtures:
- Showers: (Count them)
- Tubs: (Count them, especially large soaker tubs)
- Sinks: (Kitchen, bathroom, laundry room, bar)
- Appliances: (Dishwasher, clothes washer)
The Shower Test: Your First Reality Check
Think about your family’s routine. Is it chaos every morning with showers overlapping? Does someone run the dishwasher after everyone goes to bed? Your real peak demand happens during the busiest 30 minutes of your day. A single person’s home might never have two things running. A family of four almost certainly will. This daily reality check, not your floor plan, determines the size of heater you need.
2. The Two Magic Numbers You Must Calculate: Flow Rate and Temperature Rise
This is your essential homework. Skipping this step is the main reason people get a weak tankless unit that can’t keep up. You need to find two numbers: your total flow rate and your required temperature rise.
Flow Rate (measured in Gallons Per Minute, or GPM) is simply how much hot water comes out of your fixtures at once.
Temperature Rise is how many degrees the heater needs to warm up your incoming cold water. This number changes with the seasons.
How to Find Your Total Flow Rate (GPM)
Every fixture uses water at a different rate. Here are the averages. If you have modern, water-saving fixtures, use the lower number.
Now, think back to your “simultaneous use” scenario. Add up the GPM of all fixtures that could run at the same time. For our 6 PM example: Shower (2.5 GPM) + Shower (2.5 GPM) + Dishwasher (1.5 GPM) = 6.5 GPM total demand. Your tankless water heater’s maximum GPM rating must be higher than your calculated total demand.
How to Find Your Required Temperature Rise
Groundwater is cold. In winter, it’s much colder. To get your shower to 120°F, the heater must know how cold the water starts. This is your Temperature Rise.
Your incoming water temperature depends on your climate. Here’s a rough guide:
- Northern US / Canada: 40°F – 50°F
- Central US: 50°F – 60°F
- Southern US: 60°F – 70°F
Use 50°F for a safe, year round estimate in most places. The formula is simple.
Desired Output Temp (e.g., 120°F) minus Incoming Groundwater Temp (e.g., 50°F) equals Required Temperature Rise.
120°F – 50°F = 70°F Temperature Rise.
Every tankless unit’s specification sheet will list its flow rate at a specific temperature rise, like “5 GPM at a 60°F rise.” Your unit must meet or exceed both your GPM and your Temperature Rise numbers. This is where tankless heater sizing gpm flow comes into play, guiding you to choose a unit that maintains adequate hot water at your usual temperature drop. Understanding the GPM flow turns numbers into the real-world performance you can count on.
3. Water Science Snippet: Why Your Water’s “Hardness” Matters
Think of your home’s water like a glass of iced tea. Total Dissolved Solids (TDS) is a measure of everything dissolved in it, sugar and lemon included. Water hardness is a specific part of that, measuring the amount of calcium and magnesium minerals, the “sugar” in this case. We measure it in grains per gallon (gpg).
One grain per gallon is a tiny amount, about the weight of a single grain of wheat dissolved in a gallon of water. Water is considered hard at around 7 gpg and very hard at over 10.5 gpg.
Scale is Your Heater’s Worst Enemy
Those dissolved minerals are not your friend. When you heat water, the calcium and magnesium solidify out of solution, forming a rock-like crust called scale. You’ve seen this as the white, chalky limescale inside your kettle.
Inside a tankless water heater, this scale cements itself directly onto the vital heat exchanger, the copper or stainless steel coils that get super hot to warm your water.
It acts like a thick blanket of insulation. The burner has to work much harder and longer to push heat through that crust to get your water hot. This wastes gas or electricity, drives up your bills, and causes overheating that can crack the heat exchanger. A failed heat exchanger means a complete unit replacement.
The Non-Negotiable Maintenance Factor
If your water tests at over 7 grains per gallon of hardness, you have two paths, and ignoring the problem isn’t one of them.
You must commit to annual descaling flushes with a pump kit and white vinegar or a commercial descaling solution, or your expensive tankless unit will fail years early.
The best long-term solution is to install a whole-house water softener upstream from the heater. It swaps the hardness minerals for sodium or potassium, sending “soft” water to every appliance. This prevents scale from forming in the first place, protecting your water heater, dishwasher, showerheads, and plumbing. It’s the single most effective companion system for a tankless heater in a hard water area.
If a softener isn’t possible, mark your calendar for that yearly descaling flush. It’s not optional maintenance, it’s mandatory for the life of the heater.
4. Fuel Type and Installation: Your Practical Constraints
Your fuel choice isn’t about preference. It’s about what your house already has. This is often the deciding factor that sends people back to the drawing board.
Here’s the breakdown. Think of it like choosing between a powerful truck and an efficient car.
| Type | Power & Performance | Installation Complexity | Operating Cost |
| Natural Gas or Propane | High. Easily handles multiple fixtures at once. | Complex. Needs gas line, new venting, and possibly a larger gas meter. | Lower. Gas is typically cheaper than electricity for heating water. |
| Electric | Variable. Whole-house models need immense power. | Can be simple or very complex, depending on your electrical panel. | Higher. Electricity costs more per unit of heat. |
Your first question is simple: do you have a gas line already running to your house, or are you willing to pay to run one? Retrofitting a gas line is a major, expensive excavation project. If you don’t have gas, your decision is mostly made for you.
Can a tankless water heater be installed in a condo?
Yes, but it’s an uphill battle with two main hurdles.
- Venting: You need a direct path to the outside for exhaust. Many condo units don’t have an exterior wall where the old tank was. Running a new vent through interior walls or common spaces is usually a no-go with the HOA.
- Gas/Electric Capacity: Your unit’s existing gas line or electrical service was sized for a small tank heater. A whole-house tankless unit often demands more. Upgrading the building’s main service to your unit is complex and costly, if it’s even allowed.
I’ve seen more success with point-of-use electric units in condos for a single bathroom, not whole-house gas replacements.
The Electric Shock: Upgrading Your Panel
People see a small electric unit and think the install will be easy. That’s a trap. A whole-house electric tankless water heater is a power monster. If you’re exploring installing and adjusting an electric water heater, planning and safety matter more than you think. We’ll dive into the details in the next steps.
These units often need a dedicated circuit of 120 amps or more, which can be half the capacity of your entire home’s main electrical panel. Your existing 100 or 200-amp panel likely can’t handle that added load without a full upgrade. This isn’t just adding an outlet. It’s a major, expensive electrical job that can cost thousands.
There is a smart workaround: point-of-use electric heaters. These are small, under-sink units designed for one fixture. They solve the “remote bathroom” problem where hot water takes forever to arrive. You would never use one for a whole house, but for a single sink or a basement bar, they’re perfect.
Venting and Codes: Don’t Guess Here
If you’re going gas, the vent is non-negotiable. Old tank heaters used a simple, wide chimney vent. Tankless heaters need a dedicated, sealed vent, often made of special stainless steel. Gas water heater vent types vary—from traditional chimneys to direct-vent and power-vent configurations. Knowing your vent type helps ensure safe, efficient operation and easier future maintenance.
Condensing tankless water heaters are more efficient but have specific vent requirements because their exhaust is cooler and more acidic. These considerations also tie into water heater electrical venting requirements, which outline how the venting system must be configured and powered for safe operation. Adhering to the electrical venting requirements also helps maintain efficiency and prevents unsafe backdrafts. You must use the vent material specified by the manufacturer, typically a special plastic (like CPVC) or coated aluminum. Mixing parts can cause rapid corrosion and dangerous exhaust leaks.
This is not a DIY guesswork zone. Local building codes dictate everything: vent material, size, length, how many elbows you can use, and how far the termination must be from windows and property lines. A bad vent job can lead to carbon monoxide poisoning, which is silent and deadly. Pull a permit. Better yet, hire a licensed pro for this specific part of the install. The inspector’s sign-off is your guarantee of safety.
The DIY vs. Pro Verdict: Where You Can Help and Where You Can’t
Let’s get real about who should do this job. Swapping a traditional tank for a tankless water heater is a major upgrade. It’s not like changing a faucet.
Here’s your clear difficulty rating: 8 out of 10 for a whole-house gas replacement, and a solid 9 out of 10 for a whole-house electric system. Electric units often require massive electrical upgrades that are far beyond most DIY skills and local codes.
Homeowner’s Role: The Prep Work You Own
You have a critical job to do before any tools come out. This work sets the stage for a smooth, correct installation.
- Site Prep and Clearing the Area: Move everything away from the old heater. Sweep, vacuum, create a clean, open workspace. This saves the pro time and money.
- Performing the Demand Calculation: This is your most important task. Use the flow rates and calculations from earlier in this guide. Know your needed GPM and temperature rise. This dictates which unit you buy.
- Purchasing the Unit: Based on your calculations, buy the correct model. Get all the required parts listed in the manual, like specific venting kits or water filter housings.
Think of this like preparing for a kitchen remodel. You decide the layout and buy the cabinets, but you hire a carpenter to build and install them correctly.
Pro’s Role (Non-Negotiable): The Hands-On Technical Work
This is not a suggestion. The following tasks require a licensed professional. Mistakes here are dangerous and expensive.
- Gas Line Work: Running new gas lines, adjusting gas pressure, and making leak-free connections. A small gas leak can cause an explosion.
- Electrical Panel Upgrades: Most whole-house electric tankless units need a new, dedicated double-pole breaker and heavy-gauge wire run from your main panel. This is high-voltage work.
- Complex Venting: Installing concentric vent kits, running long vent lines, and ensuring proper draft and clearance to combustibles. Improper venting can leak deadly carbon monoxide.
- Final Water Connections and System Check: Solder or press the final water lines, connect the unit, and test the entire system for leaks, proper ignition, and safe operation.
- Ensuring Code Compliance: A pro pulls permits and gets the installation inspected. This is your legal and safety guarantee.
Hiring a licensed plumber or gas fitter ensures the work is done safely, to code, and protects your home insurance. I’ve seen DIY gas jobs fail inspection, requiring a full pro redo at double the cost.
The Outdoor Unit Exception
Installing a dedicated outdoor tankless unit can be slightly less complex. There’s no indoor venting to worry about. Even then, the gas line and electrical connections remain strict pro territory. You might handle mounting the bracket and simple water line hookups if you’re very skilled, but never touch the fuel or high-voltage power.
6. Busting Myths and Answering Odd Questions
You hear some wild things about tankless heaters. Let’s clear the air on the common, but odd, questions.
Can a tankless water heater fill a bathtub?
Yes, absolutely. I run a deep soaker tub in my own home off a properly sized gas unit. The confusion comes from misunderstanding how they work.
A tankless heater doesn’t store hot water. It heats water on demand as it flows through. Your tub will fill just fine if the heater’s flow capacity (in gallons per minute, or GPM) meets the tub faucet’s demand.
The real issue is simultaneous use. You cannot fill that tub while the washing machine is running and someone is in the shower. That’s asking for more hot water than one unit can produce at once. Size it for your largest single need, and you’re golden.
Can a tankless water heater be used for baseboard heat?
Almost always, no. Don’t try to rig this.
Home heating boilers are built for closed-loop systems. The same water circulates for months, getting treated with chemicals to prevent corrosion. A tankless water heater is designed for “once-through” potable water that’s constantly fresh.
Using a standard tankless for heat will void the warranty and likely destroy the heat exchanger from corrosion and scaling. This is a claim we frequently address when debunking tankless myths. Some manufacturers make specific “combi-boiler” units for both heat and domestic hot water. That’s a different, and more expensive, appliance entirely.
Can a tankless water heater heat a pool?
No. This is a great way to kill a perfectly good water heater in one weekend.
Think of the scale. A residential tankless might output 6-10 GPM. An average pool holds over 10,000 gallons. You’re trying to heat a small lake with a kitchen kettle.
The unit would run non-stop at maximum output, overheat, and trigger a failure or safety shutdown. Pool heaters are built with different materials and controls for that massive, slow heat rise. Buy the right tool for the job.
Your Tankless Water Heater Maintenance Roadmap
Think of your tankless unit like a high-performance car. You cannot just drive it for years and never change the oil. Regular maintenance is the only way to get the 20-year lifespan manufacturers promise and prevent very expensive repair bills. The schedule below is non-negotiable if you want reliable hot water. Sticking to a simple water heater maintenance schedule keeps everything humming. In the next steps, we’ll outline exactly what to check and when.
The Monthly Check: A 60-Second Conversation
Once a month, take a quick look at your unit’s display panel. You are looking for any error codes or warning lights. Modern units are smart; they will tell you when something is wrong long before you run out of hot water.
- Consult your owner’s manual for the specific code meanings.
- A common code like “11” often means no ignition, which could be a simple vent blockage.
- Ignoring a recurring error code allows a small problem to become a major failure.
This takes less than a minute and can save you a $300 service call.
The Six-Month Visual Inspection
Every six months, do a walk-around. You are checking for obvious physical issues.
- Inspect the vent terminals (outside where the pipes exit). Make sure leaves, nests, or snow are not blocking the airflow. A blocked vent will shut your heater down.
- Check the inline water filter if your model has one. It’s usually on the cold water inlet. Look for sediment buildup. A clogged filter starves the unit of water flow.
- Listen for any unusual noises like whistling or banging when the unit fires up.
In my own home, I do this every spring and fall when I’m already checking other systems. It becomes part of a routine.
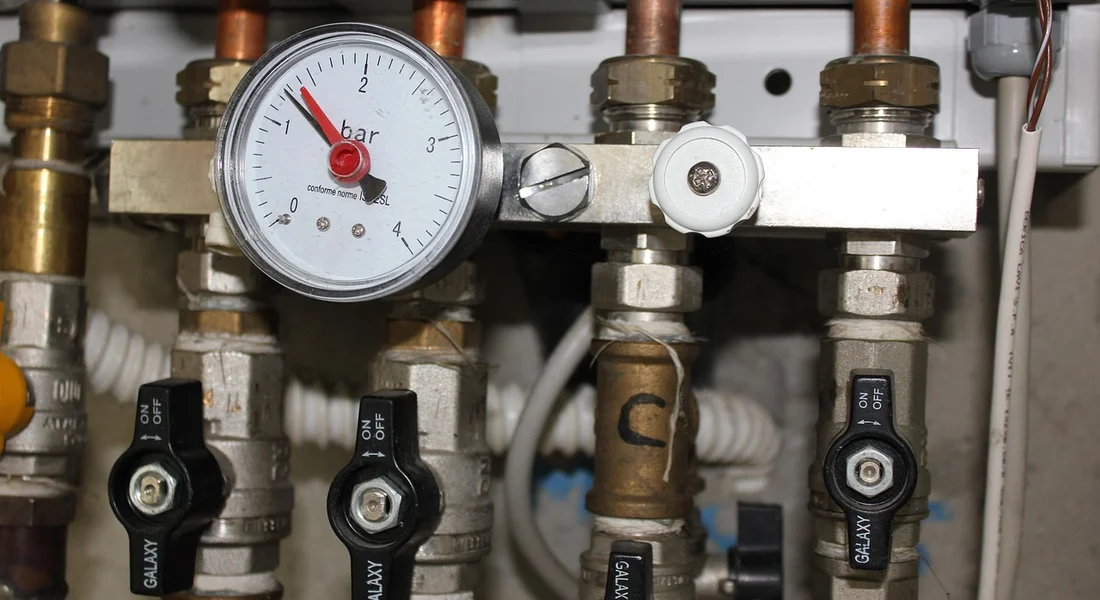
The Annual Service: The Critical Descaling Flush
This is the most important task you will do. Hard water minerals (calcium and lime) build up inside the heater’s small heat exchanger channels. This is like clogged arteries. Over time, hard water reduces heat transfer, so the heater must work harder and longer to reach the same temperature. This wastes energy and lowers efficiency. Neglecting the annual descaling flush is the number one reason for premature failure and will void nearly every manufacturer’s warranty. If you have a water softener, you still need to do this, but maybe every 18-24 months.
You will need a submersible pump, two hoses, and a five-gallon bucket. You can buy a specific descaling pump kit online for about $100, which is a great investment.
- Turn off power and water to the unit.
- Connect the pump and hoses to the unit’s service ports to create a closed loop with your bucket.
- Fill the bucket with 4 gallons of warm water and 1 gallon of plain white vinegar or a citric acid solution (follow package directions).
- Run the pump for 45-90 minutes, circulating the solution through the heater.
- Flush the system with clean water for 5 minutes to rinse out the loosened scale and acid.
The first time I did this, the vinegar came out looking like muddy milk. That was all the scale that would have eventually killed my heater. Now it comes out clear, proving the maintenance is working.
Quick Answers
How does my local climate affect the size of unit I need?
Climate dictates your ‘temperature rise.’ Colder regions require a much more powerful heater to warm freezing incoming water to your desired shower temperature. Always size your unit for the coldest expected groundwater temperature, not your summer conditions.
Why is my groundwater’s starting temperature so important?
It’s the baseline for all the heater’s work. If your groundwater is 40°F and you want a 120°F shower, the heater must achieve an 80°F rise. A unit rated for a 70°F rise will fail you in winter. Know this number before you buy.
What’s the best way to figure out my true simultaneous hot water needs?
Conduct a simple fixture audit. List every shower, tub, sink, and appliance that could run hot water at the same time during your busiest hour. Add their flow rates (GPM)-this total is your target capacity. Don’t guess; write it down.
Is the Energy Factor (EF) rating a reliable way to compare models?
Yes, but with a caveat. A higher EF means better efficiency and lower operating costs. However, never sacrifice the correct flow rate and temperature rise for a slightly better EF rating. Performance to meet your demand comes first.
Why do local codes matter for installation?
Codes govern safe fuel venting, electrical connections, and placement to prevent fire and carbon monoxide hazards. What works in one town may be illegal in another. Always pull a permit; the inspection is your safety guarantee and protects your home insurance.
Final Check Before You Buy
Always calculate your peak hot water demand by adding the flow rates of every fixture you might use at once. Matching this total to your tankless unit’s gallons-per-minute rating is the single most important step for reliable hot water. Get the temperature rise for your area from a local pro or your utility bill to complete the picture.
Bob is a an HVAC and plumbing industry veteran. He has professionally helped homeowners resolve issues around water softeners, heaters and all things related to water systems and plumbing around their homes. His trusted advice has helped countless of his clients save time, money and effort in home water systems maintenance and he now here to help you and give you first hand actionable advice. In his spare time, Bob also reviews home water systems such as tankless heaters, water softeners etc and helps home owners make the best choice for their dwelling. He lives around the Detroit area and occasionally consults on residential and commercial projects. Feel free to reach out to him via the contact us form.