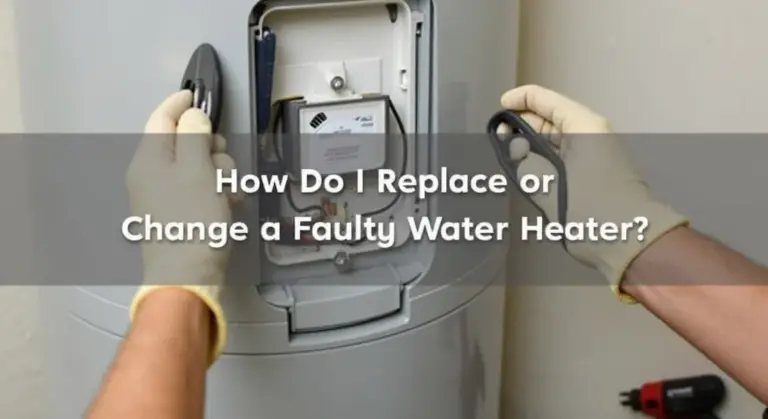
Toilet Water Supply Line Repair and Replacement: A DIY Guide to Fixing Leaks
That drip under your toilet is annoying and wasteful. Let’s get it fixed right now.
We will cover identifying where it’s leaking, the tools you need, step by step repair for a faulty valve or connection, complete replacement of the old line, and options for upgrading to a more durable braided stainless steel line.
I’ve handled this exact repair in hundreds of homes. Shut off the water valve first every single time.
What’s Leaking? Spotting Toilet Supply Line Trouble
You see water on the floor. That’s your first clue. Don’t ignore it.
Look for these clear signs of a failing water supply line:
- Water pooling near the toilet base, especially after a flush.
- Damp walls or cabinets next to the toilet.
- A swollen or soft spot in the flooring.
- Visible green or white corrosion crust on the metal nuts or the line itself.
Sometimes a leak is slow. It seeps out and evaporates, leaving only a stain. Use the tissue test to find it.
Dry the entire supply line and shut-off valve with a towel. Wrap the line from the valve to the toilet tank connection with a long piece of plain white toilet paper or paper towel. Wait 10 minutes. This prep aligns with the no-water toilet tank fix guide you’ll encounter in the next steps.
Where the paper gets wet shows you the exact leak source. This saves you from blindly tightening connections and guessing.
Now, figure out what type of leak you have:
- Leak at the shut-off valve: Water drips from the valve body or the nut connecting the supply line. Often caused by a worn packing washer inside the valve.
- Leak at the tank connection: Water drips from where the supply line connects to the toilet’s fill valve. Usually a loose nut or a bad rubber gasket.
- A burst or crack in the line itself: Water sprays or streams from a hole or split in the flexible hose. This is an emergency. Shut the water off immediately.
Repair or Replace? Making the Right Call
Fixing it might be simple. Replacing it is often smarter.
You can attempt a repair in one specific situation. If the leak is only at a connection point and the supply line itself looks perfect, try tightening the supply line nut. Use one wrench to hold the fill valve shank or shut-off valve still, and another to give the supply line nut a quarter-turn tighter. Do not over-tighten, as you can crack the toilet tank. If the leak persists or involves the tank itself, you may need to inspect the tank seals or flush valve. For a complete guide on fix leaking toilet tank, see the next steps.
If tightening doesn’t stop a connection leak, the washer or gasket inside the nut has failed. You can sometimes buy a replacement rubber washer for a few cents instead of a whole new line.
Replacement is your only safe option in most other cases. Choose to replace if you see:
- Any corrosion, cracks, or bulges in the line.
- The line is an old, stiff plastic type or a rubber hose with a fabric braid.
- The line looks generally worn or has been bent sharply.
Here’s my rule from years of service calls and home projects. If the supply line is over five to seven years old, just replace it. They are cheap insurance.
I found a gray polybutylene supply line in my own garage bathroom. It was original to the house and as brittle as a cracker. I replaced it before it could burst, even though it wasn’t leaking yet. A $15 stainless steel braided hose is far better than a $5000 water damage claim.
Gathering Your Gear: The Plumber’s Tool Pouch
Before you touch a single nut, get your tools in order. Rushing to the hardware store mid-job is a hassle. Having the right gear on hand turns a potential disaster into a straightforward swap.
List Essential Tools
You don’t need a truck full of equipment. For this job, three items are non-negotiable.
- Two Adjustable Wrenches (or One Wrench and One Pair of Channellock Pliers): You must use two tools. One holds the stationary fitting on the shutoff valve, the other turns the supply line nut. Using only one wrench will twist and strain the valve or toilet inlet, causing a much bigger leak. A 10-inch adjustable and a pair of 10-inch pliers are my standard go-to.
- An Old Towel and a Small Bucket: There will be water. Even after you shut the valve, a cup or two remains trapped in the line and toilet tank. The towel soaks up drips, and the bucket catches the water from the disconnected line. A roll of shop towels lives under my sink for exactly these projects.
Always use two wrenches-one to hold back, one to turn-to prevent damaging the valve or toilet connection.
Detail the Parts: Braided vs. Plastic Supply Lines
The supply line is the flexible hose connecting your wall valve to the toilet. You have two main choices at the store.
Plastic (Polyethylene) Lines: These are the cheapest option. They are stiff, can kink easily during installation, and the plastic nuts are prone to cracking if over-tightened. I’ve seen too many of these fail at the connection after a few years of vibration. I don’t use them in my home.
Braided Stainless Steel Lines: This is the homeowner’s best bet. The stainless steel mesh sheath protects a flexible rubber core. They are more durable, resist kinking, and have brass compression fittings that seal reliably. They cost a few dollars more but prevent call-backs. When I replaced all the supply lines in my house during a renovation, I used only braided stainless.
Spend the extra few dollars on a braided stainless steel supply line; its durability and reliable brass fittings make the job easier and last longer.
When buying, you need the correct length and connection type. Measure from the shutoff valve to the toilet tank inlet. Common lengths are 12″, 16″, or 20″. Most modern toilets use a standard 7/8″ toilet connection and a 1/2″ connection for the shutoff valve, often labeled as “3/8″ Compression x 7/8″ Ballcock.”
Mention Helpful Extras
These items aren’t mandatory, but they make the job smoother and cleaner.
- A Flashlight or Headlamp: The space behind a toilet is notoriously dark. Good light lets you see the connections clearly and spot any existing corrosion or leaks.
- A Pair of Work Gloves: Gloves keep your hands clean from tank dust, mineral deposits, and any residual water. They also provide a better grip on slippery brass fittings.
Step One: Stopping the Water Flow for Good
Before you touch a single wrench, the water must be completely off. This is the single most important step to prevent a minor repair from turning into a major flood.
Locate and Turn the Toilet’s Shut-Off Valve
Look for a small valve, usually with a football-shaped handle, on the wall or floor behind the toilet. This is your dedicated shut-off valve for your toilet water supply. Turn the handle clockwise until it will not turn any further. Righty-tighty applies here.
If the valve is stiff, use a pair of pliers gently on the handle. If it hasn’t been touched in years, it may weep a drop or two as you close it, which is normal. A properly closed valve will stop all water from entering the toilet tank.
Your Backup Plan: The Main House Valve
Not every toilet has a working shut-off. I’ve been to plenty of service calls where it’s missing, broken, or simply spins without closing. If your toilet valve doesn’t work, you must use the main shut-off for the house.
Shutting off the main water valve stops water to every fixture, so tell everyone in the house and plan to complete your repair in one session. It is essential to locate and shut off the water lines correctly before starting any plumbing work. The main valve is typically located where the water line enters your home: in the basement, crawlspace, or garage, or near your water heater.
- Turn the valve handle clockwise until it stops.
- Once it’s off, go to a sink and turn on both the hot and cold faucets to confirm the water pressure is gone and to relieve any remaining pressure in the lines.
Drain the Tank and Bowl
With the water supply secured, flush the toilet. This will empty most of the water from the tank and bowl. Any water left in the tank or supply line can still leak out when you disconnect the old line, so you need to get it as dry as possible. Next, you’ll disconnect the water supply lines from the fixtures. Keeping the area dry now helps prevent drips when you do that.
Use a small sponge and a bucket or old towels to soak up the remaining water from the bottom of the toilet tank. I usually lay a few old towels on the floor around the base to catch the inevitable drips. This simple prep saves a lot of cleanup later, especially when you’re adjusting the water level in the tank.
Removing the Old Line: A Straightforward Process
Get your bucket and an old towel ready. You will have water in the line. A little spillage is normal.
Follow these steps in order.
- Place a folded towel or your bucket under the supply line and shut-off valve.
- Use two wrenches. Put one on the shut-off valve’s body to hold it perfectly still. Put the second wrench on the supply line’s compression nut.
- Turn the nut wrench counter-clockwise to loosen it. The valve wrench prevents you from twisting and breaking the water pipe in the wall.
- Once the nut is loose, unscrew it by hand and pull the line away from the valve.
- Move to the toilet tank. Use an adjustable wrench to loosen the large plastic nut connecting the line to the tank’s fill valve. This nut unscrews counter-clockwise as well.
- Lift the old supply line out and set it aside.
If the connection is stuck or corroded, do not force it. Apply a quality penetrating oil like PB Blaster to the threads. Let it soak for ten minutes. Gently rock the wrench back and forth to break the corrosion’s seal. If it still won’t budge, you may need to cut the line, which means you’ll definitely be replacing the valve too.
With the old line removed, inspect the threads. Look at the tailpiece on the toilet’s fill valve and the outlet on the shut-off valve. Check for cracks, deep corrosion, or stripped threads. Light mineral buildup is fine. Damaged threads on the toilet or the valve will cause your new connection to leak, guaranteed.
How to Change a Water Supply Line Valve
Sometimes the problem isn’t the line. It’s the valve. You need a new shut-off if the handle spins freely without shutting off the water, or if water leaks from around the valve stem when it’s turned on.
Replacing a valve is a more serious job. You must shut off the main water supply to your house first. Open a few faucets to drain down the lines.
There are two common valve types. How you proceed depends on what you have.
- Compression Fit Valves: These have a large nut holding them to the water pipe. Use two wrenches to unscrew this nut. The new valve screws on in reverse.
- Soldered Valves: The valve is soldered directly to a copper pipe. You must heat the solder joint with a propane torch to melt it and pull the old valve off. This requires skill to avoid fire hazards and damaging nearby materials.
If your existing valve is soldered on, consider calling a professional unless you are very confident with a torch. For DIY, many choose to have a pro solder on a short copper stub with a new threaded fitting, allowing you to screw on a reliable quarter-turn ball valve yourself in the future.
When installing any new valve, get a quarter-turn ball valve. They are more reliable than the old multi-turn globe valves. Hand-tighten, then give it a final snug turn with a wrench. Once installed, turn your main water back on slowly and check for leaks at the new connections before attaching your new supply line.
Installing the New Line: Getting a Secure, Dry Connection
Now for the good part. This is where you turn a potential mess into a solid, professional-grade fix.
The right order of operations prevents you from fighting the line and cross-threading the nuts.
Step 1: Hand-Tighten to the Toilet First
Take your new supply line. Start by threading the larger nut (usually 7/8″) onto the toilet’s fill valve shank by hand. Do not use a wrench yet.
Spin it clockwise until it stops turning easily. You should feel the rubber or plastic washer inside the nut seat against the bottom of the fill valve.
Starting here gives you the most room to maneuver and ensures the line is oriented correctly before you connect it to the wall. Trying to connect to the shut-off valve first often puts the line in a bind.
Step 2: Hand-Tighten to the Shut-Off Valve
Next, take the smaller nut (usually 1/2″) and thread it onto the shut-off valve’s outlet. Again, do this by hand only.
If the new line has a plastic collar you need to push down to thread it, make sure it’s fully depressed. Hand-tighten until you feel firm resistance.
At this point, the line should be holding itself in place between the toilet and the wall without any kinks. If it’s pulling at an angle, unscrew the nut from the shut-off valve and adjust the line’s position slightly.
The Final Snug: How Tight is “Tight Enough”?
This is where most DIYers mess up. Over-tightening cracks plastic nuts and crushes seals, causing a new leak. Under-tightening leaves you with a slow drip.
Grab your two wrenches. Place one on the hex of the fill valve shank to hold it steady. Place the other on the supply line nut you just hand-tightened.
Give the nut a final turn of about a quarter to a half turn past hand-tight. You are applying gentle force, not brute strength. You should not hear creaking or cracking sounds. Do the same at the shut-off valve end, holding the valve body steady with one wrench and turning the nut with the other.
On my own toilet, I use the “two-finger rule.” If I need my whole arm and shoulder to tighten it, I’ve gone way too far. A simple, firm nudge with the wrench is all it needs.
Check the Line’s Path
Before you turn the water on, take a final look. The supply line should have a gentle curve.
A sharp bend or kink will restrict water flow and is a weak point that can burst later. Make sure the line isn’t pressed against a sharp floor flange or stretched tight. It needs a little slack.
If you’re using a braided stainless steel line, they are flexible but can still kink if forced into a bad angle. A basic plastic or nylon line is very stiff and requires a nearly perfect straight shot.
Turn On the Water and Test
Slowly turn the shut-off valve all the way open. Listen for the toilet tank filling. Immediately check both connections you just tightened with your fingers for moisture. If the tank level looks off, check and adjust the water levels in the toilet. This step also supports proper operation with a septic system.
It’s normal to see a tiny bead of water form at the nut and then stop as the rubber washer seals. If you see a steady drip or stream, turn the water back off. The connection likely needs one more slight, gentle turn with the wrench. Dry the area completely first so you can see if the drip stops.
The Leak Test: Don’t Skip This Part
This is where a good repair can turn bad in seconds. Rushing this step is how you end up with a flooded bathroom floor.
Do not just turn the water on and walk away.
The Testing Procedure
Place a bucket under the new or repaired supply line to catch any initial drips. Put a dry towel on the floor directly beneath the connections. Slowly turn the supply valve on a quarter turn. Wait five seconds. Listen and watch the connection at the wall valve and the connection at the toilet fill valve.
Open the valve another quarter turn. Watch again. You are looking for any spray, drip, or bead of water forming. Once the valve is fully open and water is flowing to the tank, keep watching for a full minute. This slow, deliberate process gives seals time to seat and prevents a pressure surge from blowing a poor connection apart.
Feel for Tiny Seeps
Your eyes can miss a small seep. After the initial visual check, run a dry finger along the bottom of each connection nut. Feel for coolness or moisture. A clean, white paper towel works even better-press it against the connections. Any damp spot will show up clearly.
Check the entire length of the supply line, especially if you replaced an old braided hose. Feel for any pinprick sprays. I found a leak on my own basement toilet this way; the paper towel revealed a tiny seep my fingers missed.
What to Do If You Find a Leak
Do not panic. Immediately turn the water supply valve completely off.
- If the leak is at a connection nut, try tightening it just a little-about an extra quarter turn with your wrench. Do not crank on it. Over-tightening can crush the rubber gasket or crack the plastic fitting on the toilet, making the leak worse.
- Turn the water back on slowly and re-test. If the leak stops, you’re done.
- If it still leaks, turn the water off again. You need to check the rubber gasket inside the connector. Disconnect the line.
Inspect the gasket. Is it cracked, missing, or rolled out of its seat? Sometimes during installation, the gasket gets pinched or folds over. A damaged or mis-seated gasket will never seal, no matter how tight you make the nut. Replace it with the spare that came with your new supply line or get a new one from a hardware store. Reassemble and test again, slowly.
Keeping It Dry: Your Supply Line Maintenance Roadmap
A new supply line is a solid fix, but stopping a leak before it starts is better. Think of your supply lines like the tires on your car. You check them for wear, and you replace them before they blow out on the highway. Water damage is your highway blowout.
Schedule a quick visual check every six months. Get a flashlight and look behind the toilet. You’re looking for three things: moisture or drips, a change in color (like green corrosion or white mineral crust), and any bulging or kinking in the line itself. A bulging braided line is a red flag that the inner rubber is failing.
Your best defense is a proactive replacement schedule, not waiting for a sign of failure. Materials break down from the inside out, and you often can’t see the failure point.
- Replace any old, non-braided plastic or rubber line every 5 years.
- Replace a standard braided stainless steel line every 7 to 10 years.
I mark the install date on the tag of every new line I put in, both at home and on service calls. It takes the guesswork out.
Avoid These Common Mistakes
Even with a good part, the install can go wrong. Here are the pitfalls I see most often.
- Using Teflon tape on compression fittings: The ferrule (that little brass ring) creates the seal by compressing, not by thread tightness. Adding tape can actually cause leaks. Only use tape on threaded pipe connections (NPT threads).
- Overtightening: Hand-tighten, then give it a quarter to a half turn with a wrench. Cranking on it can crack the toilet fill valve or distort the ferrule.
- Forgetting to shut off the water: It sounds obvious, but in a hurry, people skip it. Always shut the angle stop valve off first and flush the toilet to drain the line.
- Buying the wrong part: Measure from the shutoff valve to the toilet fill valve. Lines come in standard lengths. Know your connection types: the toilet end is almost always a standard 7/8″ nut, but the valve end can be a 1/2″ or 3/8″ compression fitting or a 1/2″ IPS thread.
What About Other Water Lines?
The skills you use here apply all over your house. Changing an ice maker line is a perfect example. The process is identical: shut off water, disconnect old line, connect new line, check for leaks. The only difference is the connector type on the fridge end, which is usually a quick-connect fitting. It’s similar to when you install water supply lines for appliances.
The core principles of shutting off the water supply, careful removal, and thorough leak-testing are universal for any appliance connection. Whether it’s your dishwasher, washing machine, or water heater, the steps are the same. You’ve just learned a fundamental home maintenance skill. Keep a few extra braided lines of common lengths in your toolbox. When another connection springs a leak, you’ll be ready to handle it in fifteen minutes.
Common Questions
When should I upgrade to a braided stainless steel supply line?
Upgrade immediately if you have an old plastic or rubber line. Braided stainless lines are more durable, resist kinking, and have superior fittings. Consider them a cheap, long-term upgrade for any toilet.
How do I know if my new connections are tight enough?
Hand-tighten the nuts first until they stop. Then, using two wrenches to prevent twisting, give each nut a final quarter to half-turn. If you’re straining your shoulder, you’re over-tightening and risk cracking the fittings.
What’s the most common mistake during this repair?
Using Teflon tape on the compression fittings is a frequent error. These seals are made by a compressed ferrule or washer, and tape can prevent a proper seal. For water line threads, Teflon tape is typically used on pipe threads, not compression fittings. Understanding where tape belongs helps ensure a leaks-free connection. Also, avoid using only one wrench, which can twist and damage the valve.
If the leak is just at a connection, should I repair or replace the whole line?
For a very new, high-quality line, you can try replacing just the rubber washer inside the nut. Otherwise, if the line is more than five years old, full replacement is the safer, more reliable choice to prevent future failure.
What’s your top safety tip before starting?
Always confirm the water is off by trying to flush the toilet after closing the valve. If the tank refills, your local valve isn’t working, and you must shut off the main house water supply before proceeding. If you hear a constant running sound or see water dripping from the tank, that’s a toilet tank leak that should be addressed before continuing.
Maintaining a Dependable Toilet Water Line
Shut off the water at the valve before any repair to instantly stop leaks and avoid water damage. Use a braided stainless steel supply line for a strong, lasting connection that won’t fail.
Bob is a an HVAC and plumbing industry veteran. He has professionally helped homeowners resolve issues around water softeners, heaters and all things related to water systems and plumbing around their homes. His trusted advice has helped countless of his clients save time, money and effort in home water systems maintenance and he now here to help you and give you first hand actionable advice. In his spare time, Bob also reviews home water systems such as tankless heaters, water softeners etc and helps home owners make the best choice for their dwelling. He lives around the Detroit area and occasionally consults on residential and commercial projects. Feel free to reach out to him via the contact us form.