Water Softener Salt: Pick the Right Type and Save Your System
Grab the wrong bag of salt and you’re asking for a clogged mess and a hefty repair bill. I see it all the time, so let’s get this sorted.
We will cover the three main salt types, key factors for choosing, and my straightforward recommendation.
I’ve pulled enough mushy salt bricks out of tanks to fill a truck. Trust me on this: high-purity pellets are your easiest path to trouble-free soft water.
How Do Salt Based Water Softeners Actually Work?
Think of a water softener as a swap meet. Your hard water contains minerals like calcium and magnesium. These are the “bad” minerals that cause scale on your showerhead and spots on your dishes. The softener swaps them for something else.
Inside the softener tank are millions of tiny resin beads. These beads are coated with sodium ions. As hard water flows through the tank, the beads grab onto the calcium and magnesium ions. They let go of their sodium ions in exchange. This process is called ion exchange.
This ion exchange is the core of the system, turning your hard water into soft water by literally trading one mineral for another. Specifically, it swaps calcium and magnesium ions for sodium, reducing hardness. That’s the essence of how ion exchange softens hard water minerals.
Now, this is very different from a “no-salt” or “salt-free” conditioner. Those systems don’t remove hardness minerals. They try to change the chemistry of the minerals so they don’t stick to your pipes as scale. A salt-based softener physically removes the hardness, which is why you need to recharge it with salt.
The Regeneration Cycle and Why Clean Salt Matters
Your resin beads can only hold so much hardness. Once they’re full, the softener needs to recharge. This recharge is called the regeneration cycle. Here’s the simple version of what happens.
- The control valve triggers a regeneration, usually at 2 AM.
- It pulls a strong brine (very salty water) from the salt tank.
- This brine washes over the resin beads.
- The high concentration of sodium in the brine kicks the hardness minerals off the beads and flushes them down the drain.
- The beads are re-coated with sodium and ready to go again.
Clean salt is crucial because any dirt or insoluble material in the salt gets washed into the brine tank and can clog the valve that creates the brine. I’ve been on service calls where a mushy pile of dirt at the bottom of a salt tank was the whole problem. The valve couldn’t draw brine, so the beads never regenerated.
Water Science Snippet: Grains Per Gallon (GPG)
You’ll see hardness measured in “grains per gallon” or GPG. One grain is a tiny unit of weight. If your water tests at 10 GPG, that means every gallon of water contains 10 grains of hardness minerals (calcium and magnesium).
Your water’s GPG hardness directly determines how much salt your softener will use and how often it needs to regenerate. Higher hardness means the resin beads fill up faster. Your softener’s settings are based on this number. Get a good test to set it correctly, or you’ll waste salt and water.
The Four Main Types of Water Softener Salt
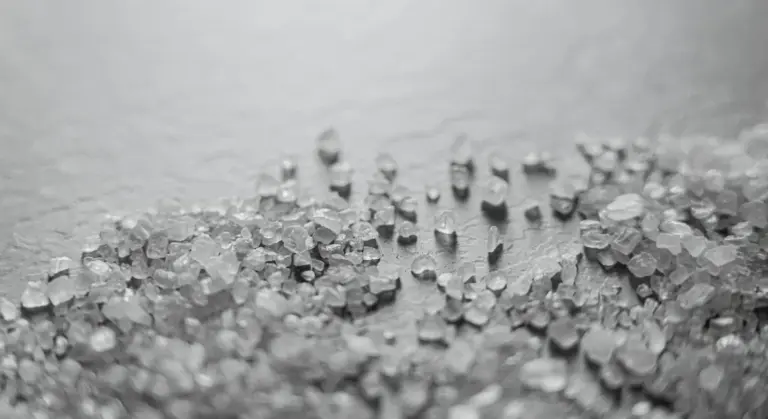
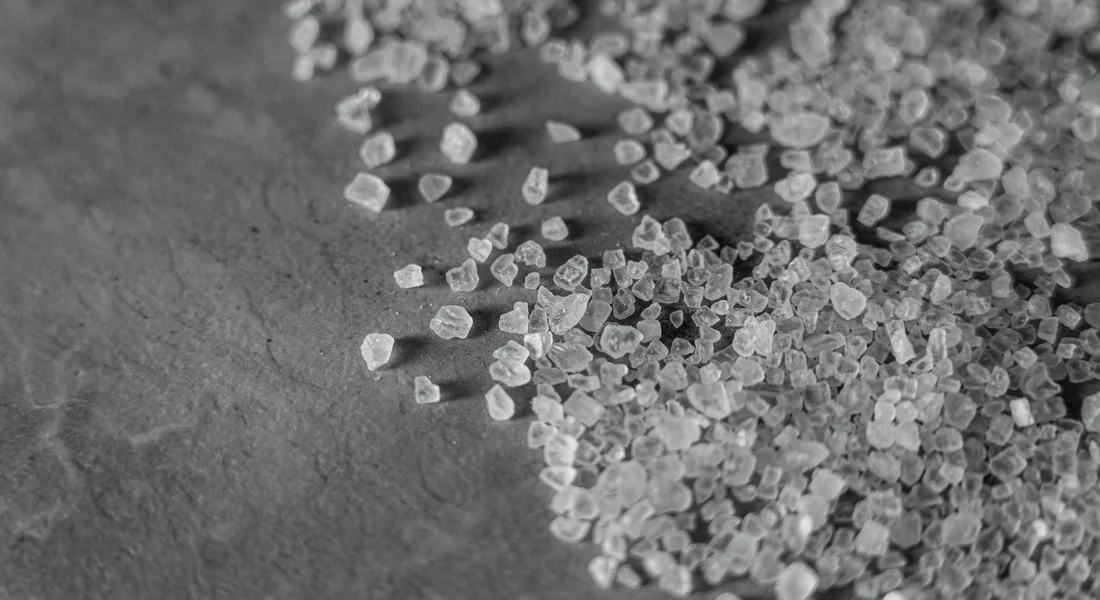
Not all salt is the same. The main difference between rock, solar, and evaporated salt is purity. Rock salt has the most dirt. Evaporated salt is the cleanest. Solar salt is in the middle. Here’s your direct breakdown.
Rock Salt: The Budget Pick
What it is: This is the least processed and least expensive option. It’s mined directly from the earth, so it contains the highest amount of natural impurities like insoluble clay, rock, and dirt (about 30-40% insoluble matter).
The Pros:
- Lowest upfront cost per bag.
The Cons:
- Creates the most sludge and sediment in your brine tank, which can lead to maintenance issues.
- Lower purity means it’s less efficient at regenerating your resin beads.
- You may need to clean the brine tank more often.
I almost never recommend rock salt for standard softeners because the potential for clogging the brine draw system isn’t worth the few dollars you save. It’s better suited for open trench-style brine tanks in some commercial setups.
Solar Salt: The Common Middle Ground
What it is: This salt is made by evaporating seawater or brine from salt lakes using the sun and wind. It usually comes in crystals or pellets. It’s more refined than rock salt, with a purity around 99.5% and much less insoluble matter.
The Pros:
- Good balance of price and performance.
- Much cleaner than rock salt, minimizing tank sludge.
- Widely available at most home centers.
The Cons:
- Can still contain some fine impurities that settle over time.
- The crystal form can create “bridging” (a hard crust over a void) more easily than pellets.
This is what I use in my own home softener. It’s reliable, easy to find, and keeps my system running clean without the premium price.
Evaporated Salt Pellets: The Premium Choice
What it is: This is the purest form, typically 99.99% pure sodium chloride. It’s produced by boiling and evaporating brine in a factory, then formed into uniform pellets. The “pellets” refer to the shape, which is designed to resist bridging.
The Pros:
- Highest purity means maximum efficiency and almost zero sediment.
- Extends time between brine tank cleanings.
- Uniform pellet shape resists bridging and mushing.
- Best choice for high-efficiency softeners and those with clog-sensitive parts.
The Cons:
- Highest cost per bag.
- Sometimes only sold in larger, more expensive bags.
If you have a newer, high-end softener or have had issues with sediment, switching to evaporated pellets is the first thing I’d try. The extra cost often pays for itself in reduced maintenance.
Potassium Chloride: The Sodium-Free Alternative
What it is: This isn’t salt (sodium chloride) at all. It’s a different mineral sold in pellet form as a direct substitute for people who need to reduce sodium in their diet, as the softener will add potassium to the water instead.
The Pros:
- Adds no sodium to your softened water.
- Works in any standard salt-based softener.
The Cons:
- Costs significantly more than even premium evaporated salt.
- Is less efficient than sodium chloride, so you may need to use more to achieve the same softening level.
- Can require adjustments to your softener’s regeneration settings.
You only need potassium chloride if you are on a strict doctor-recommended sodium-restricted diet. The amount of sodium added to water by a softener is very small, but consult your physician if you’re concerned. Some people opt for potassium chloride-based softener salt as an alternative to further reduce sodium exposure. If you’re researching options, potassium chloride is a popular choice for water softening.
Pellet, Crystal, or Block? Picking the Right Form
The bag says salt, but the shapes are different. That shape matters more than you think.
Is Pellet or Crystal Salt Better for My System?
For 9 out of 10 homes, solar salt pellets are the best choice. Pellets are made by evaporating brine and forming the salt into small, uniform beads. Their shape and manufacturing process mean they have fewer insoluble minerals, like calcium sulfate, which can settle as sludge in the bottom of your brine tank.
Use solar salt pellets if you want to minimize maintenance and sludge buildup in a standard brine tank.
Rock salt crystals are the more affordable option. They are mined directly from the earth. This means they contain more of those insoluble minerals. Over time, this can create a layer of muddy sludge that you’ll need to clean out periodically.
You can use rock salt crystals if you’re on a tight budget and don’t mind cleaning the brine tank once or twice a year.
In my own system, I use pellets. The last time I cleaned the brine tank, there was barely any residue to scoop out. With crystals in a previous home, I was shoveling out a thick layer of gray muck every spring.
Where Block Salt Is Used
Forget bags. Block salt comes in a solid, heavy brick. You don’t just pour it in.
Block salt is only for water softeners with a specific grid or platform inside the brine tank designed to hold it.
These systems have a raised plastic grid at the bottom. You place the block on this grid, and water dissolves it from the bottom up. This design aims to use all the salt with zero insoluble leftover mush. If your brine tank doesn’t have this special grid, you cannot use block salt. It will just sit in a puddle and not work correctly.
How Form Affects Dissolving and Potential for Mushing or Bridging
The shape of your salt directly controls how it interacts with water in the tank.
Mushing happens when salt dissolves and then recrystallizes into a thick, cement-like mass at the bottom of the tank. Crystals are more prone to this because of their impurities. Pellets resist mushing much better. A hard mush bed prevents your softener from making proper brine, leading to hard water coming through your pipes.
Bridging is when salt cakes together into a hard arch over the water. It creates a hollow space underneath. From the top, your tank looks full. But no salt is touching the water, so your softener stops working. This is common in humid conditions with both pellets and crystals.
To prevent a bridge, break up the salt with a broom handle every few months. Check for a dry, hollow area underneath the salt crust. If you find one, you’ve got a bridge. Break it up.
Pellets flow more freely and are less likely to bridge than irregular crystals, but it can still happen. Keeping your brine tank less than 2/3 full helps both forms dissolve properly and reduces the chance of bridging.
Your 5-Step Checklist to Choose the Best Salt
Choosing salt isn’t complicated if you follow a logical process. Skip the guesswork and use this five-step guide. It works for any softener brand, from the one in my garage to the unit in your basement. Part of that process is dialing in the optimal salt level for your water softener. Tuning those salt settings helps you balance regeneration efficiency and salt use.
Step 1: Test Your Water (Know Your Enemy)
You can’t pick the right tool without knowing the job. Your water’s hardness and iron content are the job description.
- Find your water hardness number. Check your latest municipal water report or use a reliable test strip. Hardness is measured in grains per gallon (gpg) or parts per million (ppm).
- Test for iron specifically. Look for reddish-brown stains in sinks, toilets, or your softener’s brine tank. A test strip can confirm it. Even 1-2 ppm of iron needs special consideration.
Your test results directly dictate how aggressive your salt needs to be to clean your resin beads effectively.
Step 2: Crack Open Your Softener’s Manual
This step gets skipped more often than the safety video on a new power tool. Don’t skip it. Your manufacturer knows their machine best.
- Look for a section on “Salt Recommendations” or “Maintenance.”
- Note any specific warnings. Some older or specific models may advise against certain salt types that can harm valves or control heads.
- If the manual is lost, search online for your model number and “owner’s manual.” It’s ten minutes of work that prevents a $200 service call.
Step 3: Match the Salt Type to Your Water
Now, pair your findings from Step 1 and Step 2. Here’s the simple matchup guide.
- For Moderately Hard Water (Under 25 gpg) & No Iron: Standard solar salt crystals or pellets are sufficient. They’re cost-effective and widely available.
- For Very Hard Water (Over 25 gpg) or Any Level of Iron: You need a cleaner salt. Choose evaporated salt pellets or cubes. They have the highest purity (99.5%+ sodium chloride or potassium chloride) to prevent mushing and iron fouling.
Impurities in cheap salt leave behind a sludge of insolubles that gums up your tank and reduces softening efficiency. My own softener deals with high hardness, so I only use high-purity evaporated pellets.
Step 4: Weigh Budget Against Local Availability
The perfect salt doesn’t help if you can’t find it or afford its regular use. Be practical.
- Check your local home improvement store, farm co-op, or hardware store. See what brands and types they consistently stock.
- Calculate the cost per bag, but also consider cost per regeneration. A purer, more expensive salt may clean more effectively and last longer.
- Buying in bulk (like a pallet) often cuts the price significantly if you have storage space.
Step 5: Make Your Choice and Observe
Put it all together and buy one bag of your top choice. Before you fill the whole brine tank, do a test run.
- Add two bags of your new salt to the brine tank.
- Manually initiate a regeneration cycle on your softener.
- After the cycle, check for excessive leftover water or sludge in the brine tank. A little water is normal; thick mud is a bad sign.
- Feel your softened water. It should feel slick. If performance is good, you’ve found your match.
Salt Type Comparison: Hard Water vs. Moderate Water
| Salt Type | Best For Moderate Water | Best For Hard/Iron Water | Key Note |
| Solar Salt (Crystals) | Yes | No | Affordable. Can leave more insoluble residue (mush) in the tank. |
| Evaporated Salt (Pellets) | Good | Yes | Highest purity. Best for preventing brine tank sludge and iron fouling. My go-to choice. |
| Potassium Chloride Pellets | Good | Good | Sodium-free alternative. Softer on septic systems, but more expensive and less efficient per pound. |
| Rock Salt (Cubes) | Not Recommended | Not Recommended | Highest impurity level. Often causes maintenance problems. I never use it. |
Salt Type Performance and Maintenance: The Real-World Impact

The salt you choose directly controls how hard your softener works and how often you need to clean it. This isn’t marketing hype. It’s basic chemistry and mechanics playing out inside your tank. When you compare potassium vs sodium chloride in water softeners, you’ll see how the salt type changes regeneration frequency and mineral removal. These choices matter for costs and maintenance.
How does the salt type affect my water softener’s performance?
Performance comes down to one thing: how much active sodium is available to recharge your resin beads. Impurities in salt get in the way. Think of your resin tank as a team of workers. High-purity salt gives them all the materials they need fast. Low-purity salt makes them sort through junk first, slowing everything down.
Rock salt, with up to 30% insoluble gunk, is the weakest performer. A lot of that sodium chloride is locked up with impurities and never dissolves fully. Your softener has to run longer regenerations to compensate, using more water and salt to get the same result. You might notice a slight drop in water pressure or less consistent soft water. That’s a sign your water softener isn’t softening efficiently. Investigating the buildup and regeneration cycle can help restore proper performance.
Solar salt and evaporated pellets are the high-performance fuels for your system. With purity levels at 99.5% or higher, nearly every grain goes to work recharging the resin. This means efficient, shorter regeneration cycles and reliably soft water from the first gallon to the last in the tank.
Does the salt type impact maintenance or cleaning frequency?
Absolutely. The impurities don’t just vanish. What isn’t dissolved settles at the bottom of your brine tank. This sludge builds up over time. More impurities mean more sludge, faster.
I see this all the time on service calls. A system using rock salt might need a brine tank cleaning every 6-12 months. A system using high-purity pellets can often go 2-3 years before sludge becomes an issue. That sludge isn’t just messy. It can clog the brine well or float valve, leading to a complete system shutdown.
Choosing a cleaner salt is the easiest way to reduce your maintenance chores and prevent sudden, messy failures.
How impurities create brine tank sludge.
Let’s break down what’s actually happening. Rock salt comes from underground mines. It contains natural, insoluble minerals like clay, shale, and gypsum. When you add water to make brine, the salt dissolves but this earthy material does not.
It sinks and forms a thick, muddy layer. Over multiple regenerations, this layer hardens into a cement-like mass. I’ve had to use a garden trowel to chisel it out. Solar salt can have trace amounts of calcium sulfate, which also contributes to a softer scale. Evaporated salt leaves the least residue, often just a fine, harmless powder at the very bottom of the tank.
System Maintenance Roadmap for brine tank cleaning based on salt type.
Use this simple guide to plan your maintenance. Your actual schedule can vary based on water usage and system age, but this is a reliable starting point.
| Salt Type | Recommended Cleaning Frequency | What You’ll Likely Find |
|---|---|---|
| Rock Salt (Pellets or Crystals) | Every 6 to 12 months | Heavy, wet clay sludge; possible hardened layer. |
| Solar Salt (Crystals) | Every 12 to 18 months | Lighter, sandy sediment; some scale. |
| Evaporated Pellets | Every 2 to 3 years | Minimal fine, white powder; very little buildup. |
Here is the basic cleaning process. Always unplug the softener first.
- Turn the bypass valve to isolate the softener.
- Siphon or bail out all remaining water from the brine tank.
- Scoop out all remaining salt and sludge with a plastic cup or dustpan.
- Wipe down the interior with a mild detergent and warm water. Do not use chemicals.
- Rinse thoroughly and reconnect the system.
Sticking to this roadmap prevents the majority of brine-system related service calls I get. A clean tank is a reliable tank. It’s that simple.
The DIY vs. Pro Verdict on Salt Service
Keeping your softener fed with salt is basic homeowner maintenance. The real question is how far you should go when things get dirty.
Difficulty Rating: 2/10 for filling salt. 6/10 for full brine tank clean-out.
Pouring a bag of salt into the brine tank is simple. Anybody can and should handle the routine task of filling the salt. Open the lid, dump it in, and you’re done. The higher difficulty comes from the periodic deep clean.
Once a year, you should fully empty the brine tank and scrub it out. Salt mush, sludge, and debris build up at the bottom. This job is messy and involves hauling water. It’s not technically complex, but it’s physical work. I rate it a 6/10 because if you don’t do it right, you can leave sludge that clogs the system.
List Tools & Material Checklist
For a full brine tank clean-out, gather these tools before you start. Trying to find them halfway through is a mess.
- Wet/Dry Shop Vacuum: This is the most important tool. A bucket alone won’t cut it for the last few inches of salty water and sludge.
- Rubber Gloves: Protect your hands from the salty brine and any grime.
- 5-Gallon Bucket: For the initial bailing and to hold the sludge you vacuum out.
- Garden Hose: You’ll need it to rinse the tank thoroughly after scooping.
- Old Rag or Sponge: For the final wipe-down inside the tank.
The shop vac I keep in my garage is specifically labeled for this job. It makes the cleanup fast and complete.
Define when a pro is needed (major sludge clogs, valve issues).
You can handle 95% of salt-related service. Call a professional in two specific situations.
First, if you have a major salt bridge or a solid mass of sludge that you cannot break up and remove. Sometimes, a hard salt bridge forms a dome over the water. You can try breaking it with a broom handle, but if it’s a solid block, forcing it can damage the tank or the grid plate at the bottom. A pro has tools and techniques to clear it without causing damage.
Second, if cleaning the tank doesn’t solve a performance issue and you suspect a brine valve or injector clog. If your softener isn’t making soft water even with a clean tank and fresh salt, the problem is likely inside the control valve. Salt mush can get sucked into the valve’s injector screen or brine line. Diagnosing and cleaning these internal parts requires taking the valve apart. One wrong move during reassembly can cause leaks or programming errors. This is where a technician’s experience pays for itself.
Troubleshooting: Red Flags in Your Brine Tank
Your brine tank isn’t just a storage bin. It’s the workshop where your softener makes its cleaning solution. When it looks wrong, your whole system suffers. Here are the problems you can spot with a quick look and how to handle them.
1. Salt Bridging (The Hard Crust)
You peek in and see salt, but your softener alarms about being out. Push on the salt surface with a broom handle. If it’s a hard, crusty layer with a hollow space underneath, you’ve got a bridge. This wall of salt blocks new water from reaching the salt below, stopping regeneration.
Break the bridge immediately with a blunt wooden tool, like a broom handle, but never use anything metal that could crack the tank.
To prevent it from coming back, break up any salt chunks when you add new bags. High humidity is a common cause, so check that your tank lid seals tightly and keep it in a cool, dry spot if possible.
2. Mushy Salt Layer or Salt Sludge
A layer of wet, muddy salt or a thick sludge at the bottom of the tank means your salt isn’t dissolving properly. This sludge can get sucked into the brine well, clogging the valve and injector screen. It’s a fast track to a service call.
You need to remove all undissolved salt and sludge to prevent damage to the softener’s control valve.
Use a wet/dry vacuum or a cup to clean it out. To avoid sludge, don’t let the tank run completely empty before refilling. Keep it at least one-quarter full of salt. Using a higher-purity salt (like pellets) over crystal salt also reduces insoluble residue.
3. Abnormally Low Water Level
In a standard softener, you should see water several inches below the salt, usually 6 to 10 inches from the top. If the water level is at the very bottom or non-existent, the system isn’t drawing in water to make brine. If it’s overly high and near the salt, it isn’t drawing the brine out.
An incorrect water level almost always points to a problem with the brine line, float assembly, or control valve timers.
First, check for a simple kink in the brine line tubing. Then, manually start a regeneration cycle and listen for the suction at the brine line. If you don’t hear it, the issue is likely a clogged injector or screen or a faulty float. This is often a job for a technician.
4. Strange Odors (Rotten Eggs or Mustiness)
A foul smell from the tank is a sign of bacterial growth, often caused by iron bacteria in your well water or just stagnation. A musty smell can also come from certain types of salt with high organic content.
Bacteria won’t damage the resin but will make your softened water smell terrible.
Clean and disinfect the tank. Drain it, remove old salt and sludge, and scrub it with a mild bleach solution (1/4 cup household bleach per 5 gallons of water). Rinse thoroughly. For ongoing control, ask about specialty odor-control salts or adding a resin cleaner to your maintenance routine.
What to Look For: Purity, Additives, and “Do It Best”

Brand Recommendations and Salt Purity
Skip the generic store brands and look for salt with high purity. Aim for pellets or crystals that are 99.5% pure sodium chloride or higher.
Impurities like insoluble dirt and calcium sulfate create a muddy sludge in your brine tank. This sludge can clog injectors and valves, leading to service calls. I use a high-purity pellet in my home softener to avoid that exact mess.
Brands like Diamond Crystal Solar Naturals or Morton Clean and Protect are reliable because they consistently hit that high purity mark. Your best bet is to choose a product labeled as 99.5% pure or greater to minimize maintenance headaches. Check the bag for the purity percentage before you buy.
Water Softening Salt vs. Other Salts and NSF Certification
Water softening salt is not the same as table salt or rock salt for your driveway. It is processed to dissolve correctly in a brine tank without leaving excessive residue, unlike regular salt which can damage concrete driveways.
Using the wrong salt, like rock salt, introduces grit and dirt that will damage your softener’s internal parts. Think of it like putting sand in your car’s gas tank.
Look for an NSF certification mark on the bag. NSF certification is a code and compliance check that means the salt meets specific safety and quality standards for use in drinking water systems. It is a simple way to verify you are buying a product designed for the job.
Are Rust Out or Iron Out Additives Worth It?
These additives claim to help clean iron from your resin bed. For most homes, they are an unnecessary expense.
If you have moderate to high iron in your water (above 1-2 parts per million), a dedicated iron filter installed before your softener is the correct solution. Additives are a temporary band aid. In my experience, they can sometimes cause foaming in the brine tank and do not prevent the long term iron fouling that requires professional cleaning.
Save your money on additives unless your softener manufacturer specifically recommends them for minor iron issues. Test your water first to know your iron level.
Recommended Products by Category
Choose your salt based on your water conditions and softener type. Here is a breakdown of the main categories.
| Category | Best For | Key Consideration |
| High-Purity Pellets | All around use. Low residue. | My go to choice. They are clean and dissolve evenly. Ideal for most electric softeners. |
| Potassium Chloride | Homeowners who need to reduce sodium intake. | It softens water but is less efficient and costs about three times more than sodium chloride. You will use more of it. |
| Solar Salt Crystals | Areas with very hard water. | These large crystals dissolve slower. Good for manual brine tank systems, but can leave more residue than pellets. |
| Block Salt | Specific softeners designed for it. | Less common. Only use if your unit’s manual specifies block salt. It can be messy to handle. |
For a standard system, start with high purity pellets. If you are on a sodium restricted diet, switch to potassium chloride and adjust your softener settings accordingly, as it requires more salt to regenerate.
What Helped Me: A Note from My Basement
I used to use the cheapest rock salt I could find. For years, I’d haul those heavy, dusty bags down to the softener. It worked, but every single year, I had to shut the system down and vacuum out a thick layer of brown, muddy sludge from the bottom of the brine tank. It was a messy, hour-long chore I dreaded.
Then, on a service call for a client with a constantly clogged brine line, I saw their pristine, clean tank. They only used high-purity pellets. I made the switch at my own house that week. The next annual checkup? Maybe a few granules at the very bottom. That sludge was gone. Switching to pellets saved me an hour of nasty cleaning every year, and my system runs smoother for it.
My Pro-Tip: Keep It Dry
No matter which salt you pick, keeping it dry is the real secret. Damp salt cakes up into a solid, impenetrable mass that your softener can’t use. It creates a “salt bridge” over empty space, tricking you into thinking the tank is full when it’s actually starving.
Store your extra bags off the concrete floor. I use a simple wooden pallet in my storage room. A shelf works great. This stops moisture from wicking up from the floor into the bag. If your brine tank is in a humid basement, don’t buy a six-month supply all at once. Buy what you’ll use in 2-3 months.
A dry bag of salt in your storage area means free-flowing salt in your softener’s brine tank, and that keeps your resin bed clean and effective.
Stop Overthinking It
Choosing salt is simpler than all the marketing makes it seem. You don’t need a chemistry degree. For 90% of homeowners, it boils down to this quick decision:
- Want the cleanest option with the least tank maintenance? Use pellets.
- On a very tight budget and okay with annual cleaning? Rock salt works.
- Have high iron content? Get salt with rust remover.
Here’s a straightforward comparison to glance at:
| Type | Best For | What to Expect |
|---|---|---|
| Solar Salt (Crystals) | Balancing cost and cleanliness. | Some insoluble residue, needs occasional cleaning. |
| Evaporated Pellets | Minimal maintenance, efficiency. | Highest purity, very little residue, costs more. |
| Rock Salt | Lowest upfront cost. | More insoluble material, requires regular tank cleaning. |
| Salt with Additives | Water with iron/rust issues. | Helps reduce iron staining, follow manual instructions. |
Pick one based on your main priority, fill the tank, and move on with your day. Your softener will handle the rest.
Common Questions
Is pellet or crystal salt better for preventing maintenance issues?
Pellets are superior for preventing maintenance. Their uniform shape and high purity dramatically reduce the mushy sludge and bridging that clog systems. For a hassle-free experience, I consistently recommend high-purity pellets.
When should I seriously consider using potassium chloride?
Only consider potassium chloride if you are on a strict, doctor-ordered sodium-restricted diet. It costs significantly more and is less efficient, so you’ll use more of it. For everyone else, the minimal sodium added by standard salt is not a health concern.
What’s the one thing I must check on the salt bag label?
Always look for the purity percentage. You want sodium chloride (or potassium chloride) purity of 99.5% or higher. This number is your best guarantee against the insoluble impurities that create tank sludge and cause malfunctions.
How can I tell if my current salt is harming my system?
Check for a thick layer of wet, muddy sludge at the bottom of your brine tank or a hard salt crust (a bridge) on top. Both are direct signs that your salt’s impurities are causing problems and increasing your maintenance burden.
Does the brand of salt actually matter, or should I just buy the cheapest?
The brand matters less than the type and purity it delivers. A reputable brand is simply a reliable way to get the high-purity pellets or crystals you need. Choosing the cheapest rock salt often leads to the most expensive service calls.
Pick Your Salt and Stick With It
Start every salt purchase by checking your softener’s manual for the manufacturer’s specific recommendation. Your best long-term bet is to consistently use high-purity pellets, as they drastically cut down on messy brine tank cleanings.
Bob is a an HVAC and plumbing industry veteran. He has professionally helped homeowners resolve issues around water softeners, heaters and all things related to water systems and plumbing around their homes. His trusted advice has helped countless of his clients save time, money and effort in home water systems maintenance and he now here to help you and give you first hand actionable advice. In his spare time, Bob also reviews home water systems such as tankless heaters, water softeners etc and helps home owners make the best choice for their dwelling. He lives around the Detroit area and occasionally consults on residential and commercial projects. Feel free to reach out to him via the contact us form.